Orders management
In this section, it is possible to manage production orders (POs).
Production orders represent a sequence of production operations (numbered 10, 20, 30, etc.) that must be executed to obtain a final product. Each operation includes mandatory steps, at the end of which the operation can be executed completely or partially. If an operation is executed partially, it is possible to proceed to the next operation, etc. Agile Factory allows you to flexibly customize functionalities based on your factory's specific needs.
In this module, it is possible to manage:
- Production orders (POs)
- The priority of various POs
- Templates (saved PO templates)
- Aggregation for POs ✨
- Queue management ✨
- Resource management ✨
By default, each operation contains the following phases:
- Material: the phase of preparing the materials needed to execute the operation
- Setup: the phase in which the material and production means must be prepared
- Approval: the phase in which the pre-production test is performed (verification of the operability of tools, machines, etc.)
- Production: the phase in which the operation is directly executed
- Check: the phase in which the results of a production operation are checked (e.g., quality, quantity).
The number of phases of a production operation (more or less) can be customized according to your factory.
Production orders
Main View
This screen shows the orders present in the system and information related to:
- production order: PO name
- product: product type
- sales order: sales order name
- customer: customer name
- delivery: delivery date
- quantity: percentage of quantity produced compared to total required
- operations: number of operations completed compared to total required to obtain the finished product (next to the number of required operations, a sign of dependencies between orders may be presented)
- total operator hours: time spent in production (man hours) / estimated hours (if specified)
- progress: production progress
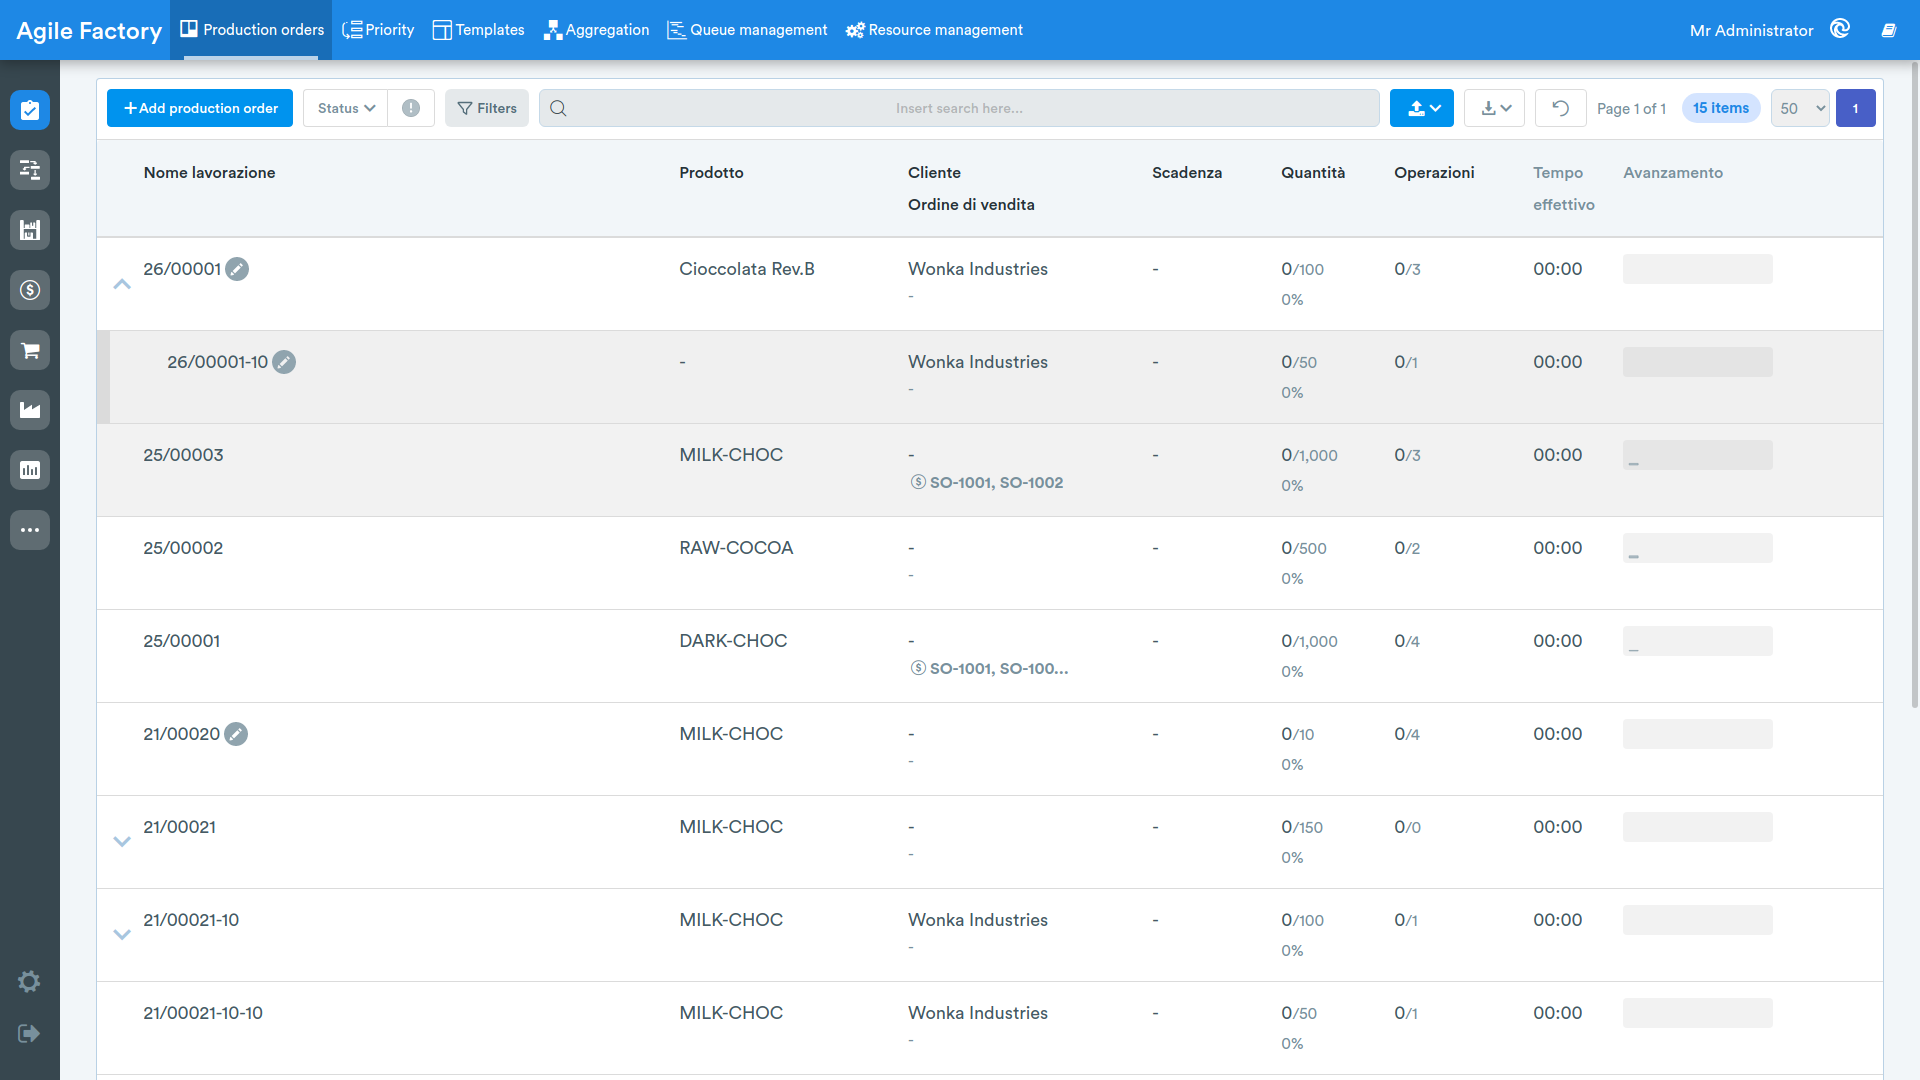
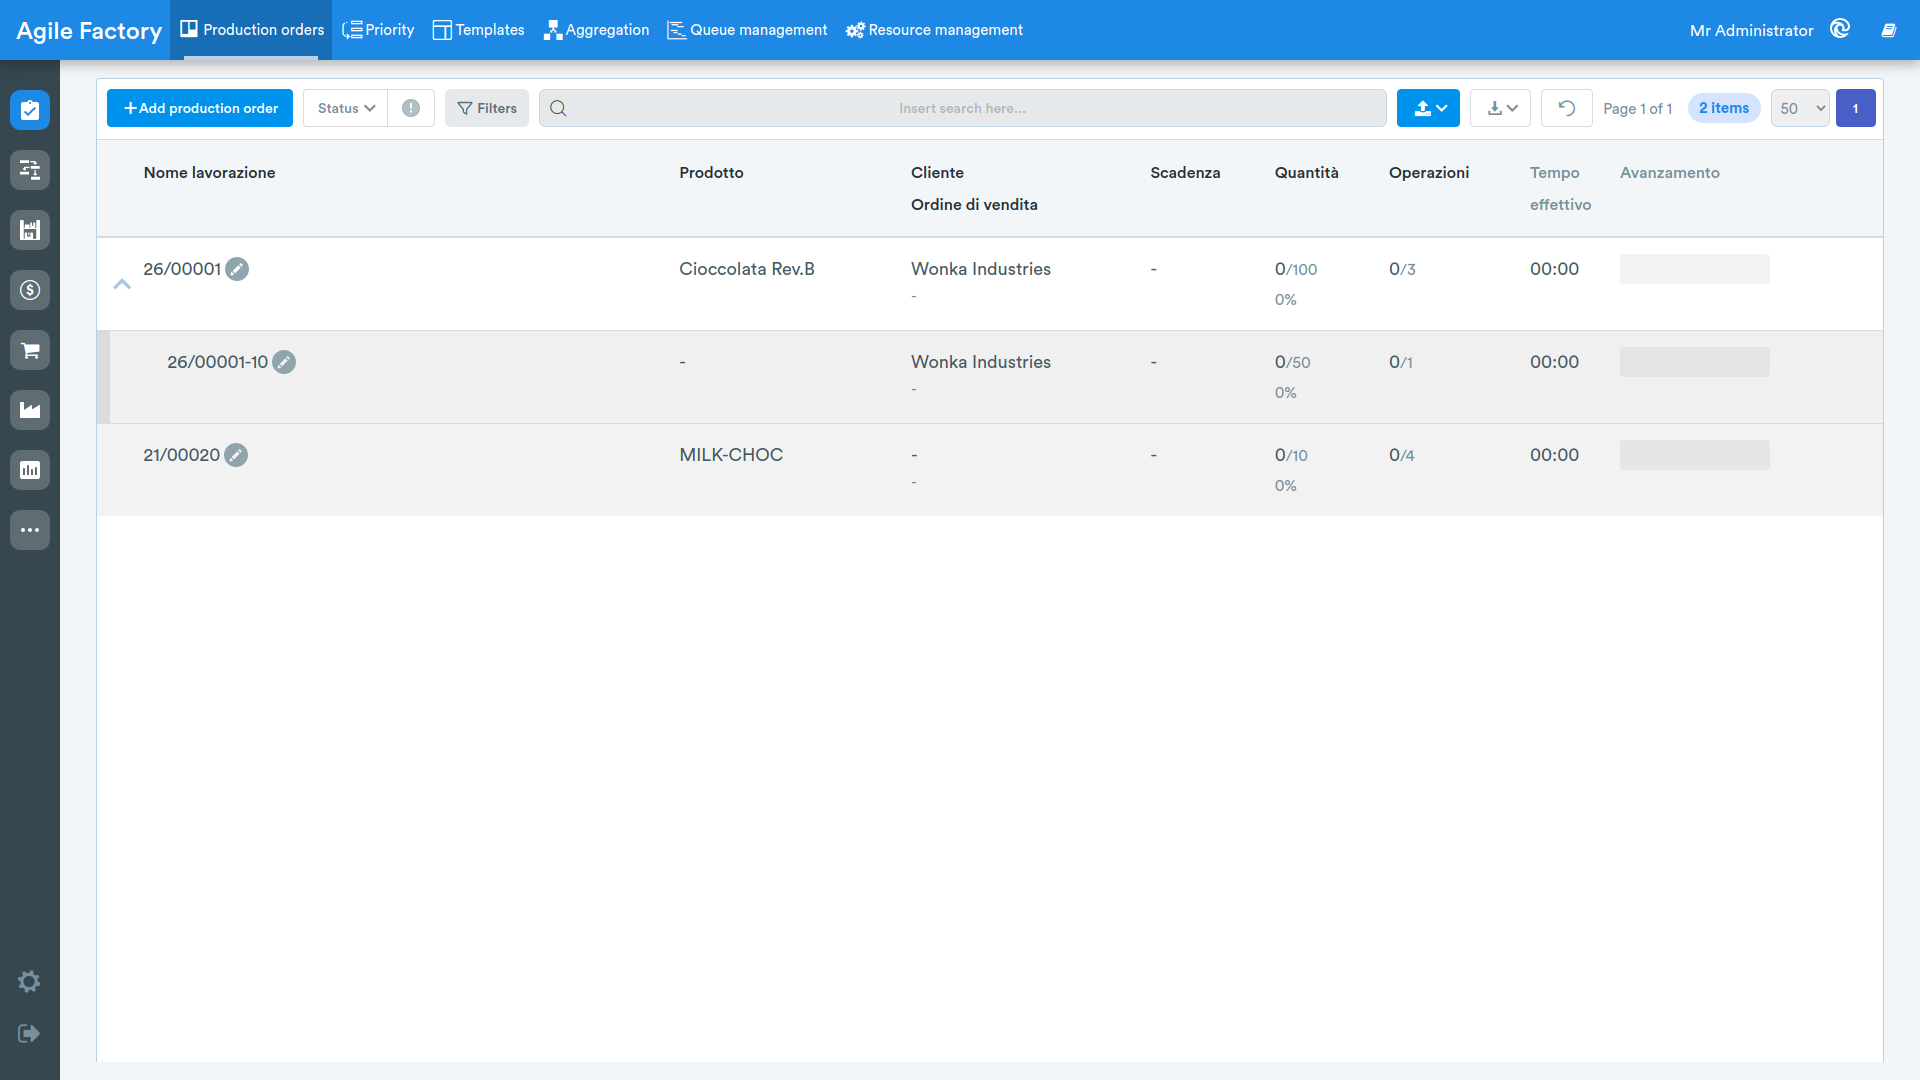
Above the order list, you have the ability to add a production order (the + Add production order button), filter by order status, and apply additional filters through the Filters button. Pressing the Filters button opens a unified panel that gathers all available filters: Filter by product, Filter by customer, and Show only errors (to quickly retrieve production orders with blocking errors). After setting the desired filters, press Apply to apply them. Next to the Filters button there is a search bar that filters orders by comparing the first four columns.
Filter by Status
By clicking on the dropdown menu, orders can be filtered according to the following statuses:
- Draft, displays production orders whose creation is not yet complete
- Assigned, displays production orders that have been saved and entered into the processing queue
- In progress, displays production orders that operators are currently executing
- Completed, displays production orders whose processing has been completed
Filter by Error
The Show only errors option is available inside the Filters panel. By enabling it and pressing Apply, only orders currently in error whose processing is interrupted due to a problem encountered in production will be shown.
Add Order
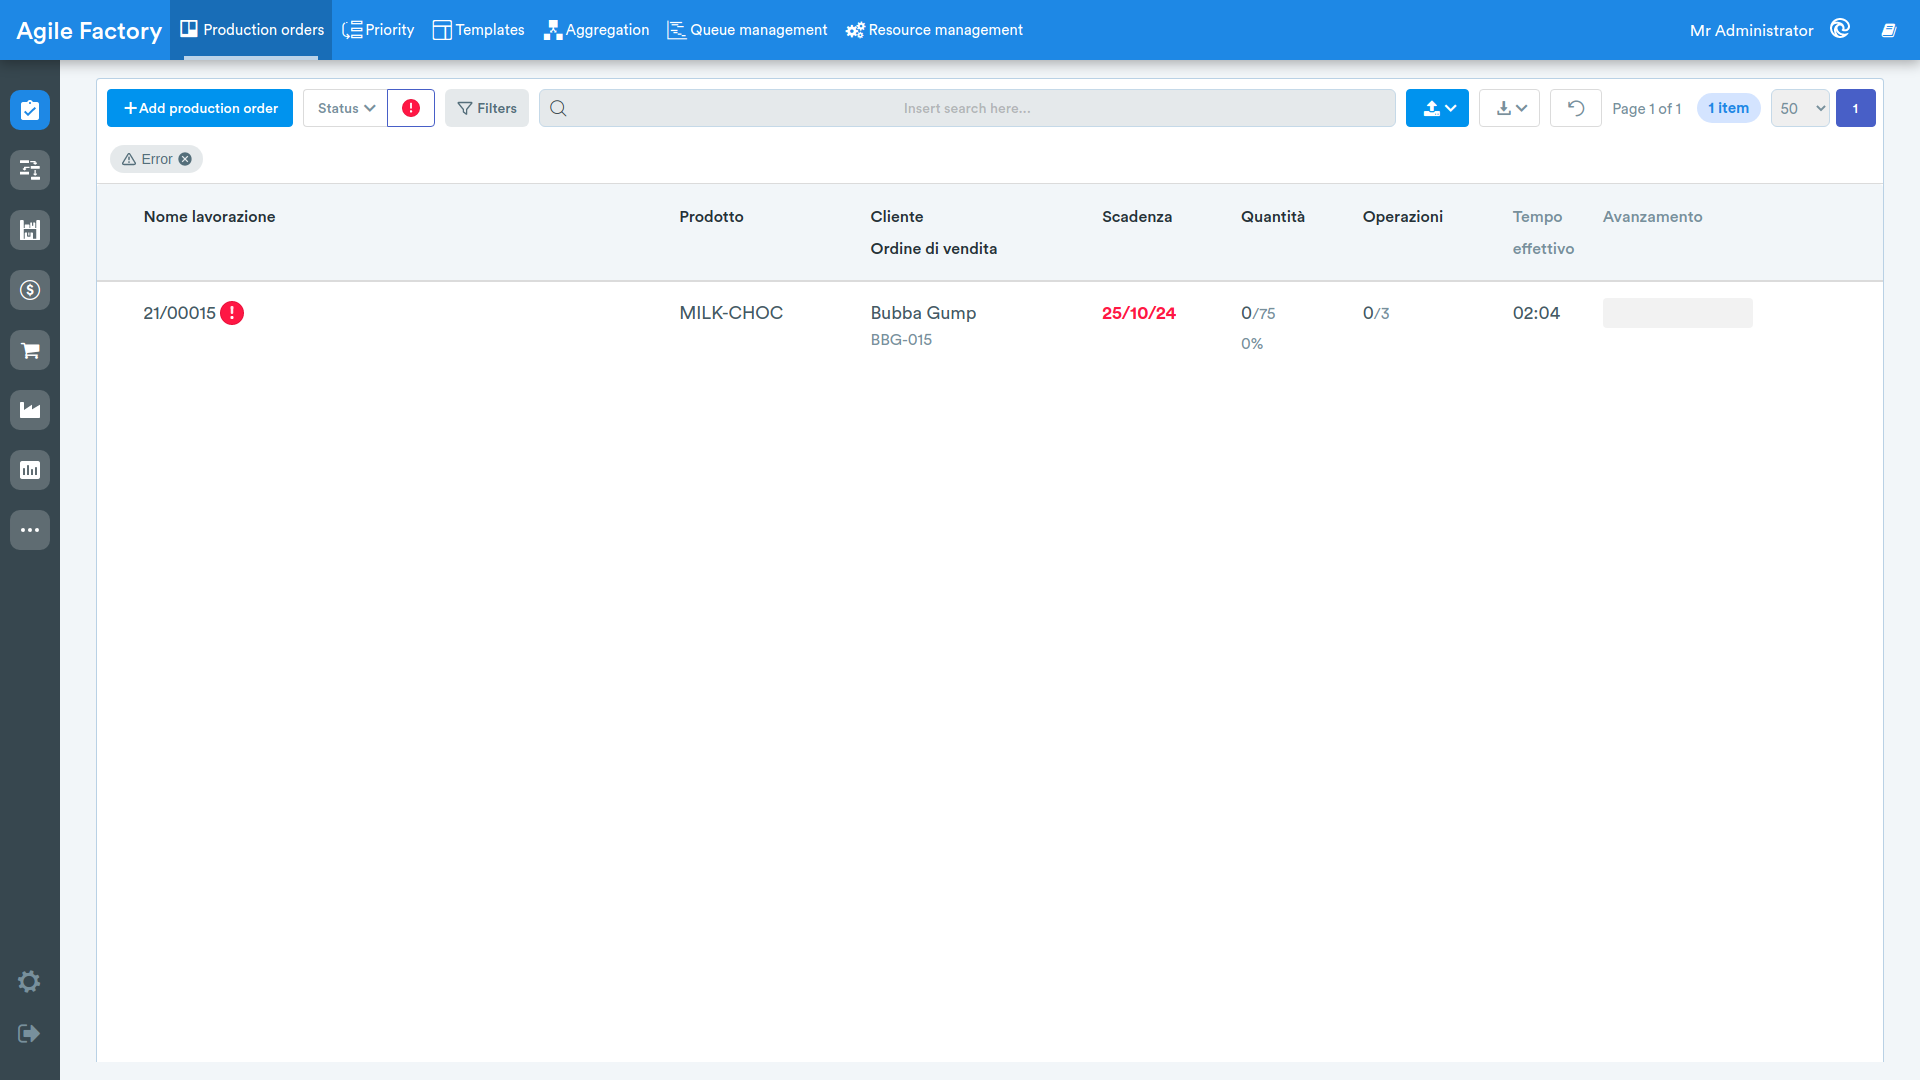
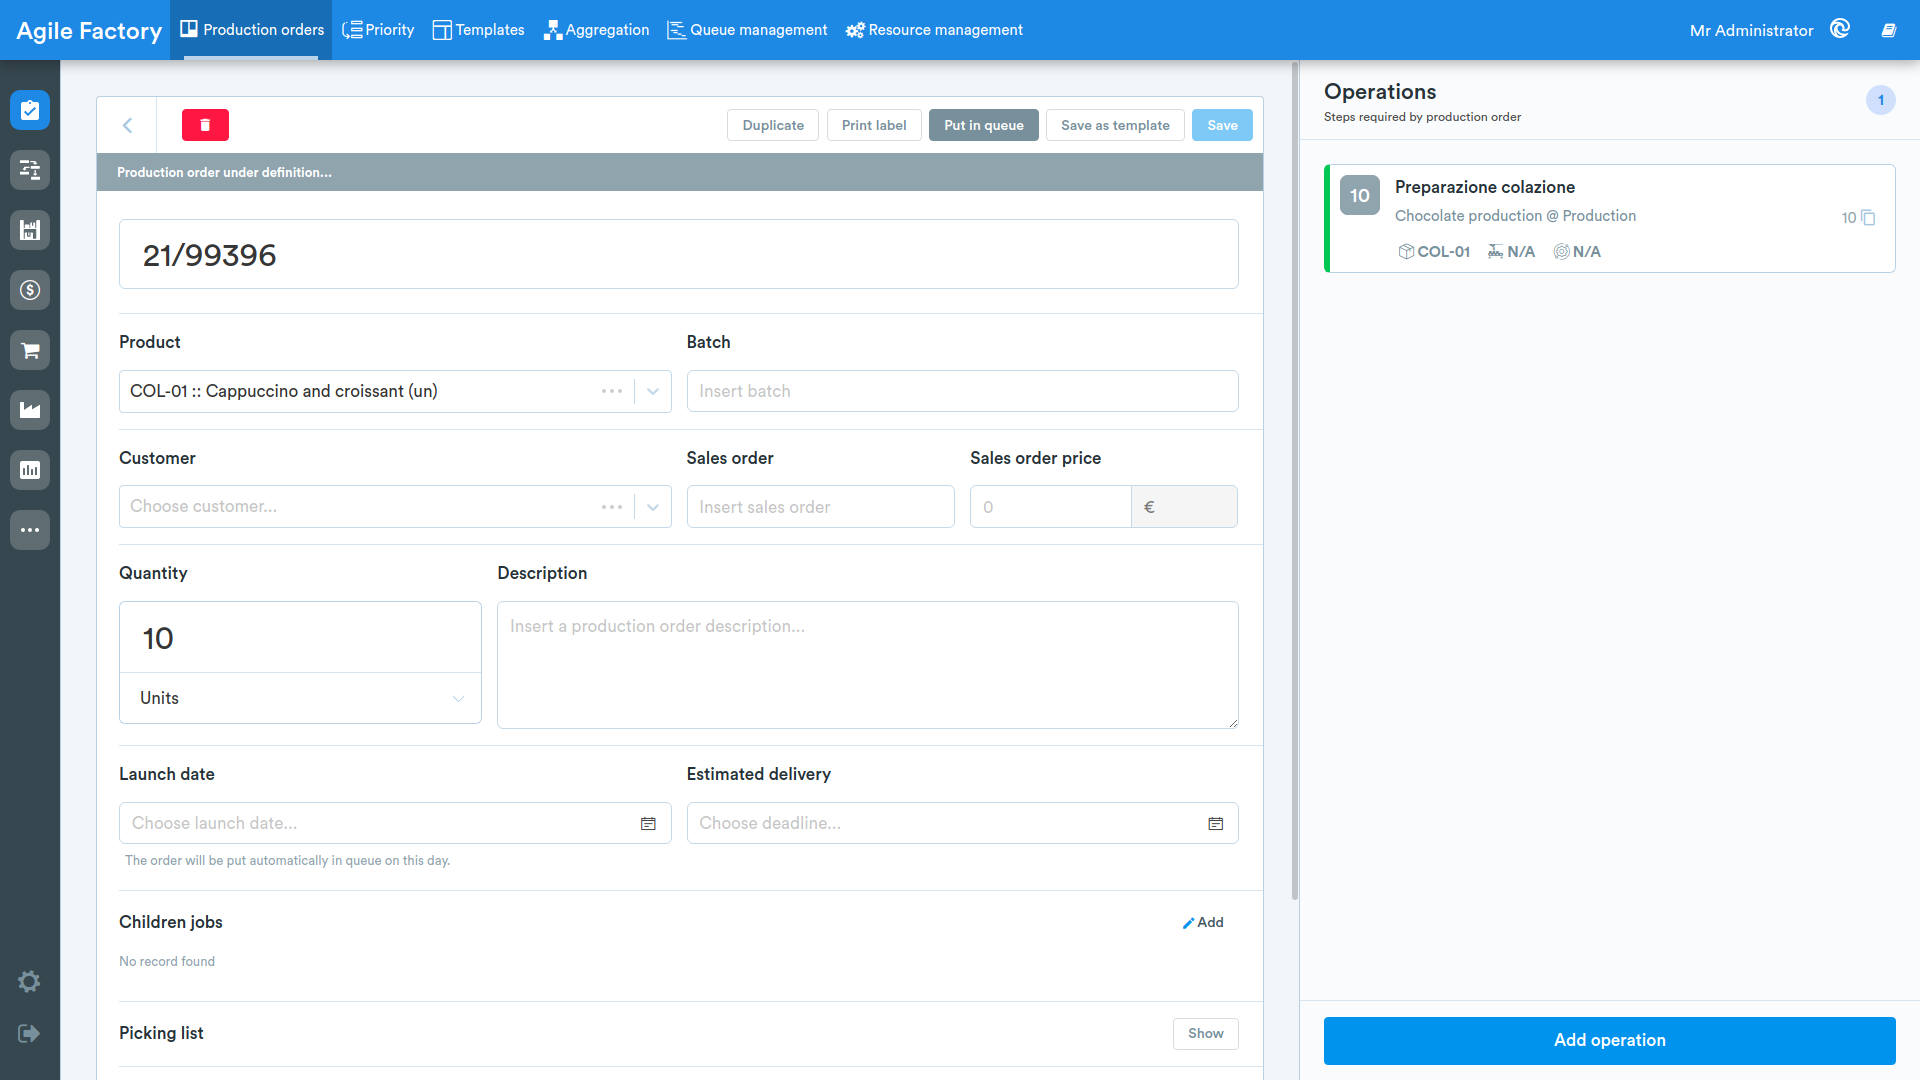
By pressing the +Create order button, it is possible to add new orders.
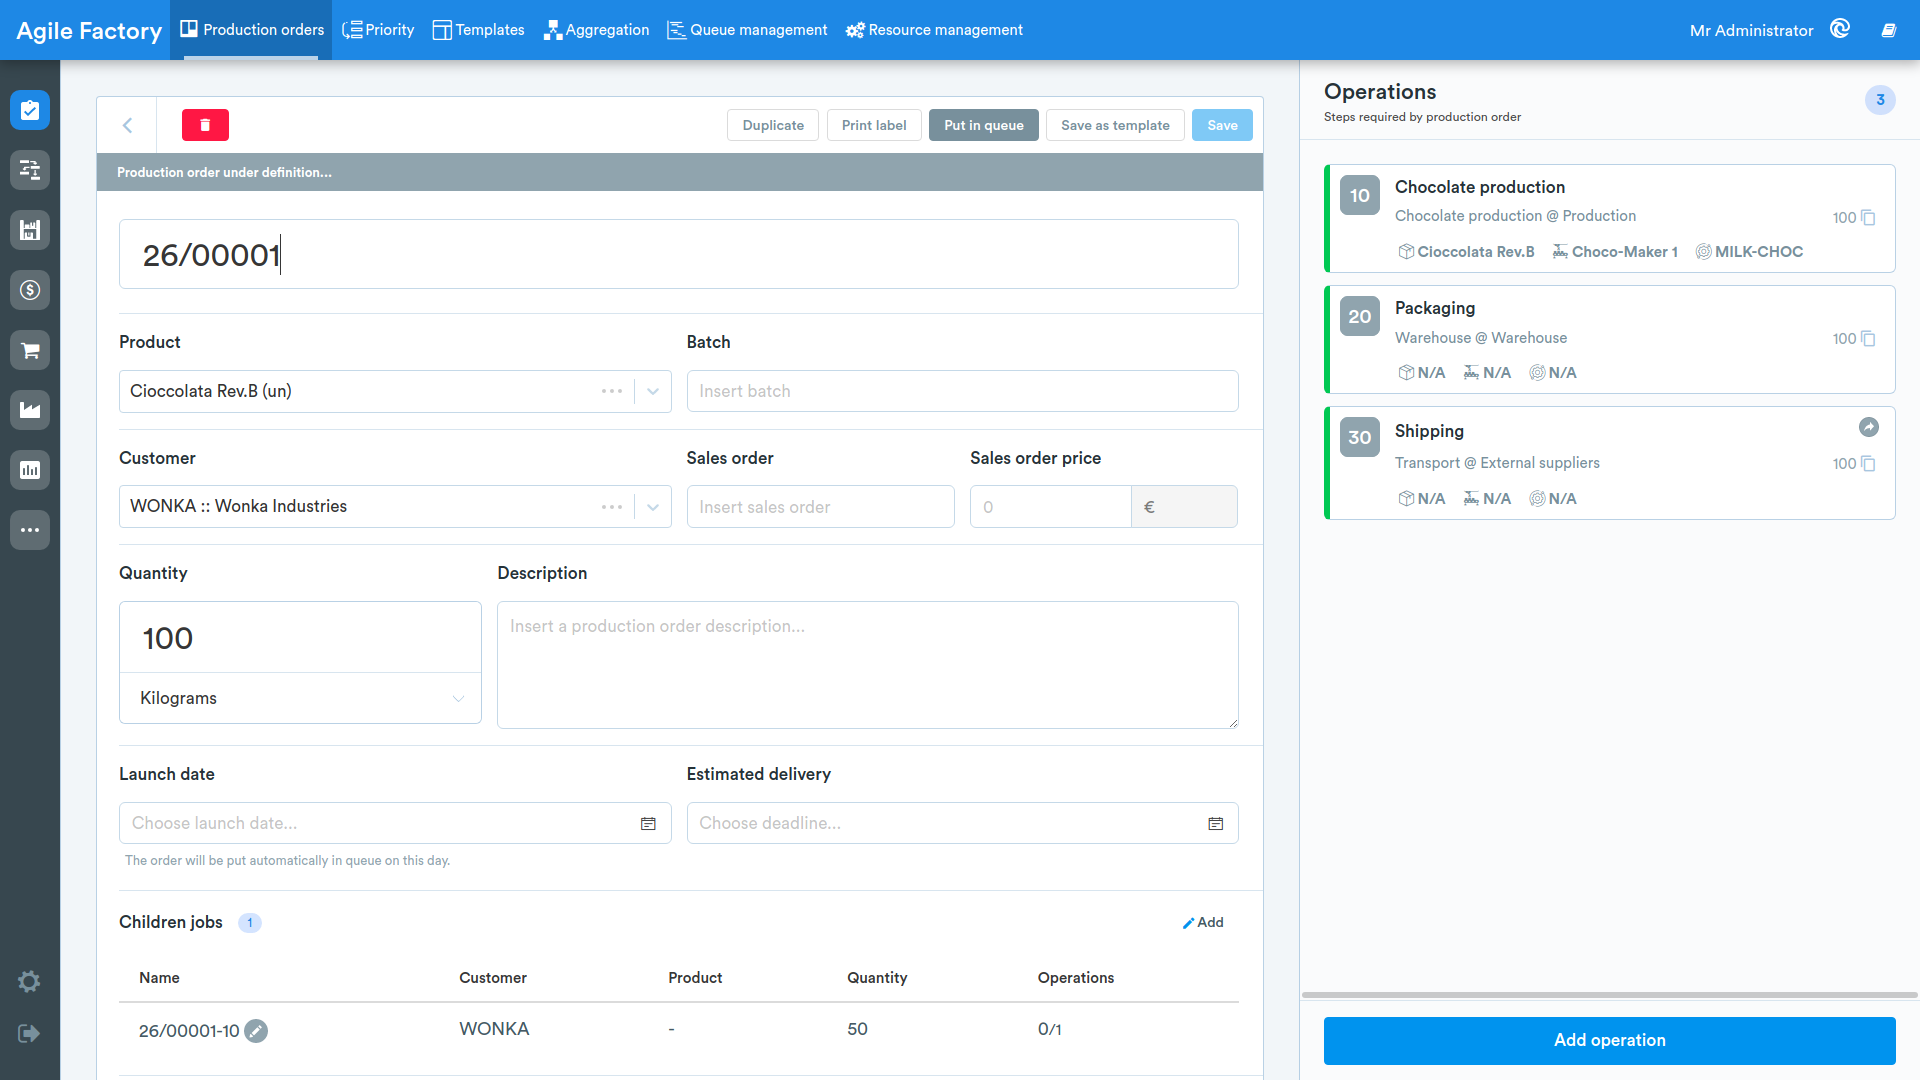
Production Order Information
The default numbering of production orders is "year/order number (increasing)". In the dropdown menus, you can select the manufactured product as well as customers, product and customer data must be added to the "Master Data" module. You also have the option to enter data manually, and the entered data will be automatically added to the "Master Data" module.
Information related to "Batch", "Sales order", "Sales order price", "Launch date", "Estimated delivery" is not mandatory, but we recommend filling in all possible fields if possible to fully exploit the potential of Agile Factory in the future.
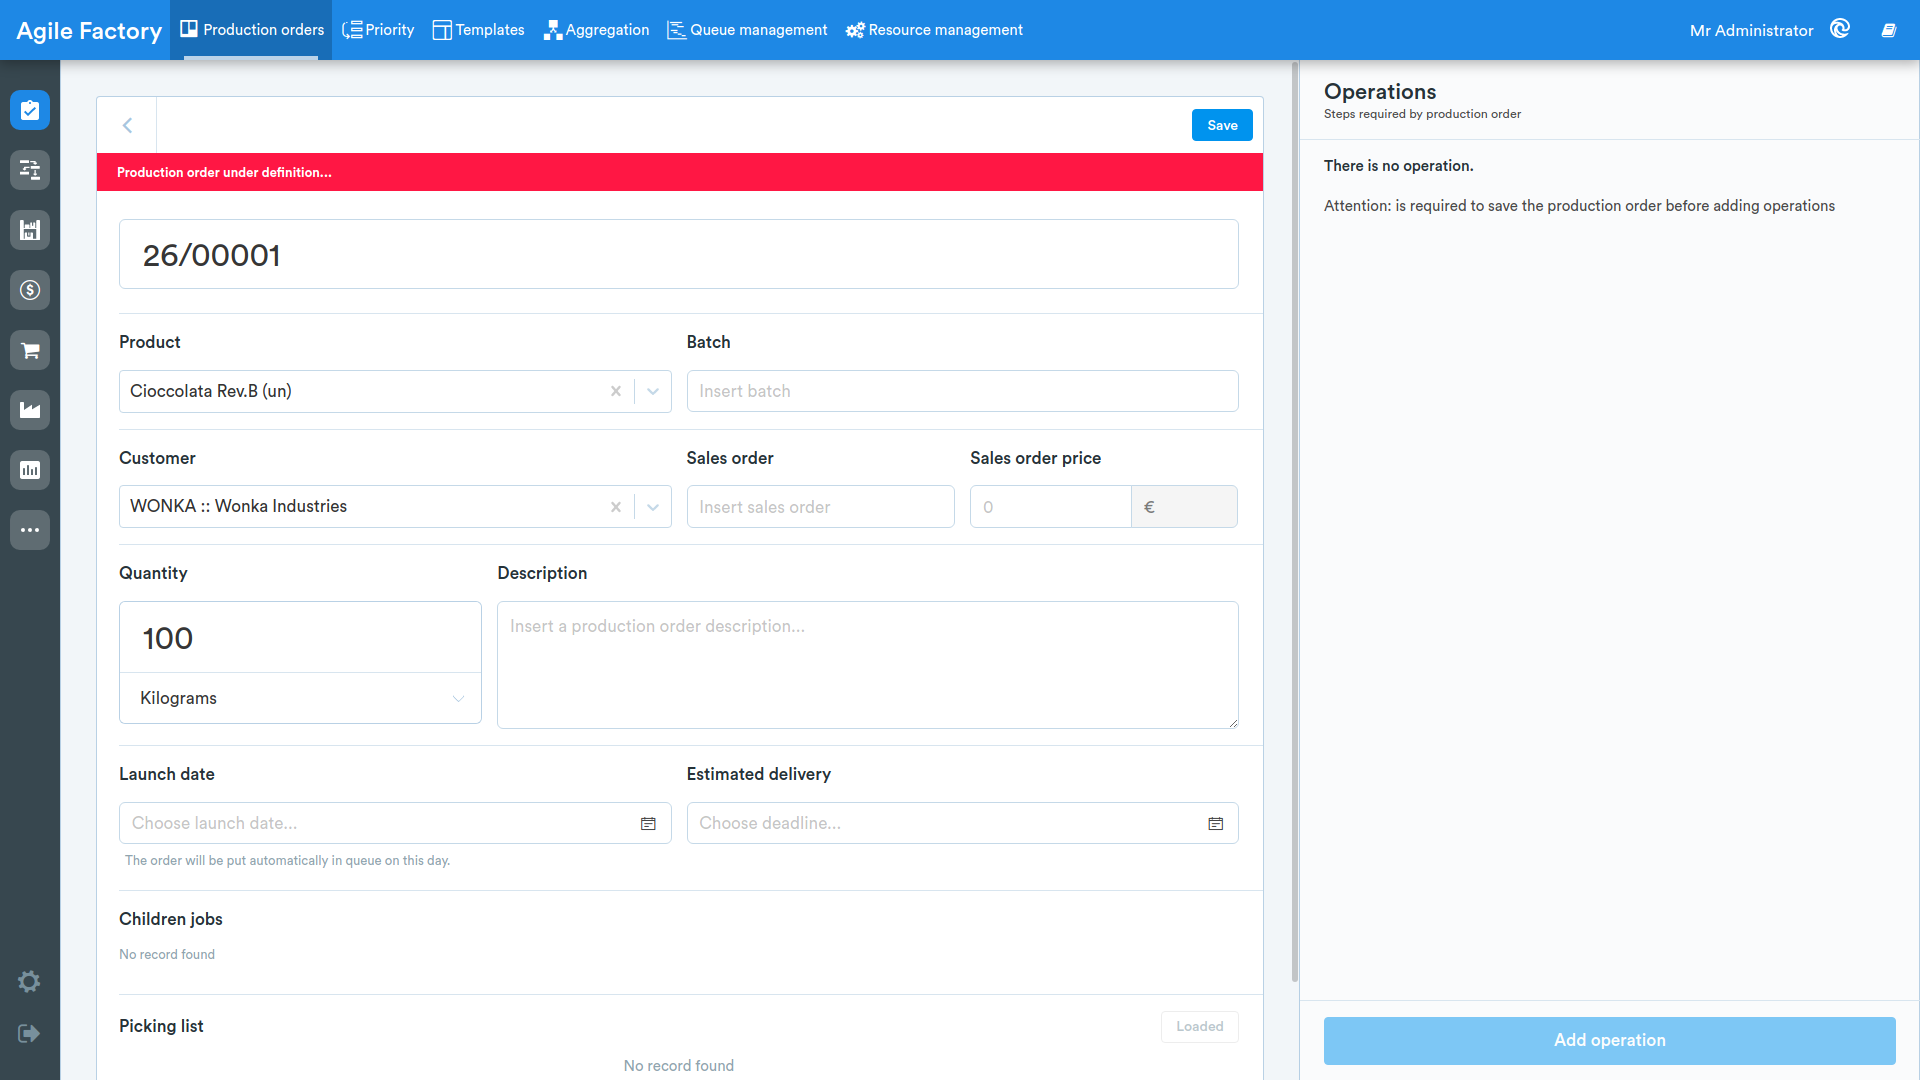
After filling in the "Product", "Customer" and "Quantity" fields, it is possible to save the created order to continue the procedure of creating a production order (proceed to adding operations).
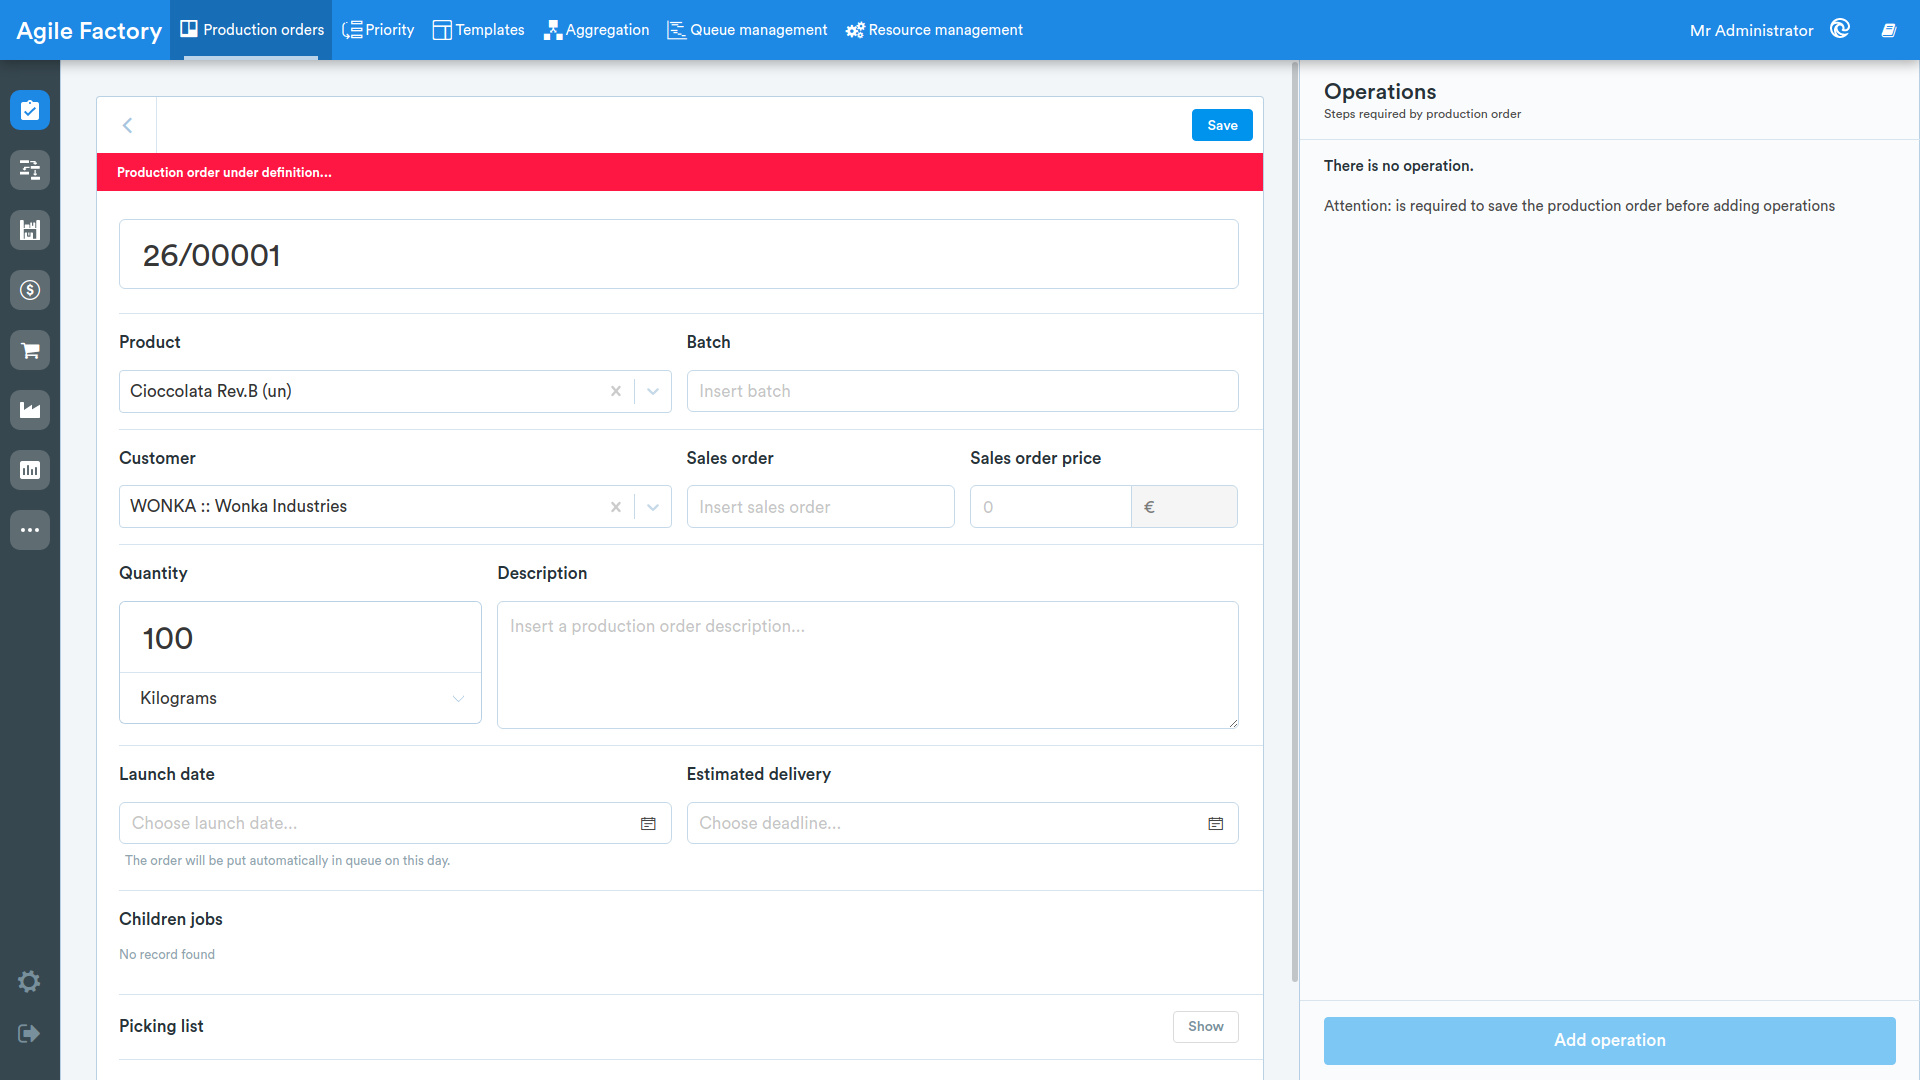
After saving, you also have the option to add documents for the different phases of a production order and create a structure of child orders if necessary (but we will talk about this later).
Add Operation
To add the production operations required by the order, click on Add operation in the lower right corner.
A list of available production areas will now be shown on the right.
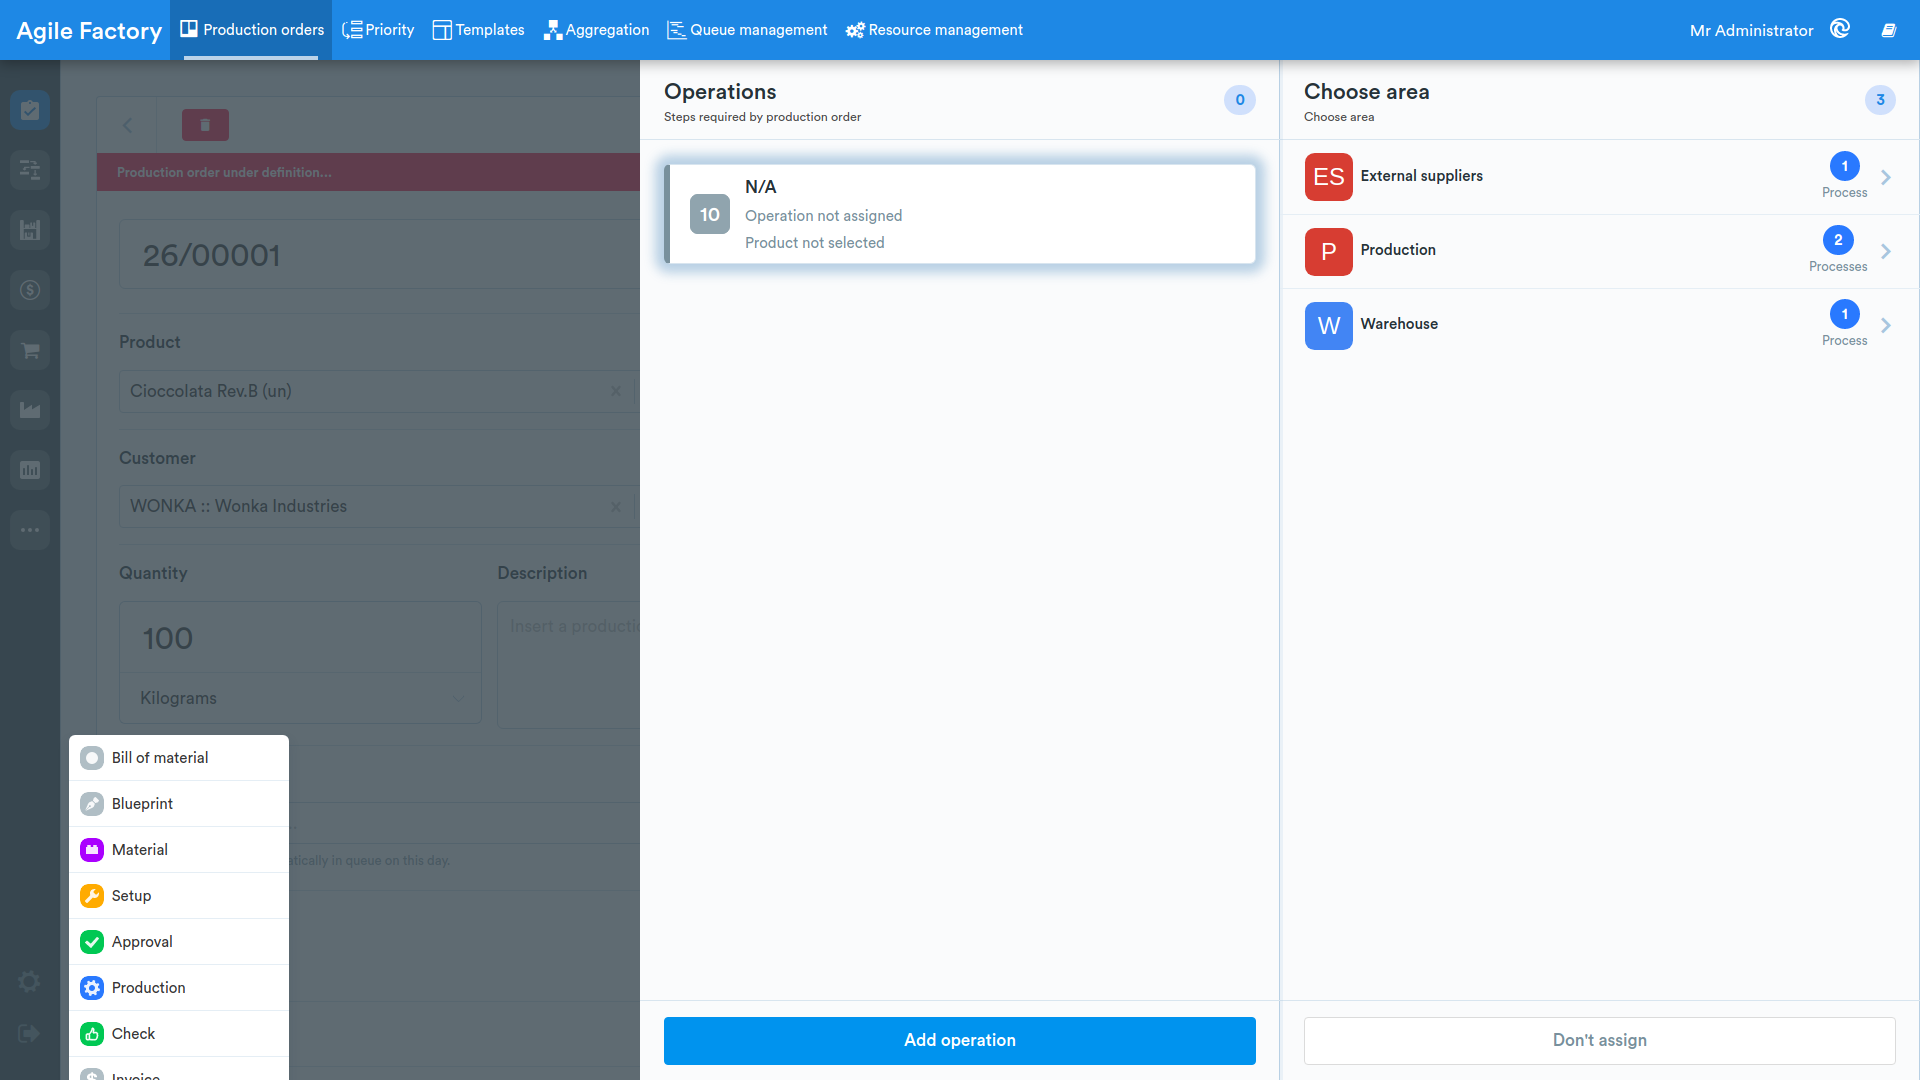
In the areas window, you can select in which area the operation will be performed. You can skip this step by pressing the Do not assign button at the bottom of the screen.
If you select the area, the screen will now show the list of production operations available in the previously selected area.
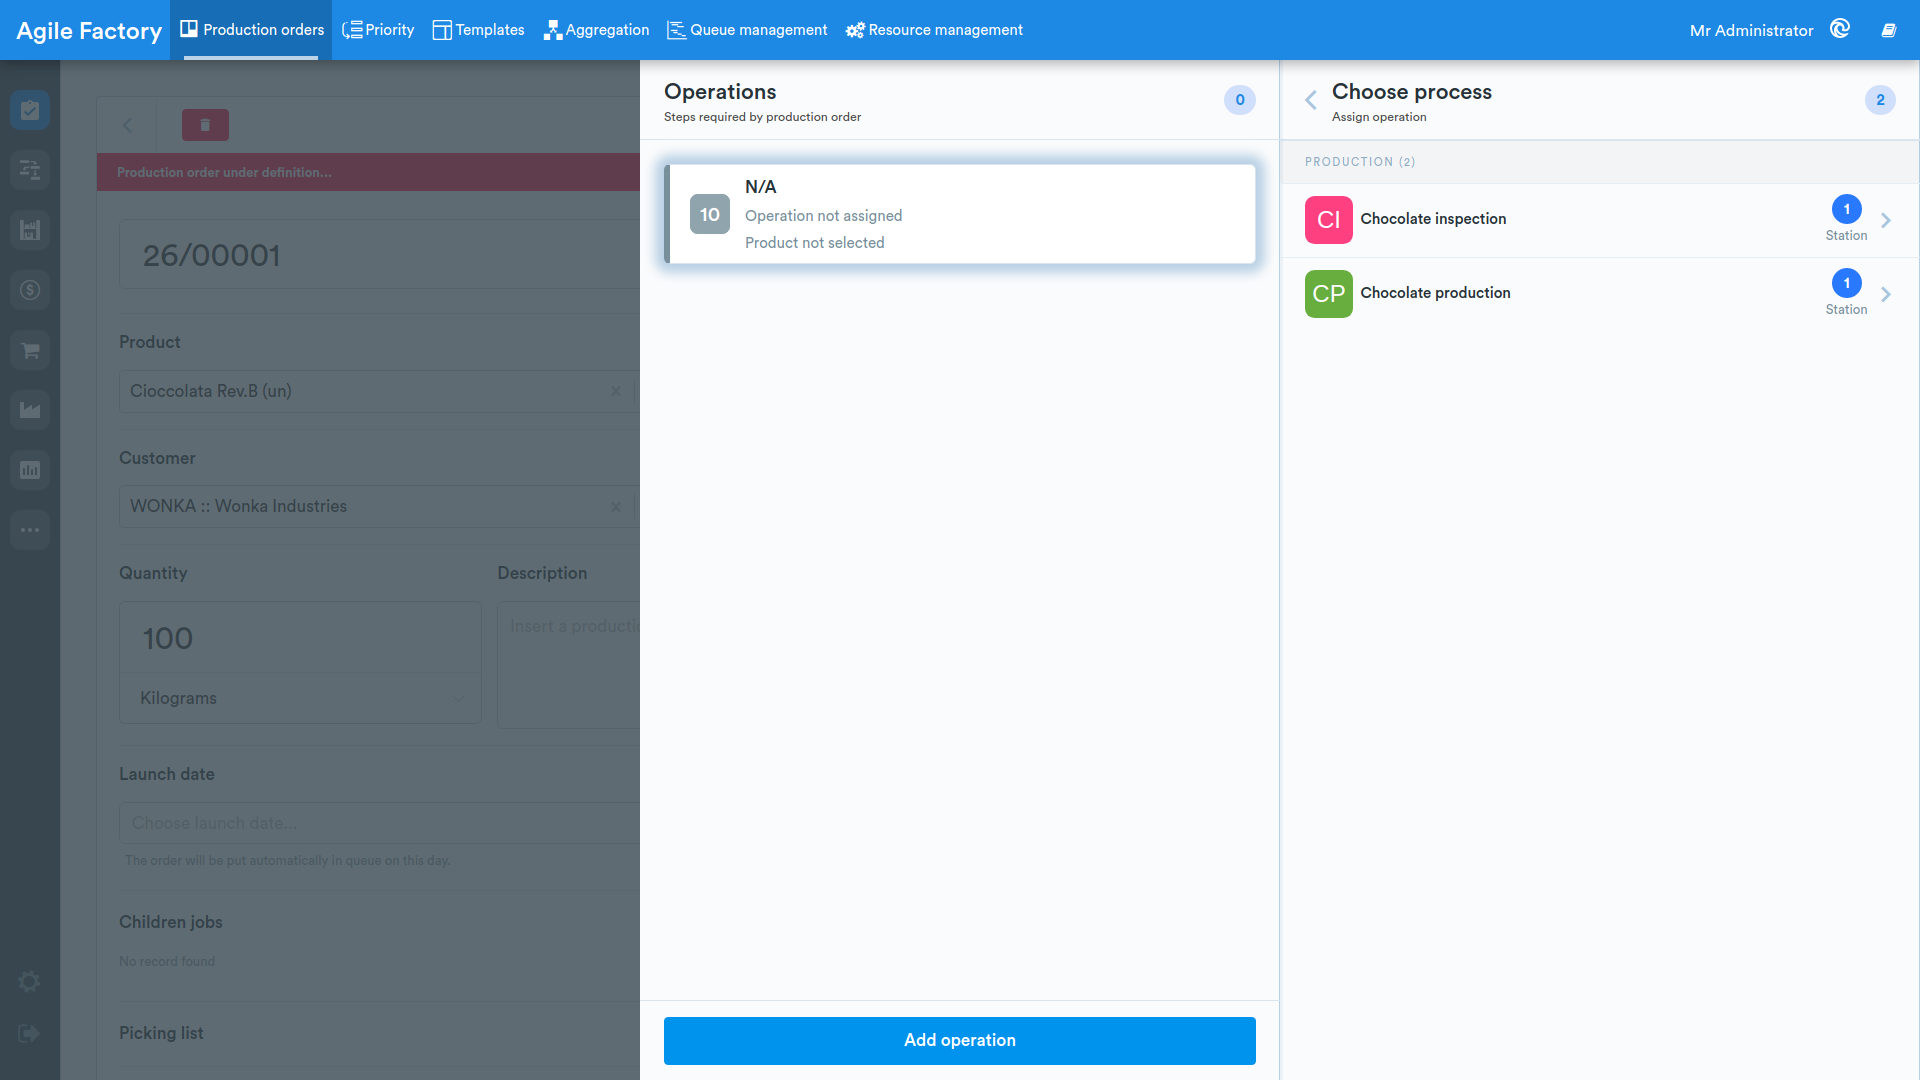
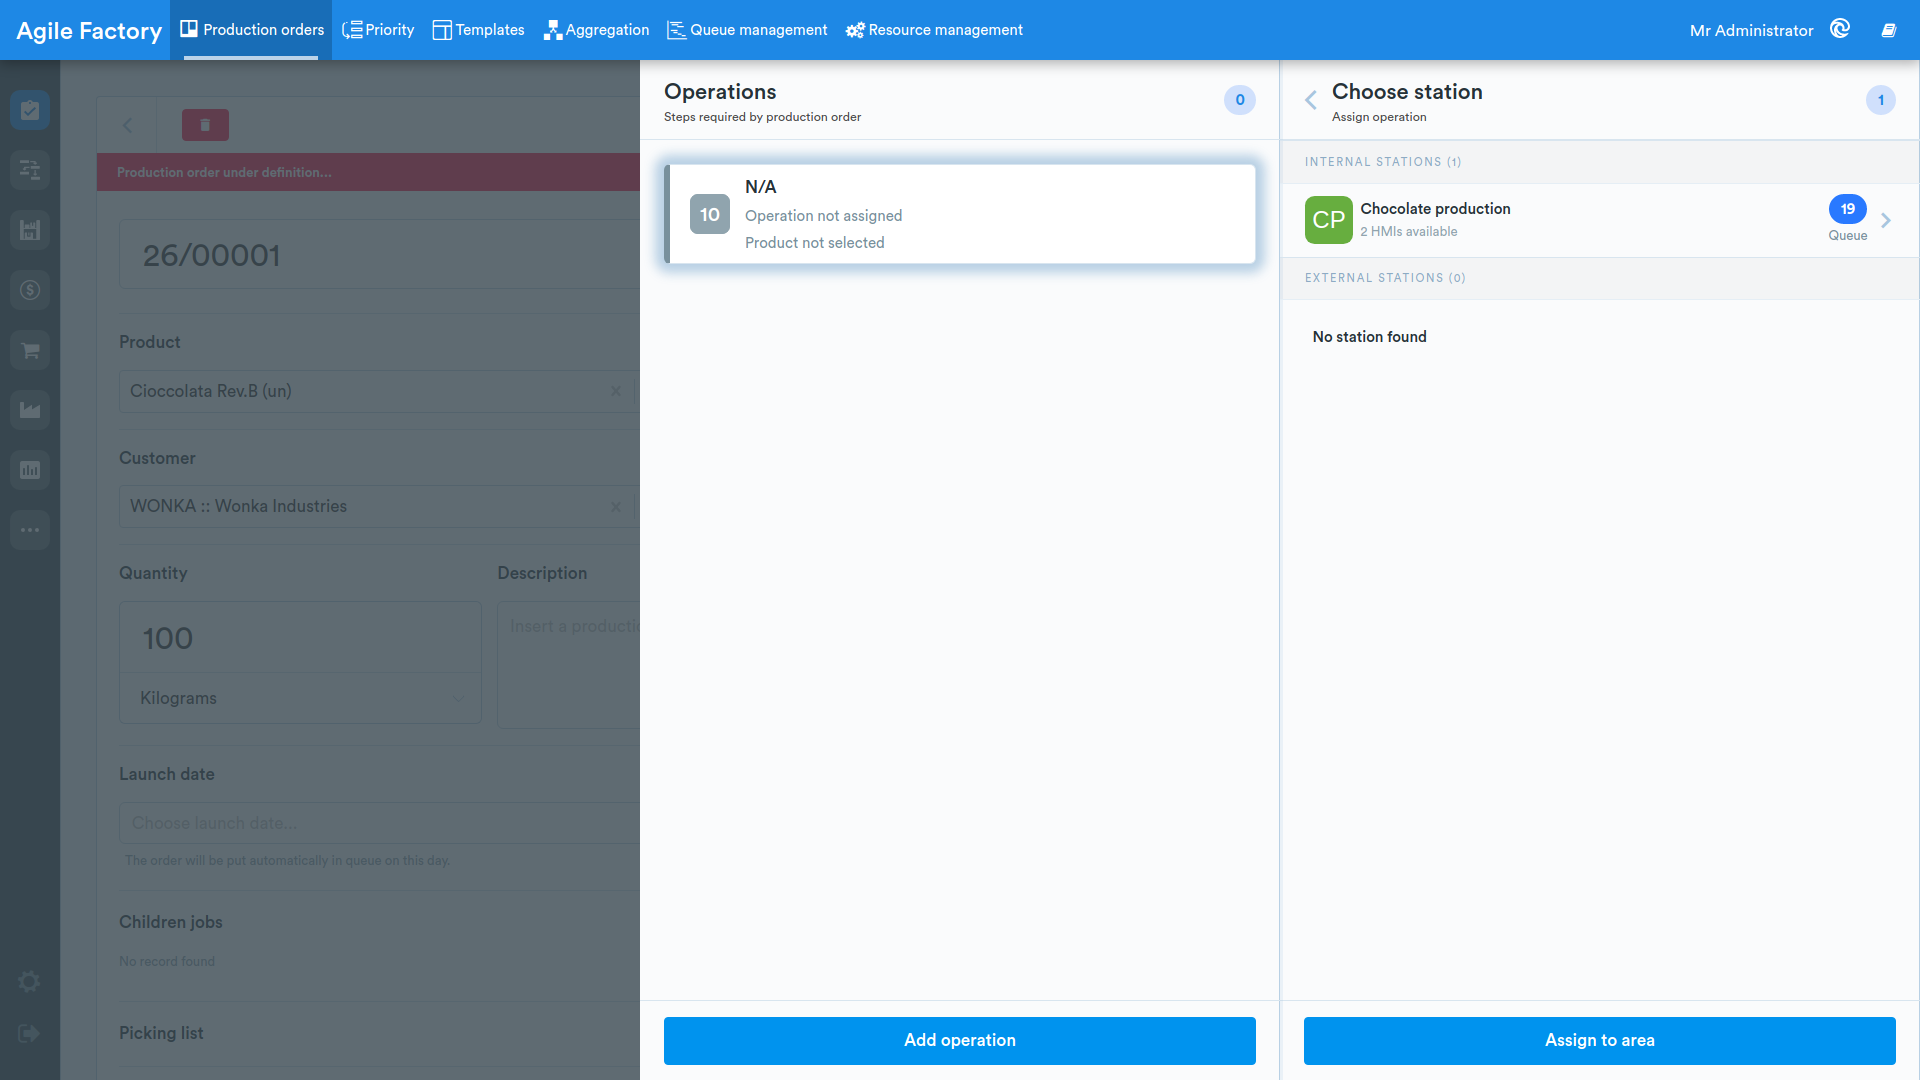
The last screen allows you to assign the operation to a station (internal or external).
In case you want to assign the operation to the entire area, simply press the Assign to area button located at the bottom.
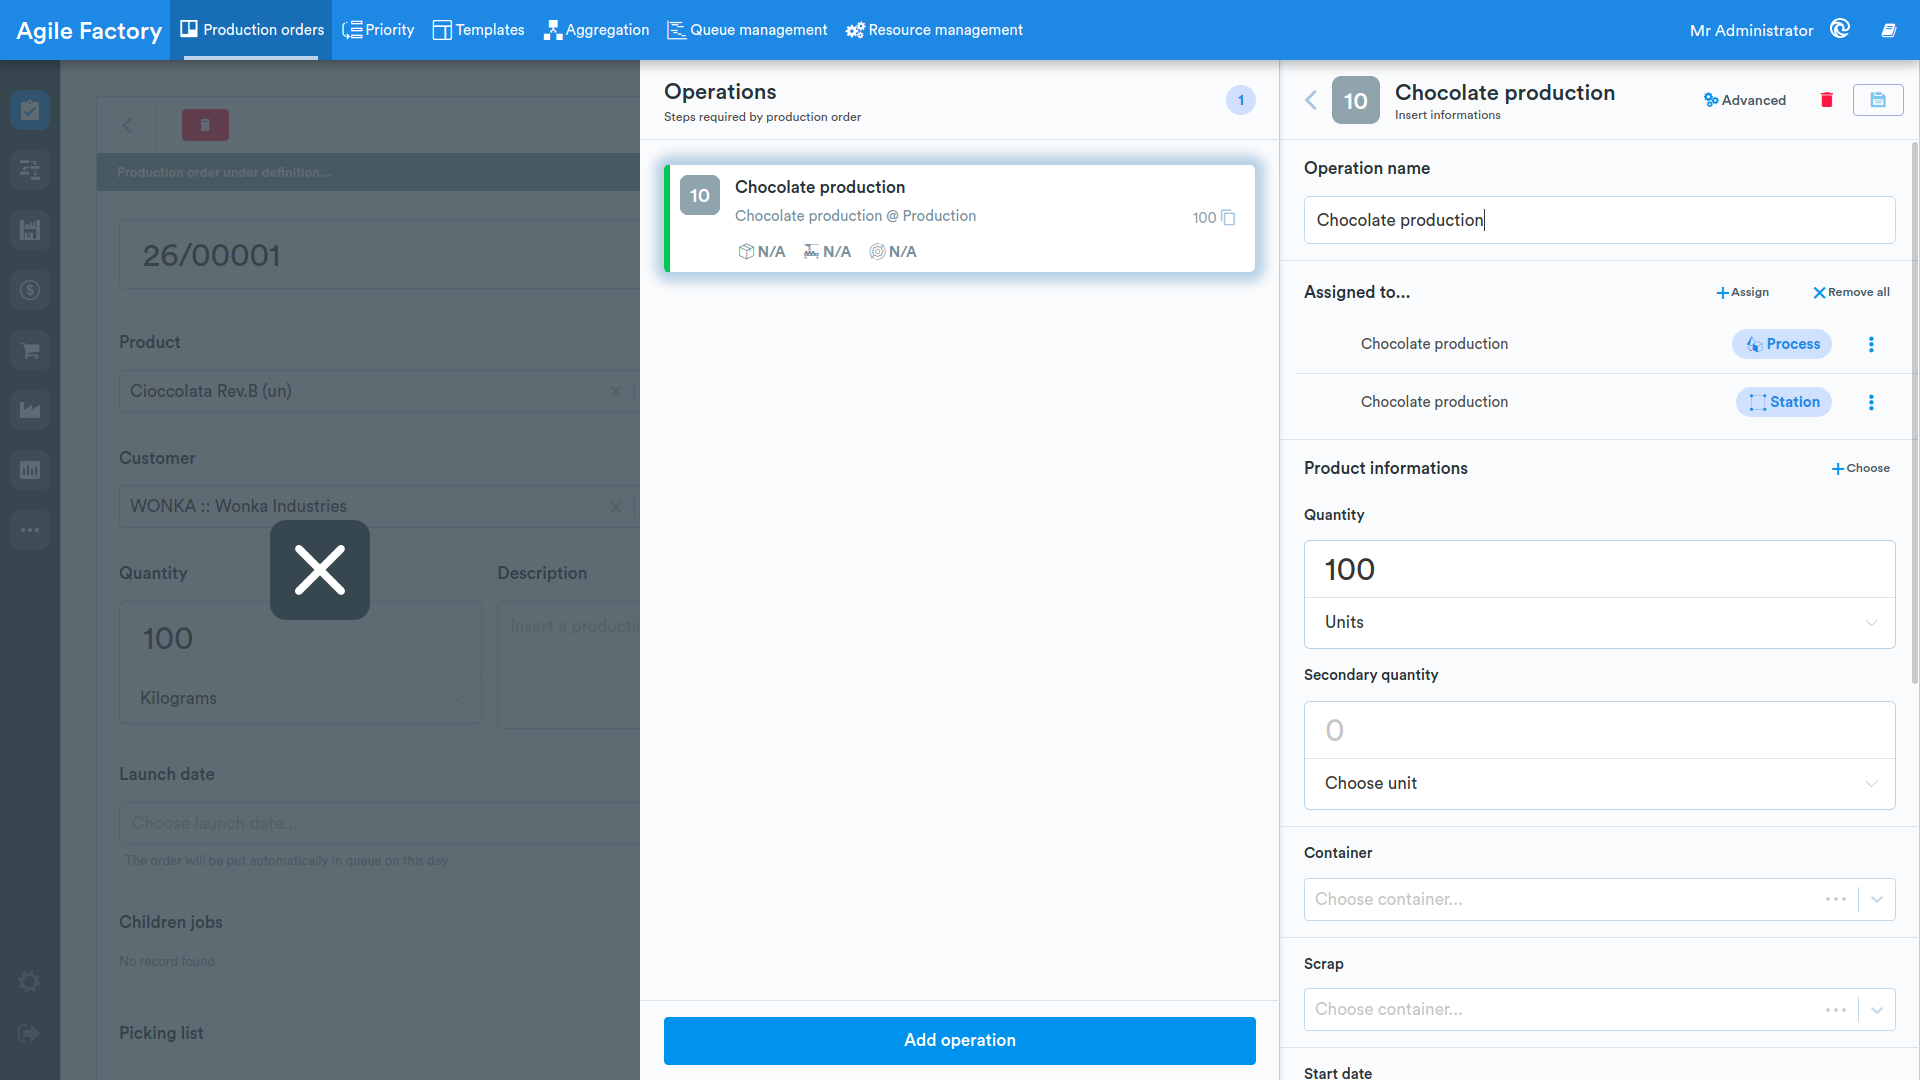
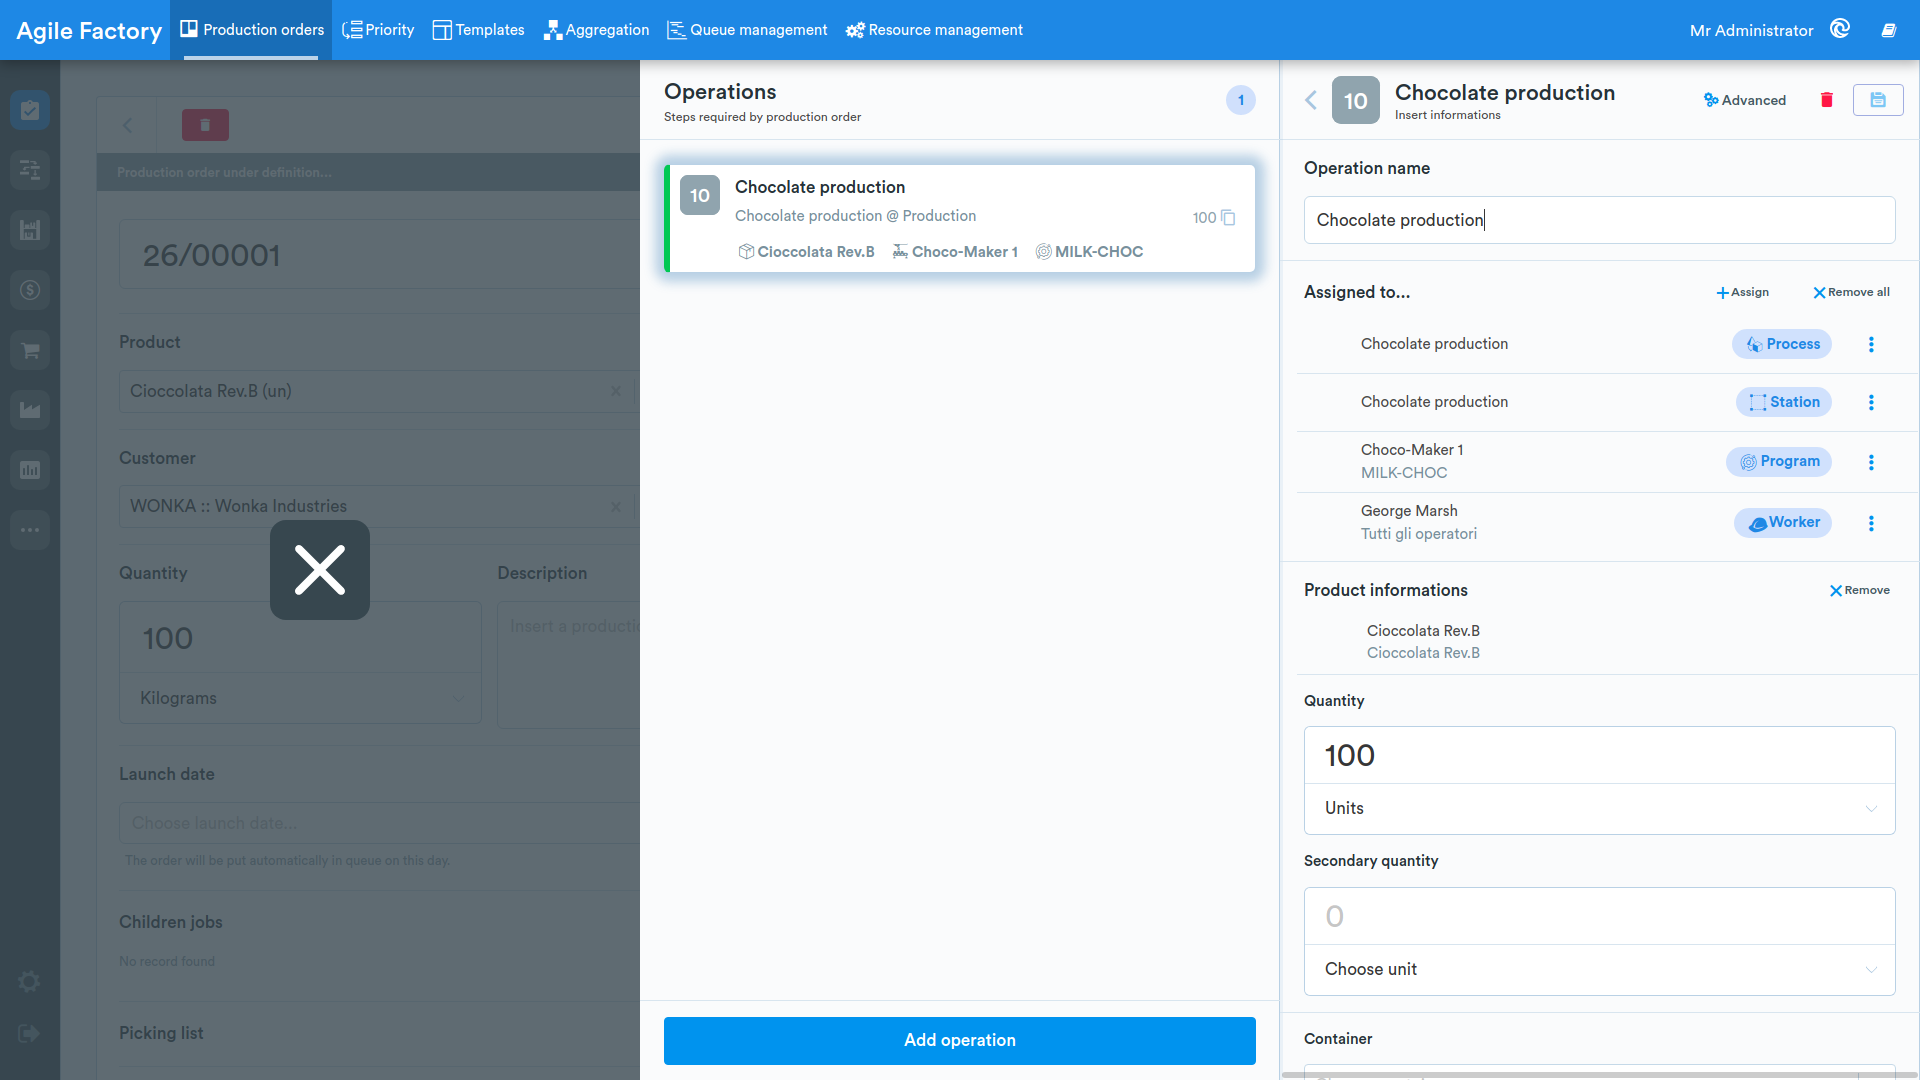
By selecting one of the operations from the list, it will be possible to modify the following information:
- work group/operator
- machine
- product
- estimated hours
- notes
- any documents
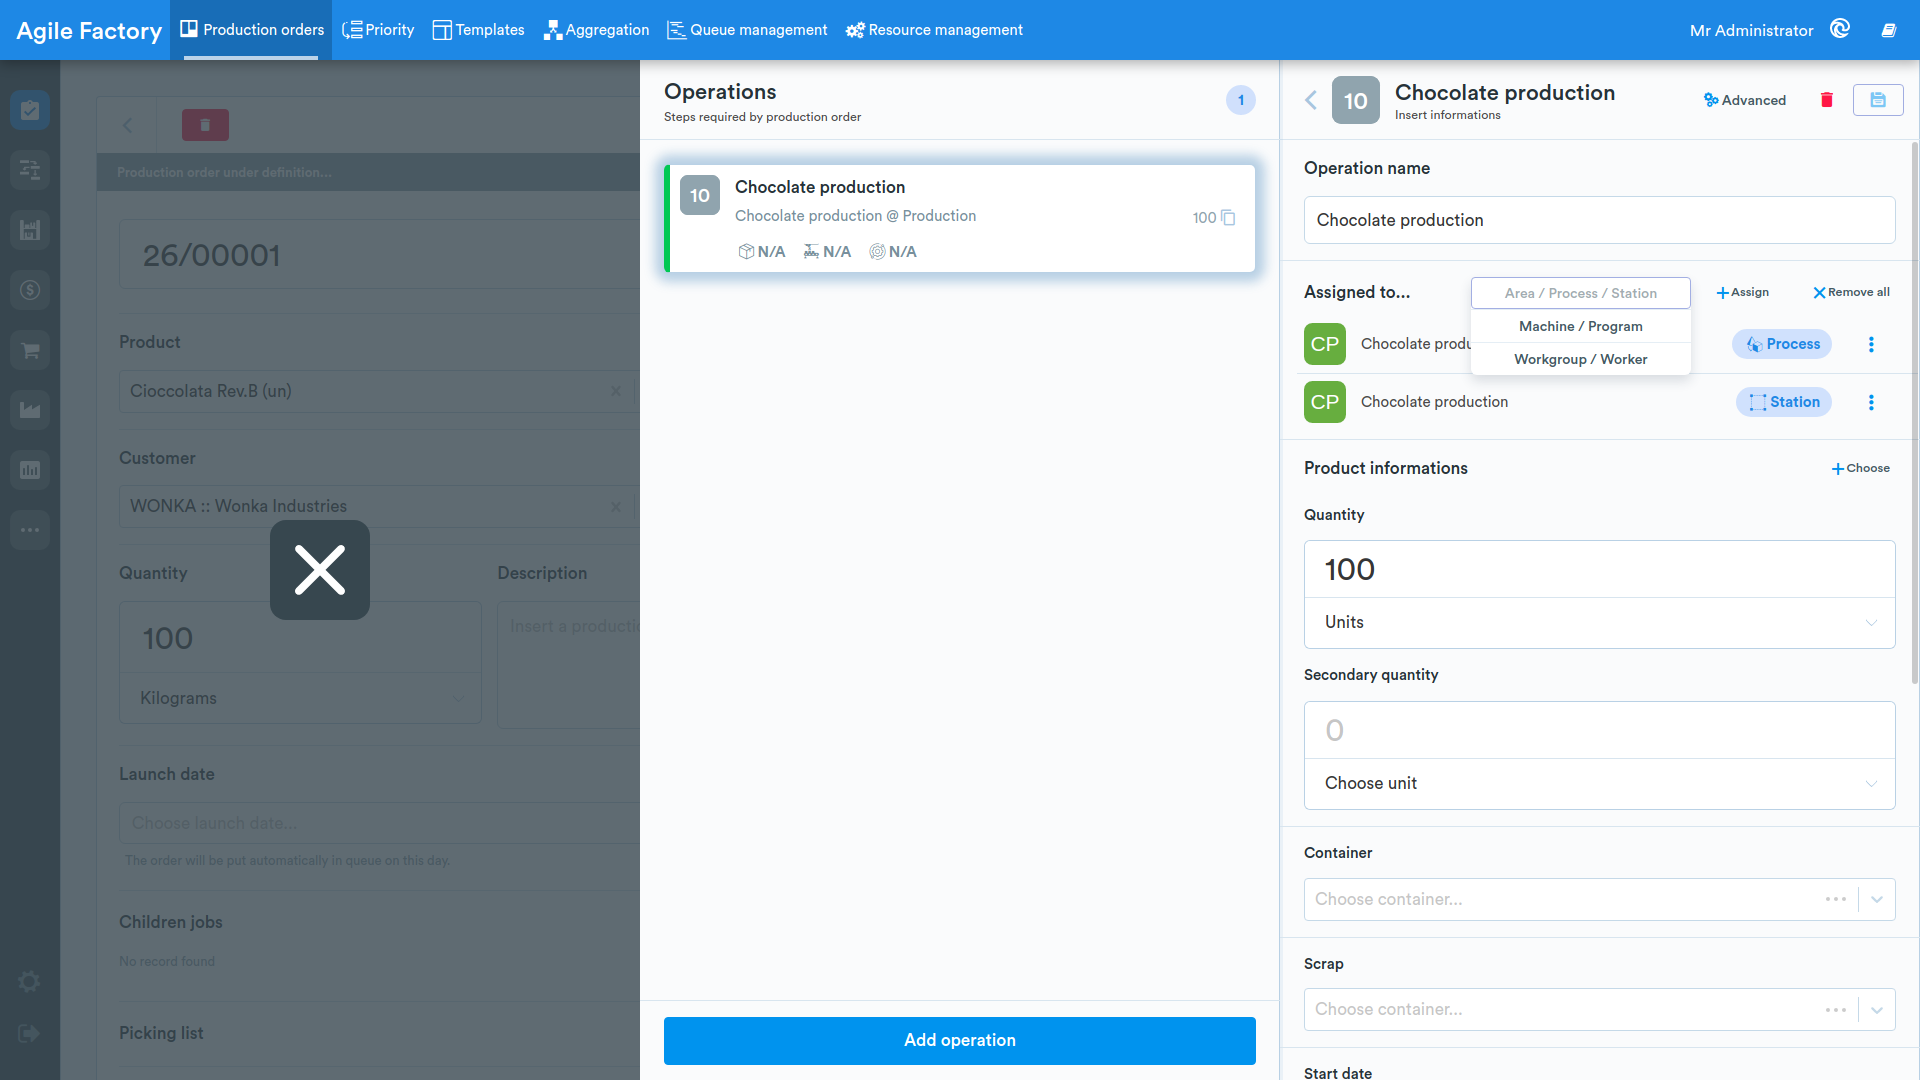
To assign the operation to a machine, you need to click on the Assign button in the respective input field and select the Machine item.
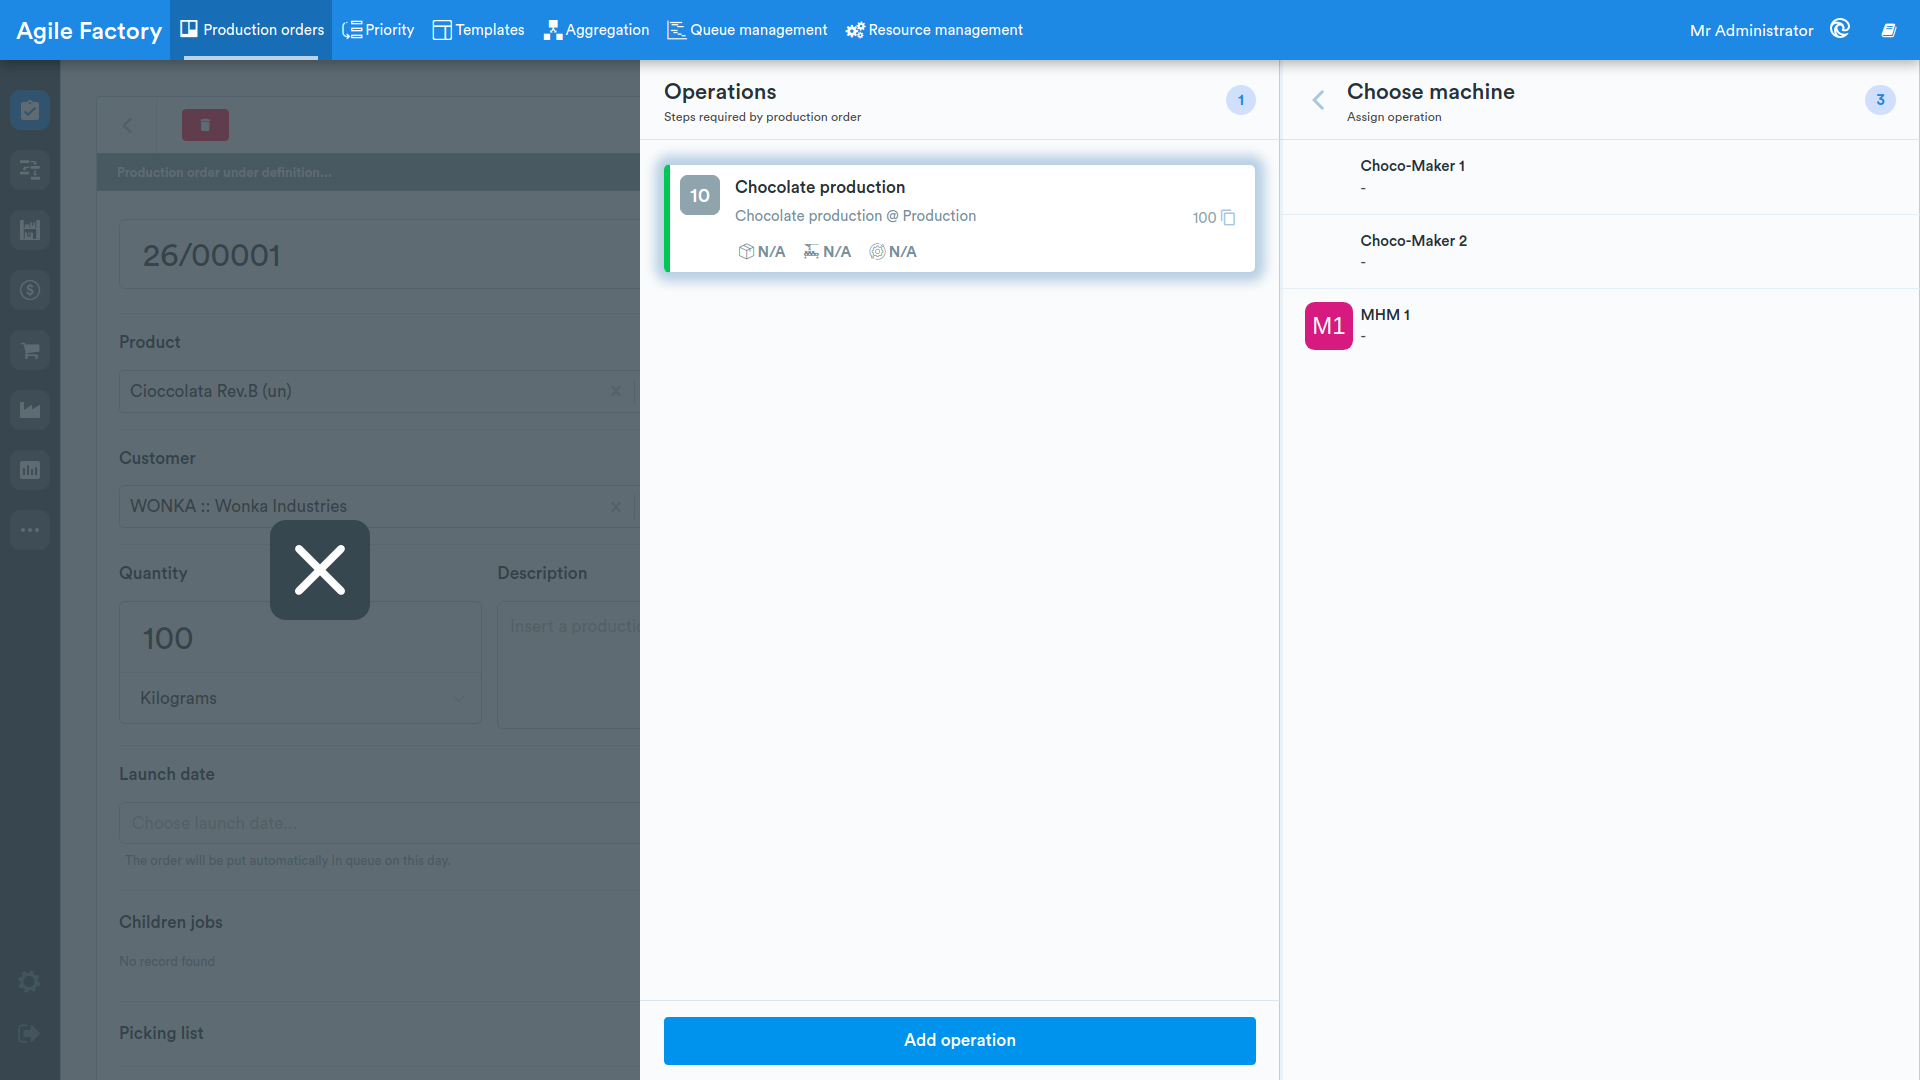
The system will show the list of available machines. In case the chosen station is an external station, this option will not be available.
You will then be able to select the program to be executed by the machine. You can skip this step by pressing the Do not choose program button at the bottom of the screen.
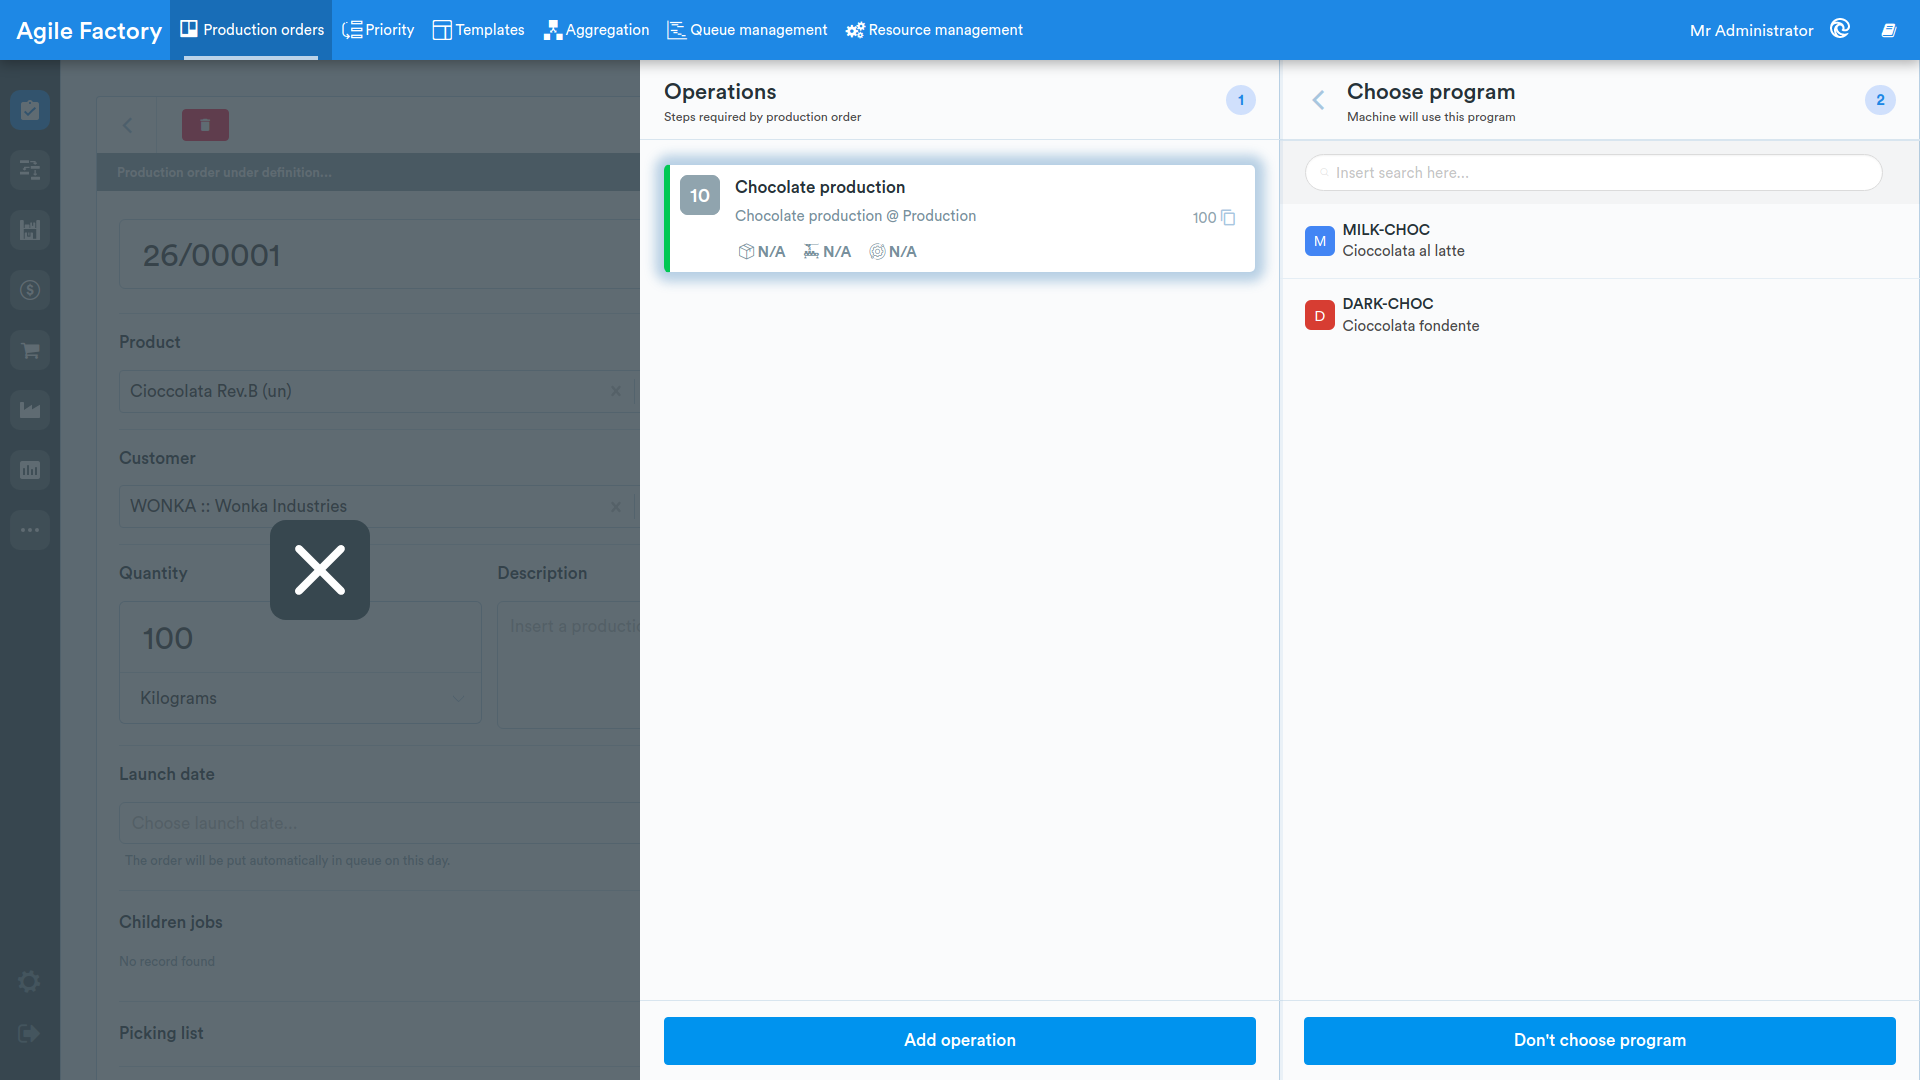
After selecting the program for the selected machine, you will return to the operation parameters page, where you can continue filling in the parameters.
To assign the operation to an operator, you need to click on the Assign button in the respective input field and select the Work group/Operator item.
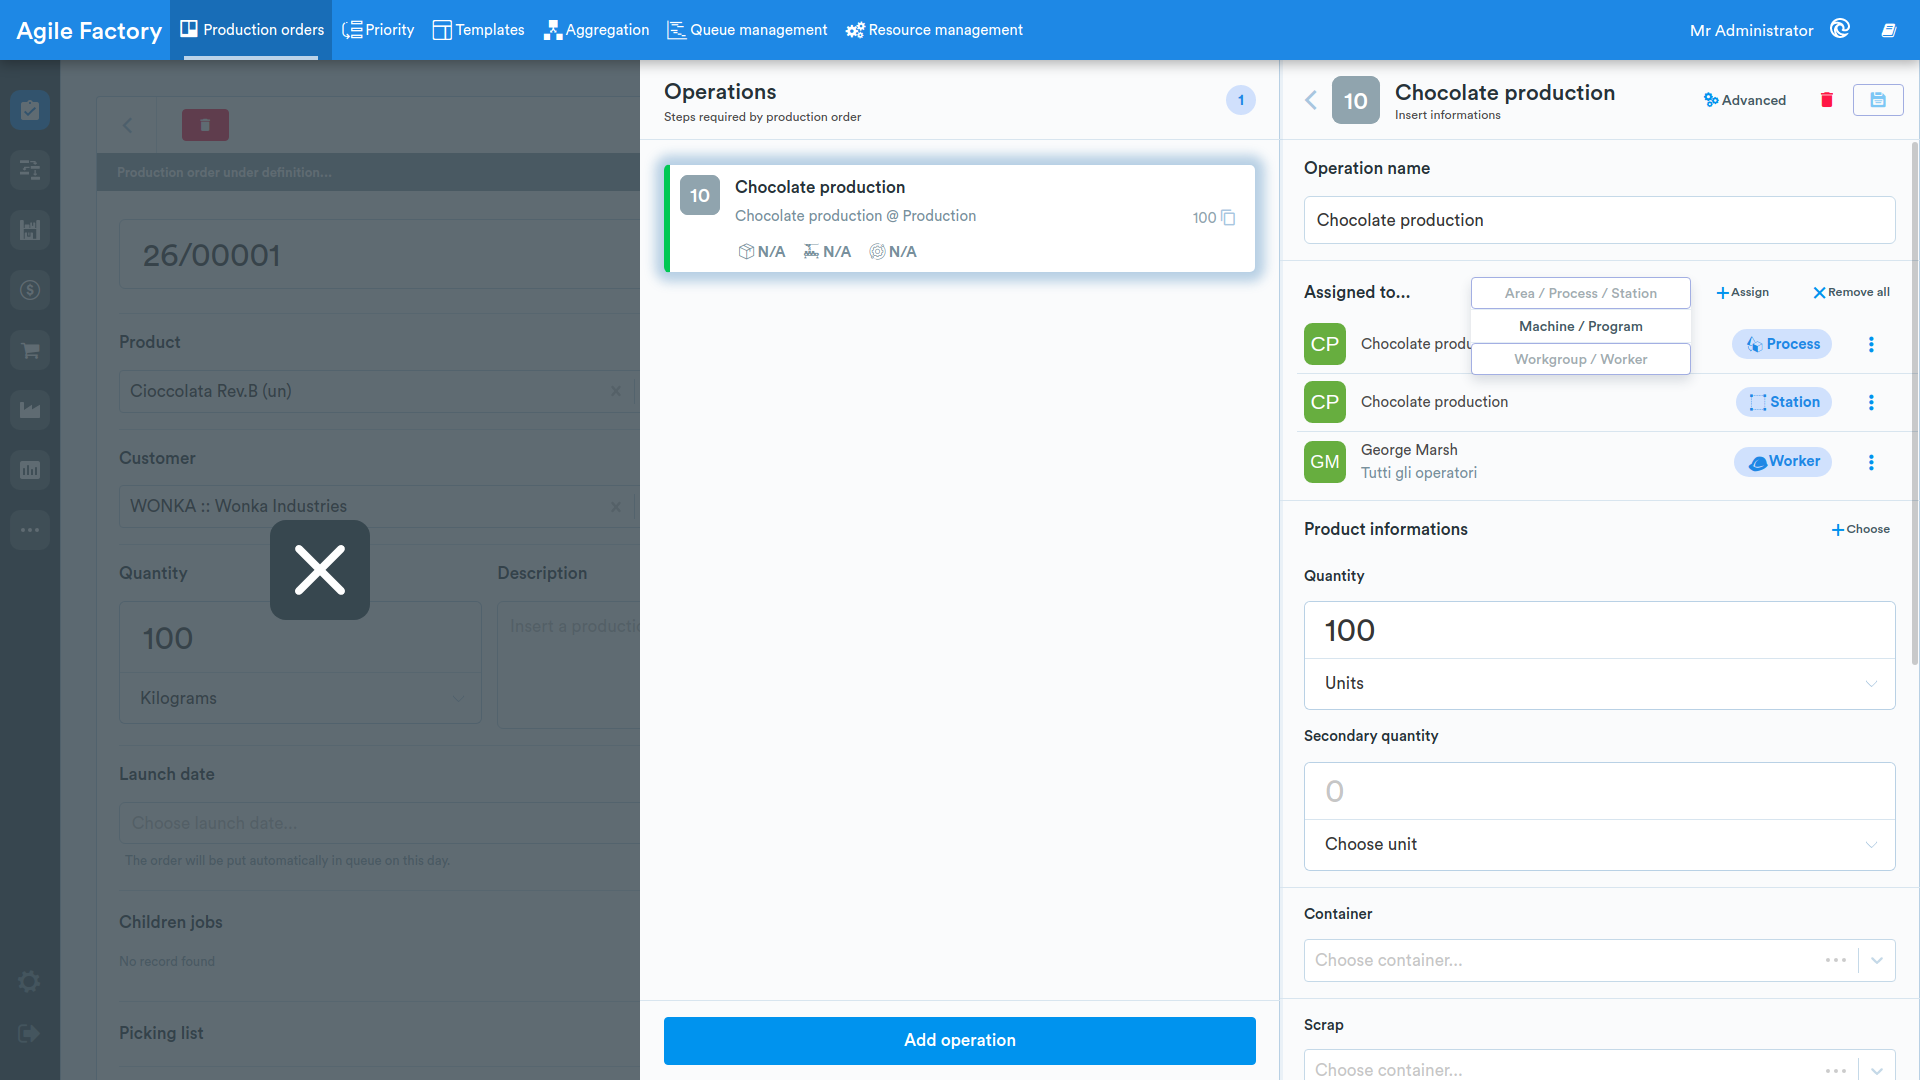
The system will show the list of available work groups. In case the chosen station is external, this option will not be available.
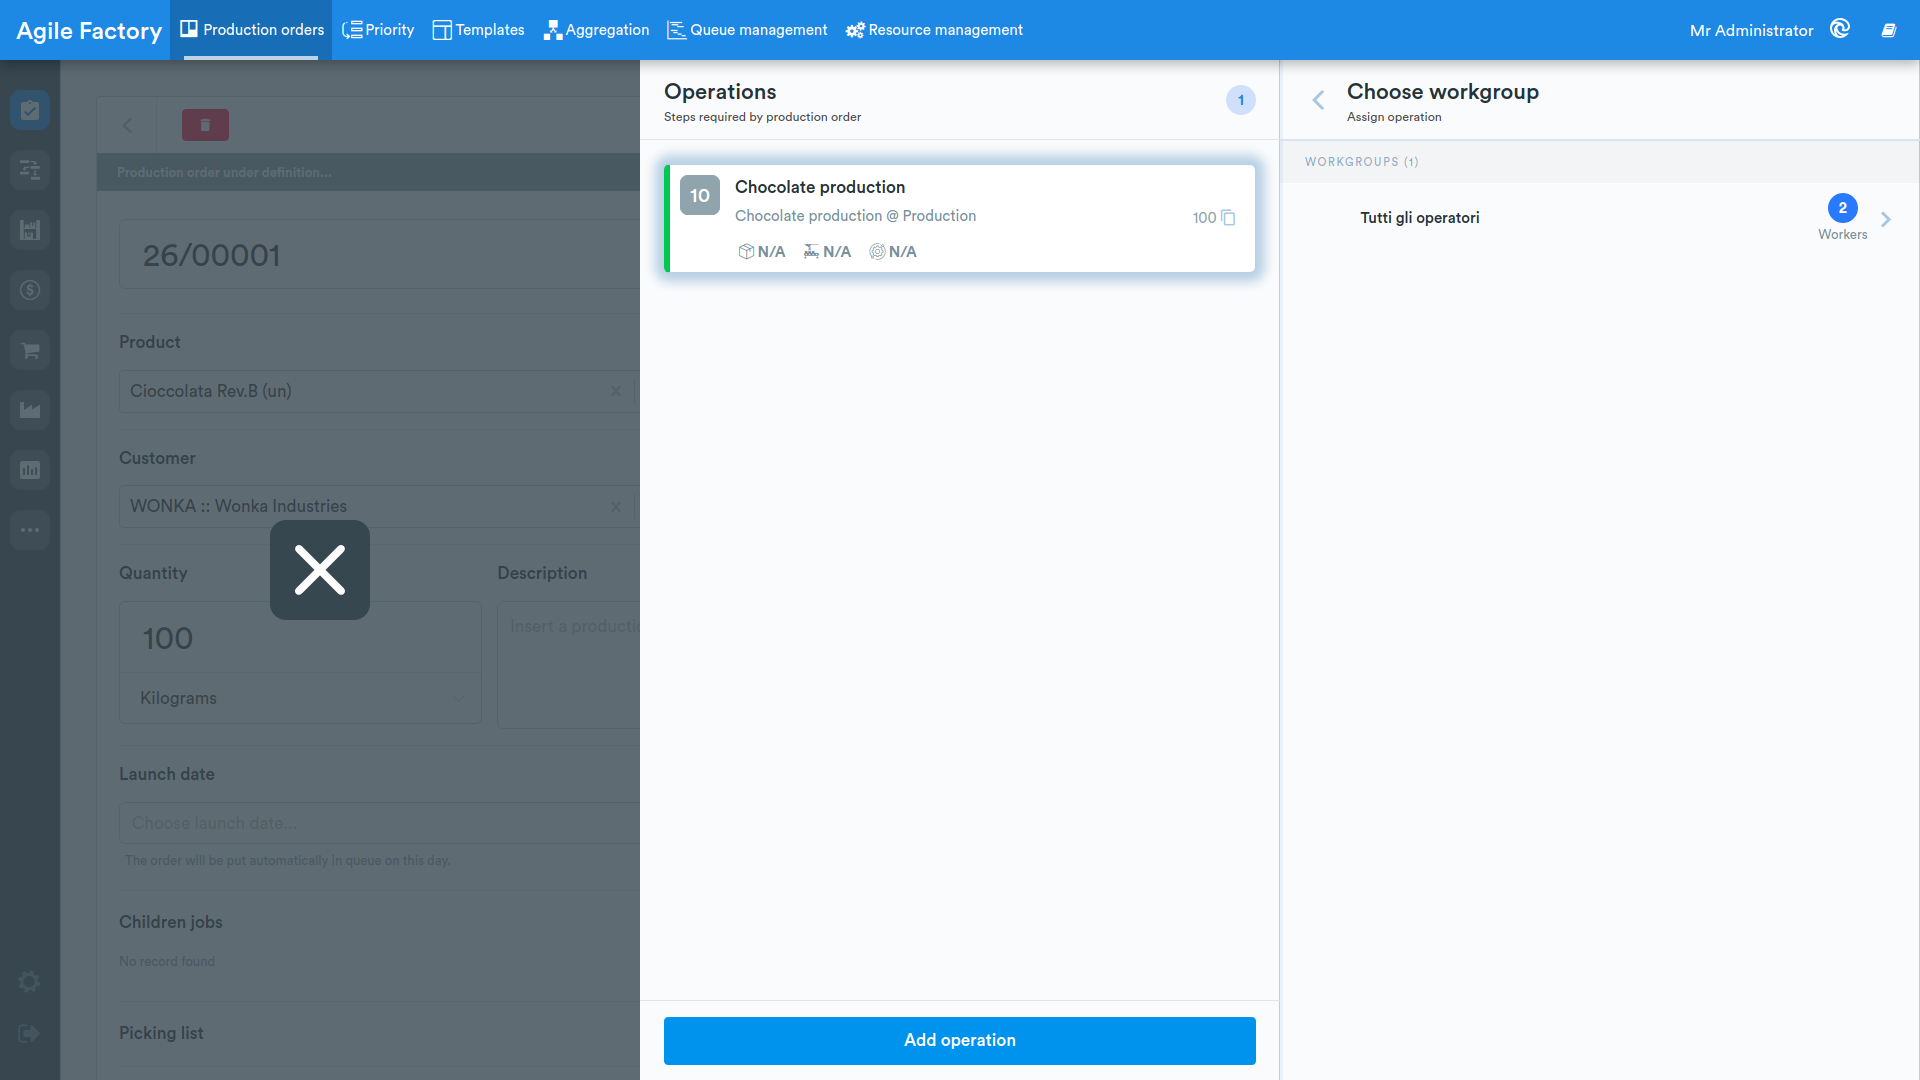
After selecting the work group of interest, a screen will be displayed showing all the operators who are part of it. By clicking on the individual operator, you can assign the operation to them; by clicking on Assign to work group at the bottom right, the operation will be assigned to all workers in the group.
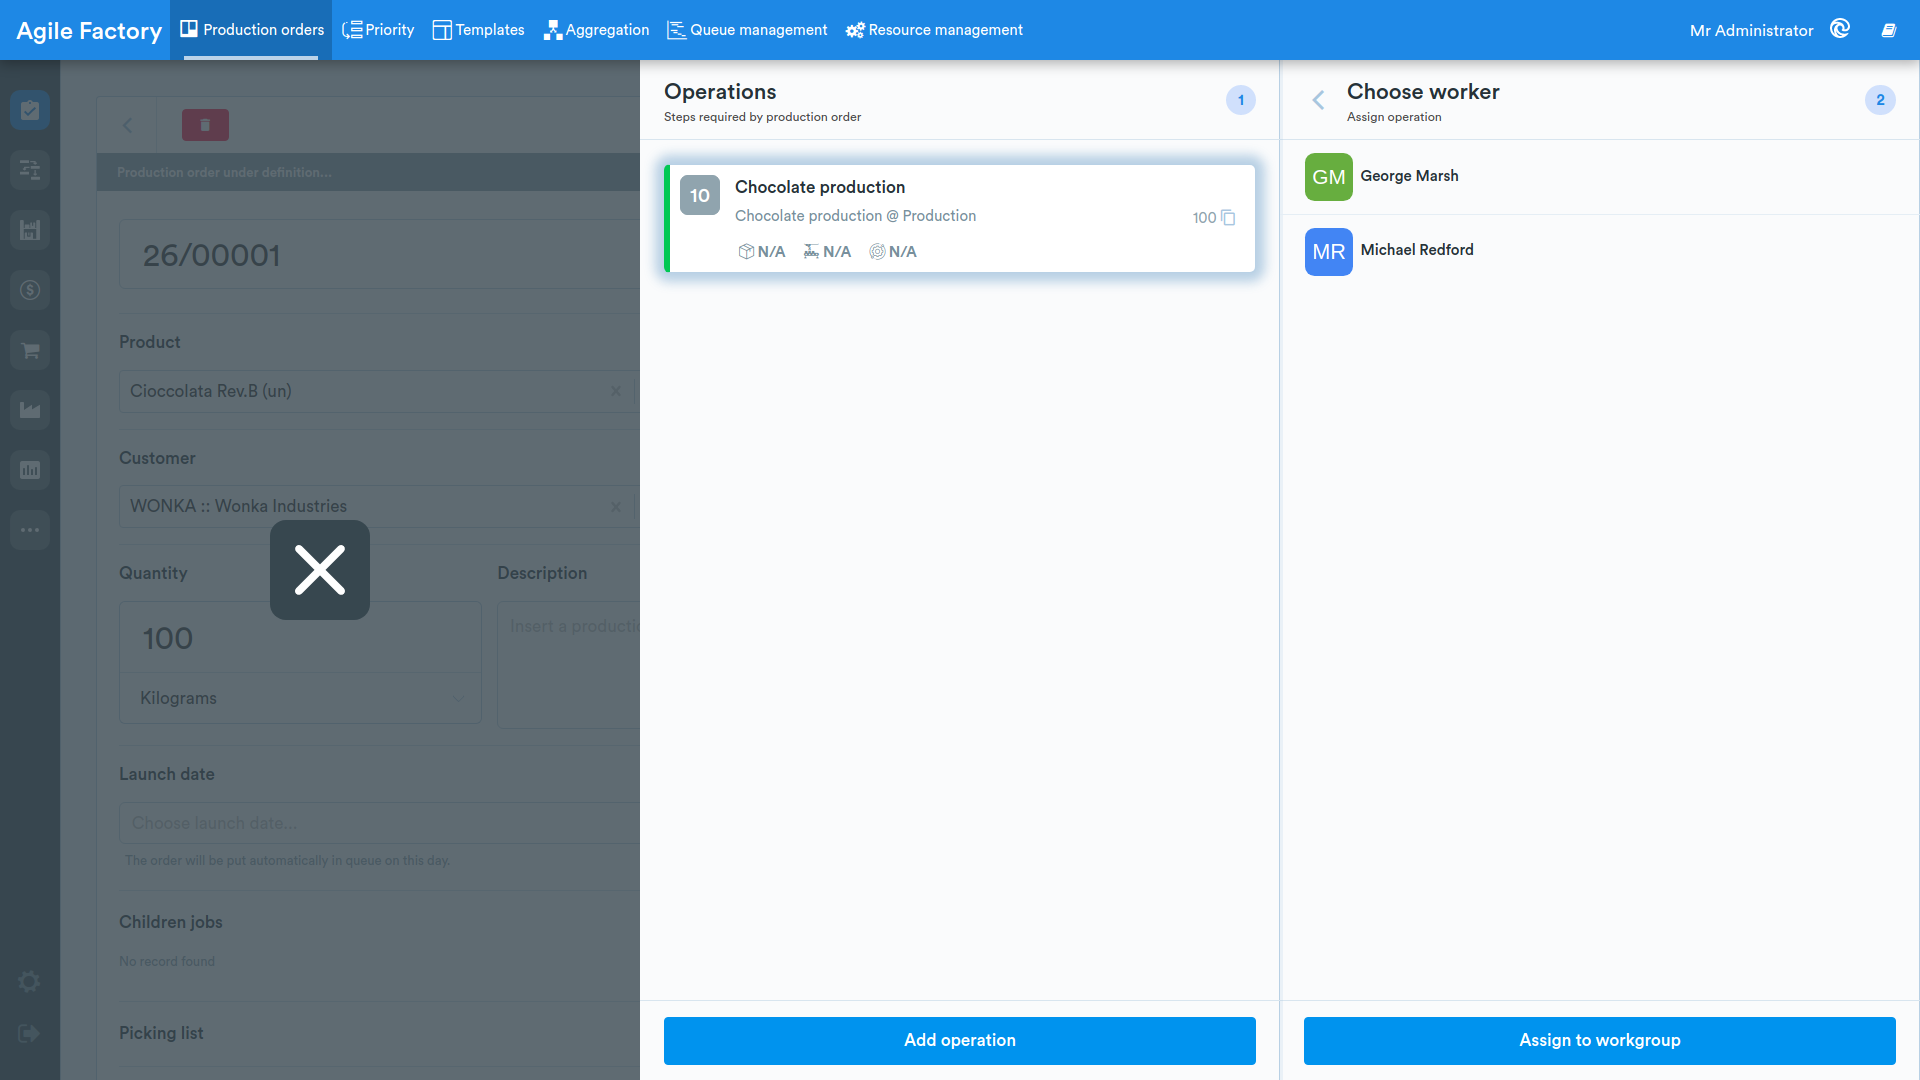
After selecting the operators or group of operators for the selected operation, you will return to the operation parameters page, where you can continue filling in the parameters.
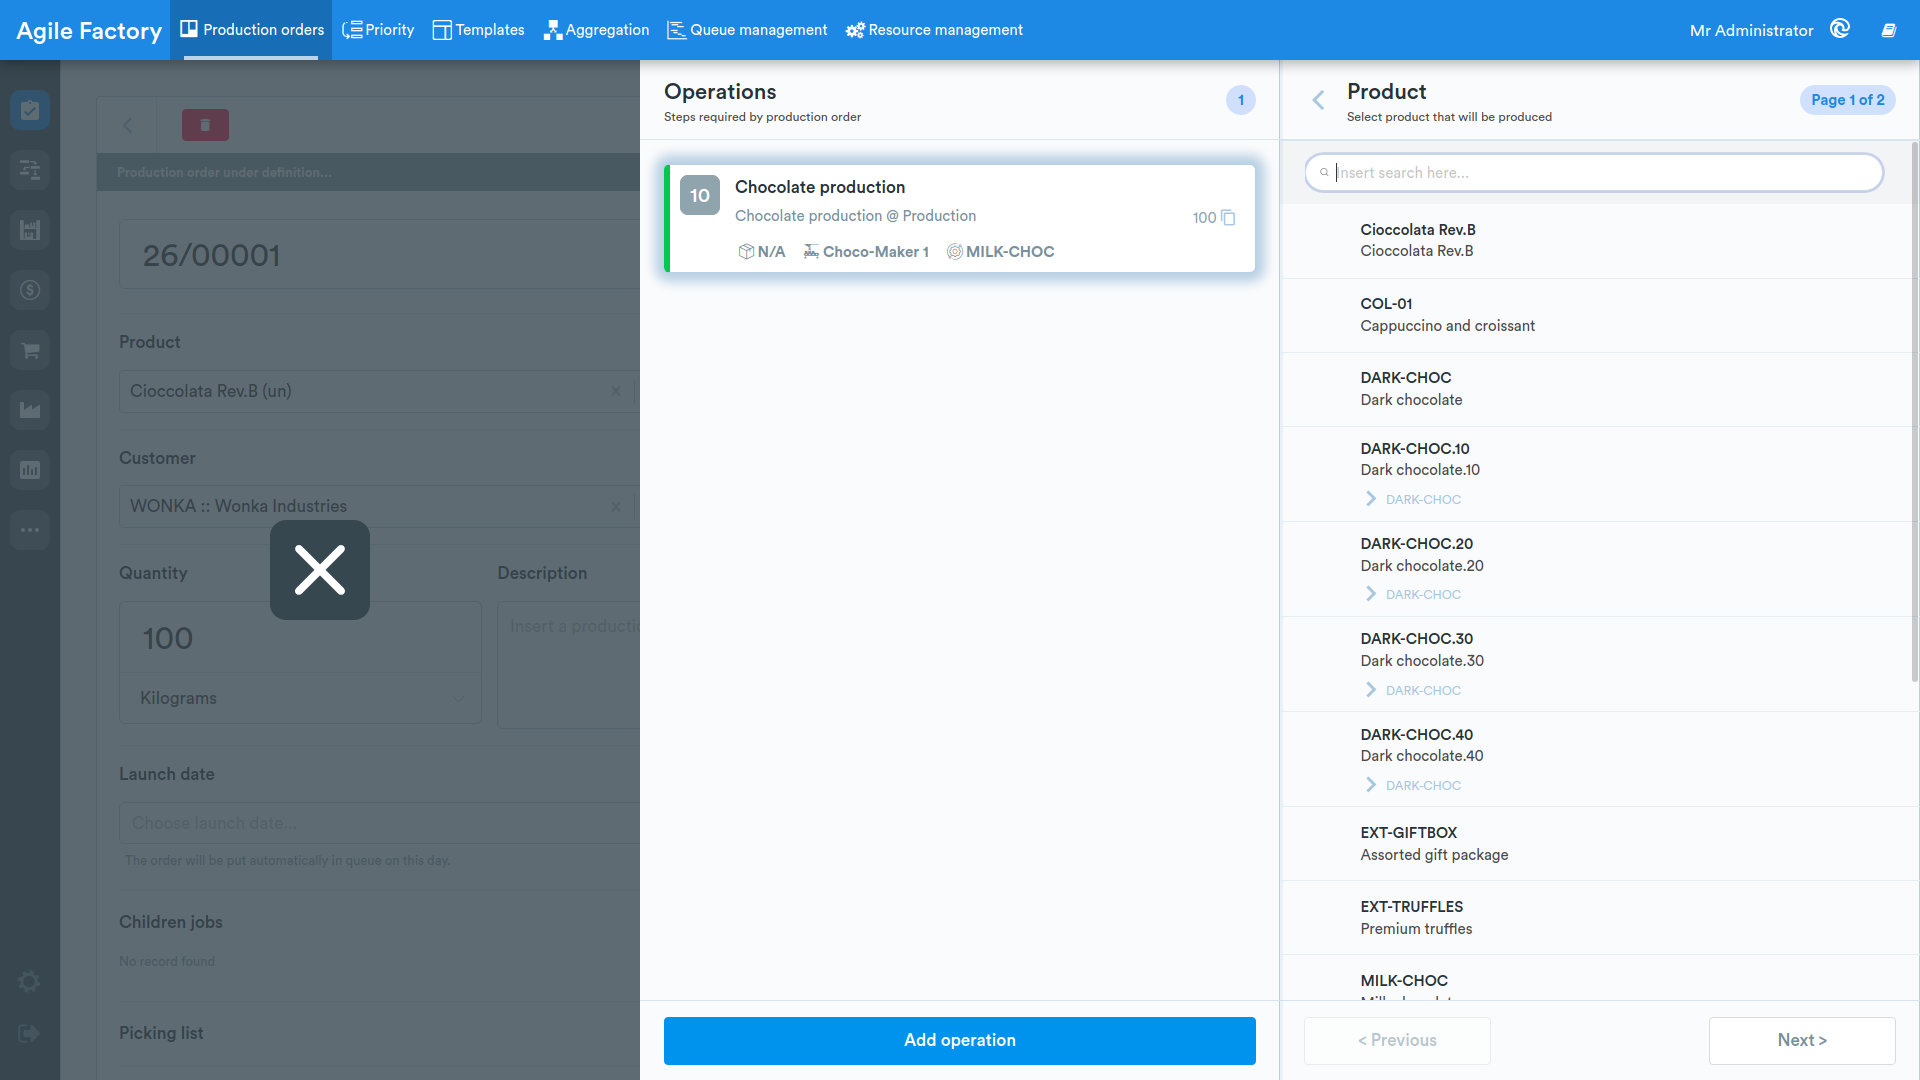
To add information related to the type of product on which the operation will be performed, click on Select in the respective input field.
The system will display the list of available items from which you can select the one of interest.
The "Secondary quantity" parameter allows you to use a second unit of measure for the quantity in a specific operation. In this case, a conversion factor will be used to convert the units of measure.
In the advanced settings of the selected operation, you can customize the Picking list that will be used to execute the production operation. To configure the picking list for the order, press the Edit button next to the Picking list item.
The current picking list will now be shown.
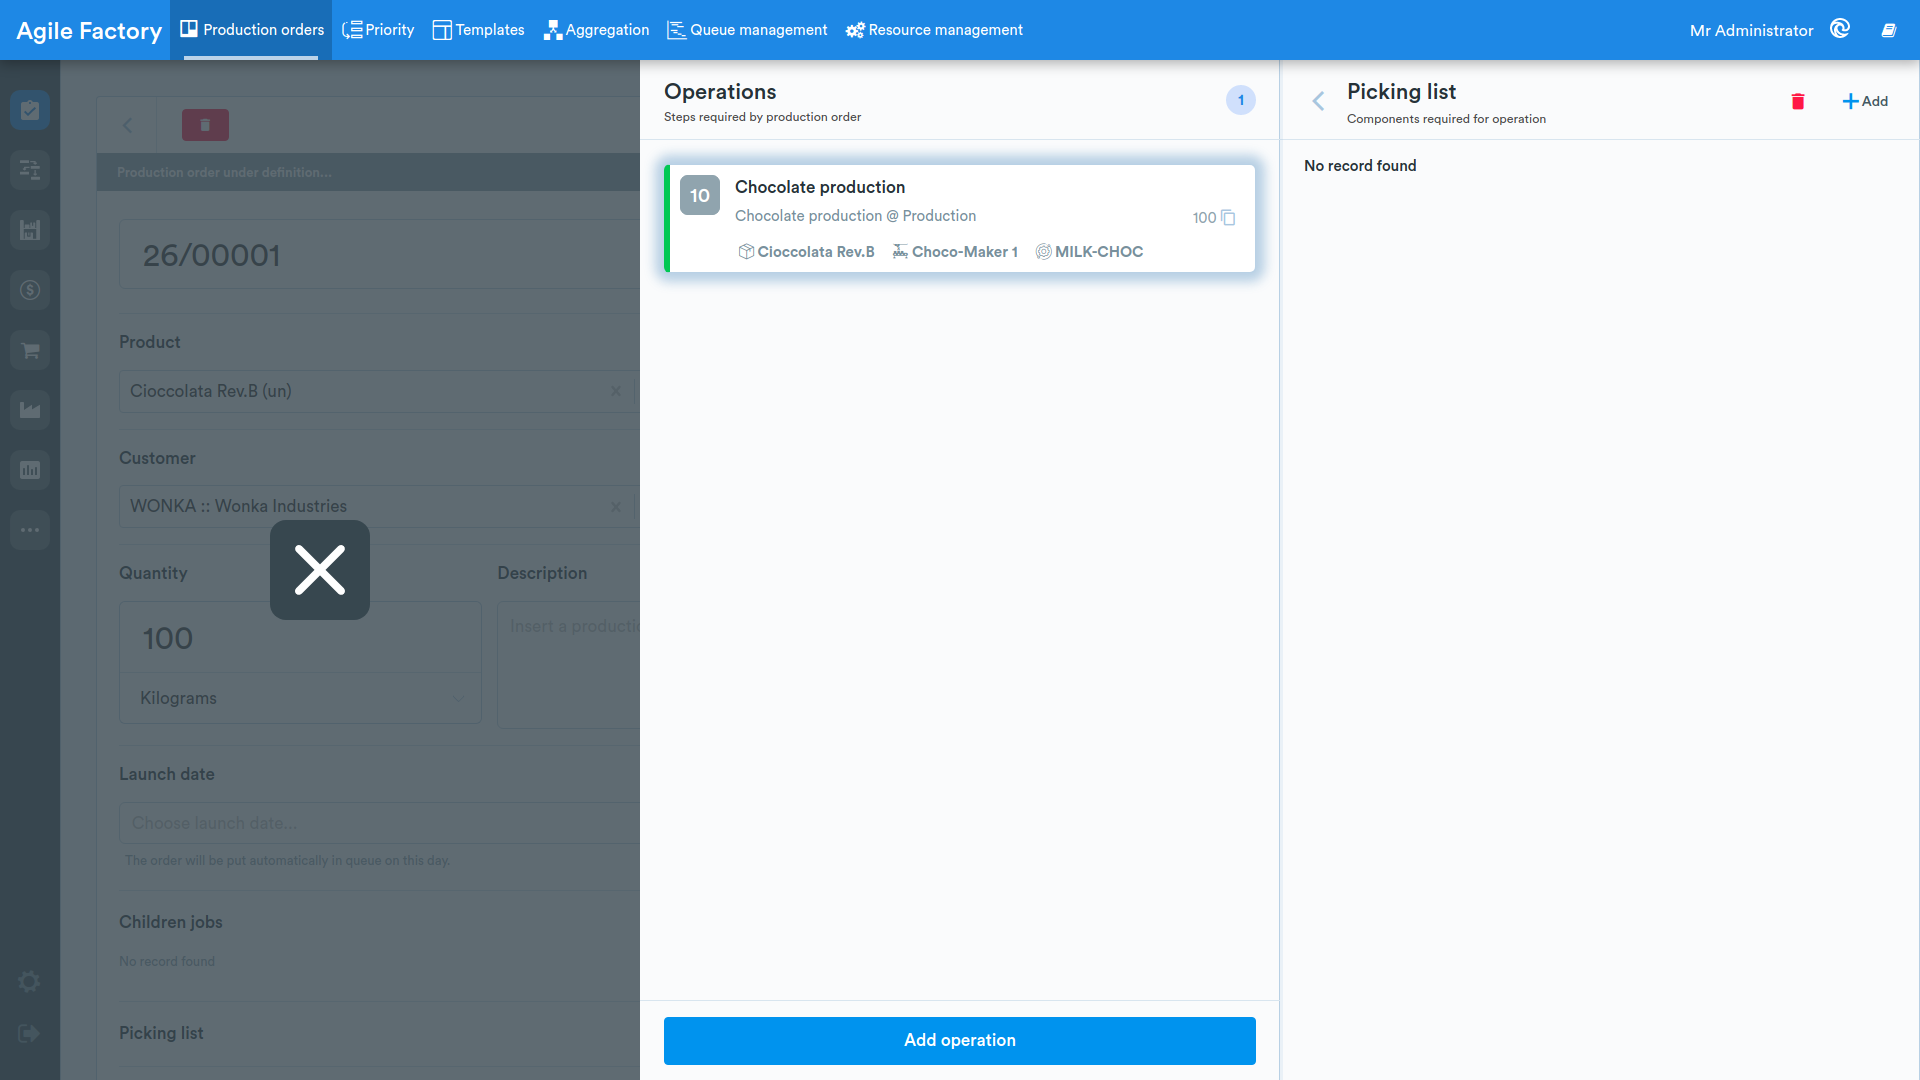
To add an item, press the Add button at the top right.
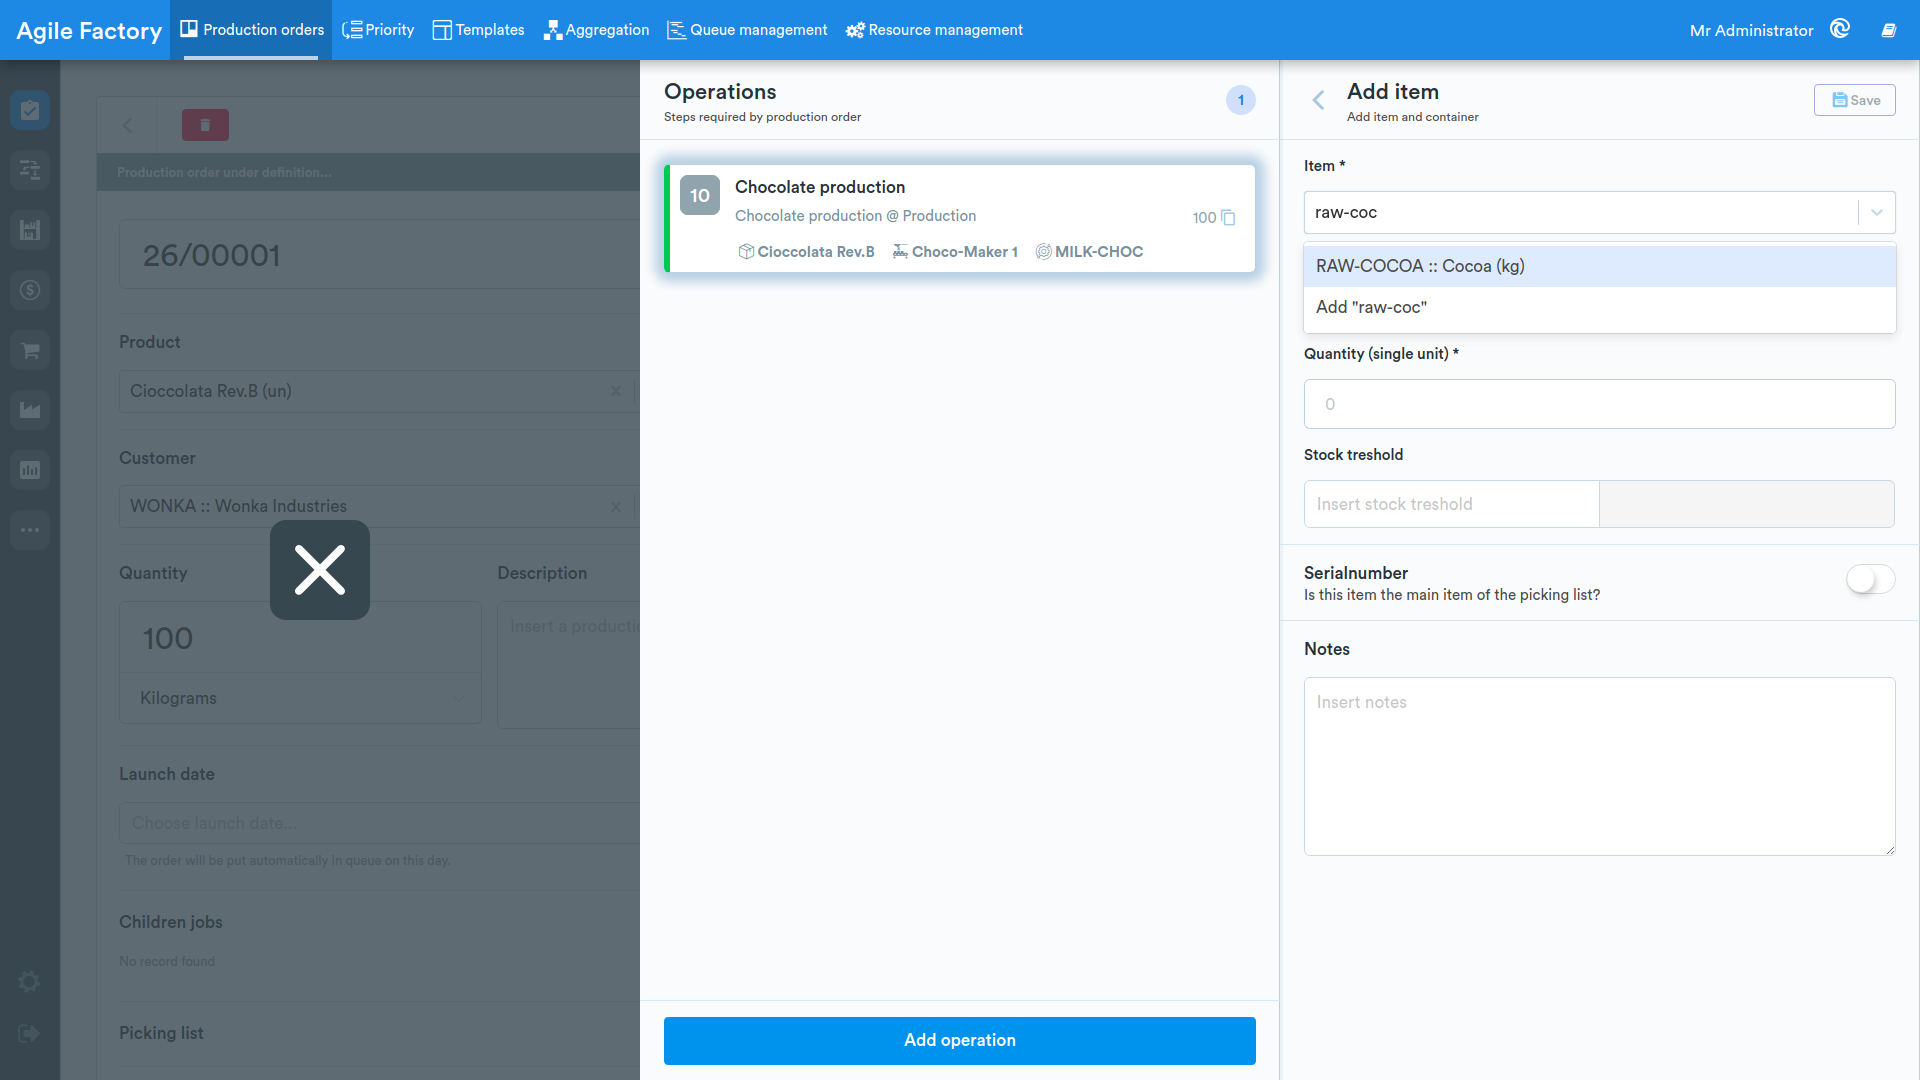
An input form will be shown, where you can choose the component, the source container (editable later by the operator) and the quantity needed to produce a single unit.
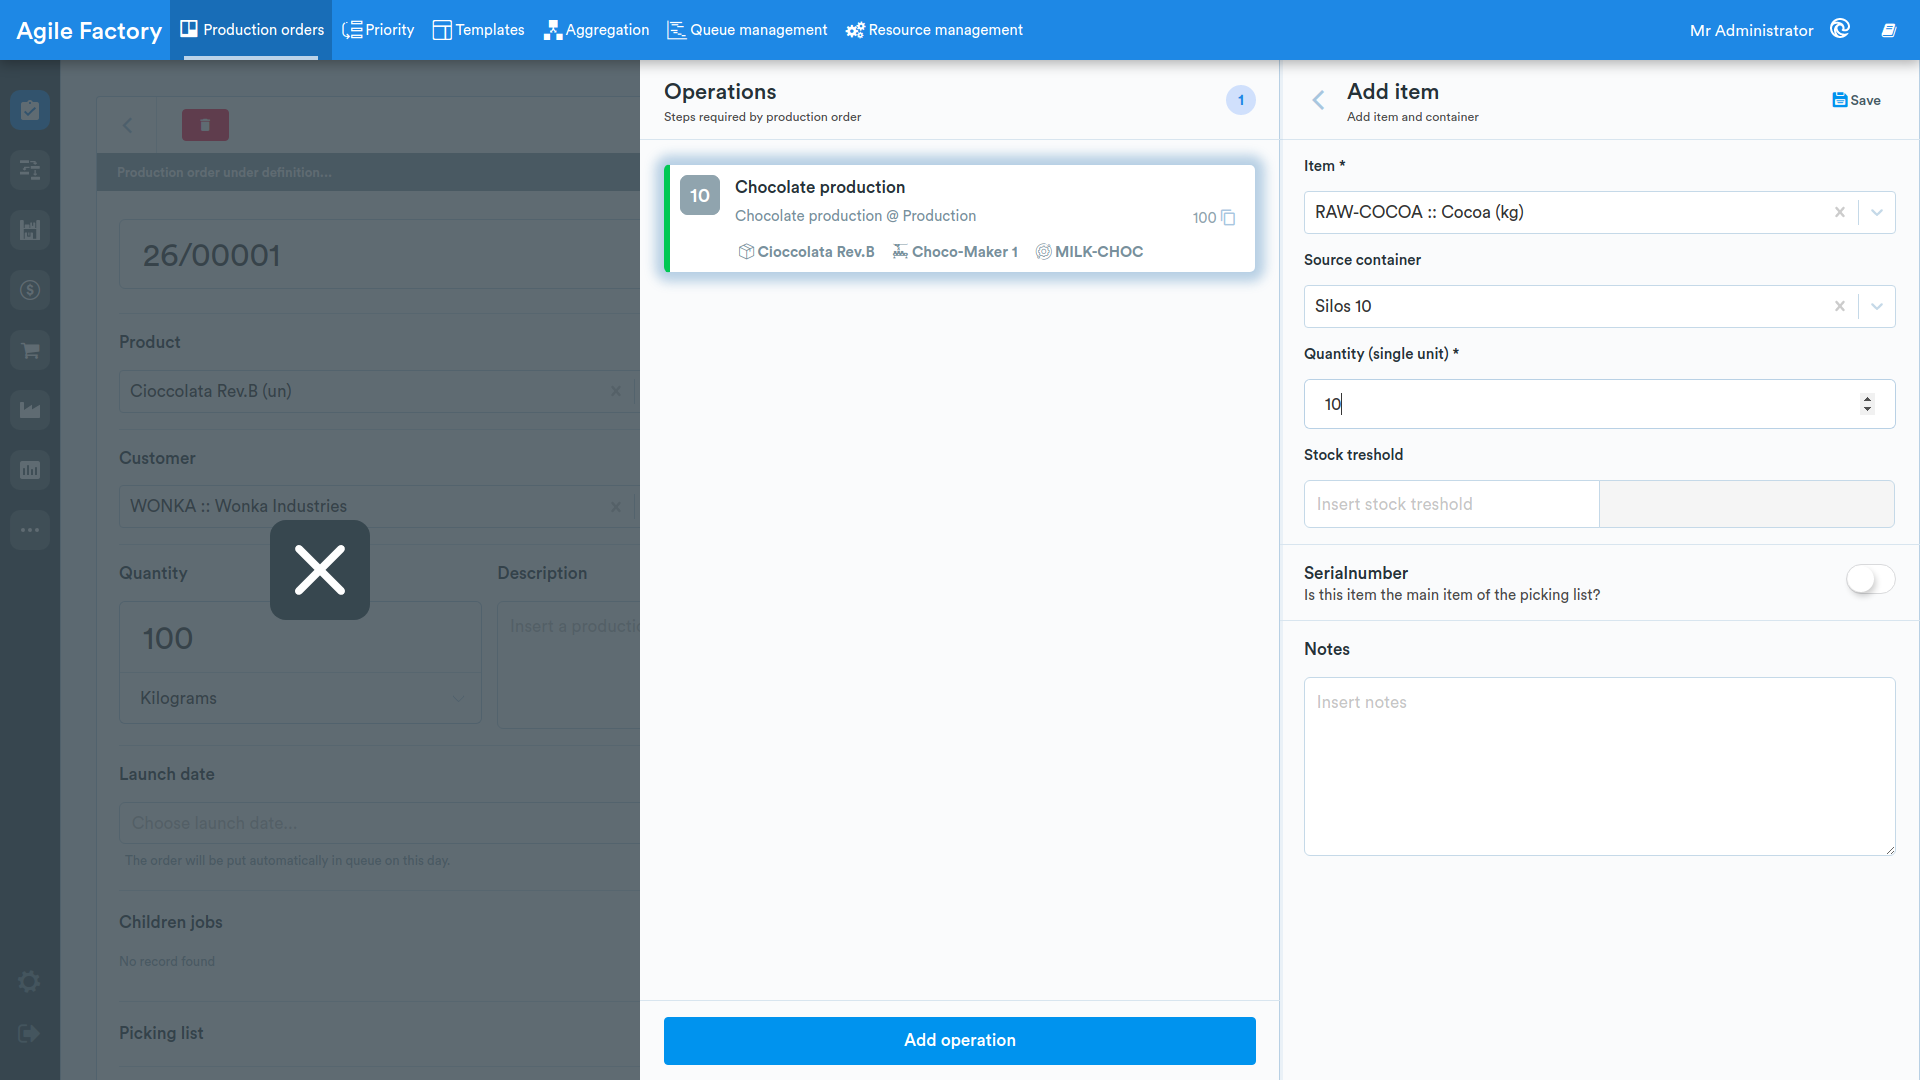
Picking List
At production-order level, a read-only view of the Picking list is available, which automatically aggregates the items configured in the picking lists of all the order's operations. To view it, press the Show button next to the Picking list item.
Once loaded, the list shows each item together with its stock availability. Since this is not a configuration view, items cannot be added here: items must be configured from each operation's picking list, as described in the previous section.
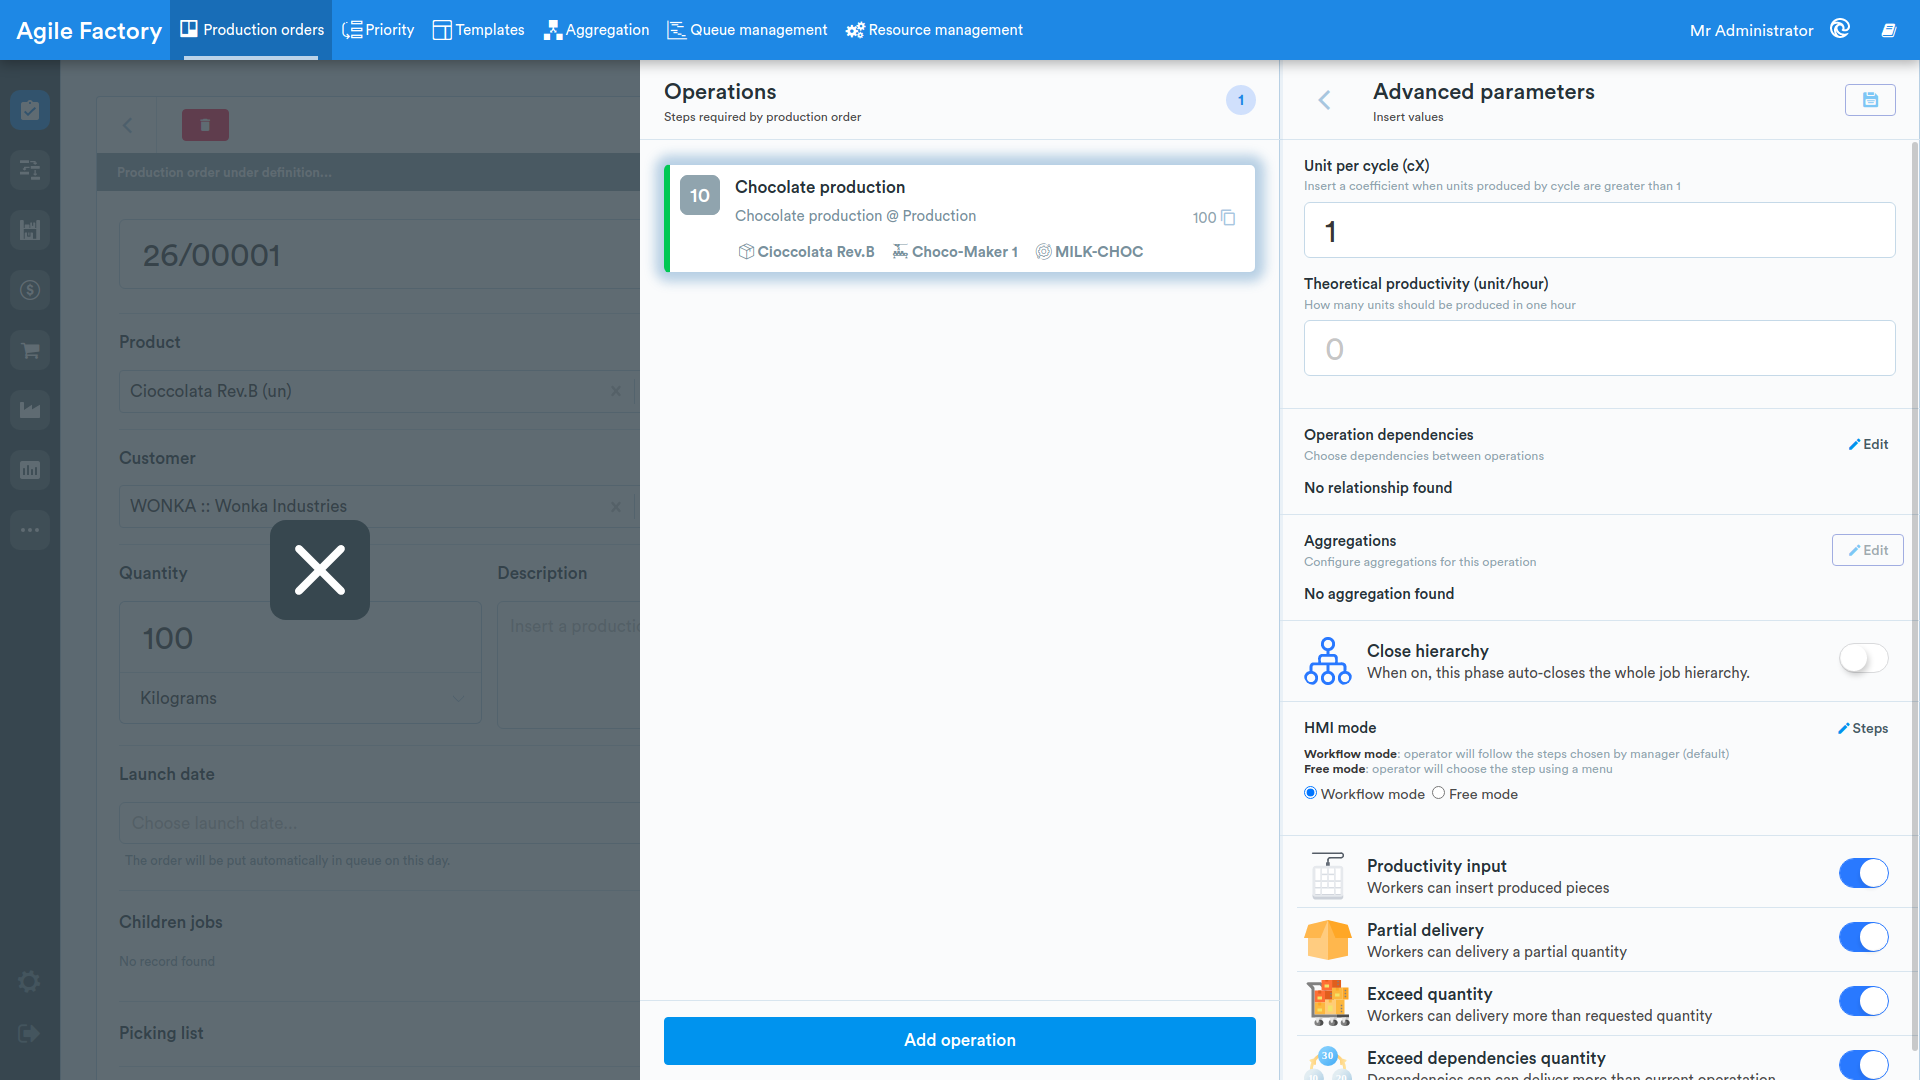
Advanced Operation Settings
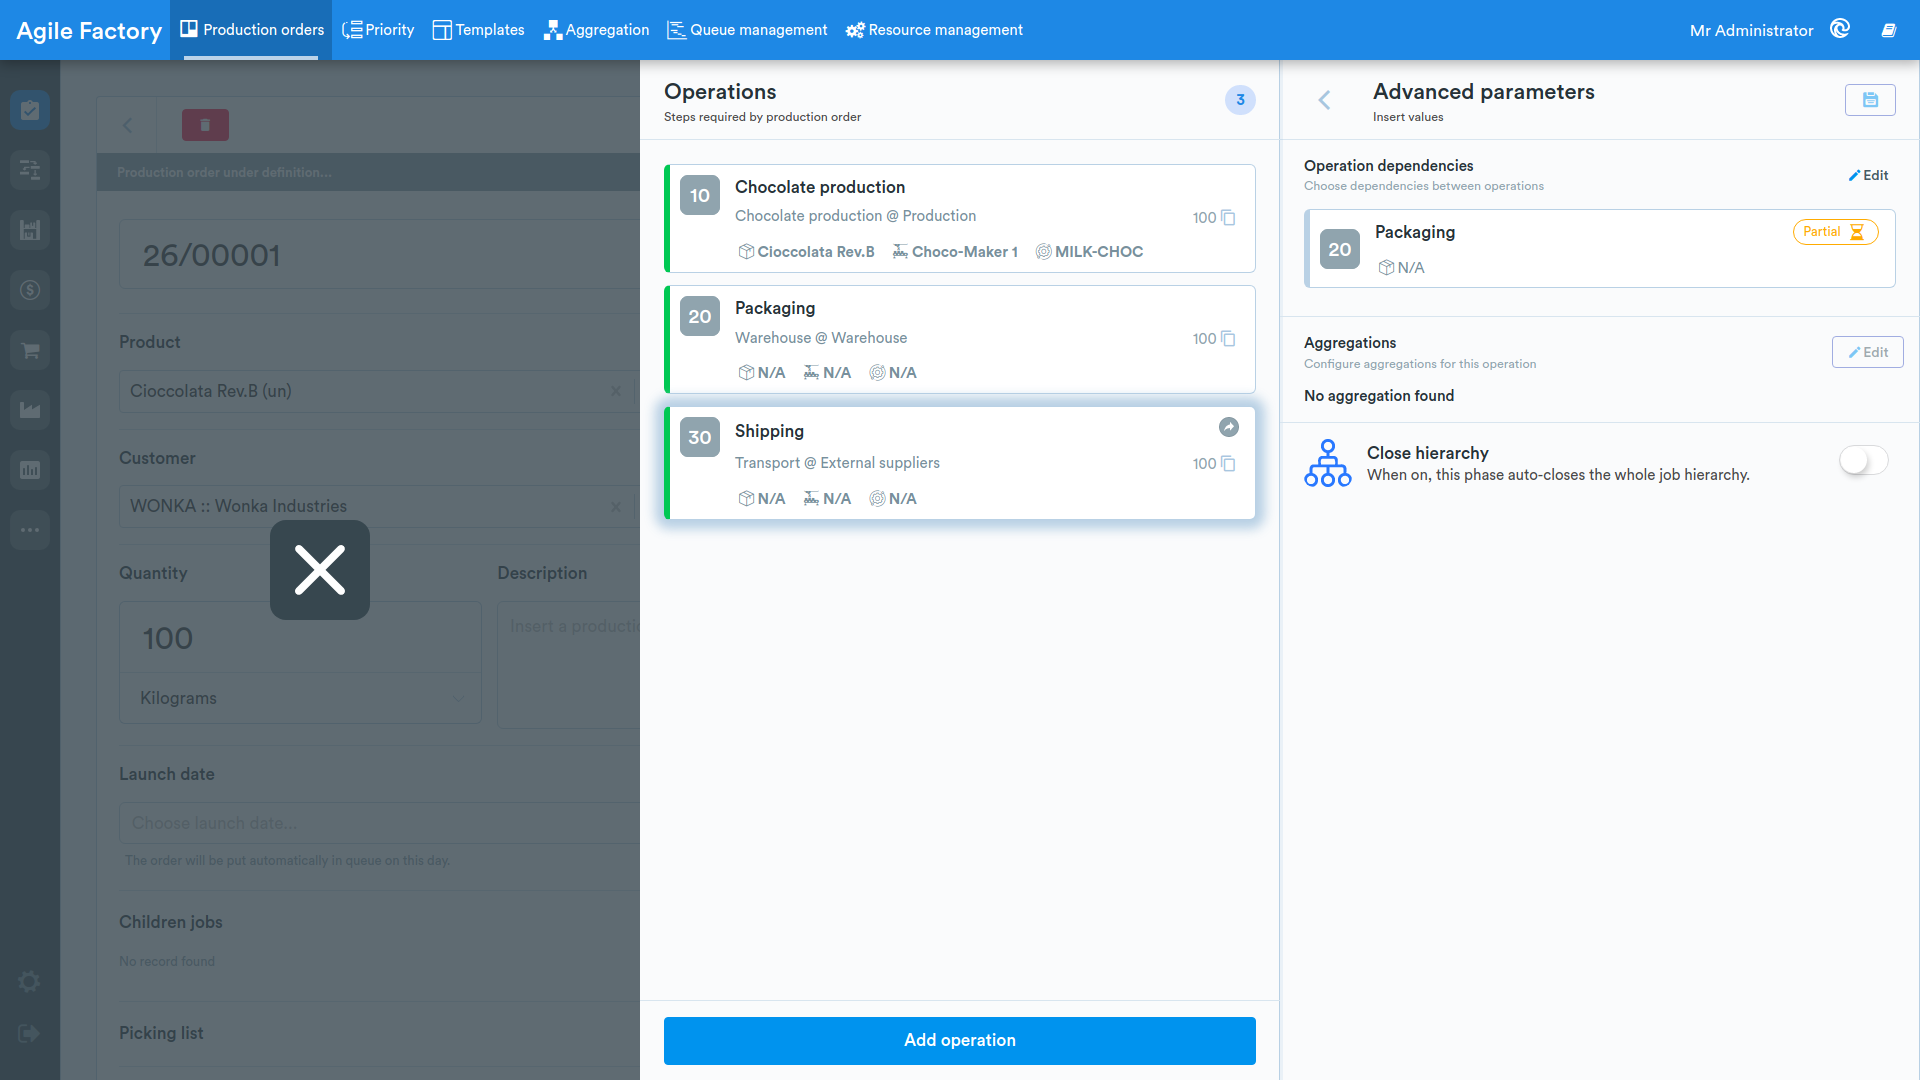
By clicking on the Advanced button at the top right, it is possible to configure additional settings:
- Units per cycle (the default value is 1), i.e., how many pieces are produced per machine cycle
- Theoretical production, the quantity that should be produced in one hour (units/hour)
- Operation dependencies, in which sequence and with which dependencies (complete/partial) the operations must be executed
- Aggregations, if a special aggregation🔥 algorithm is used, it shows here which operations are aggregated
- HMI mode, allows you to decide the order in which the operator can execute the various steps during the operation.
You can choose between:
- Workflow: the operator will follow the steps in the order decided by the manager
- Free: the operator can use a menu to choose the order in which to execute the steps or even not execute them
- Options related to delivery methods:
- Production entry: operators can manually enter the quantity produced at the end of processing
- Partial delivery: processing can be divided into multiple sessions
- Exceed quantity: it is possible to deliver a greater quantity than that required by the manager
- Exceed quantity dependencies: dependencies can deliver more units than those delivered
Steps
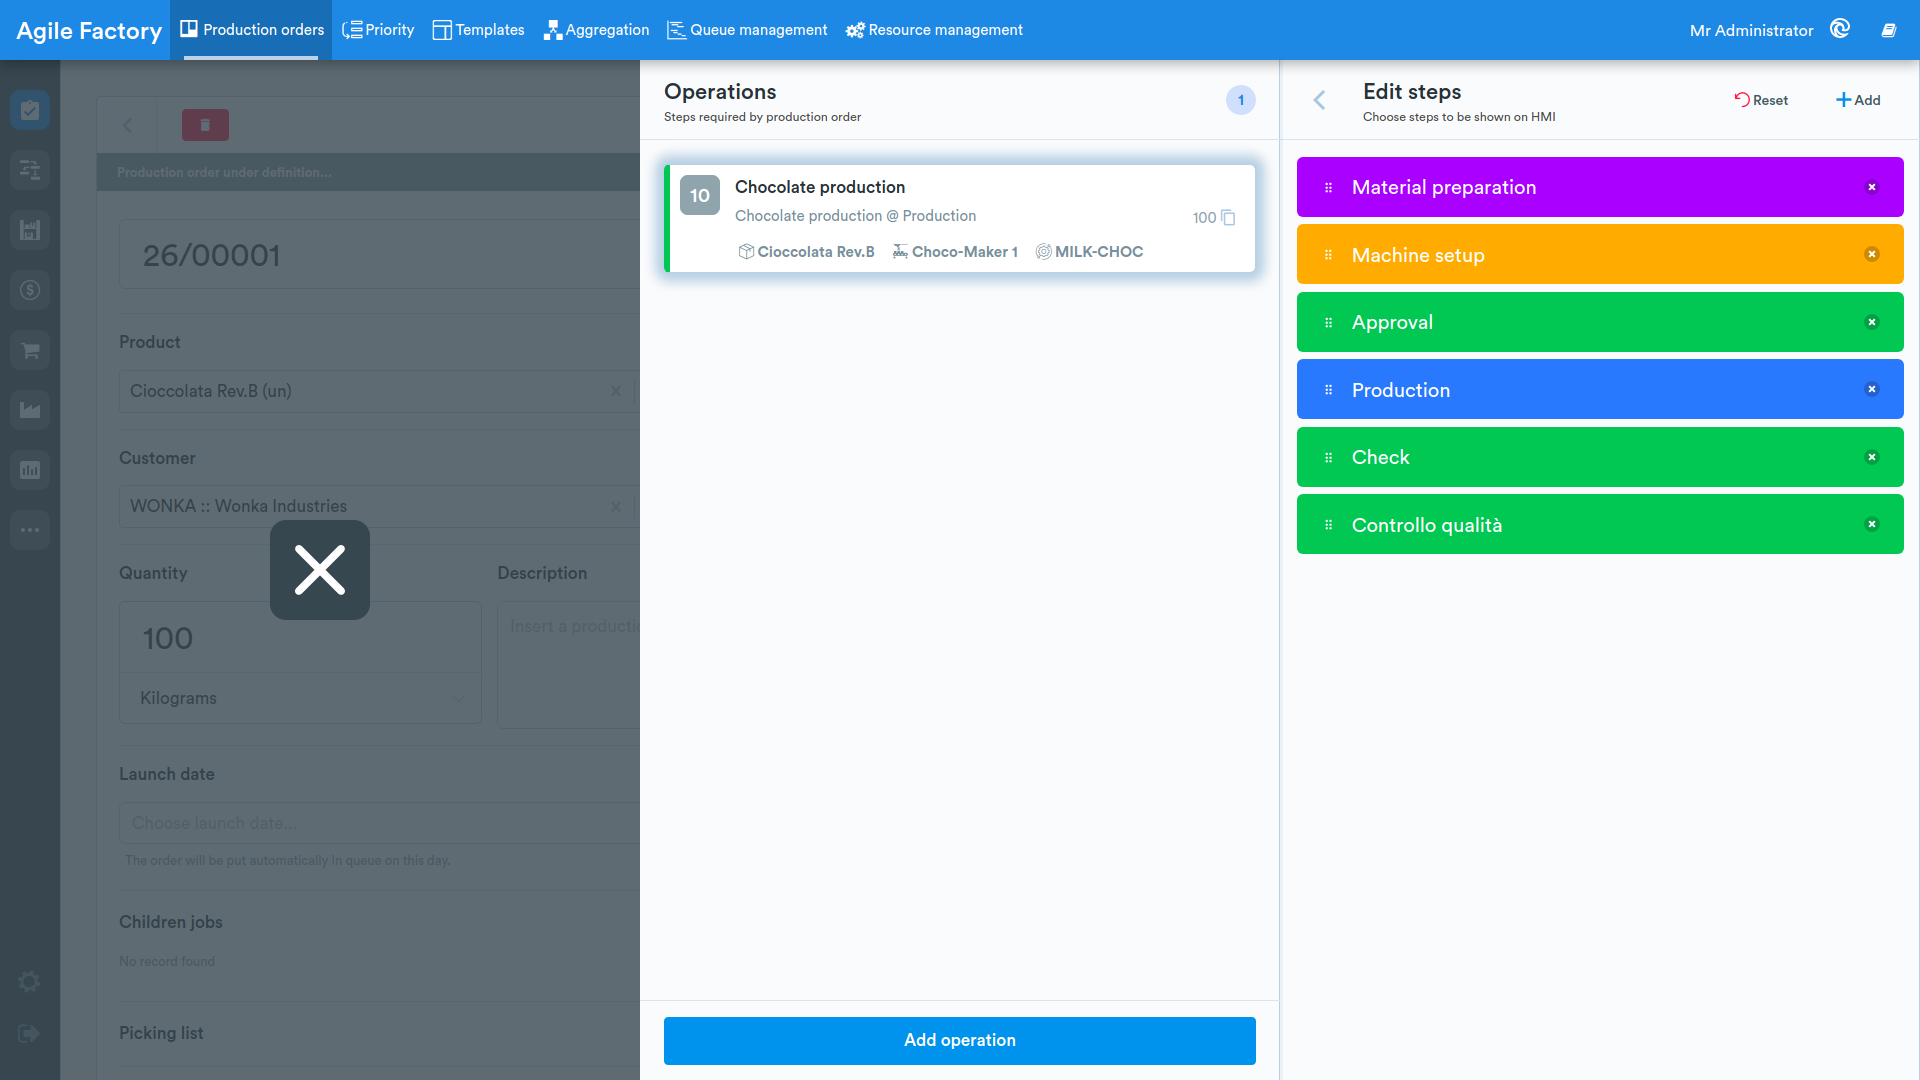
In the field dedicated to selecting HMI modes, there is also an option that allows you to modify the steps (Steps button). Clicking on it will open a screen showing the various steps to be performed to carry out the operation. To modify the execution order, simply drag them to the desired position. To delete them, click on the x button.
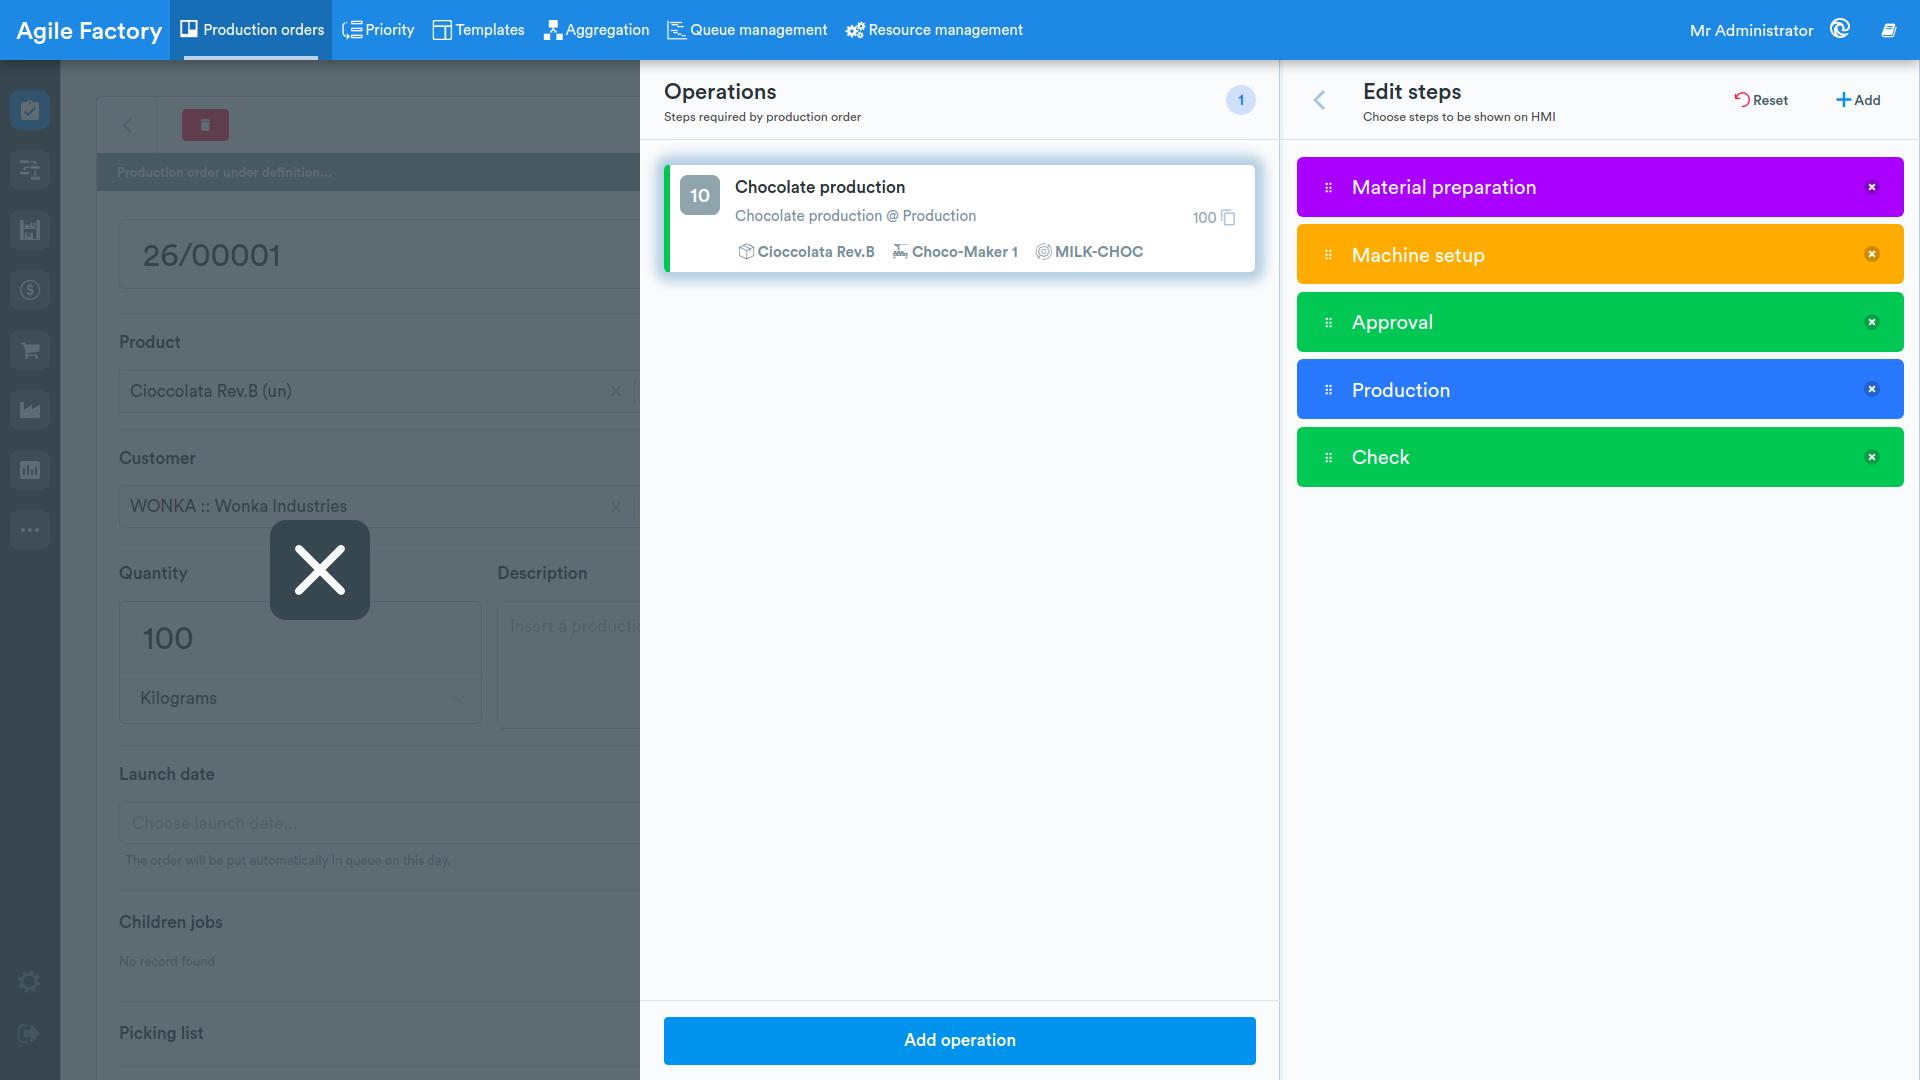
At the top there are also options to restore default settings and add new steps.
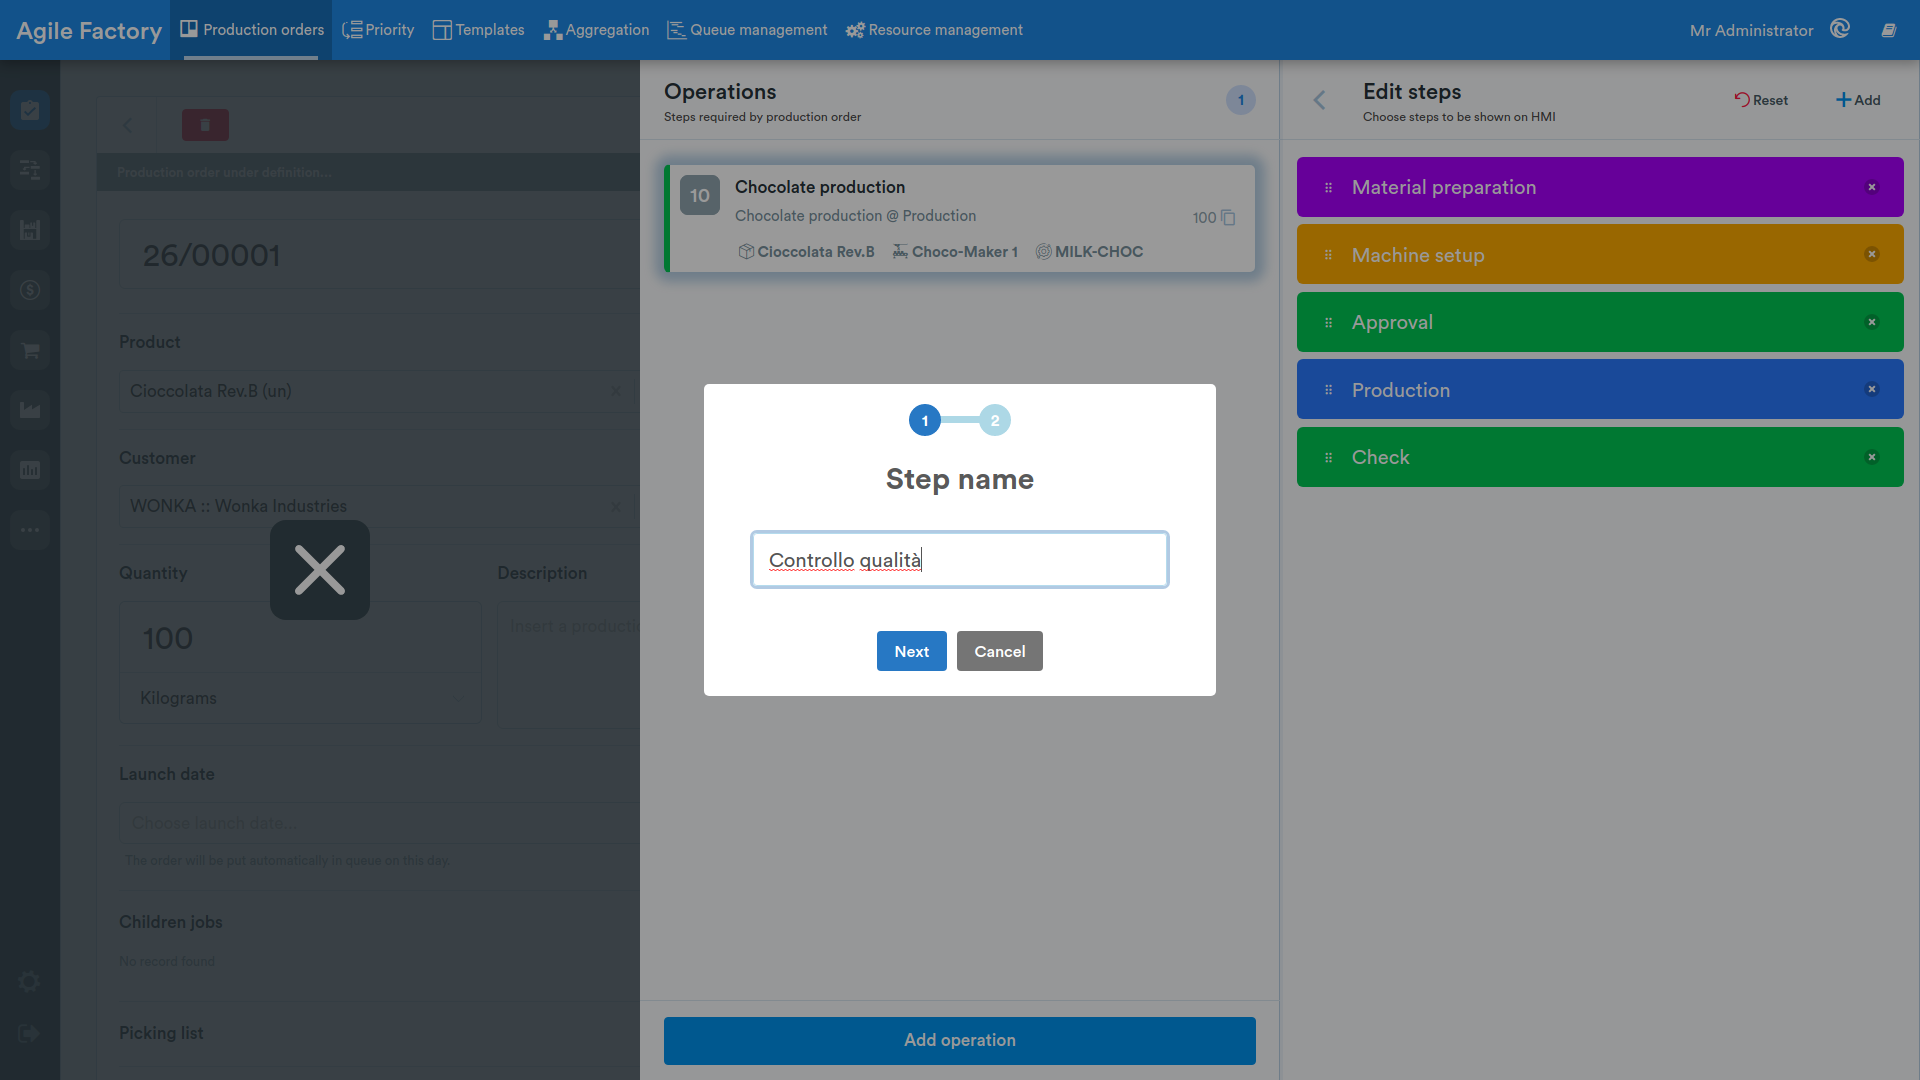
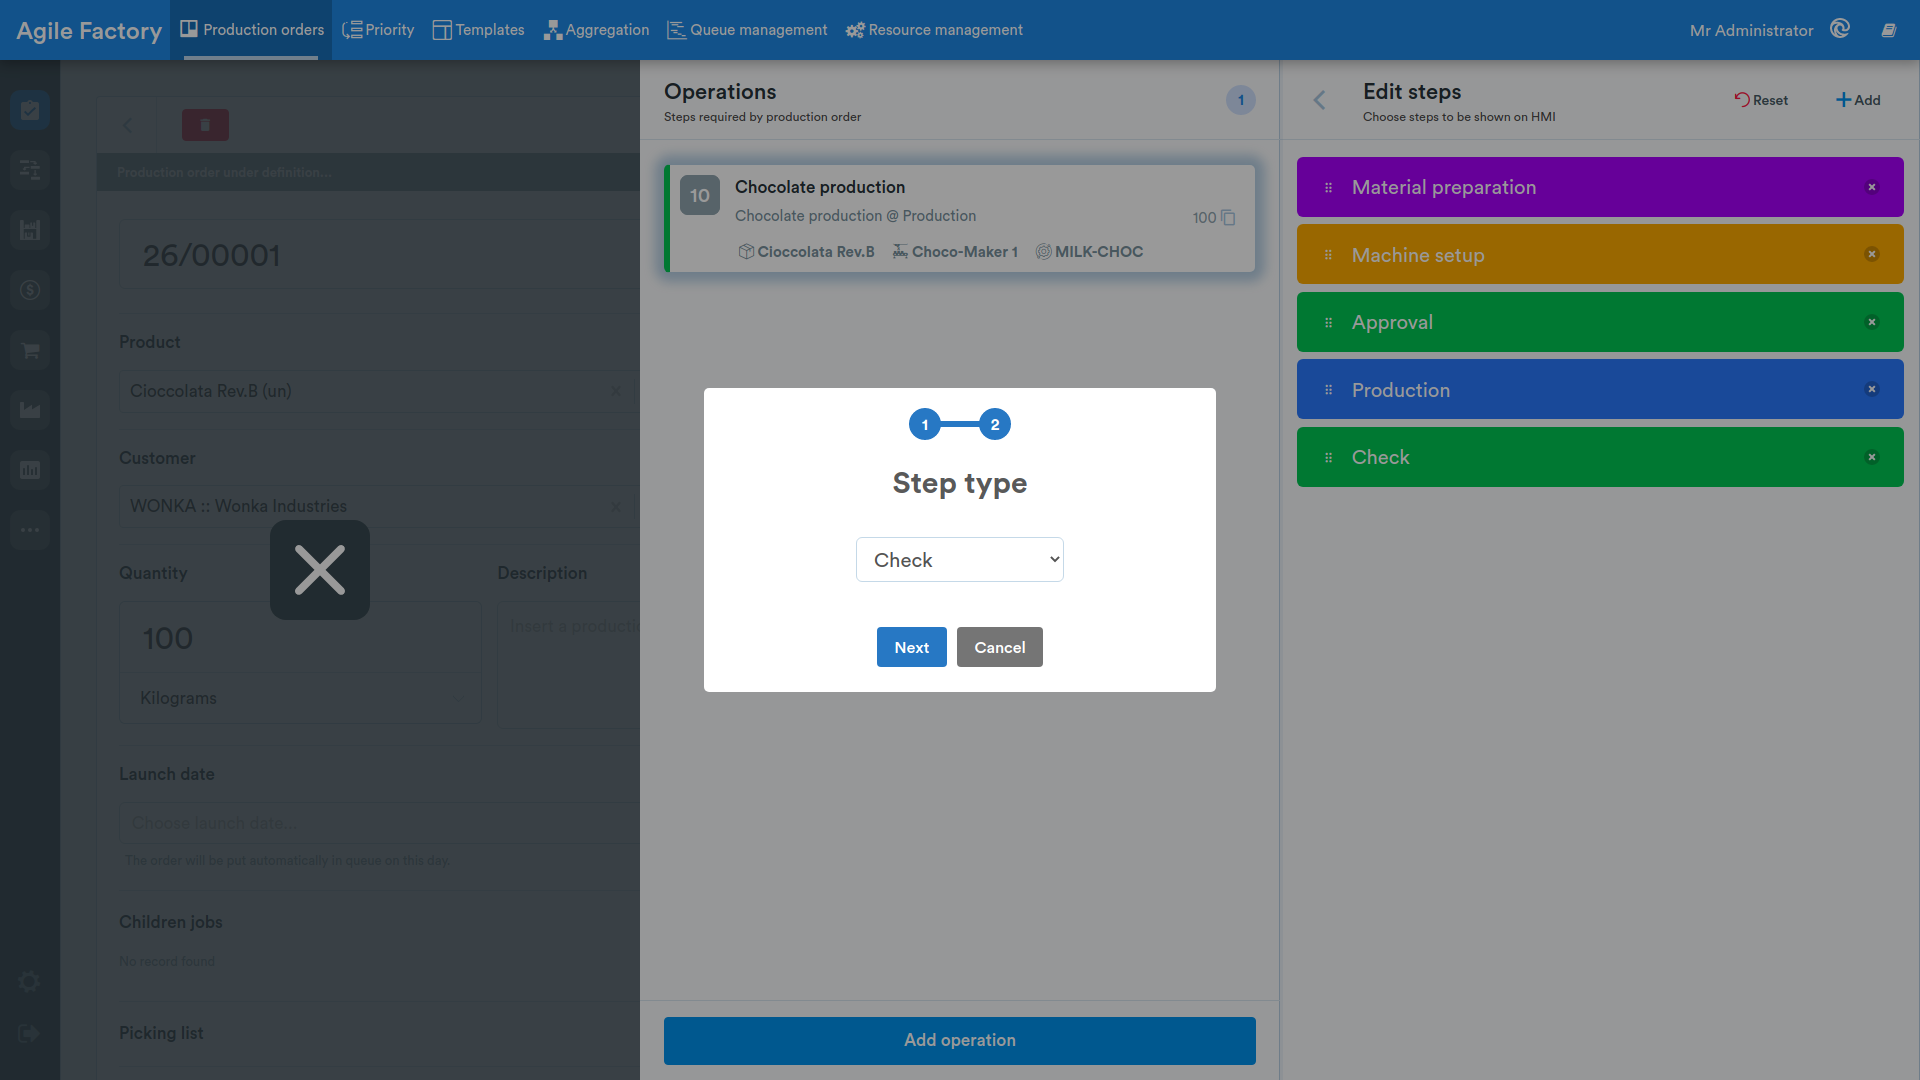
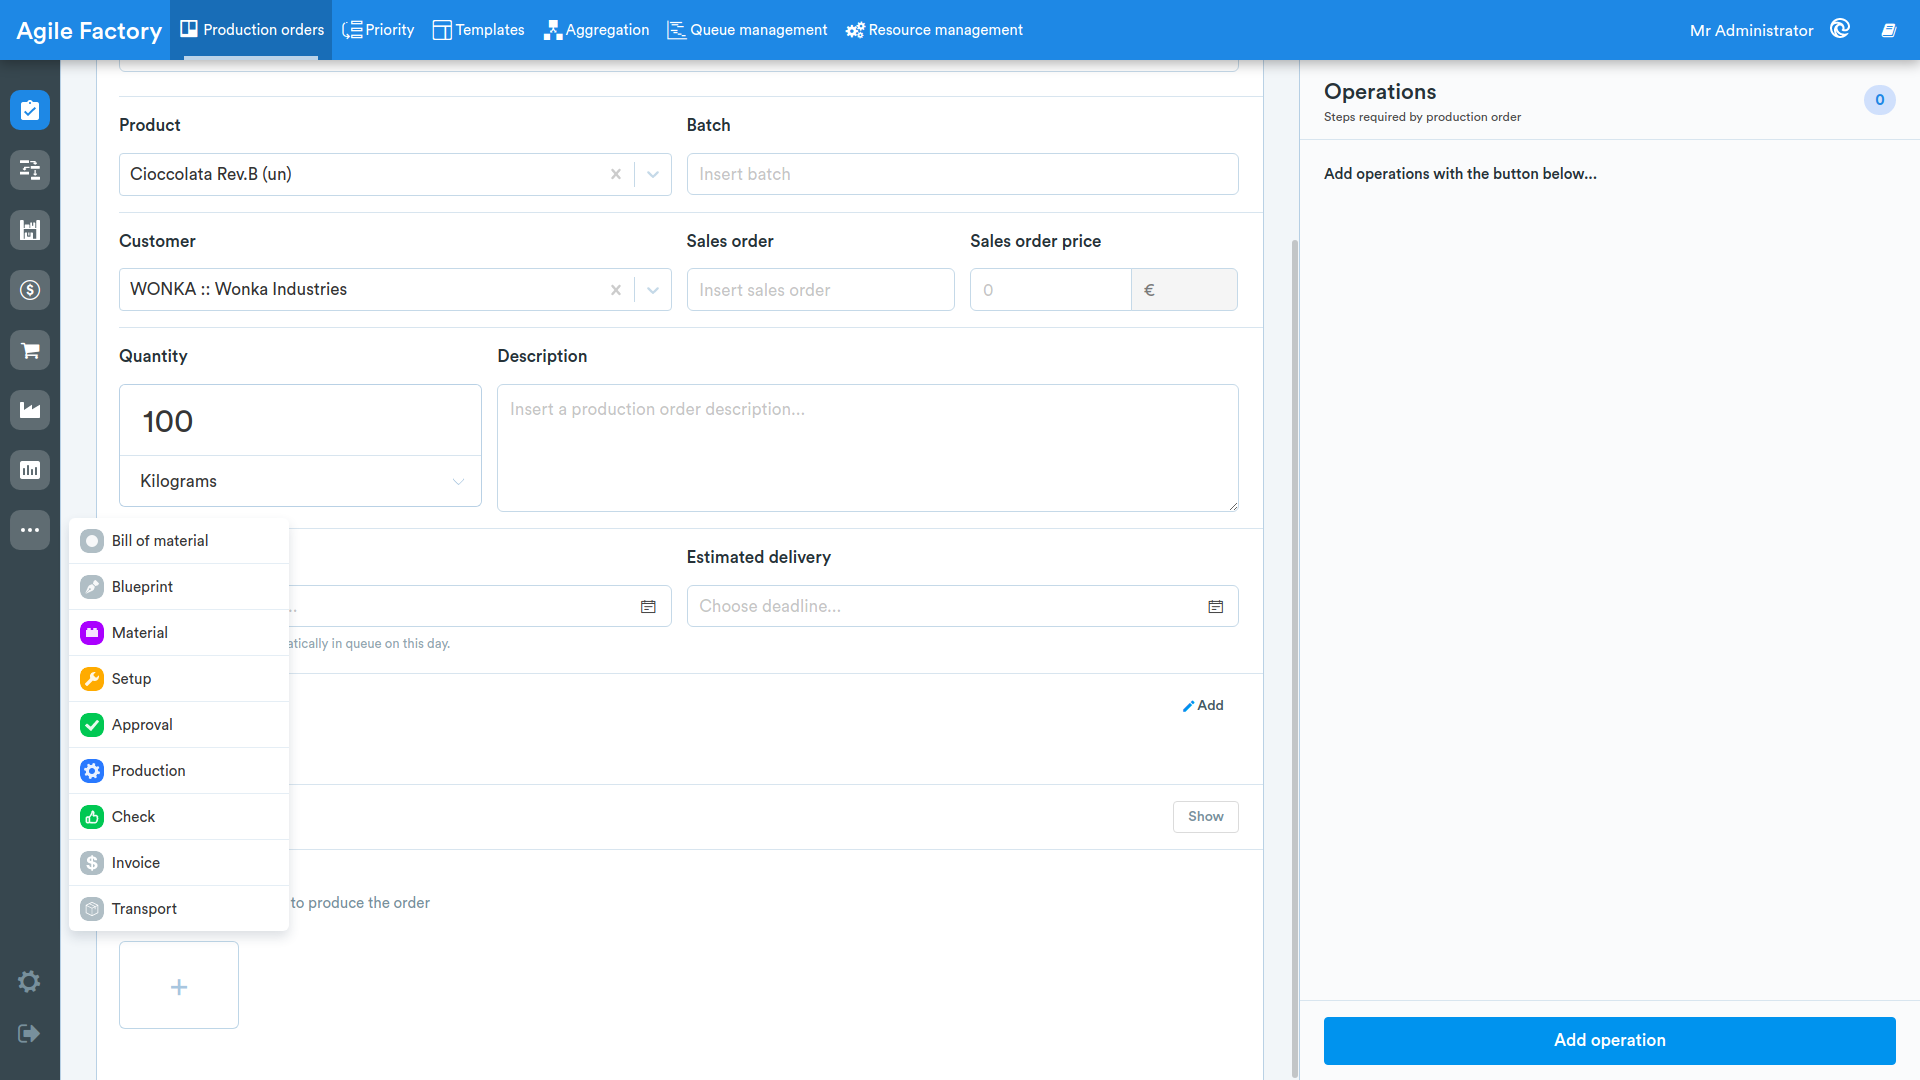
During entry, it will be necessary to select the type among:
- Material
- Machine setup
- Approval (production approval)
- Production
- Check
By selecting one of these, it will be possible to assign processing times for each step to the relevant grouping.
Operation Dependencies
In the advanced settings, it is possible to indicate if there are dependencies between the current operation and the previous one. If you use the "parent-children" structure, it is possible to indicate dependencies between operations of various child orders.
Therefore, this option is available for all operations that are added to the production order, except for the first one entered.
By clicking on edit, a form will open where you can assign previous operations to one of the three groups indicating:
- No relationship, the operations are independent
- Partial delivery, partial delivery of the order is required to start the operation
- Complete delivery, complete delivery from the previous operation is required to start the operation
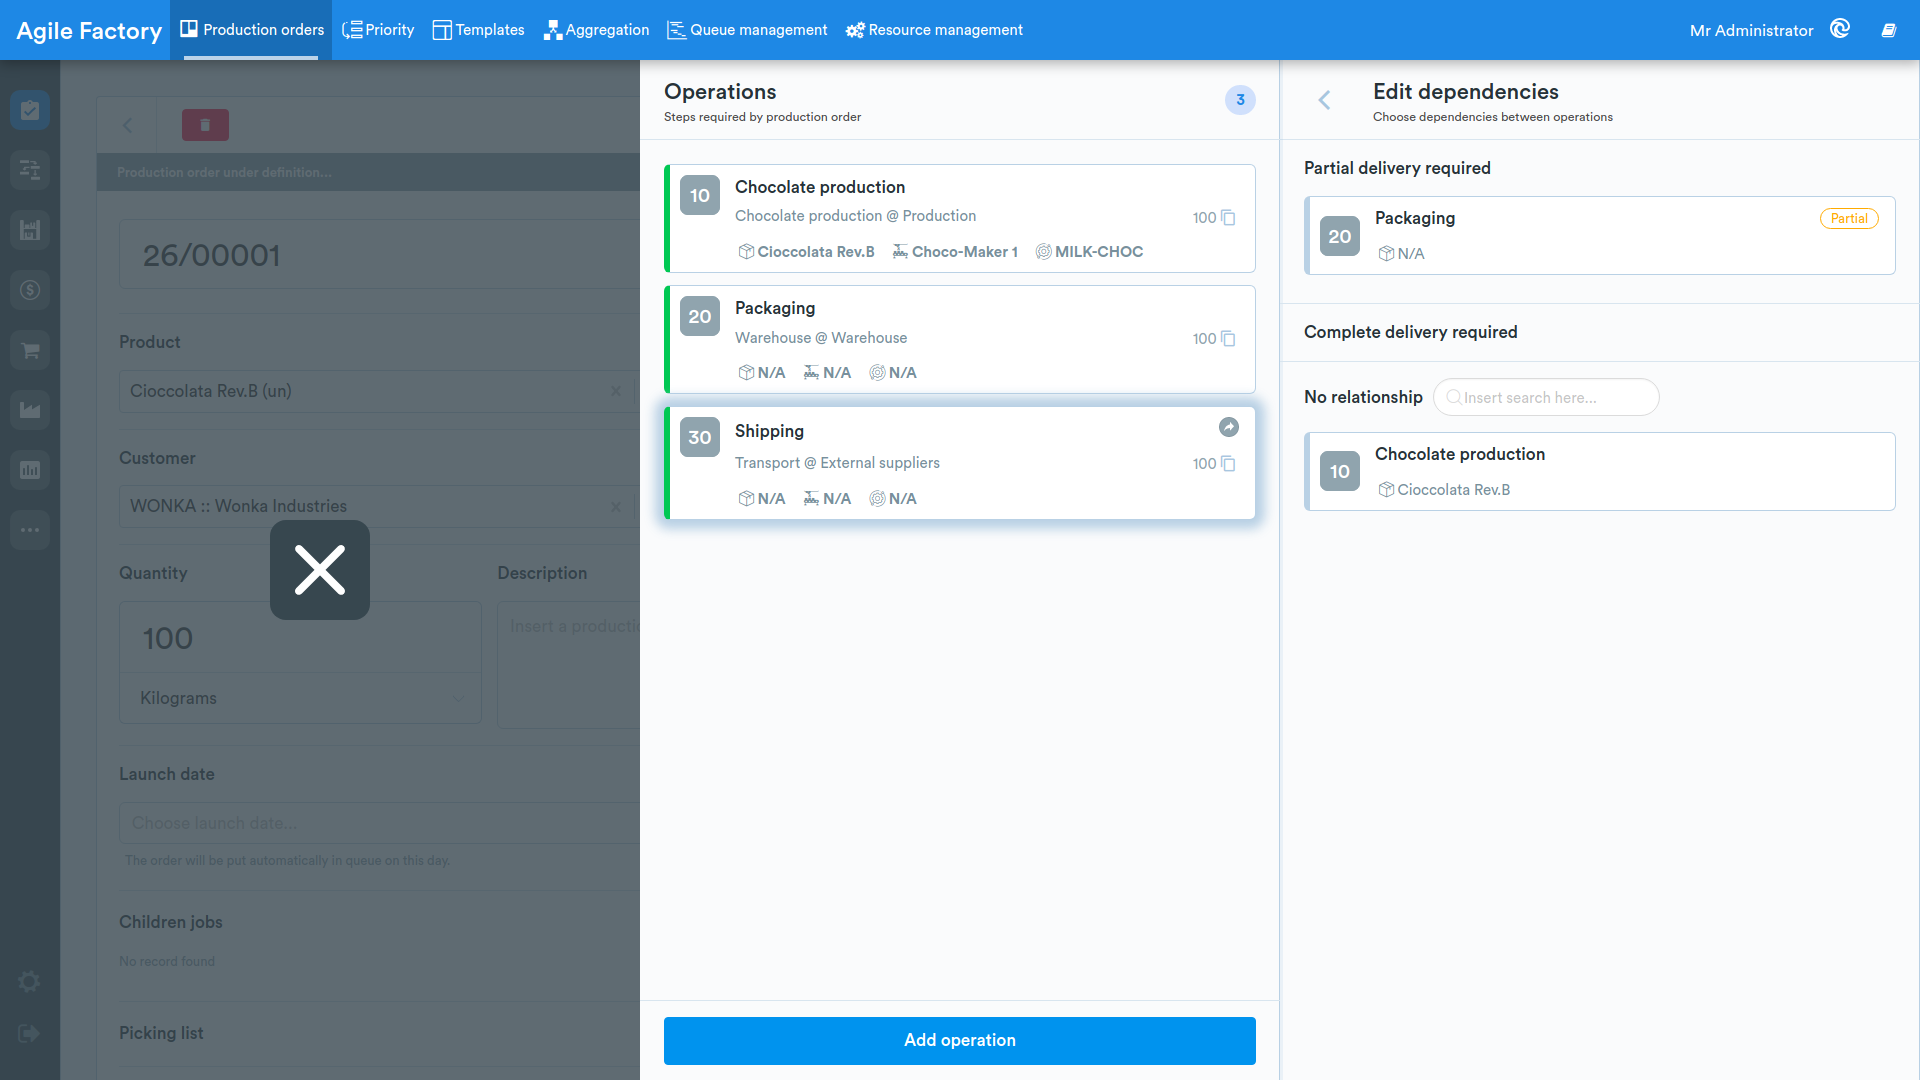
To modify the dependency, simply drag the operation within the group.
Attachments
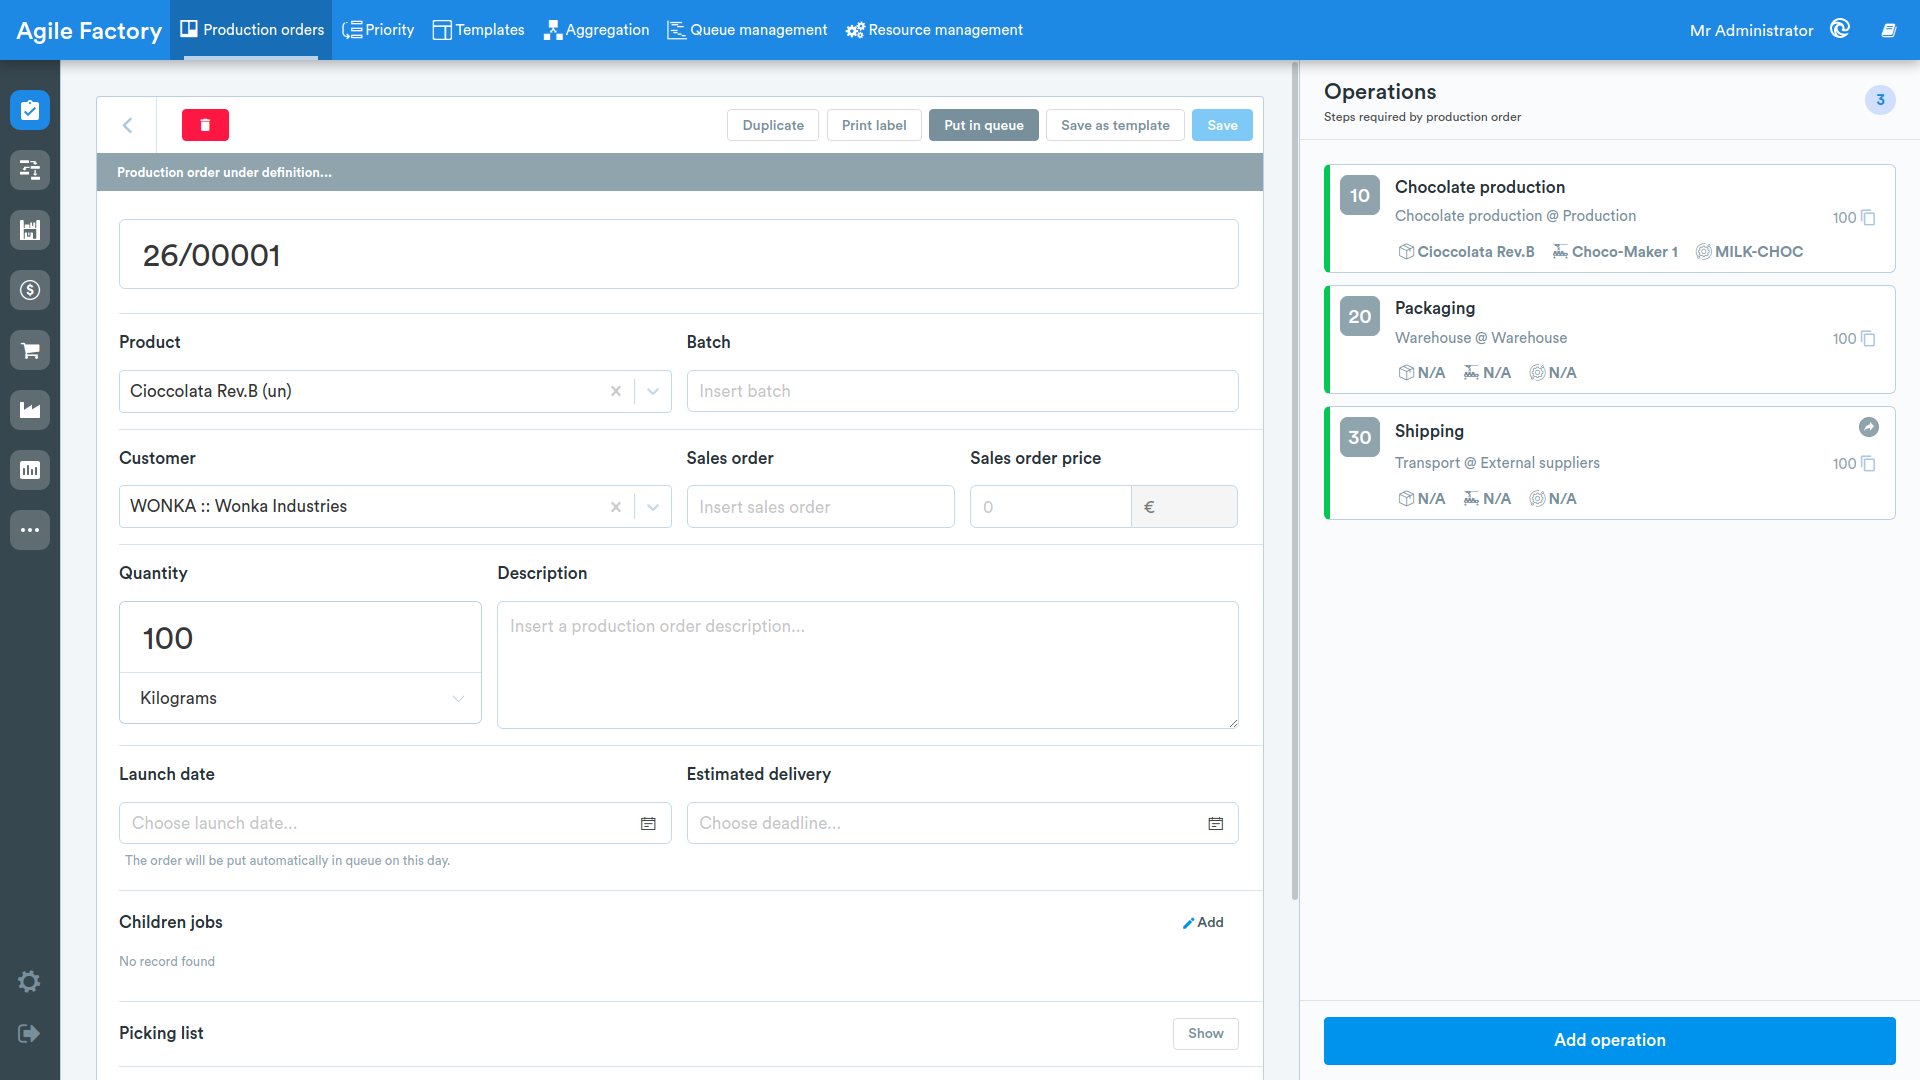
In the main view of the production order, it is possible to add attachments (documents, files) with the option to attach them to a specific step in the production operation. Before adding attachments, it is necessary to save the order by clicking on the Save button at the top right. It is then possible to add documents at the bottom of the page.
Possible Actions on an Order
- Cancel the order;
- Duplicate it;
- Save it as a template.
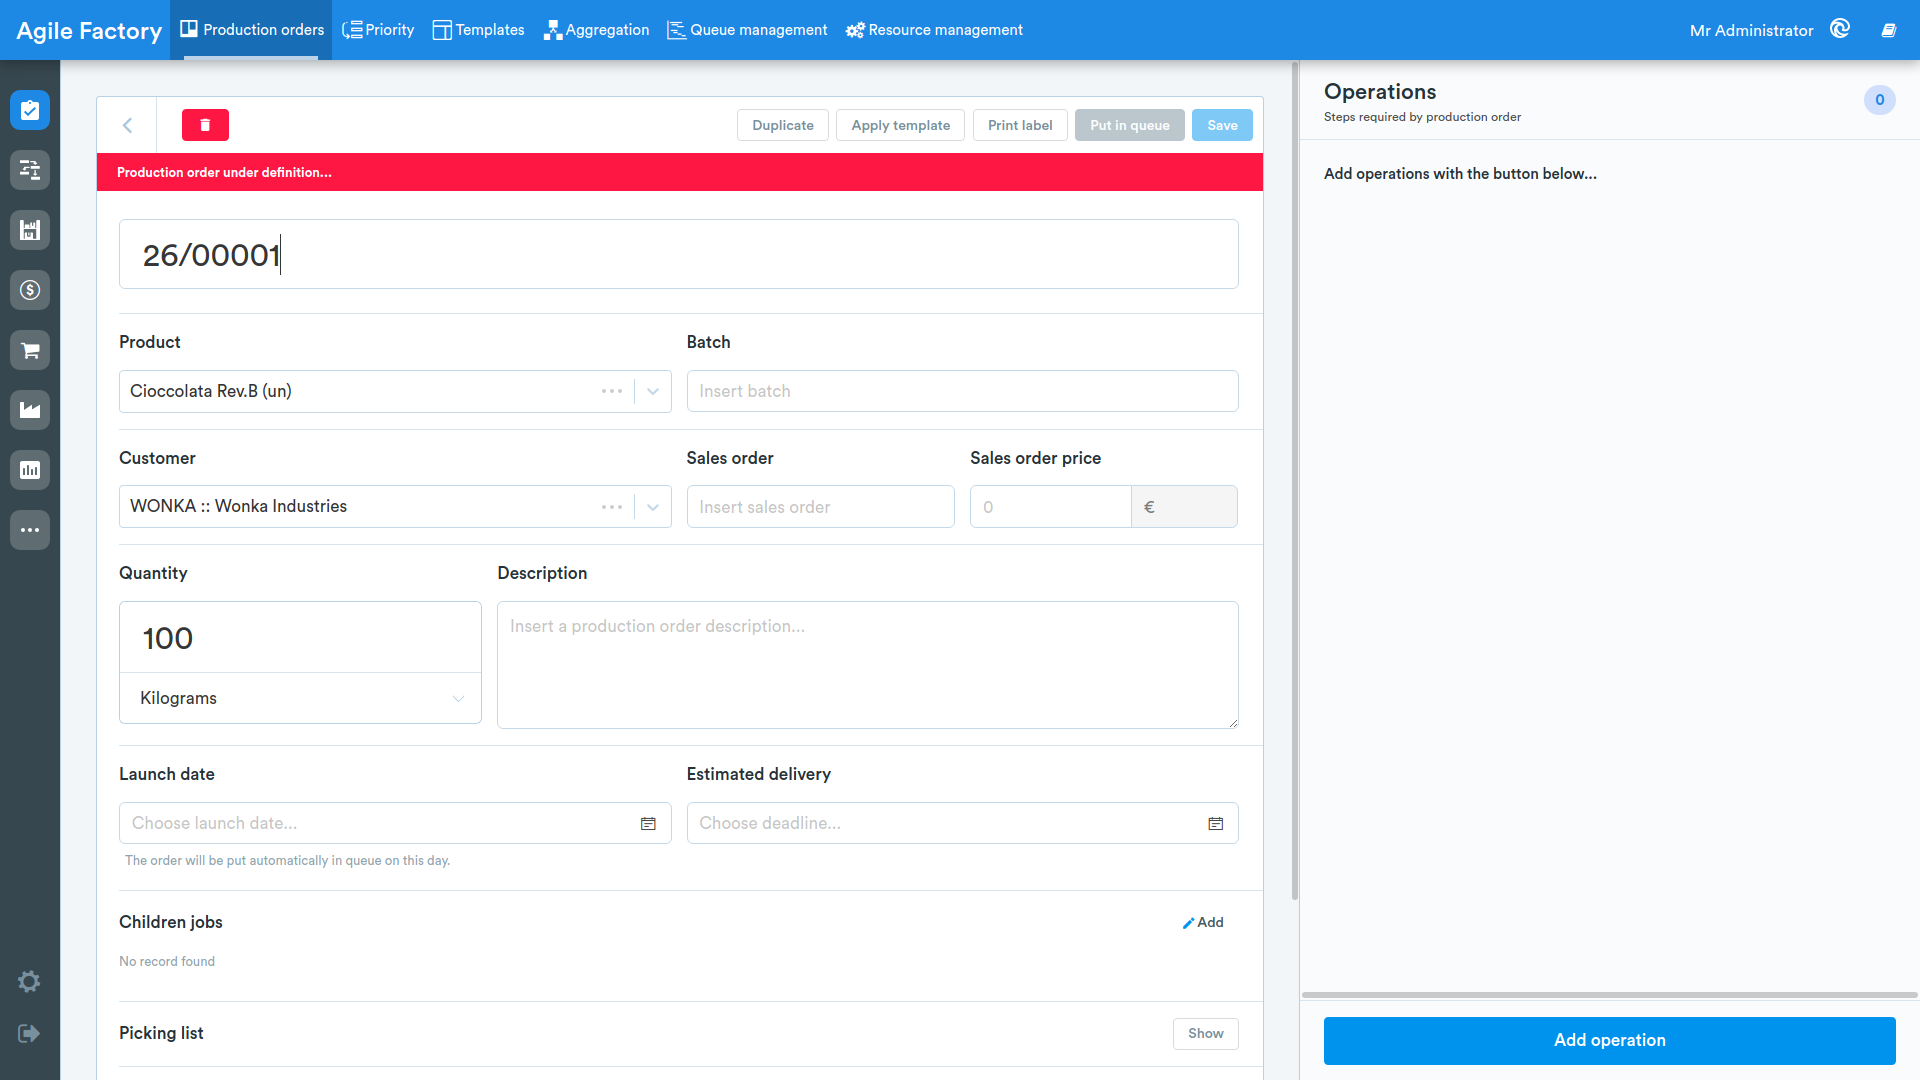
Order Cancellation
To delete a previously created order, simply select it and click on the delete option at the top left of the order page.
This option is only available if the production order has not yet been taken in charge by an operator and is therefore not currently being processed. If the order is currently being processed, it will be necessary to ask the operator to make the delivery.
Once deleted, the order cannot be restored via the manager interface.
Edit Order
The Edit button is only available for orders in the processing queue.
Note: the button will be disabled not only if the order is currently being processed, but also if production has already started.
If during editing you change the deadline of an order that has child orders, on save the system asks Propagate deadline?: choosing Yes, propagate applies the new deadline to all child orders as well, while with No, save only this job the change is limited to the current order.
Duplicate Order
This function allows you to duplicate the current order.
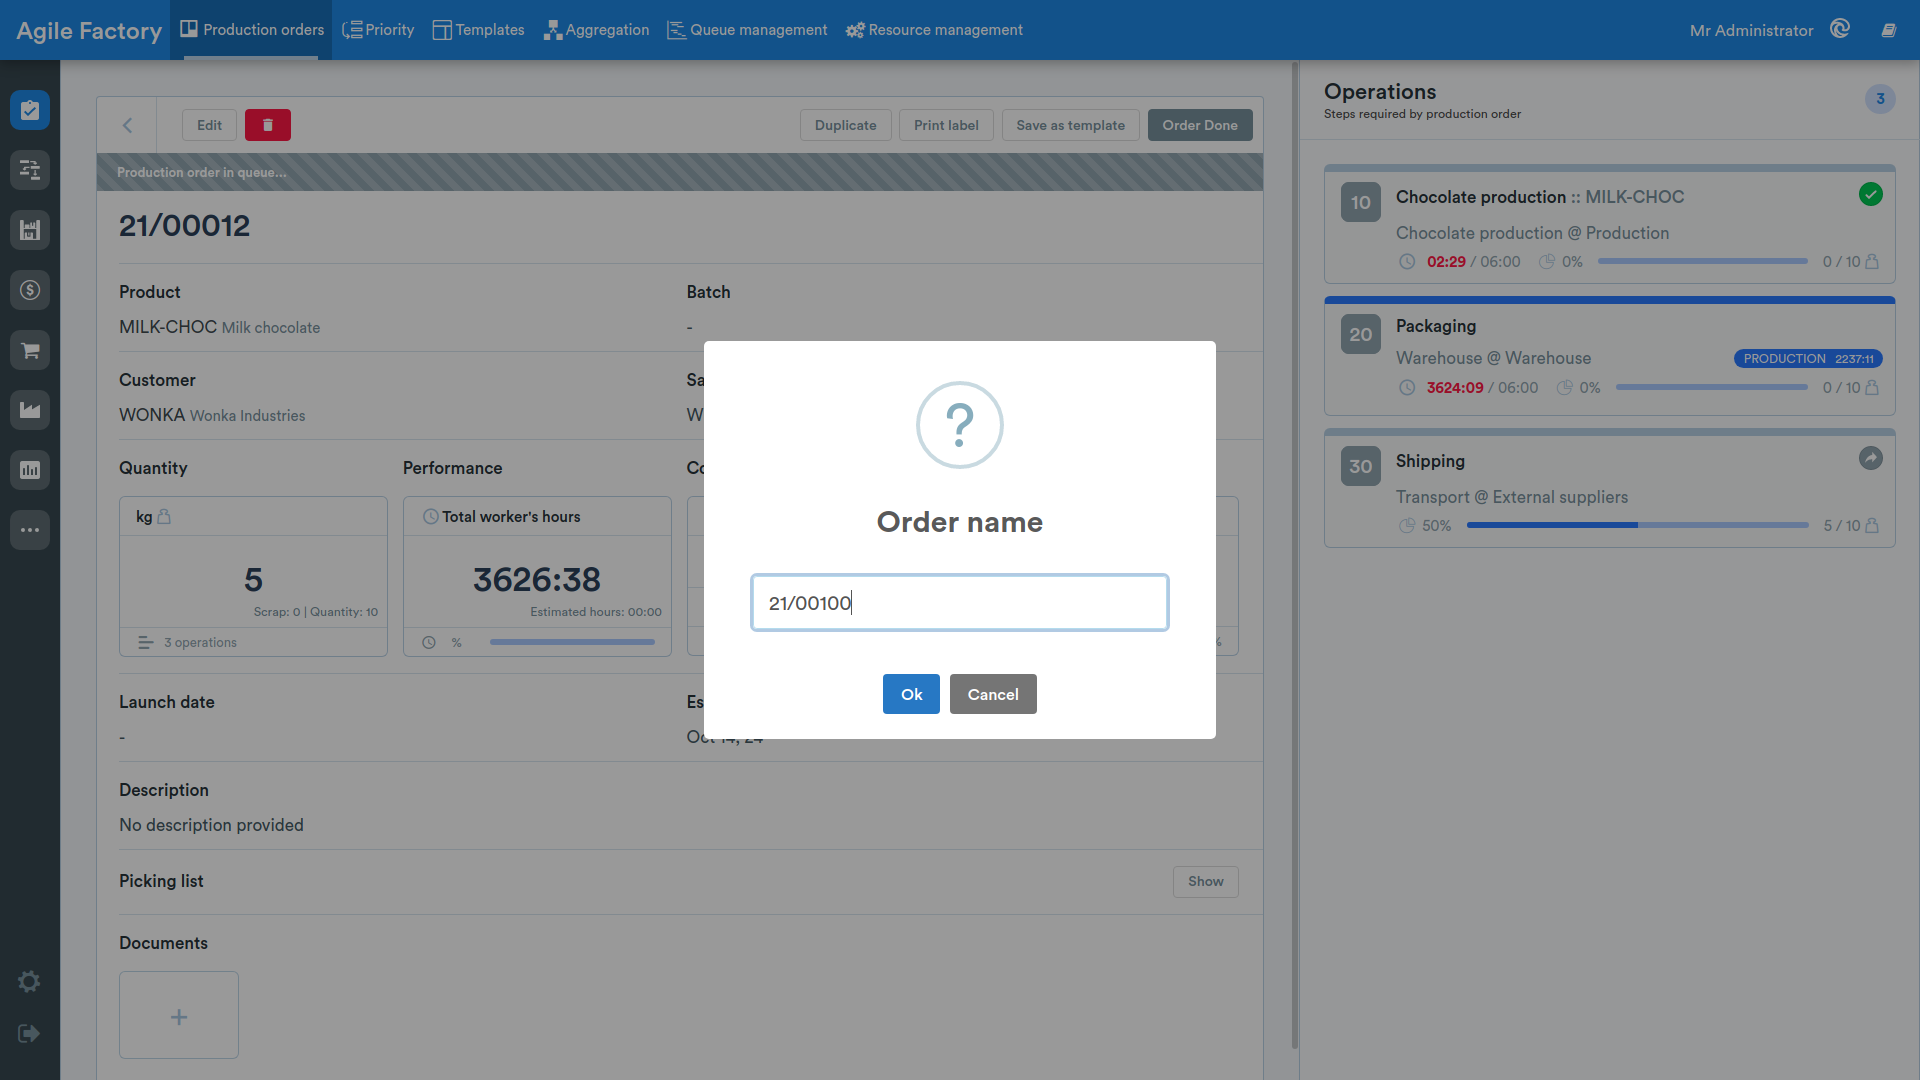
Save as Template
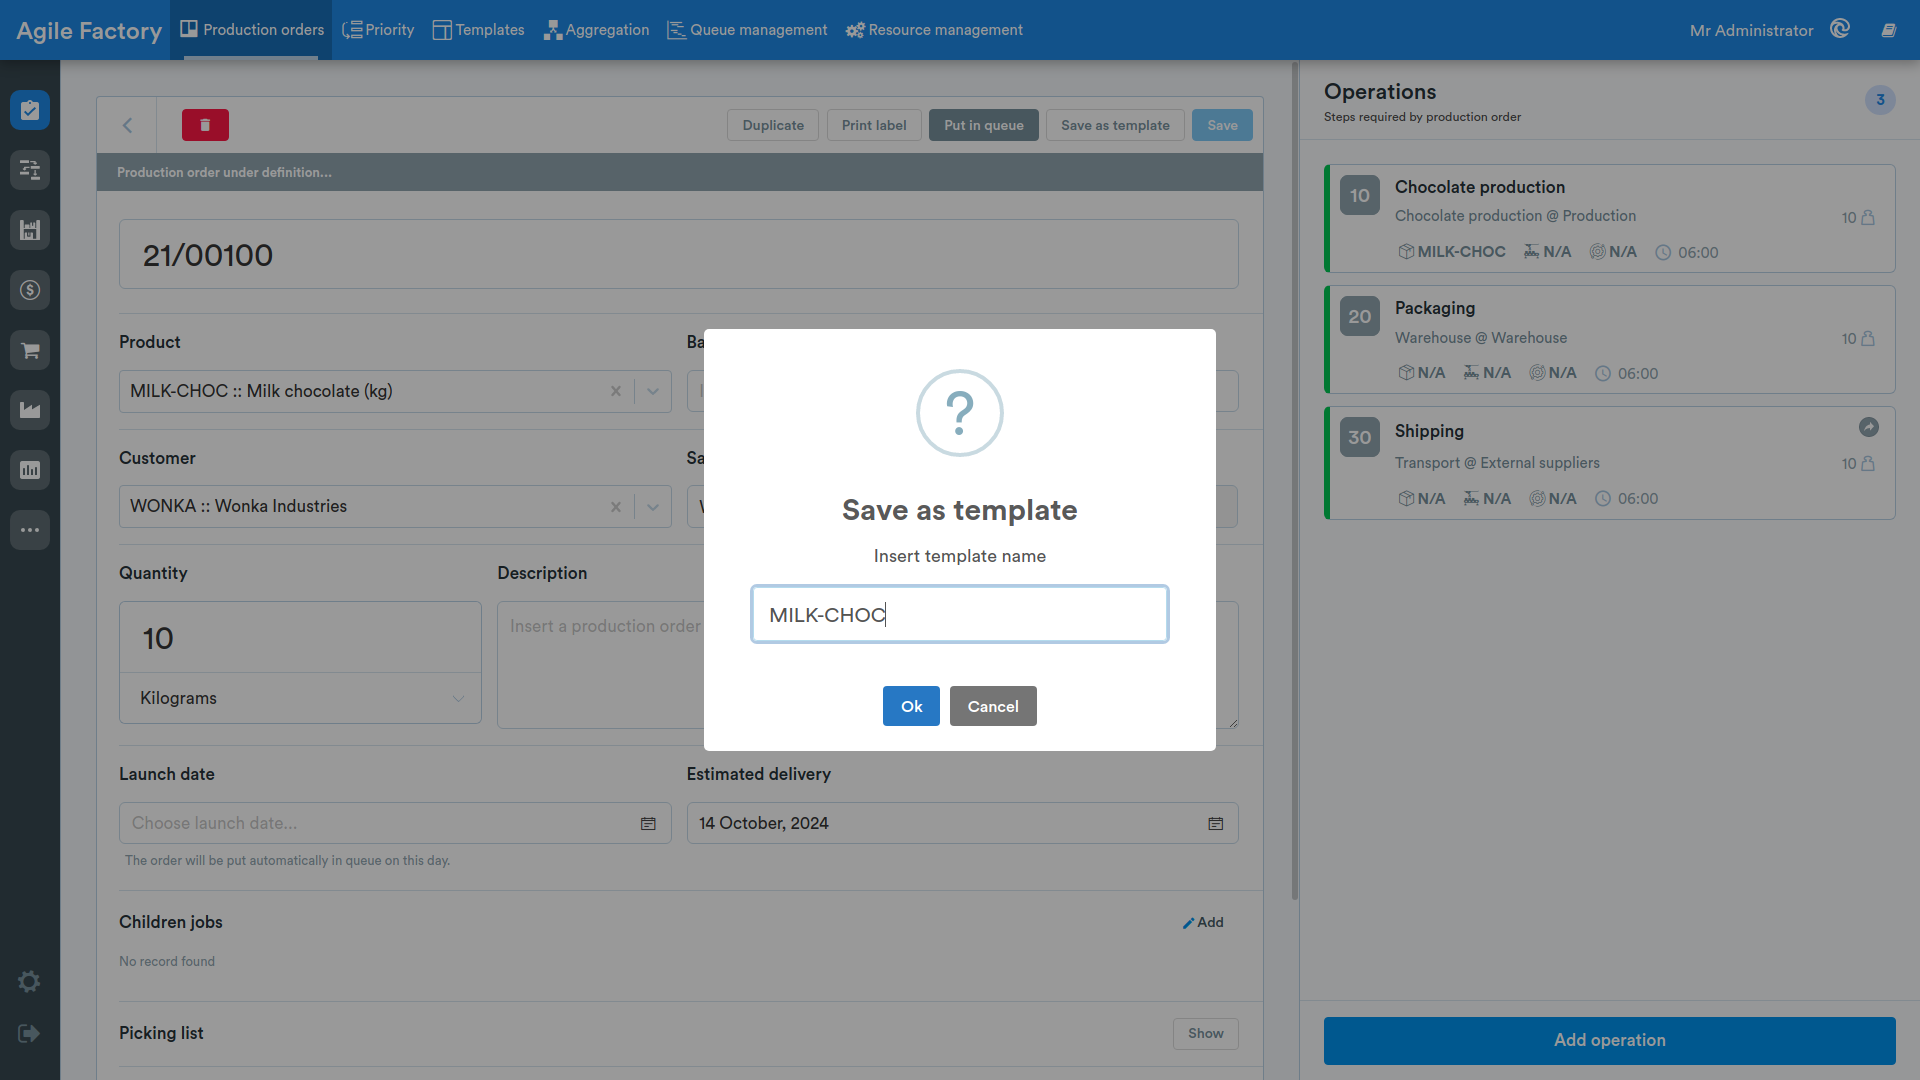
This button allows you to save the order as a template.
Orders saved as templates can be used to create new production orders later.
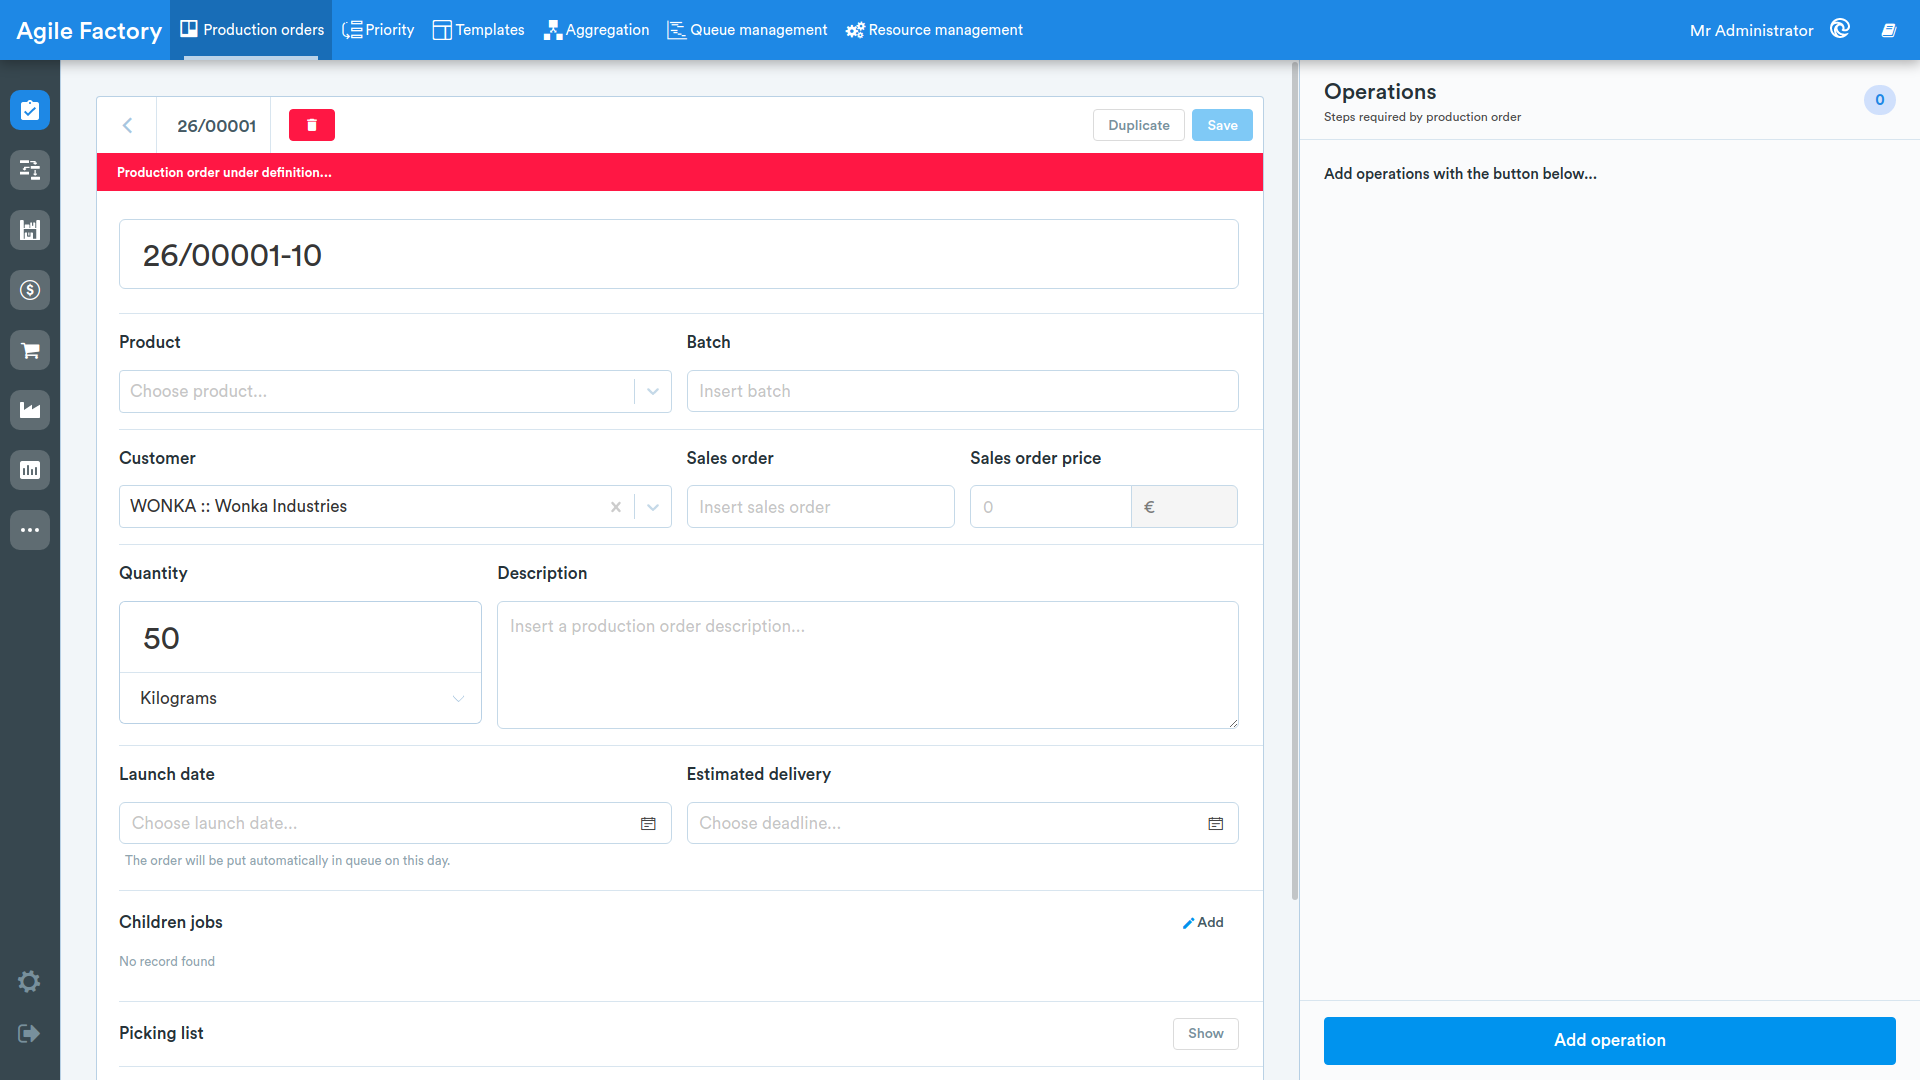
Child Orders
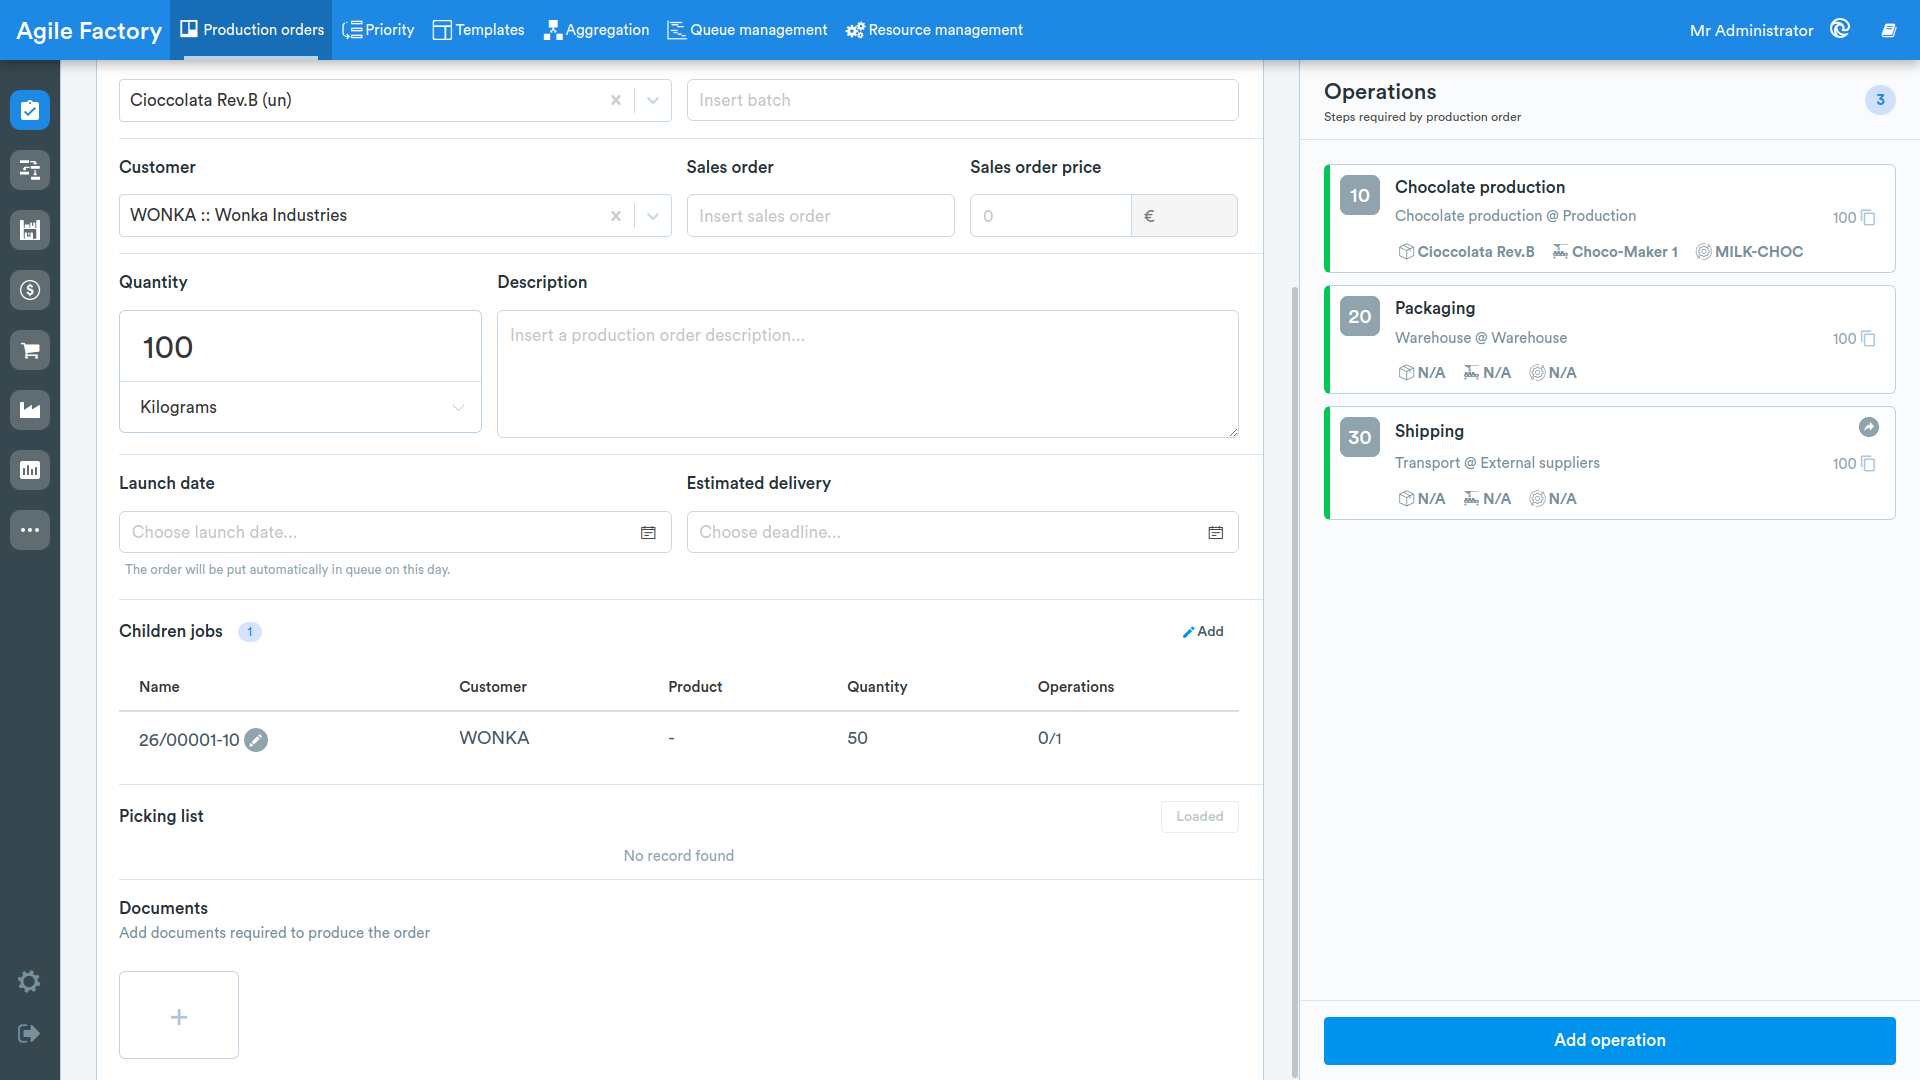
To insert a child order, press the Add button in the Child orders section.
The screens that appear will be similar to the previous screens. Then configure the production order and its operations.
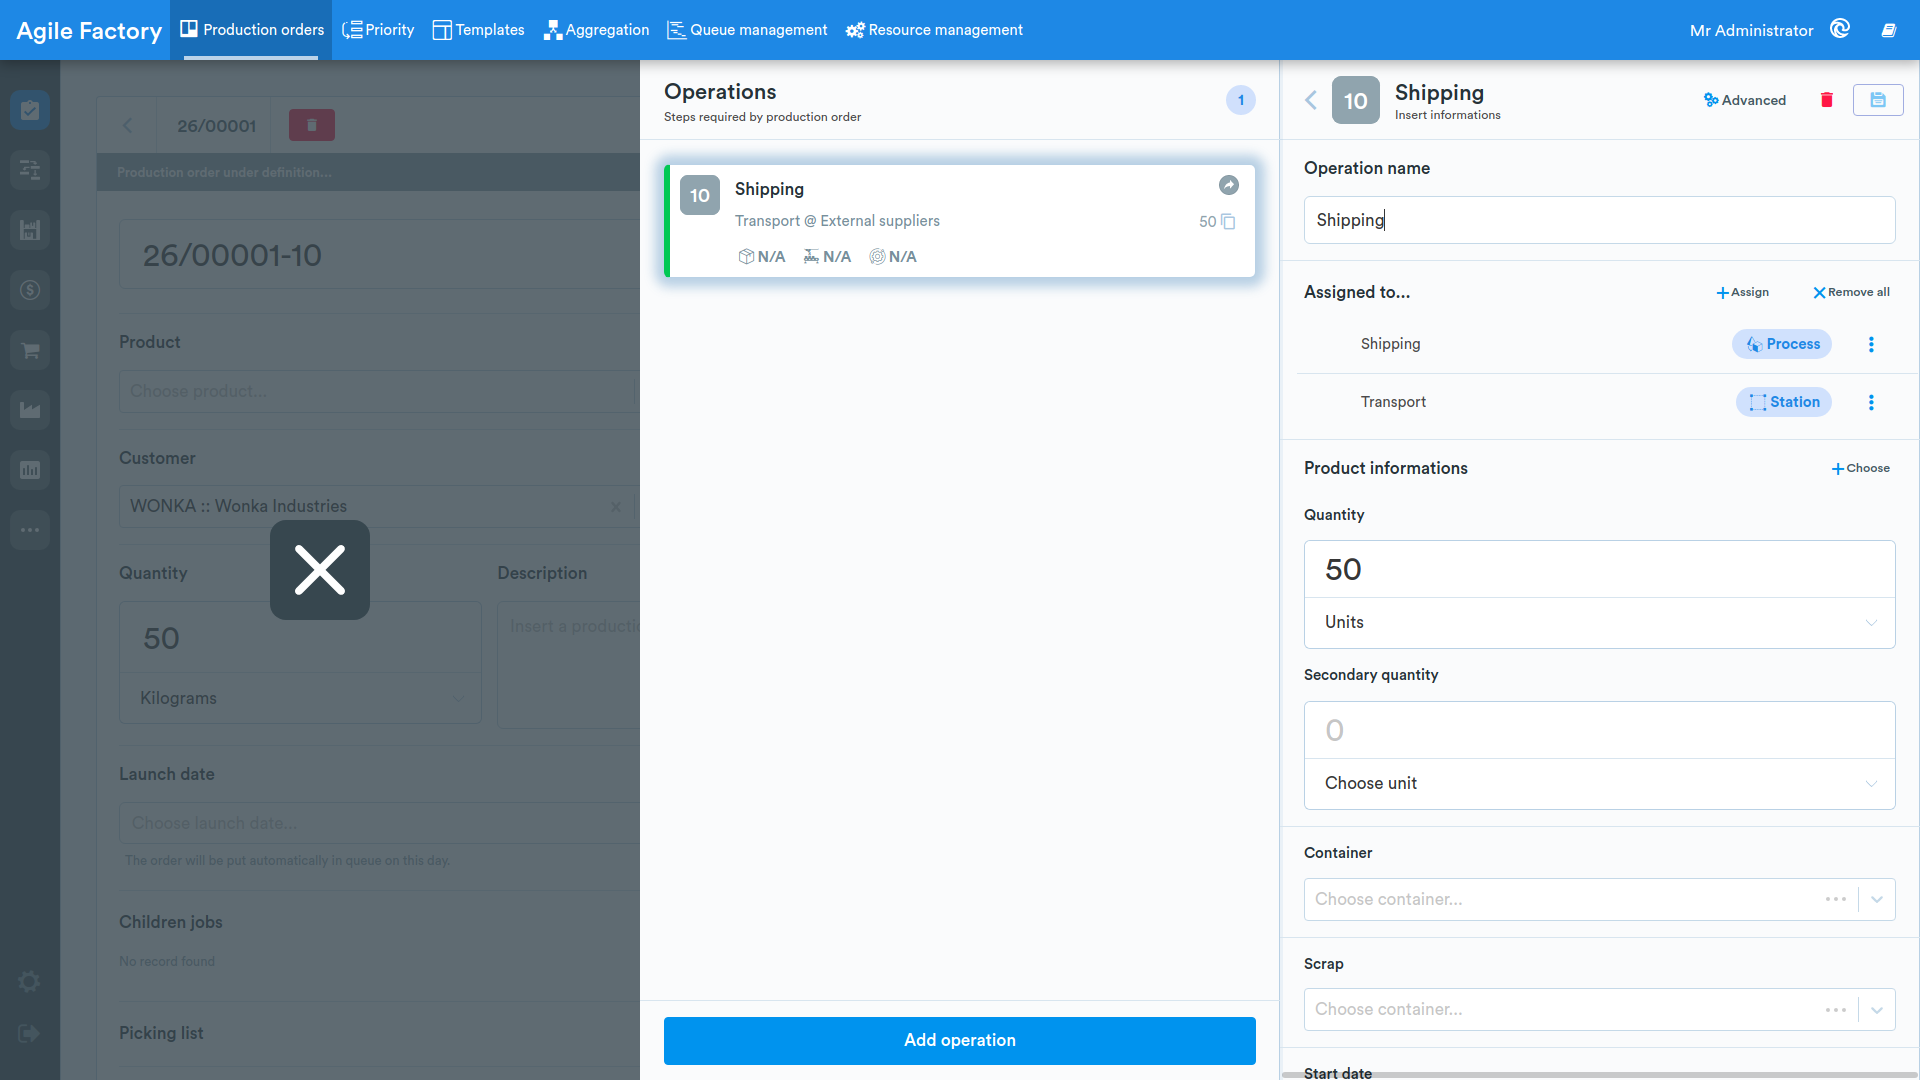
Returning to the parent order, you will see the list of child orders.
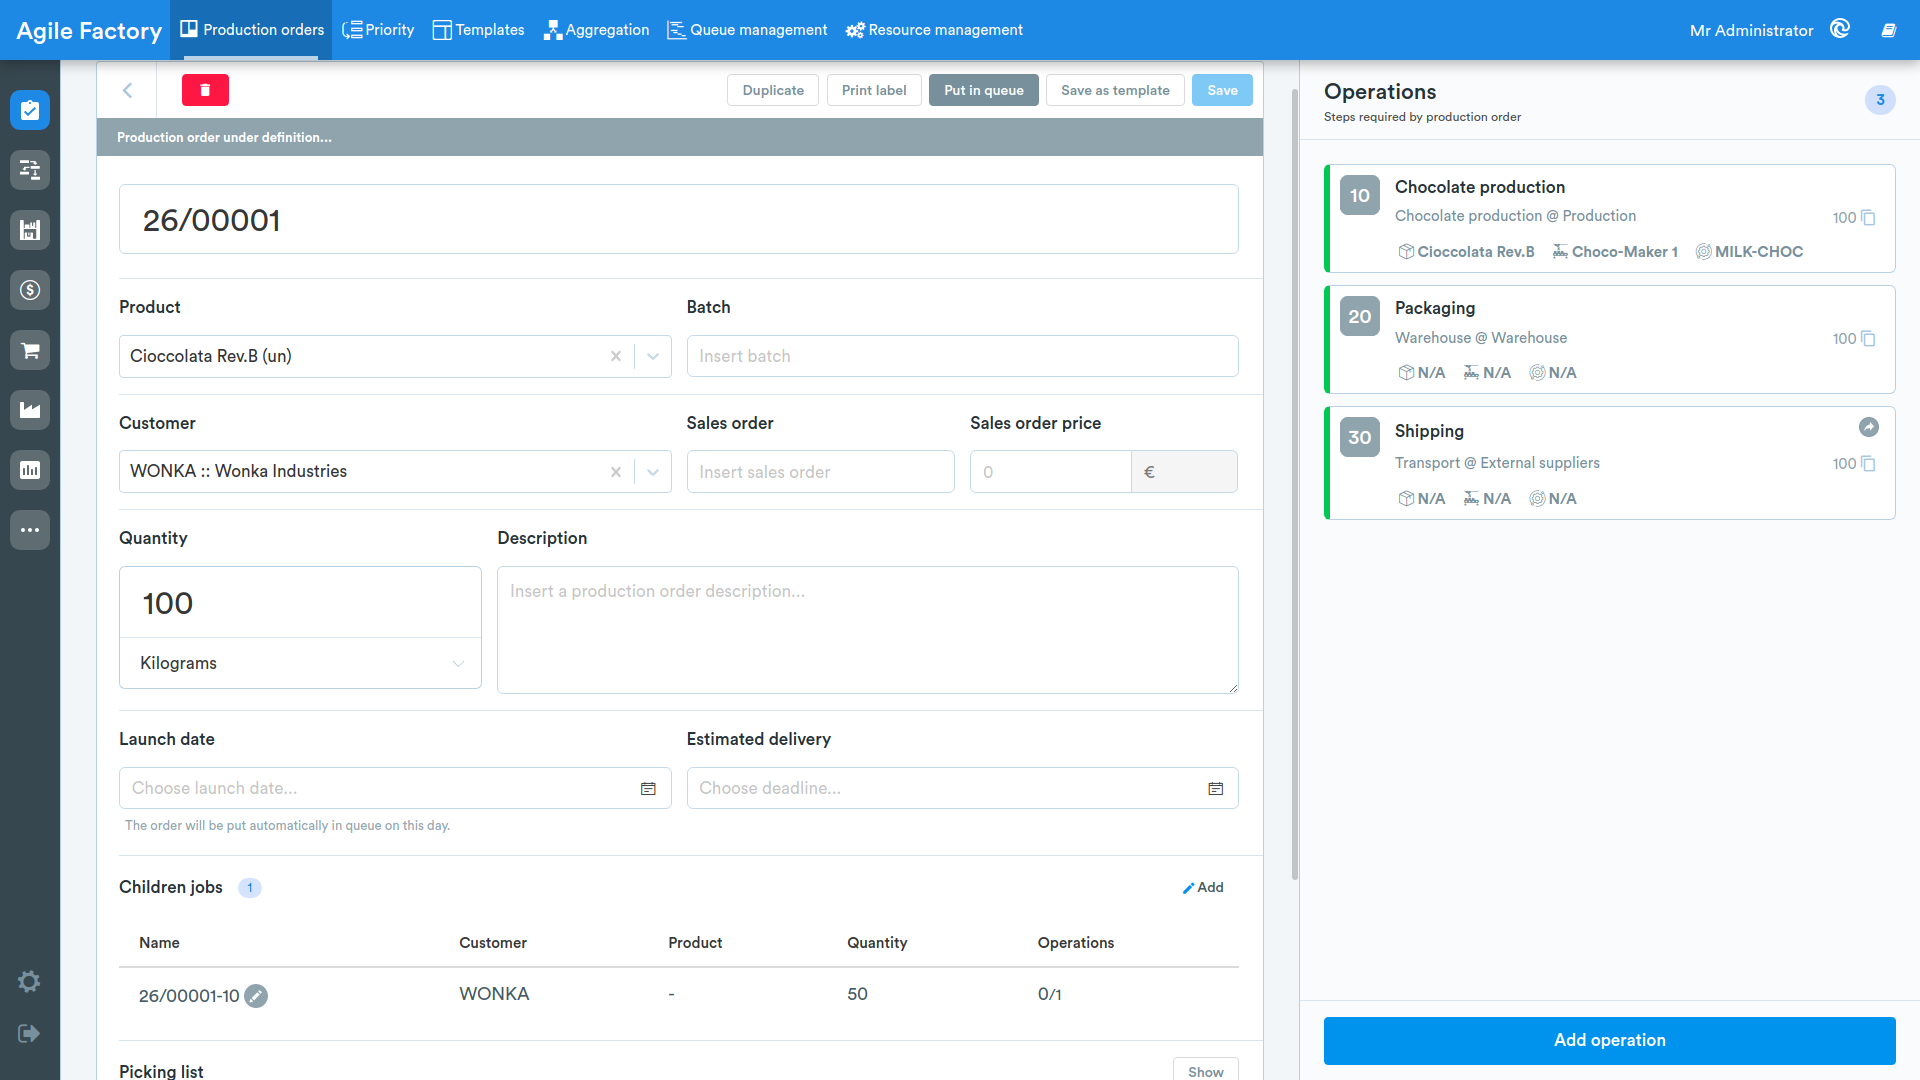
Sending Order to Processing Queue
After entering all production operations, it is necessary to save the production order and click on the Put in queue button.
If the order is part of a larger structure, the confirmation dialog offers additional options to extend the action to the linked orders:
- Also put aggregated orders in queue: available when the order contains operations aggregated from other orders; it puts those orders in queue at the same time.
- Also put parent-child orders in queue: available when the order has a parent order or child orders; it puts the orders linked in the parent-child structure in queue at the same time.
By selecting the desired options and confirming, all the affected orders will be put in queue in a single action.
The order will then be entered into the processing queue and can be taken in charge by operators.
Linked sales orders
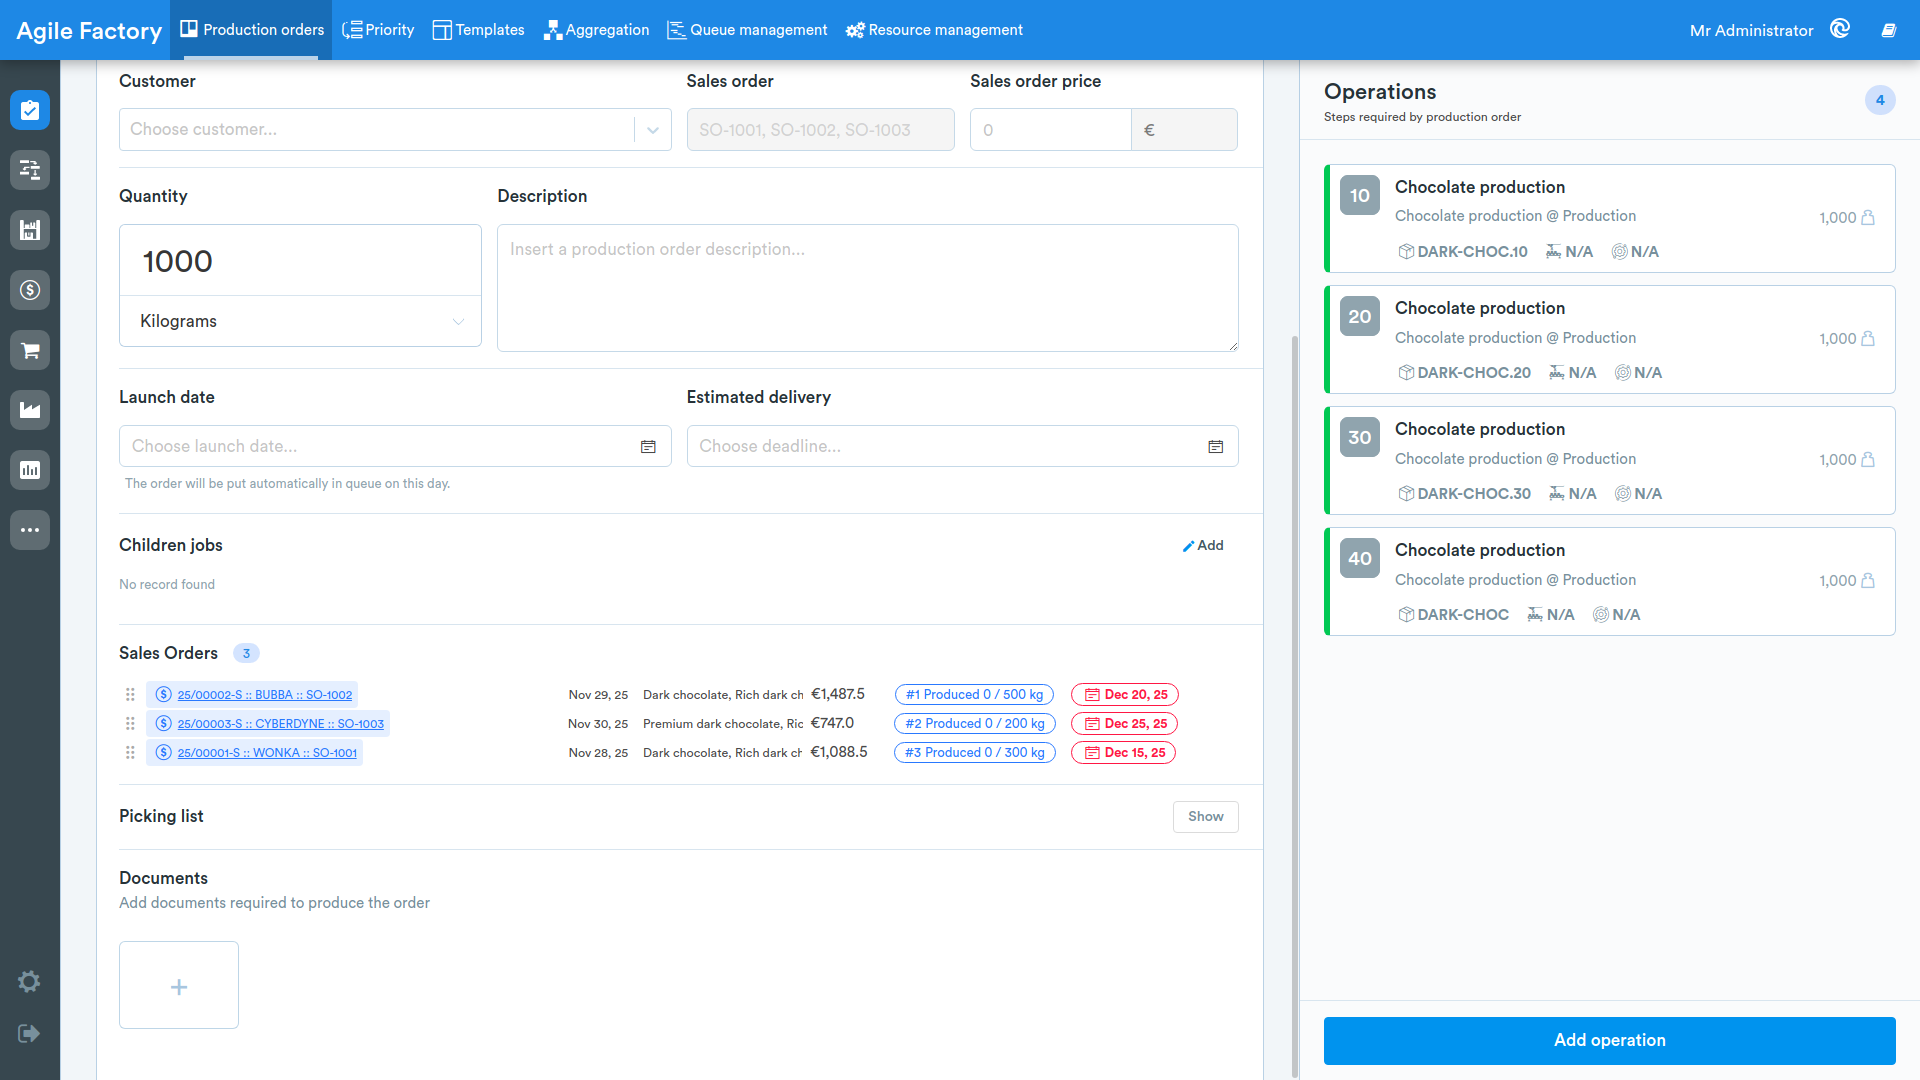
When a production order is linked to one or more sales orders, the Sales Orders section is shown at the bottom of the order detail and edit screens, together with the number of associated sales orders.
For each linked sales order it shows the order code (with its customer and reference code), the date, the line description and notes, the total price, the quantity produced compared to the required one and the delivery date. Clicking on the code opens the sales order detail directly.
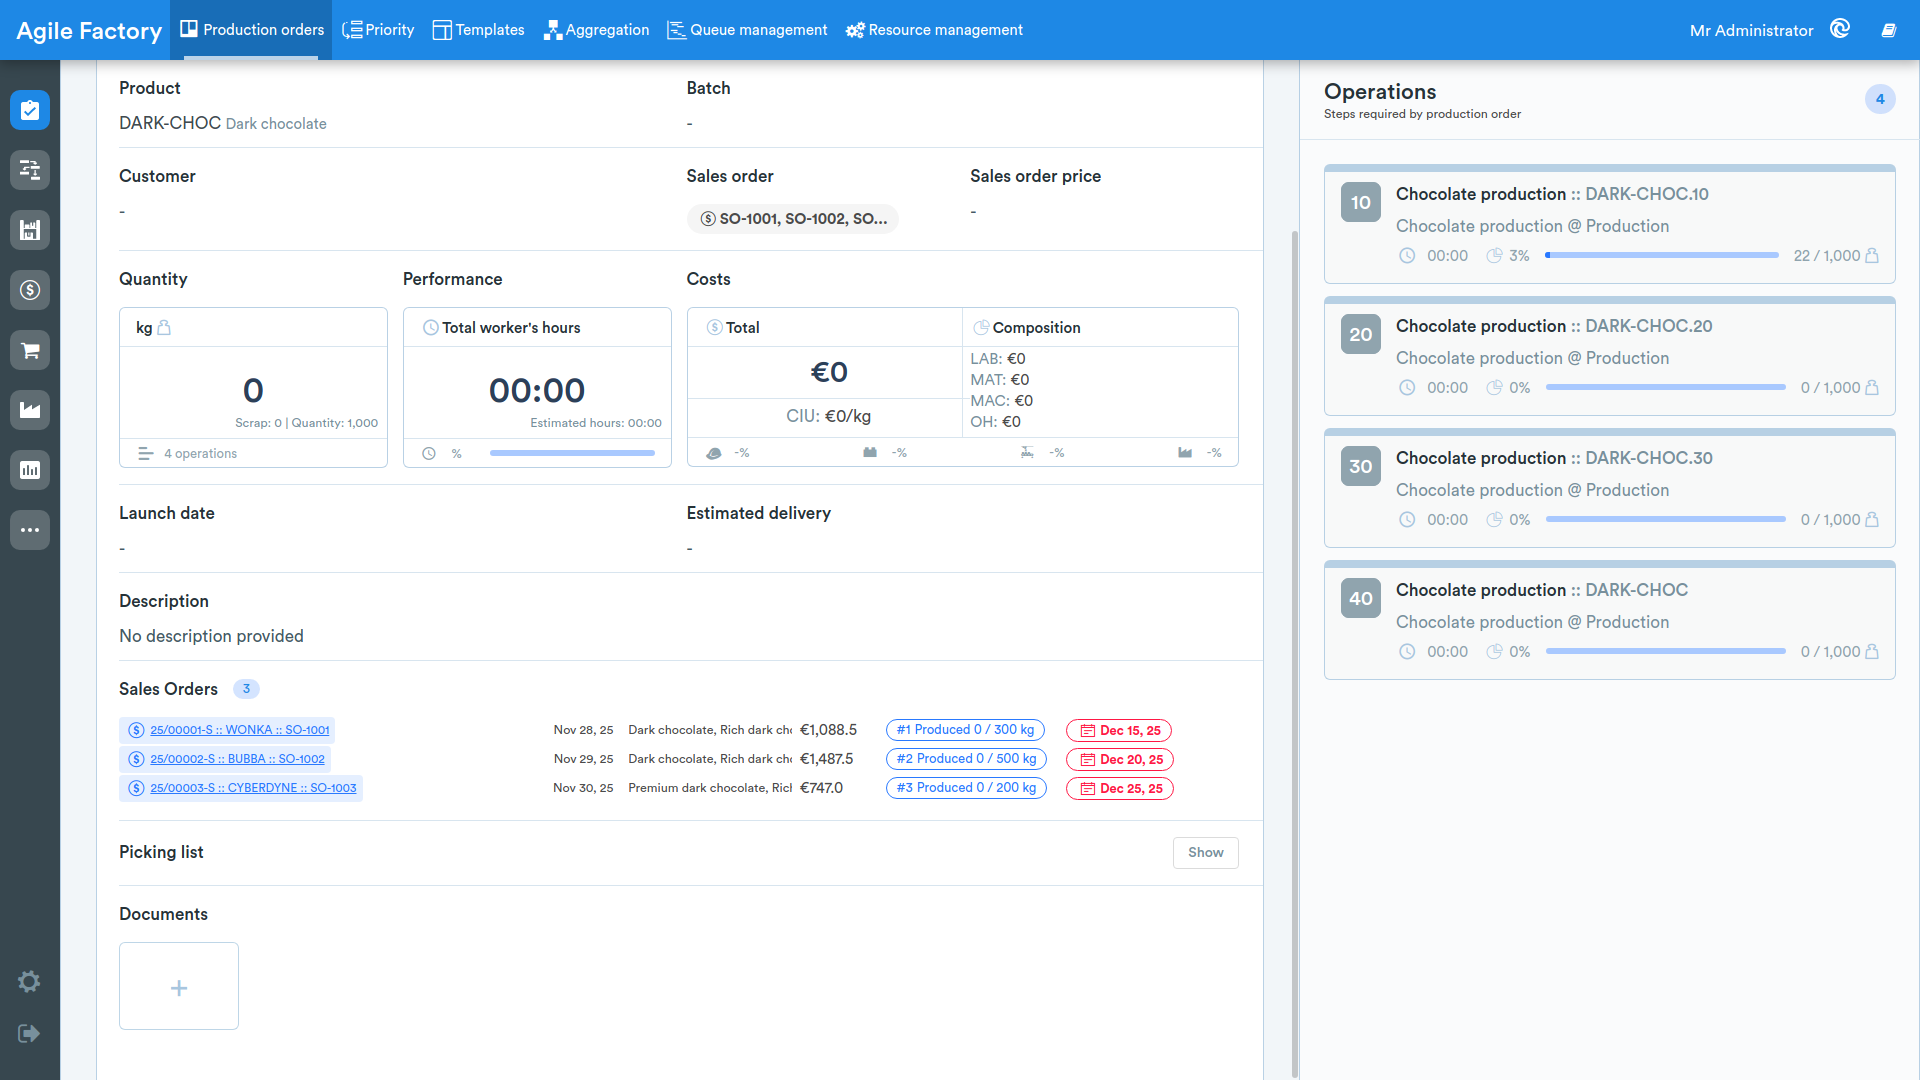
While editing the production order, when several sales orders are linked, you can reorder them by dragging them with the dedicated handle: the assigned position determines the priority with which the sales orders will be fulfilled.
Viewing Details of In-Progress/Completed Orders
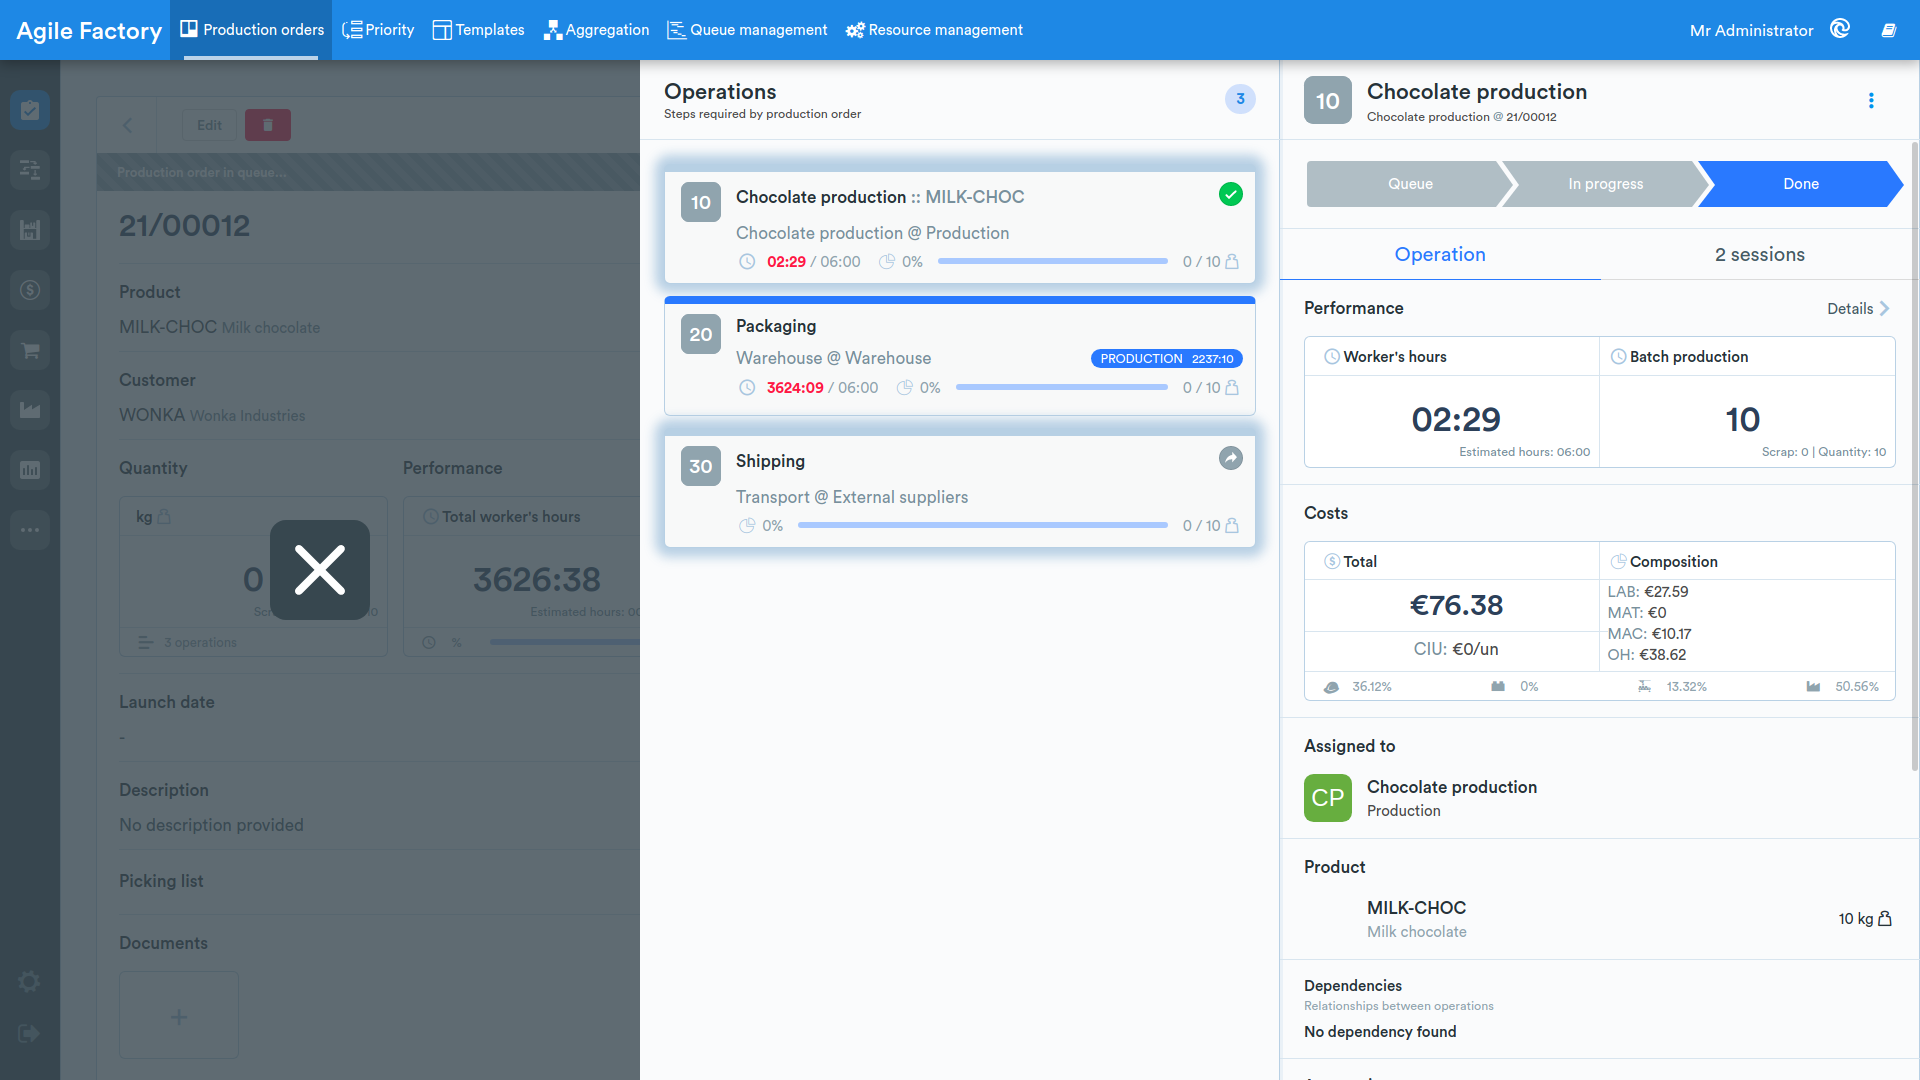
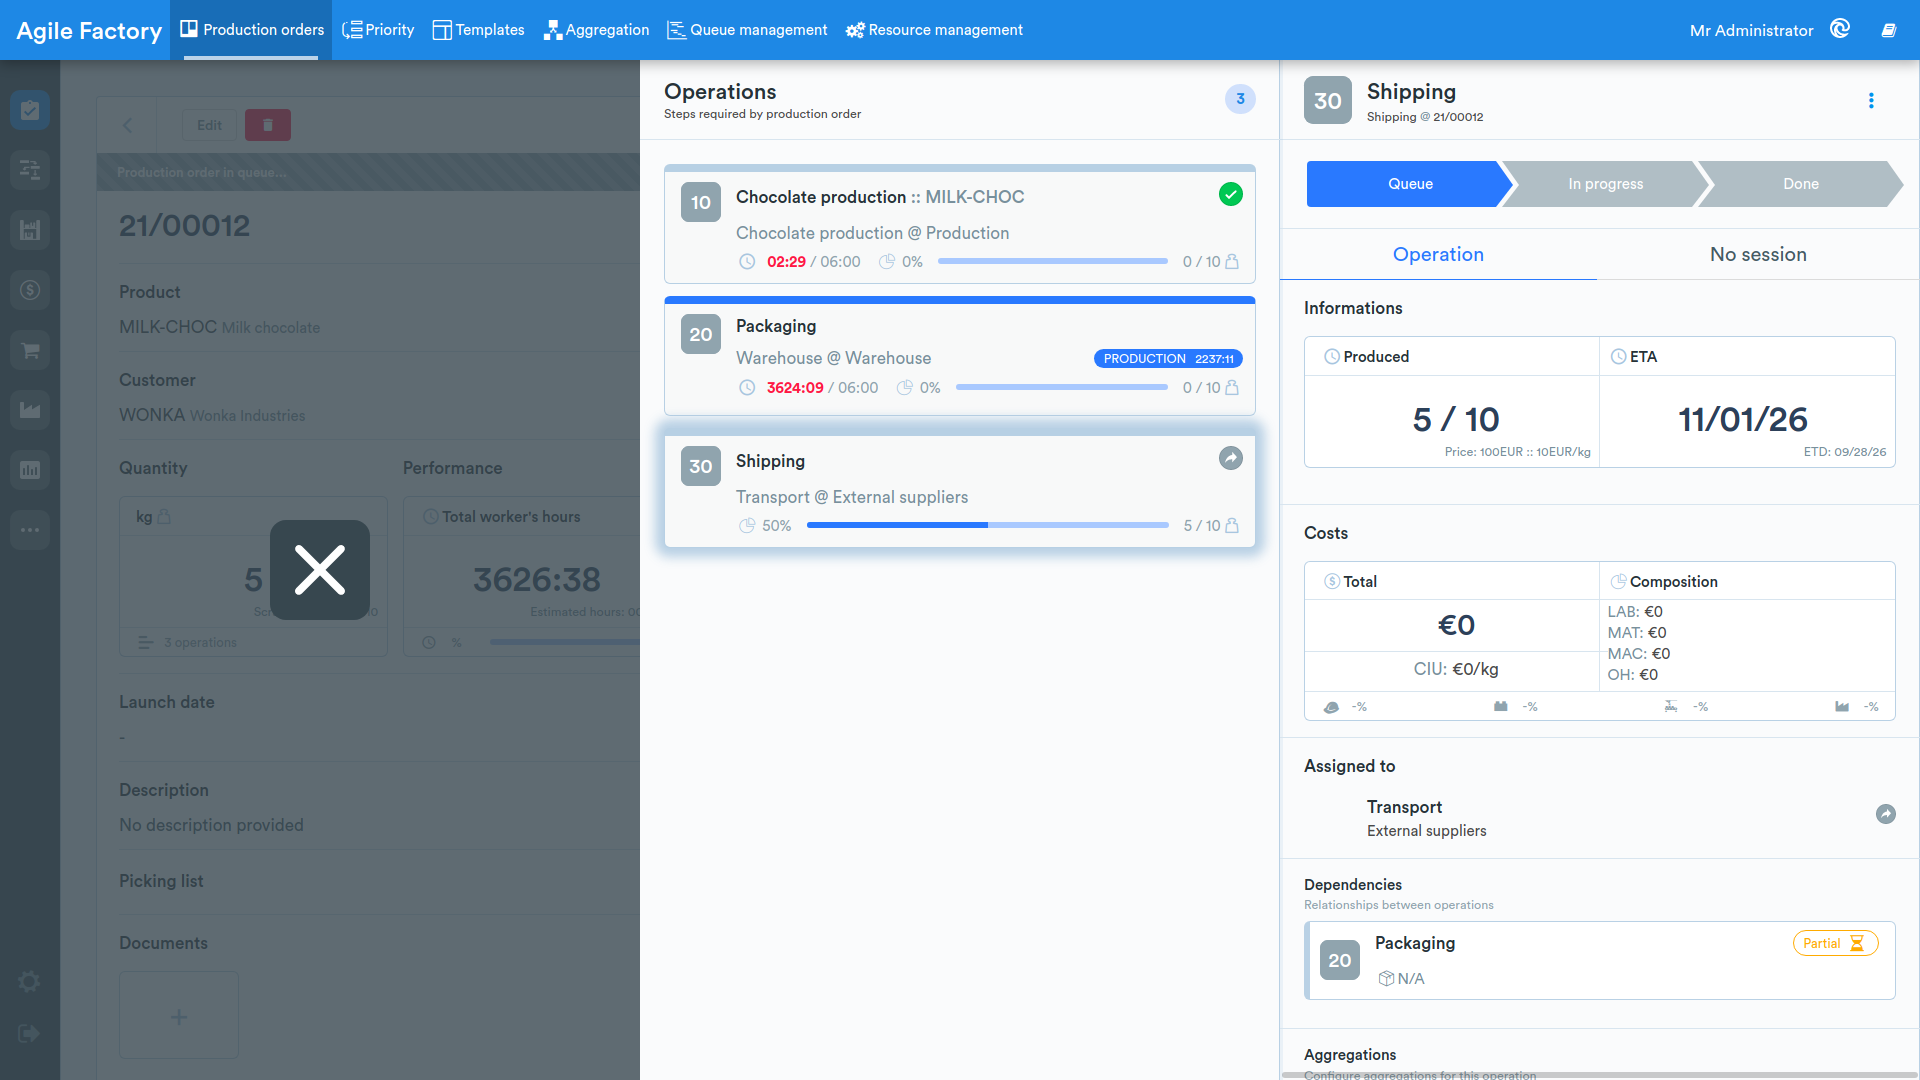
Once an order in the production queue has been taken in charge by operators, it will be possible to view the status of individual operations by selecting it from the list of created orders.
The PO detail screen will show the relevant operations on the right, which will be colored differently based on their current processing status.
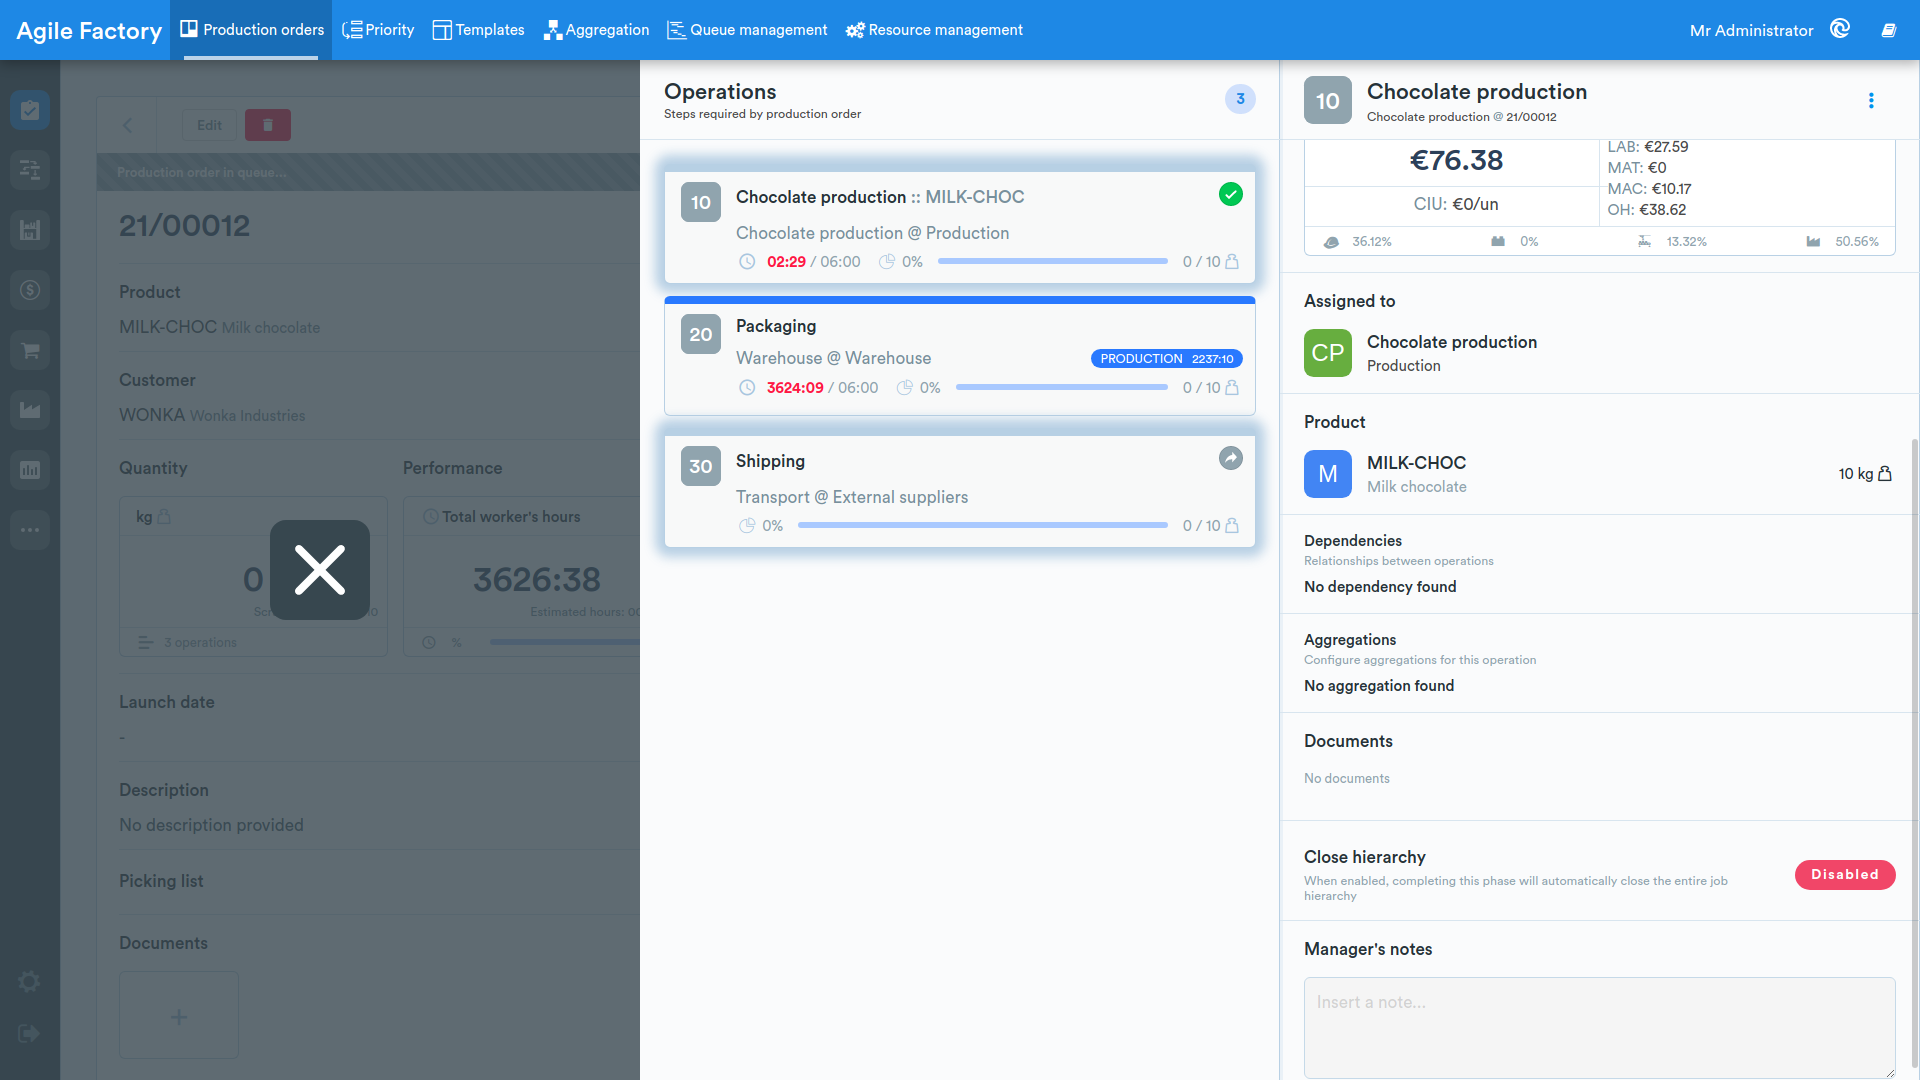
By clicking on a specific operation, it is possible to view all details and information related to performance and work sessions.
If the operation is in error status, it is possible to view the cause by opening the dropdown menu in the tab that opens.
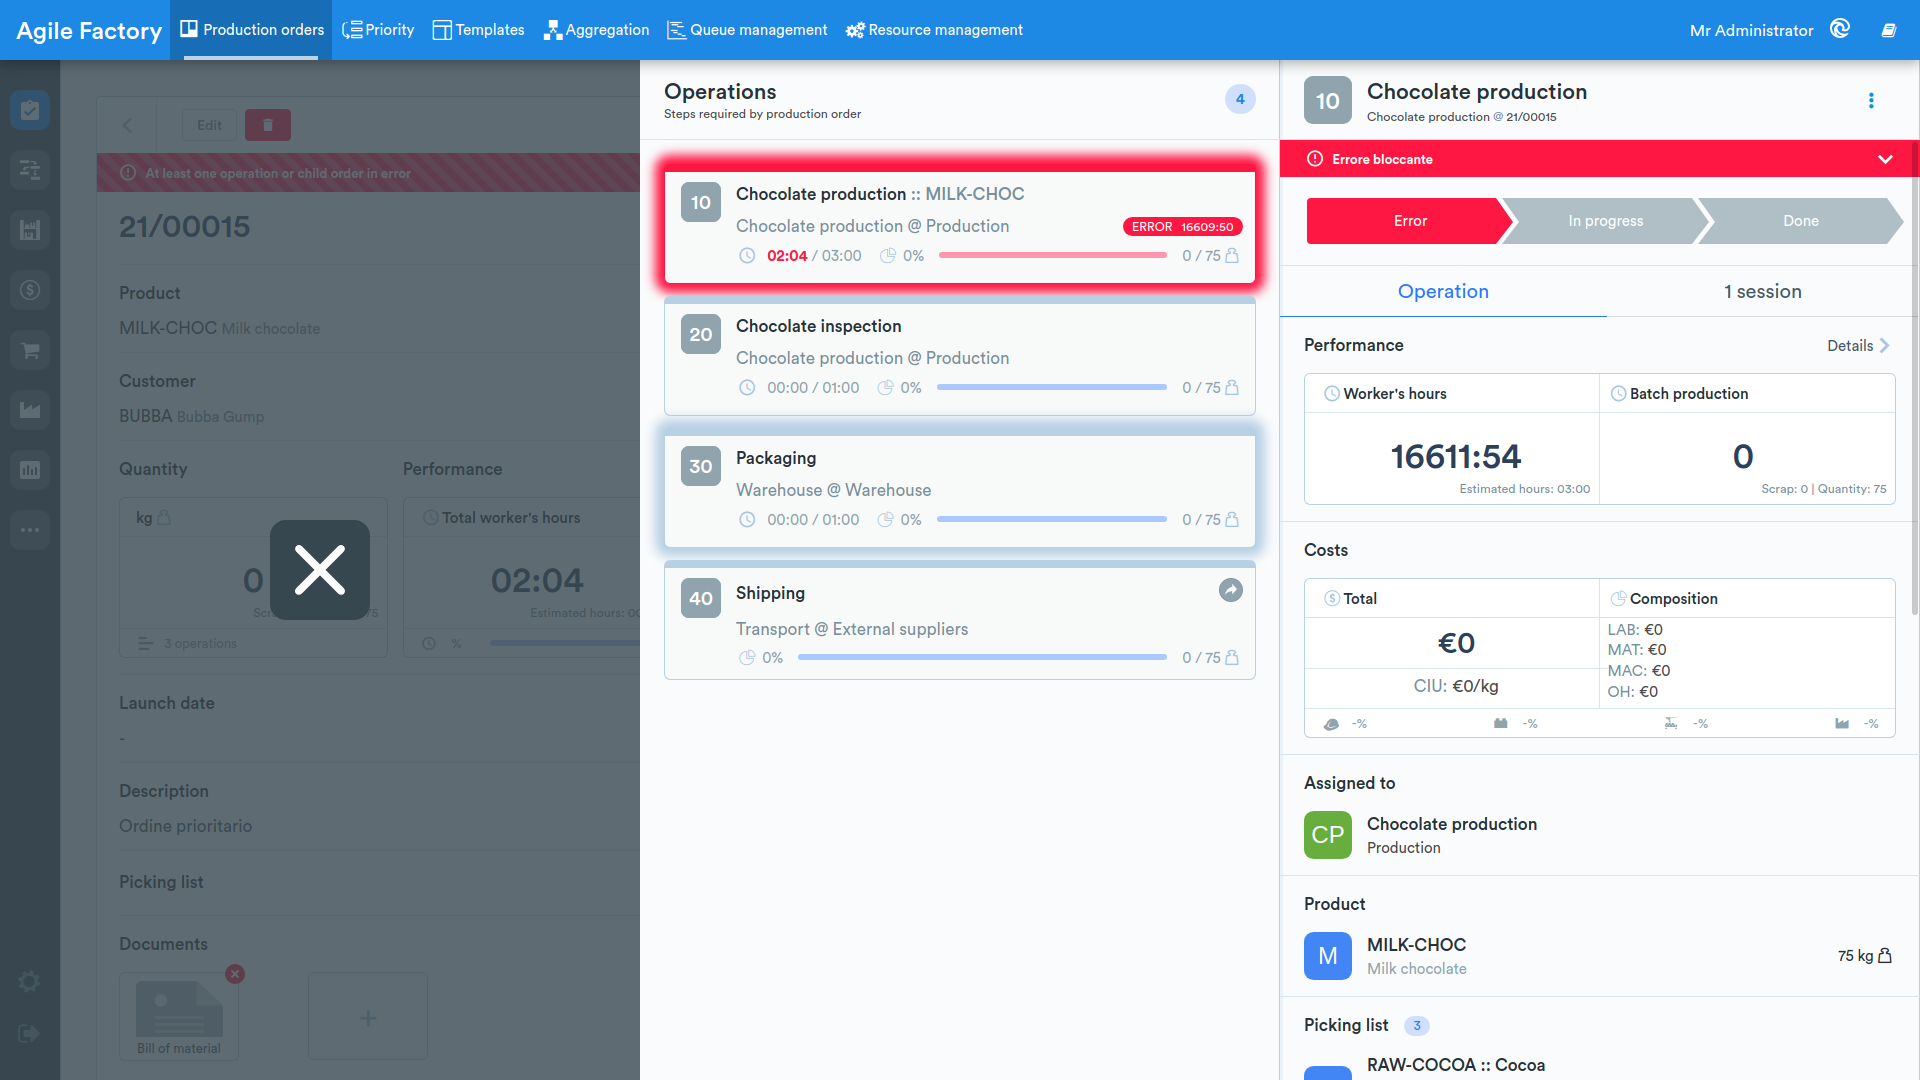
To handle the error, open the actions menu (the three vertical dots in the upper right corner) and click on Manage error.
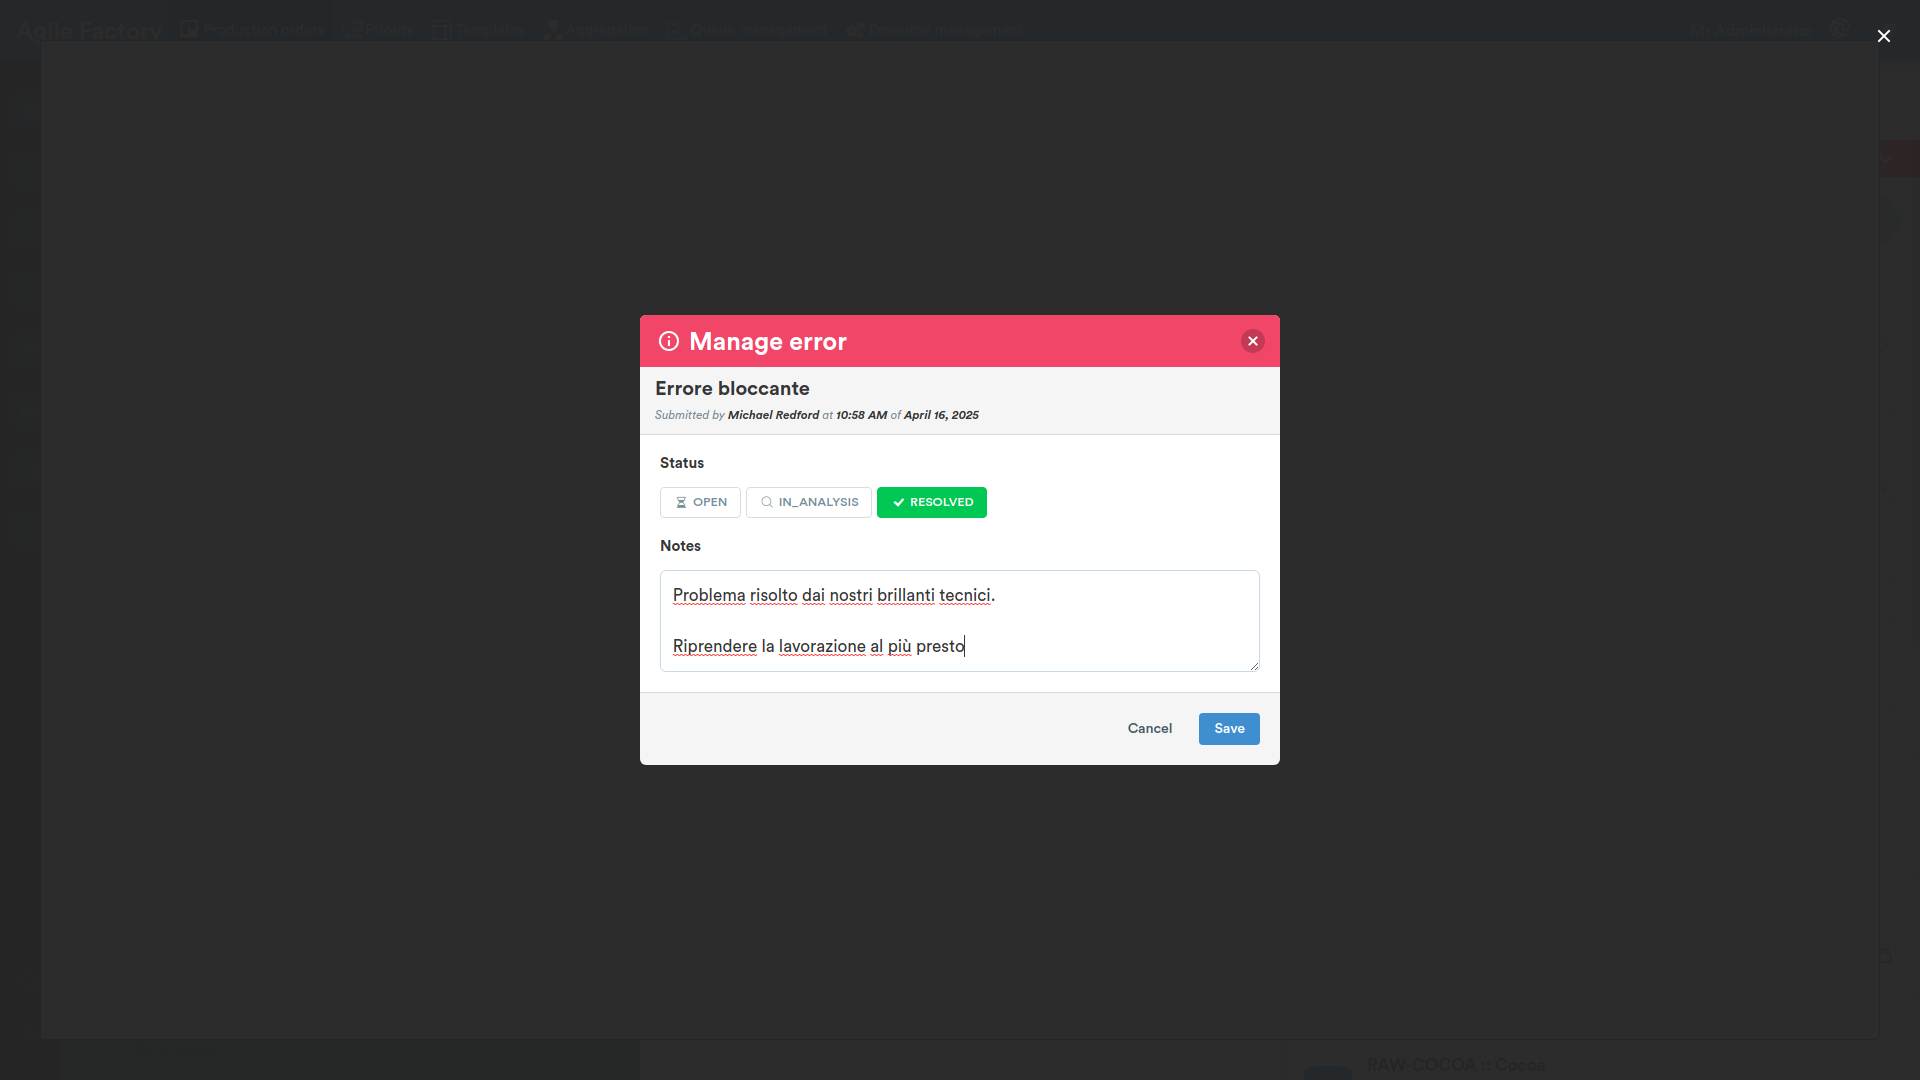
The Manage error dialog opens, showing the error message, its severity and who submitted it. From here you can manage the progress of the error by setting its Status:
- OPEN: error open, not yet taken in charge
- IN_ANALYSIS: error under analysis
- IN_REPAIR: error under repair (status available only when a repair order is associated with the error)
- RESOLVED: error resolved
You can also add Notes describing the intervention. Press Save to confirm or Cancel to close without changes.
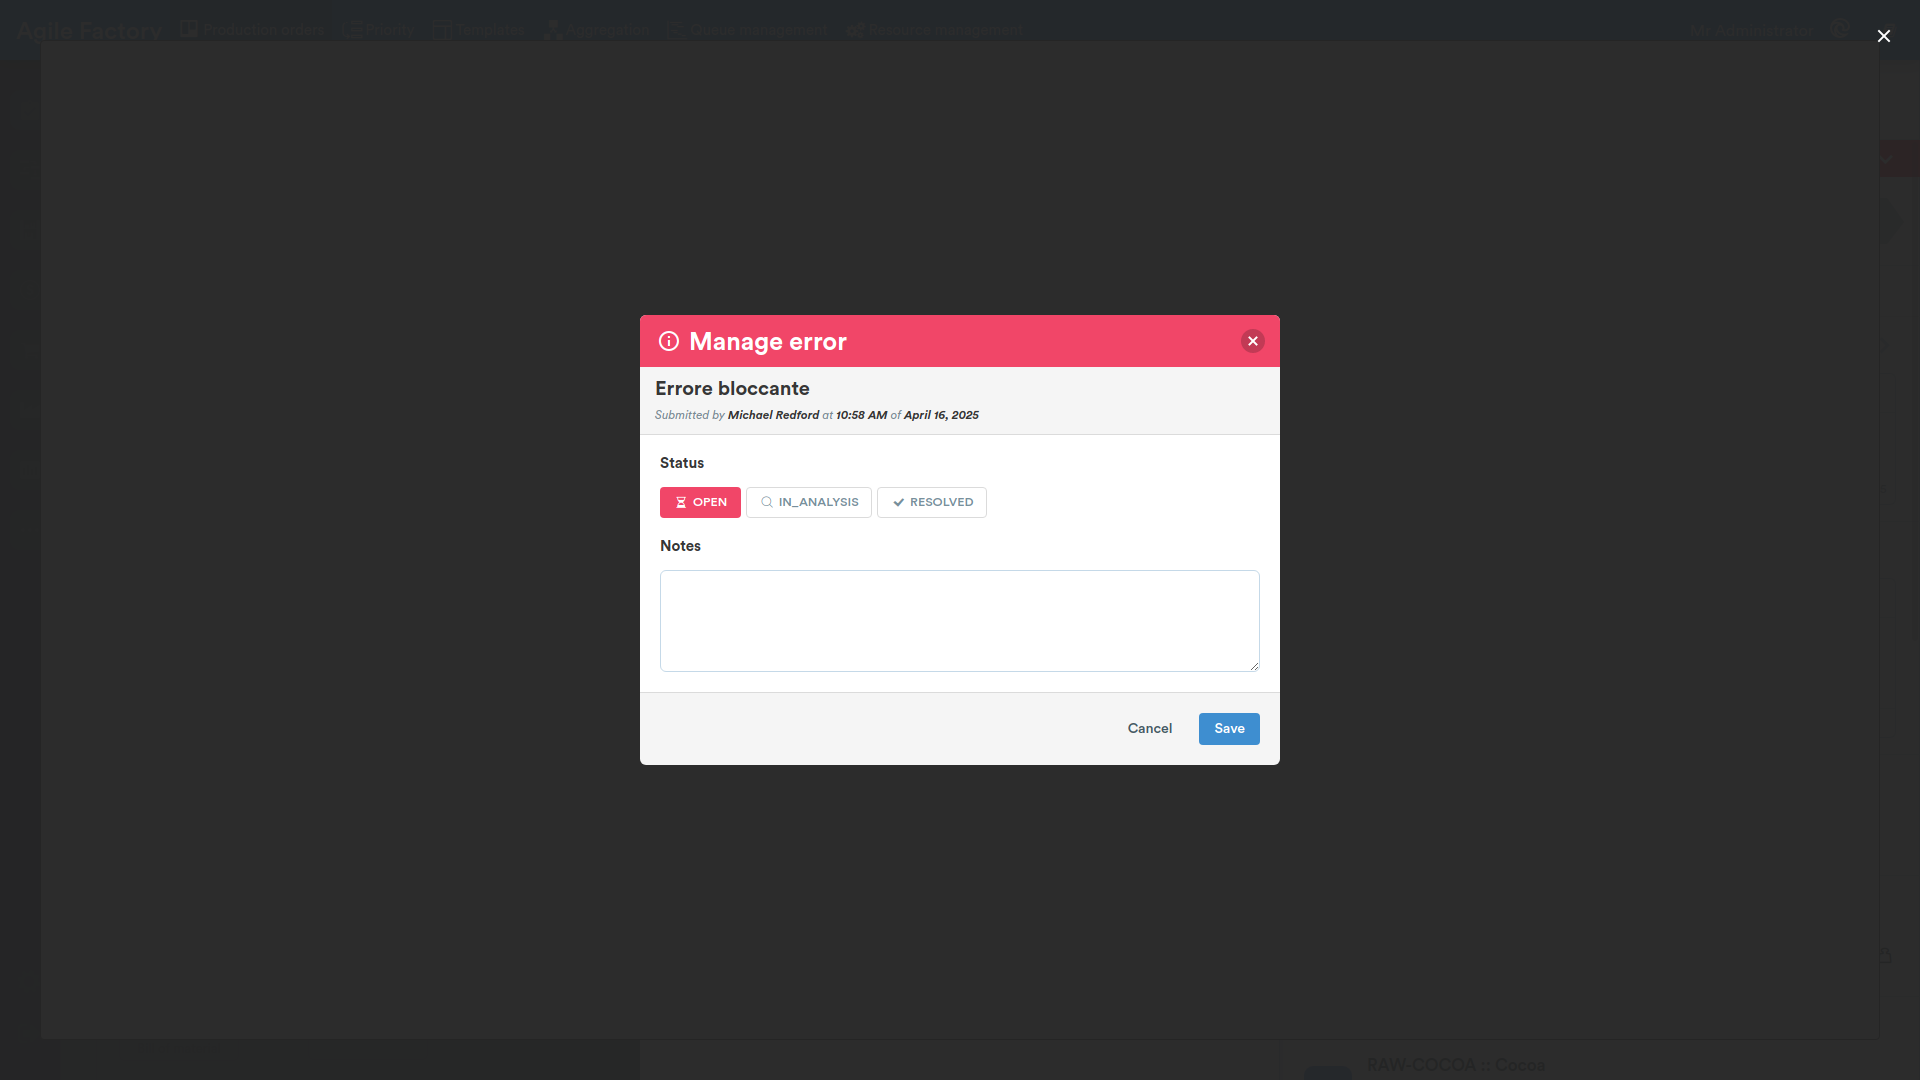
Setting the error back to resolved unlocks the operation, and only at this point will the operator be able to resume processing.
If the operation has been assigned to an external station, by clicking on the actions menu it will instead be possible to manually update the operation status.
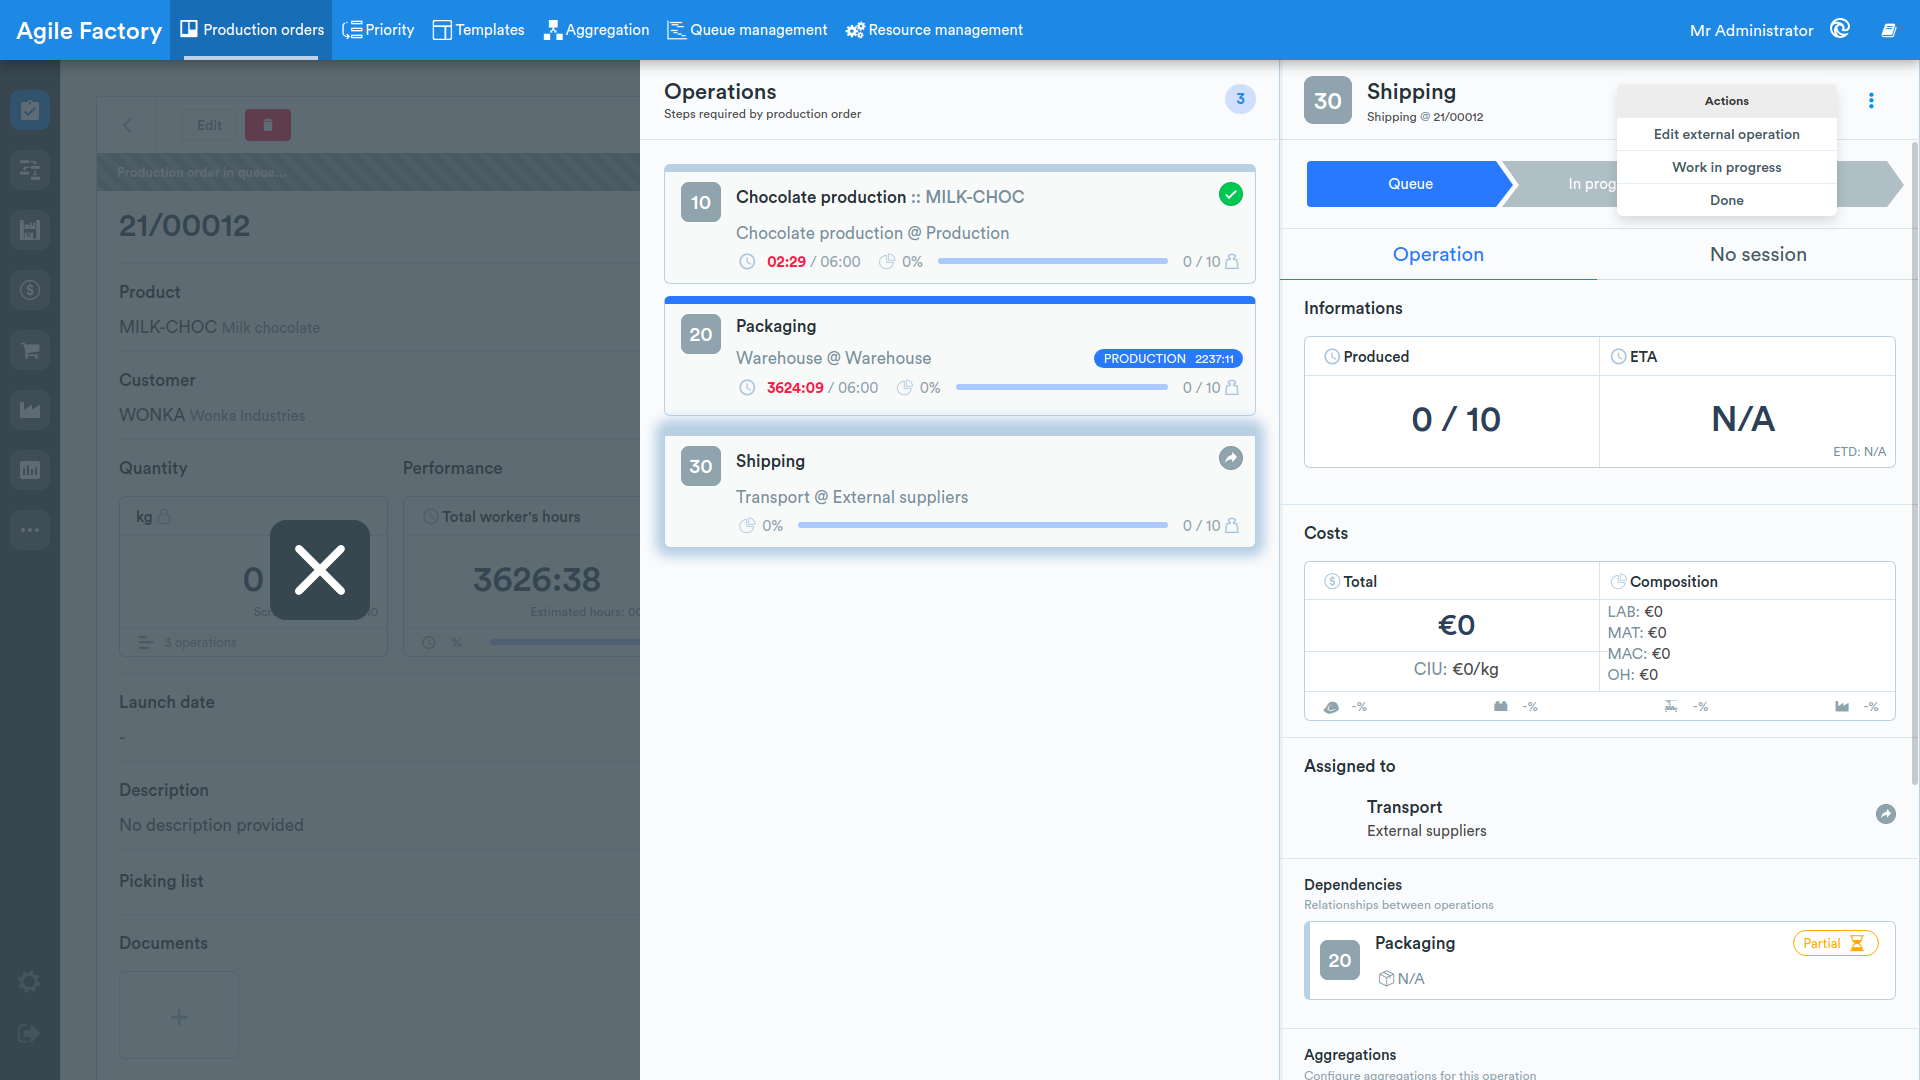
Additionally, by clicking on Edit external operation, it is possible to enter or modify:
- the quantity produced
- the total cost
- the operation start date and delivery date
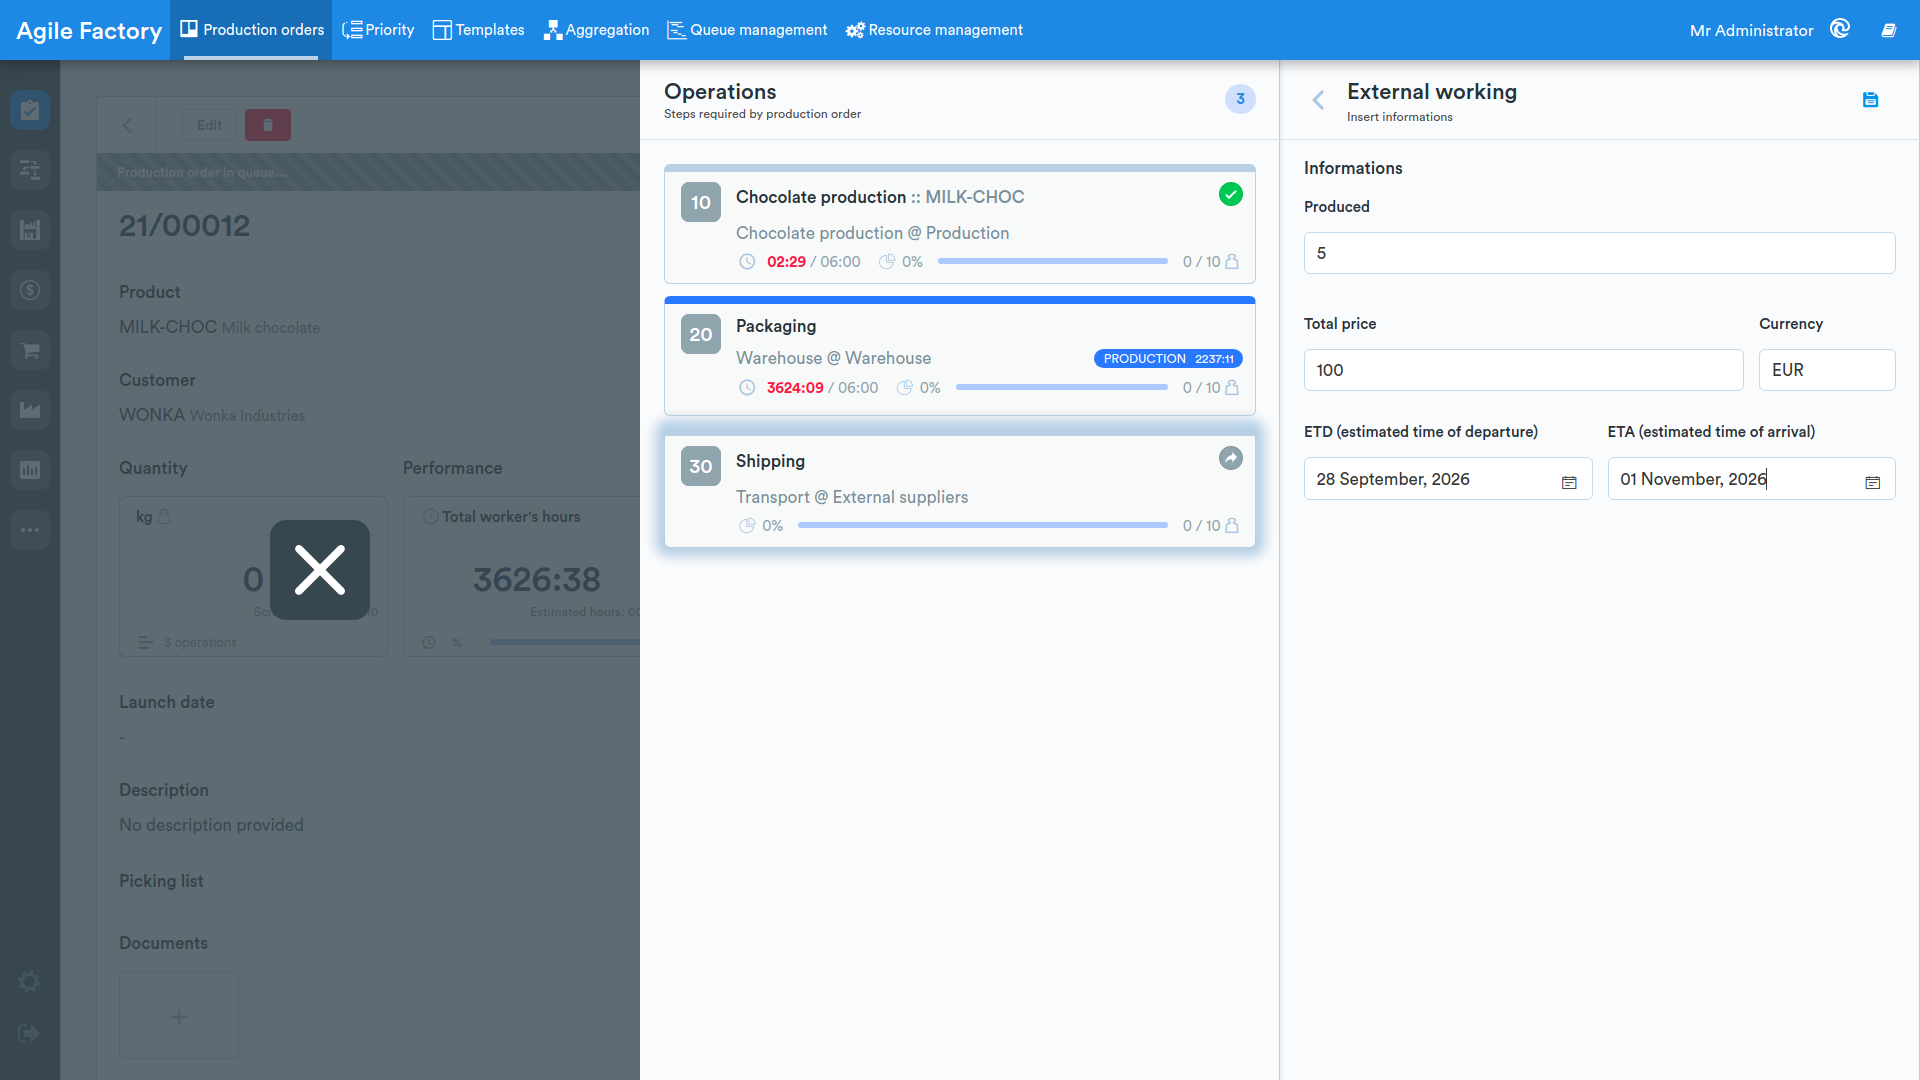
After finishing the modification, it is necessary to save the data by clicking on the button at the top right.
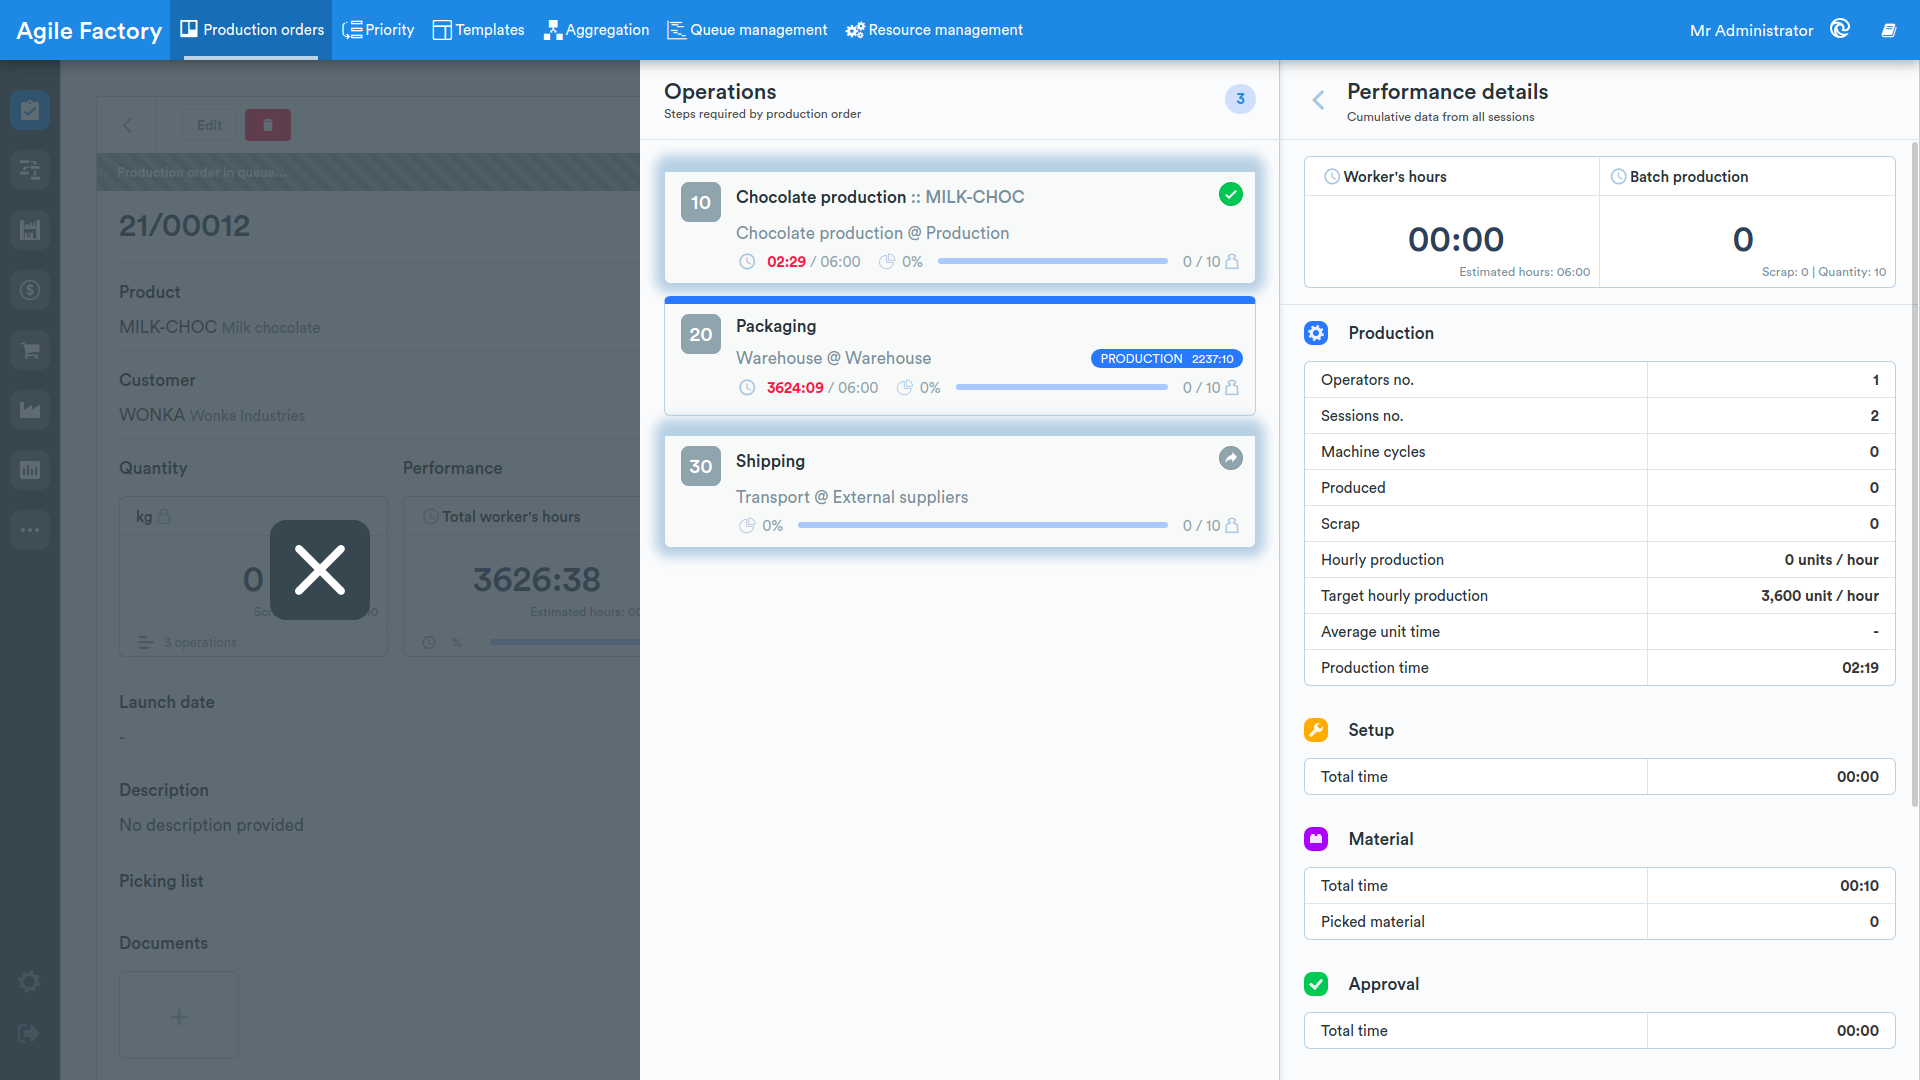
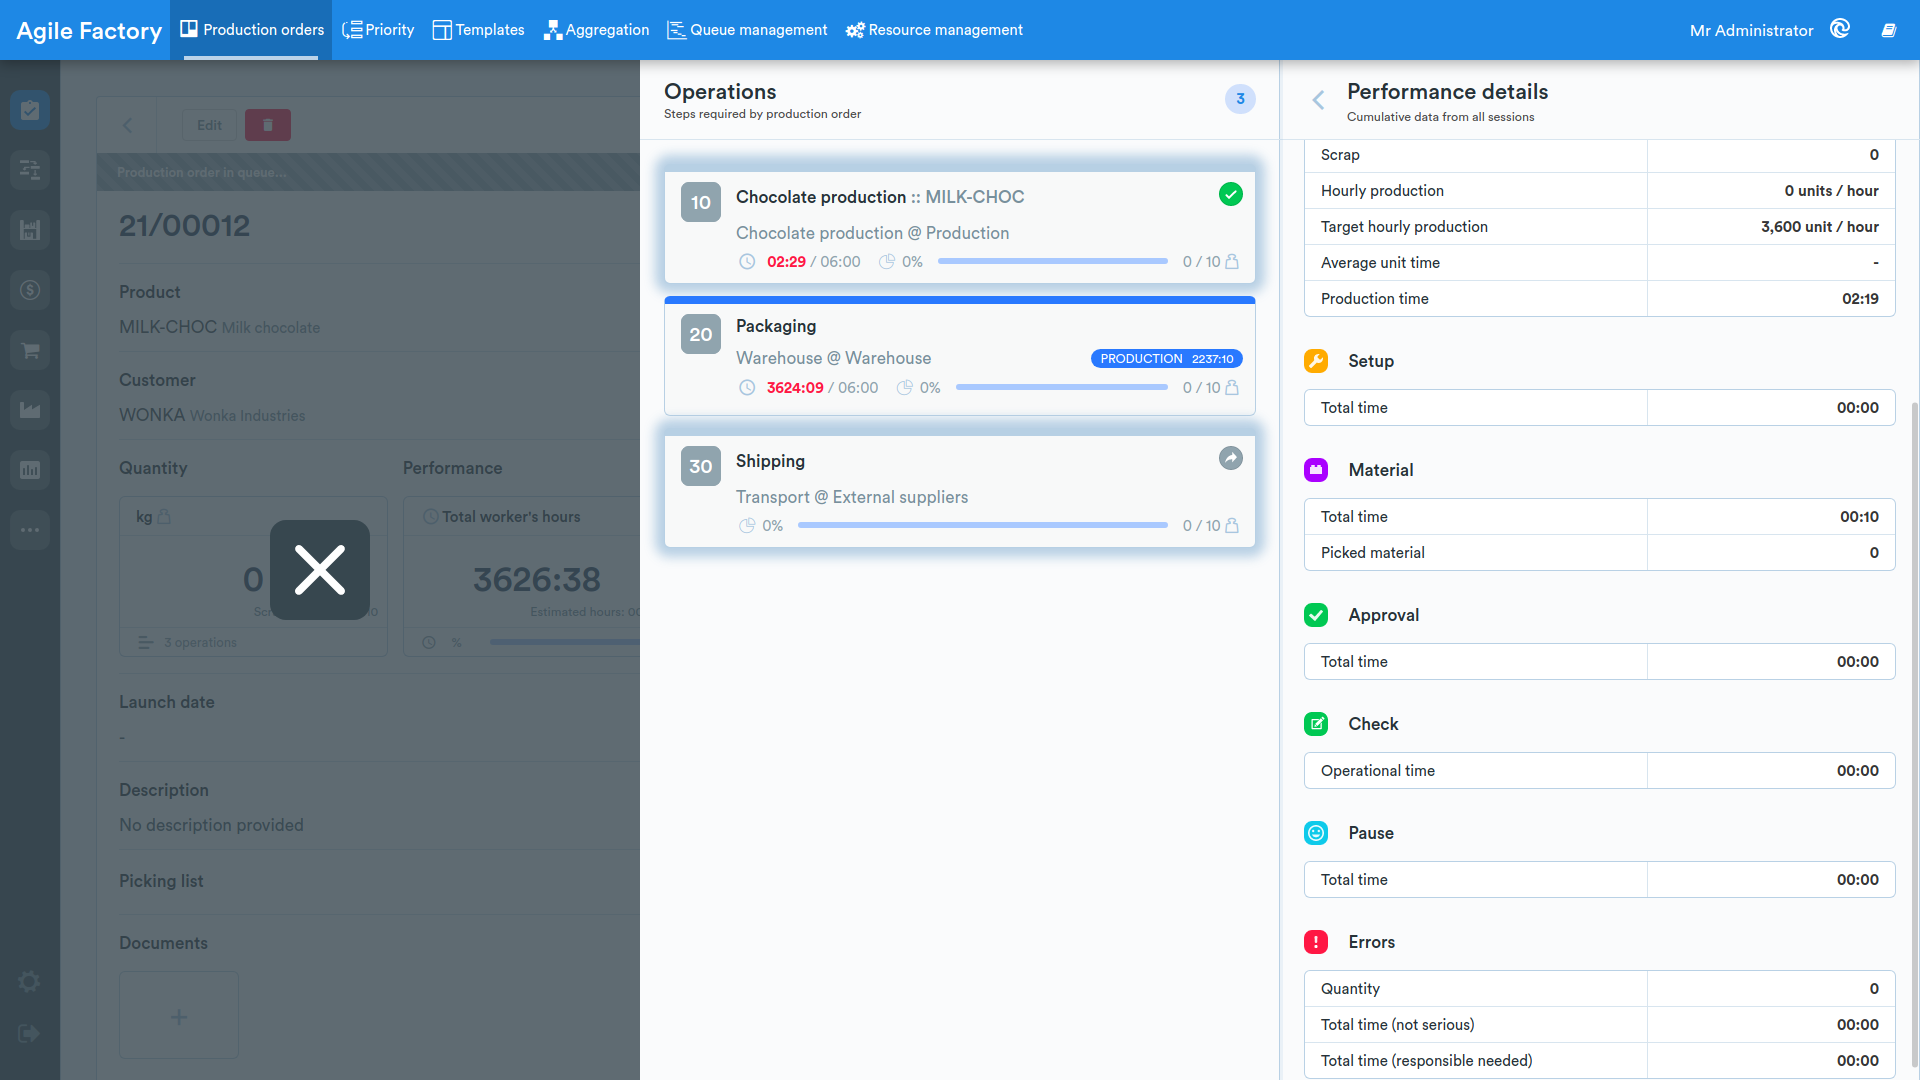
Cumulative Data from All Sessions
For each step related to the execution of the operation, information related to performance is available, which corresponds to the cumulative data from all work sessions.
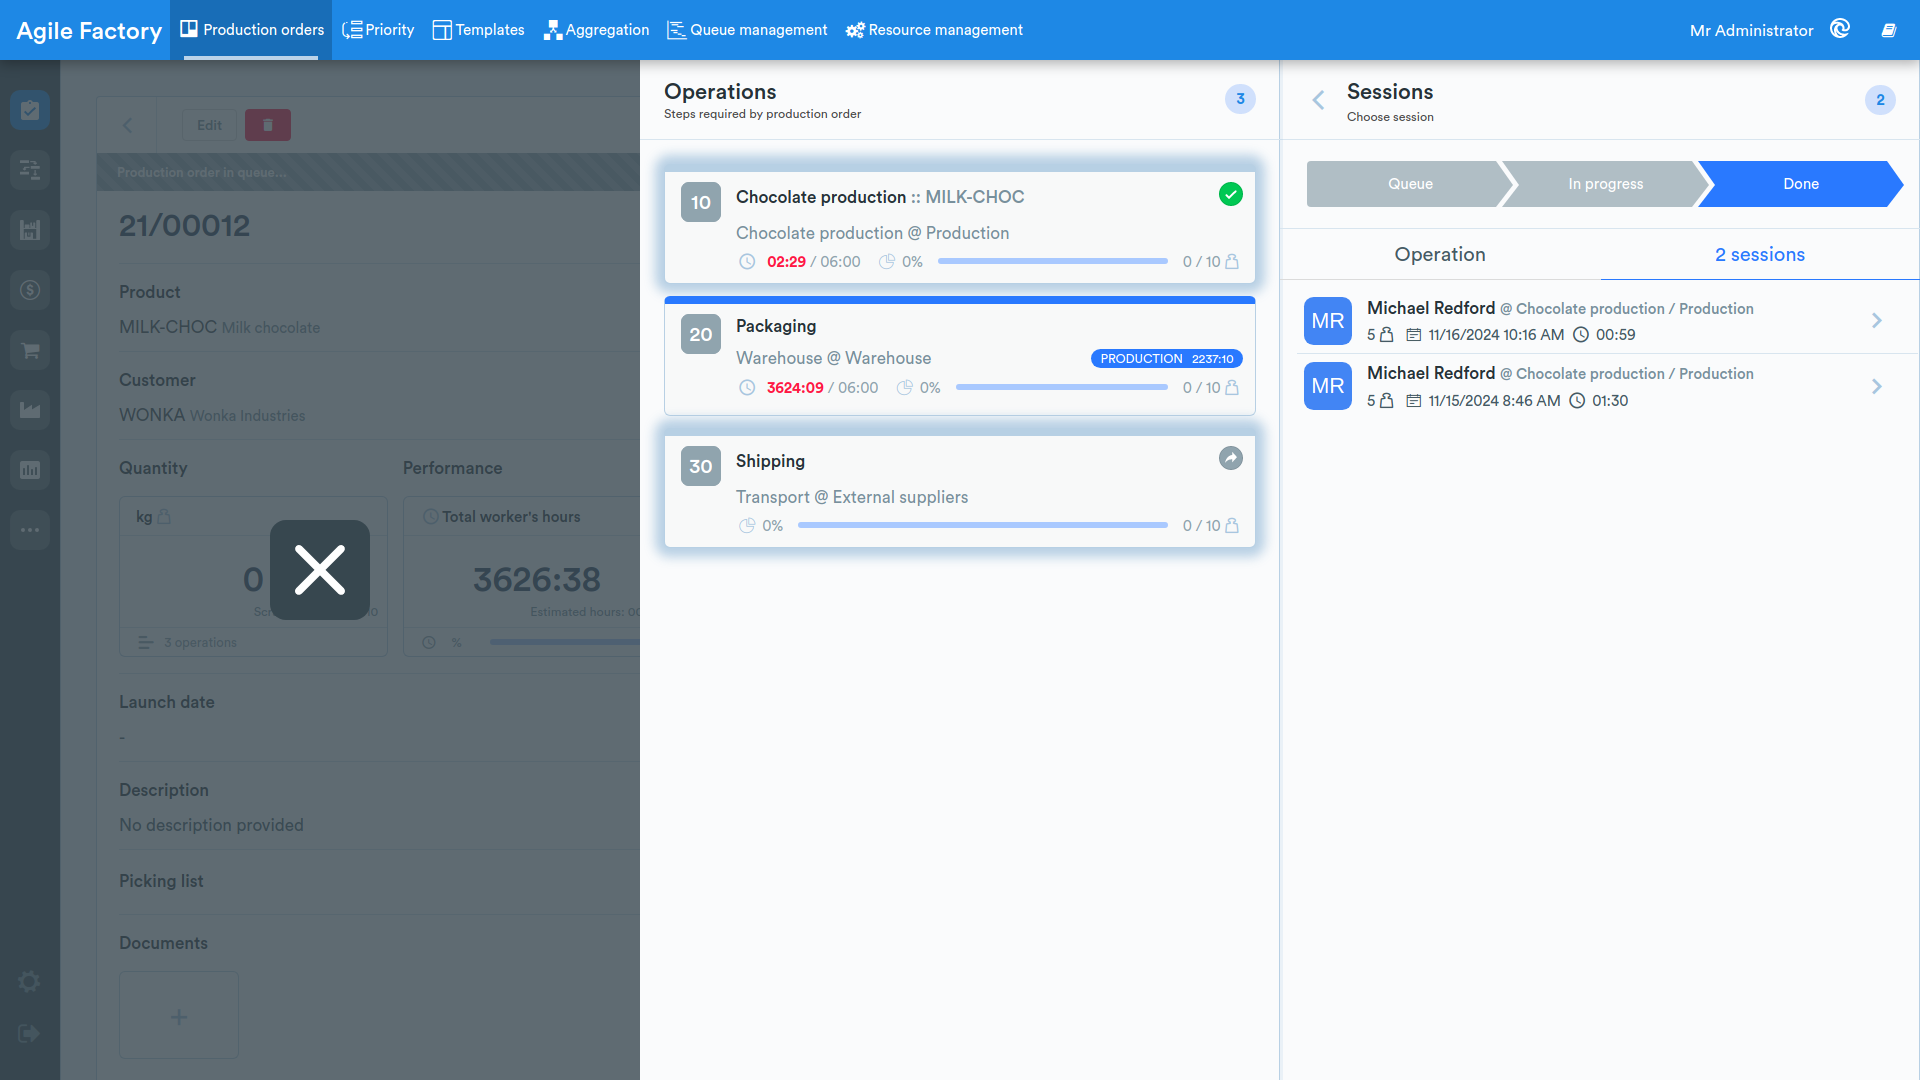
Session List
By pressing on the Number of sessions link, located next to the Operation button, you will be able to view the list of work sessions.
Session Detail
By selecting a session, it will be possible to view its details and in particular the total duration and history of all steps executed by the operator.
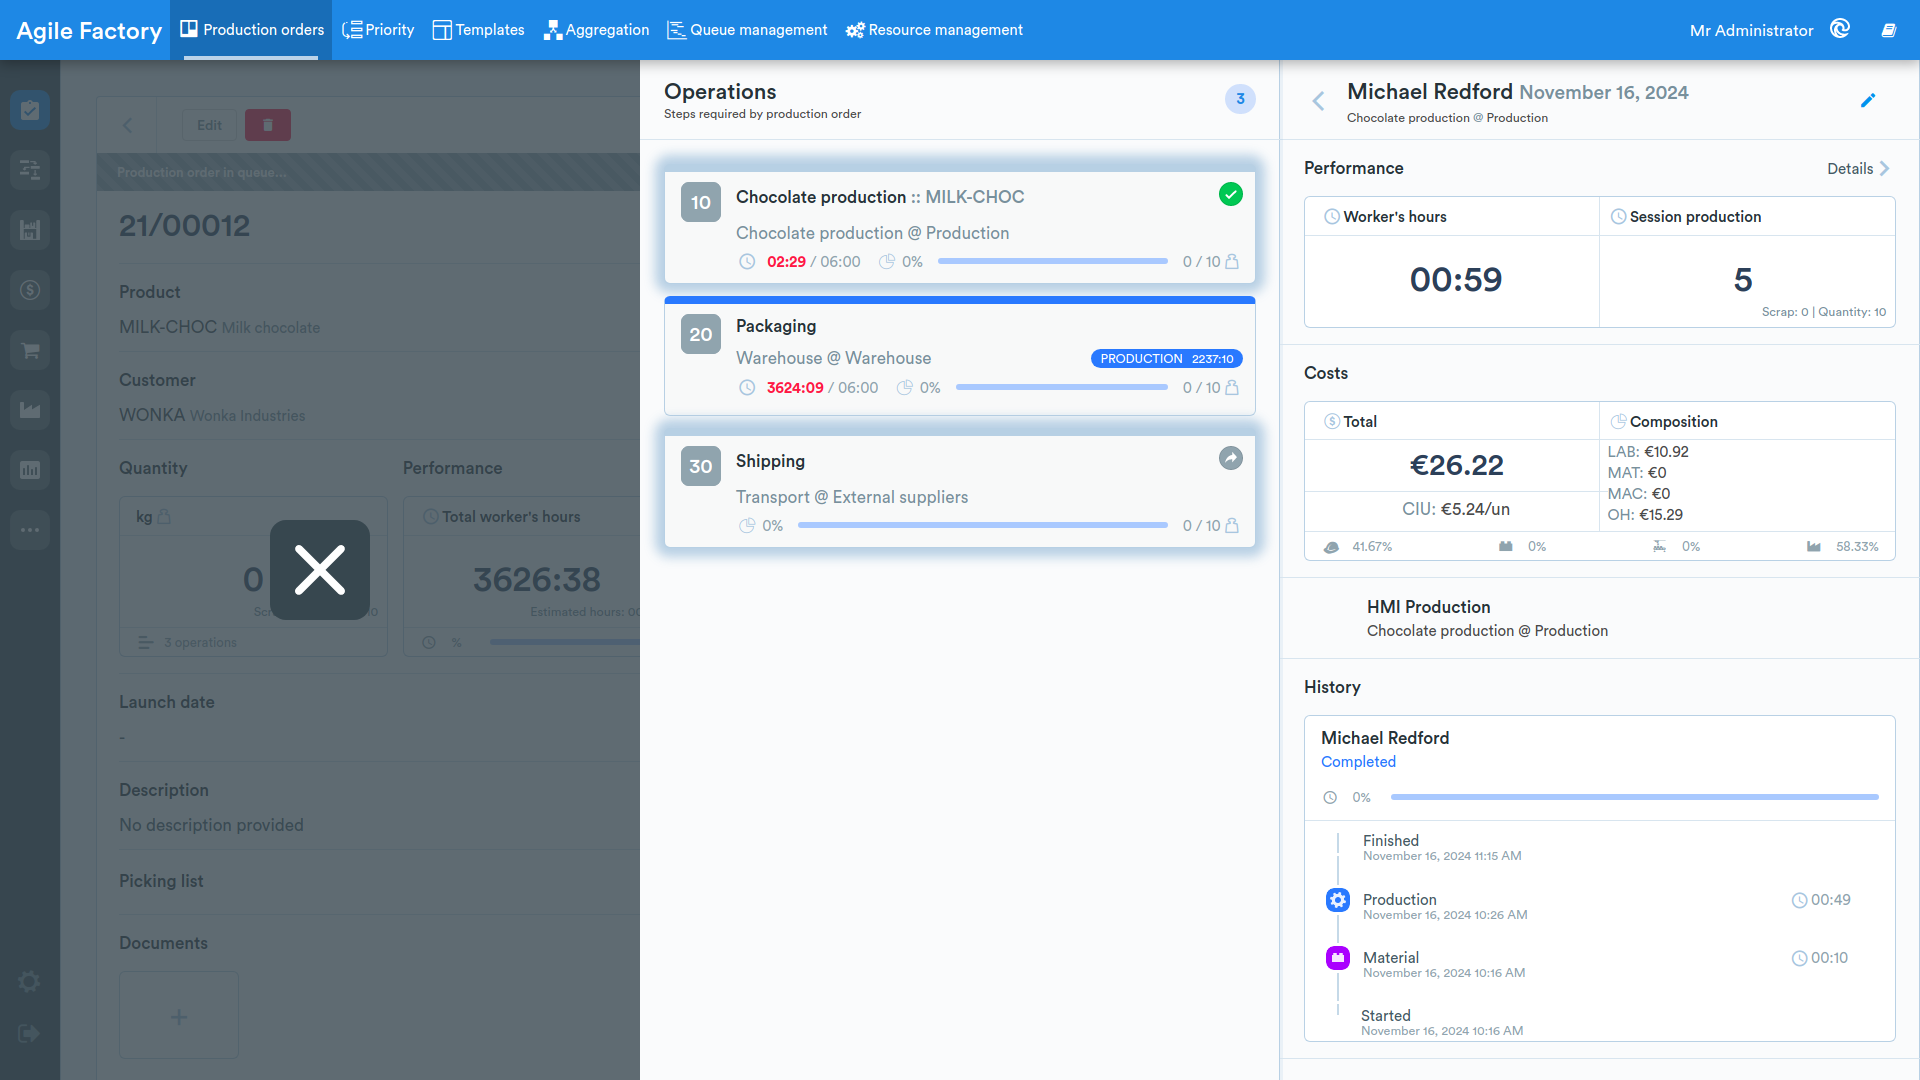
Session Times
By clicking on Go to performance details, it is possible to view the data collected for the session.
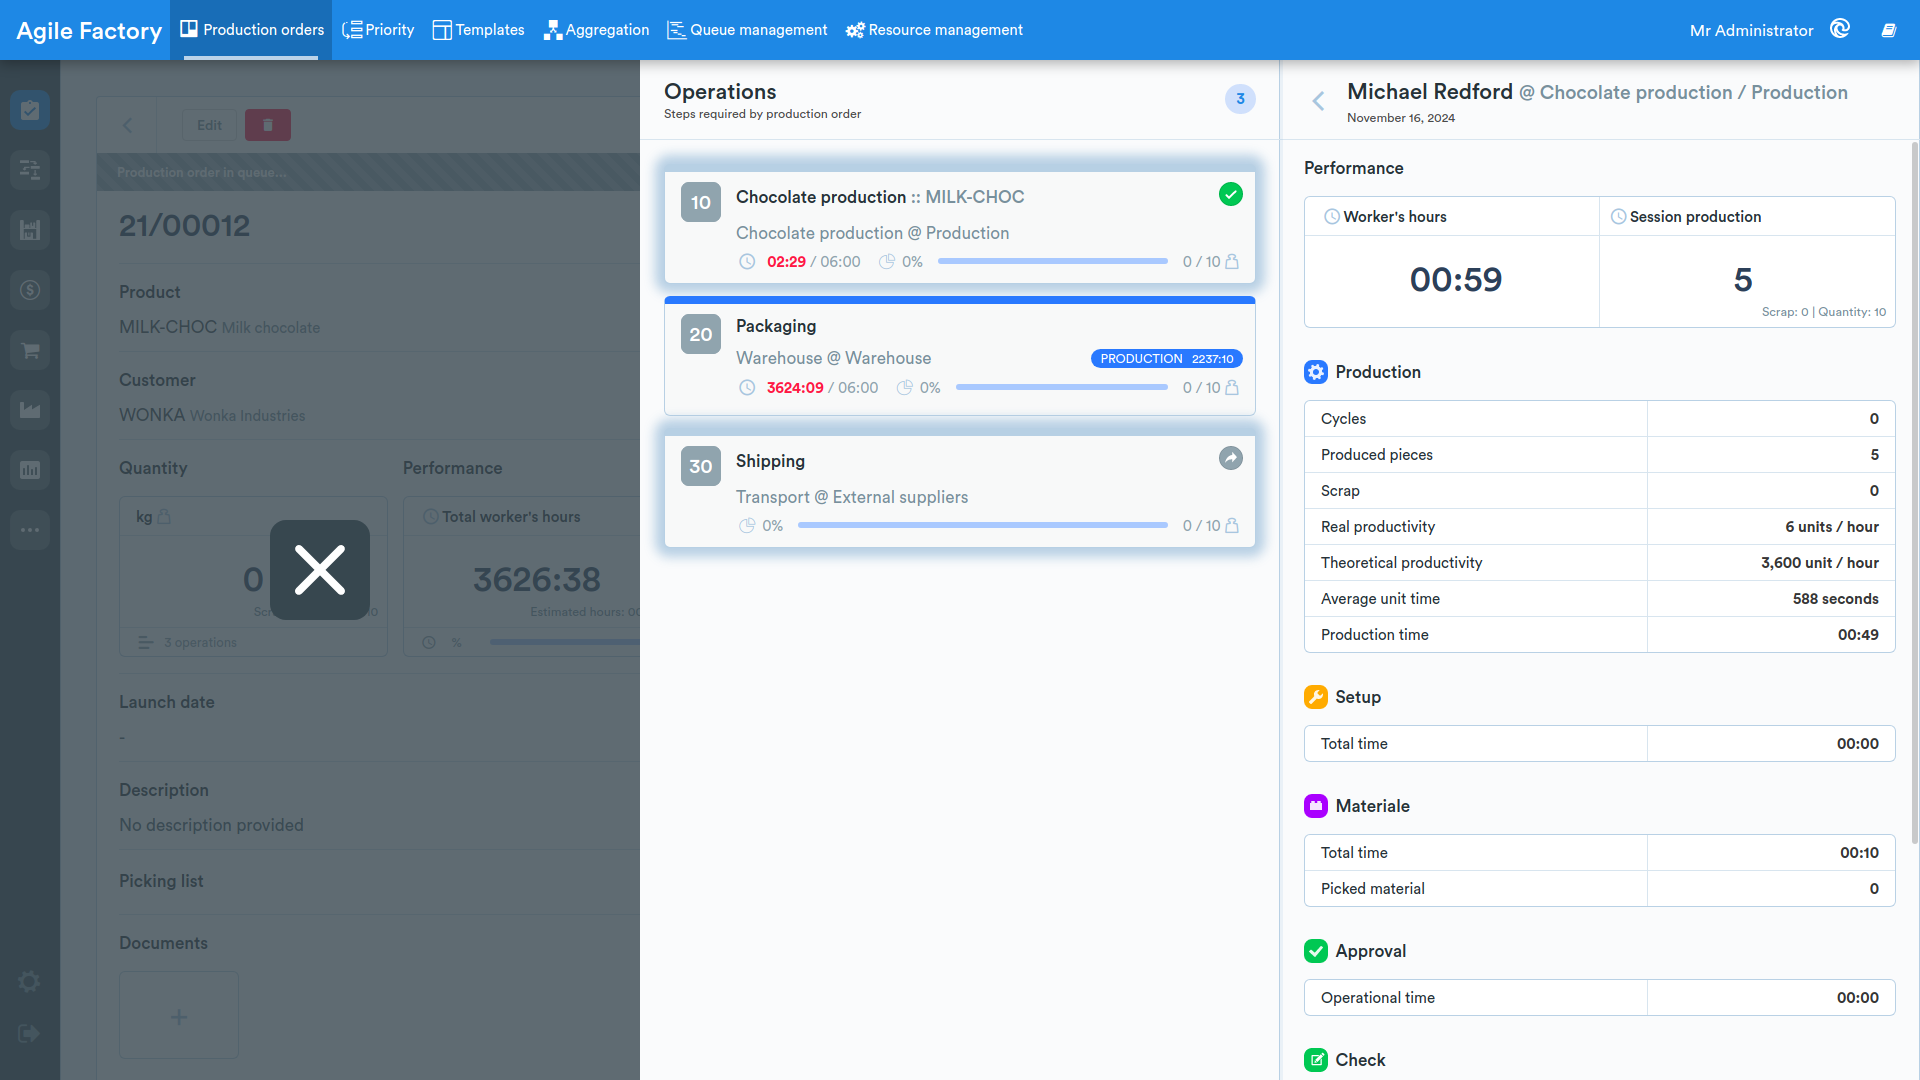
Edit Session Data
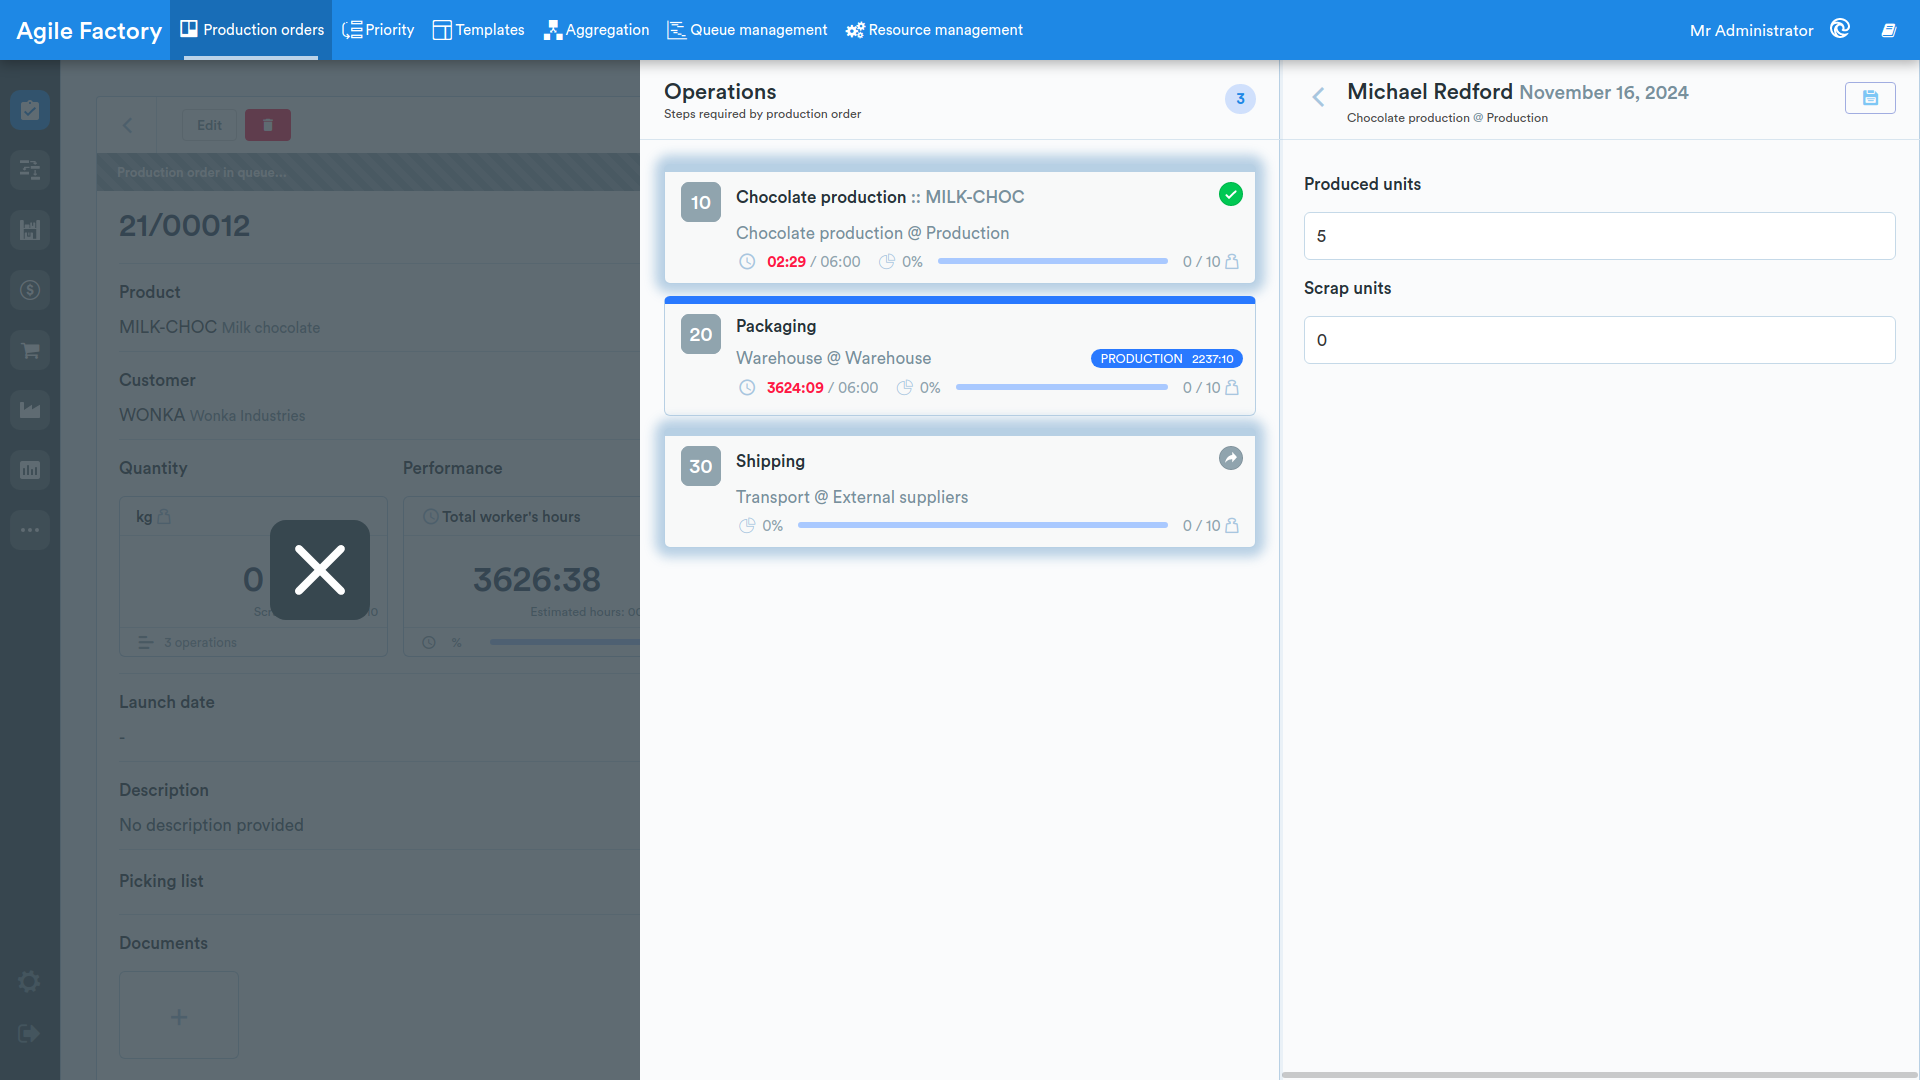
To modify the session data related to:
- material picked
- number of units produced
- quantity of scrap
Click on the pen-shaped edit icon at the top right.
Priority
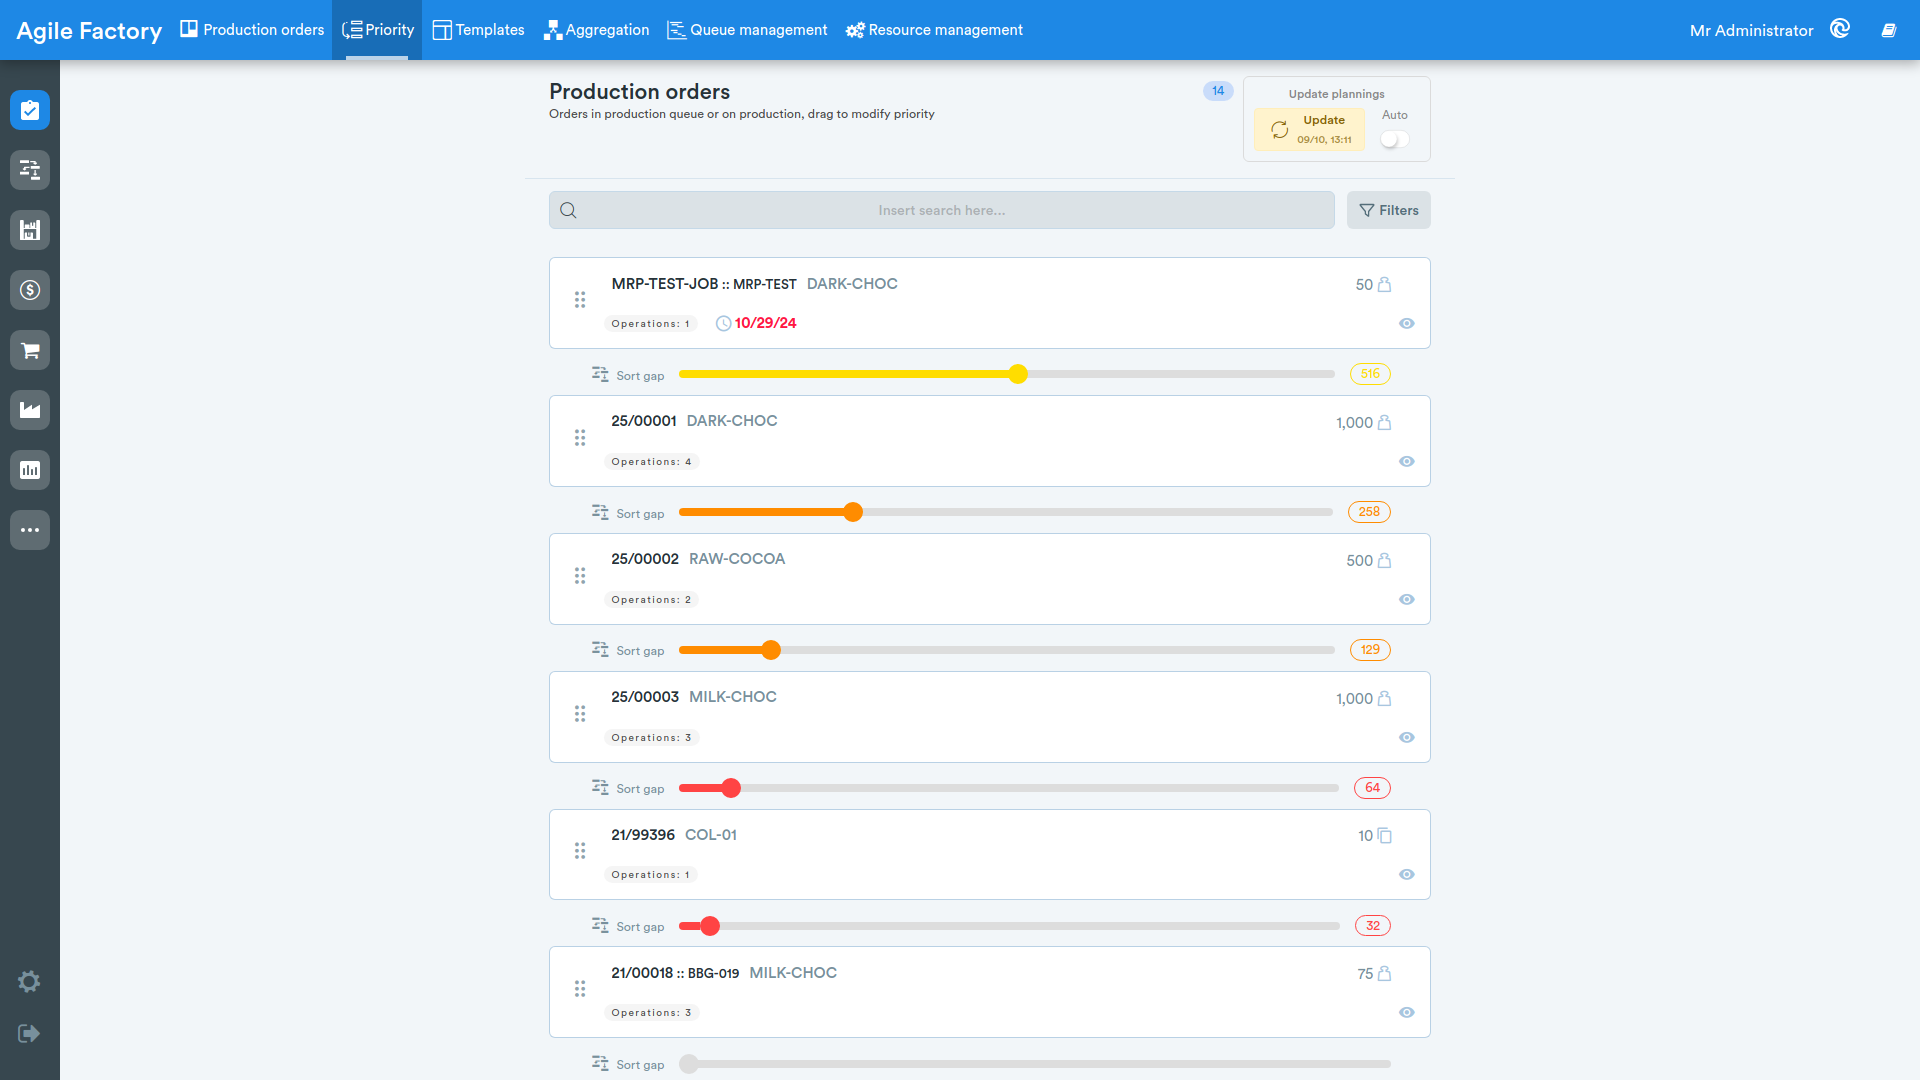
In this module you can manage the priority of the various POs
In this section, production orders in the queue are listed.
You can change their priority by dragging the production order; main details are also displayed.
Templates
In this section, it is possible to manage templates (saved PO templates).
By saving a production order as a template, it can be used again to create other orders.
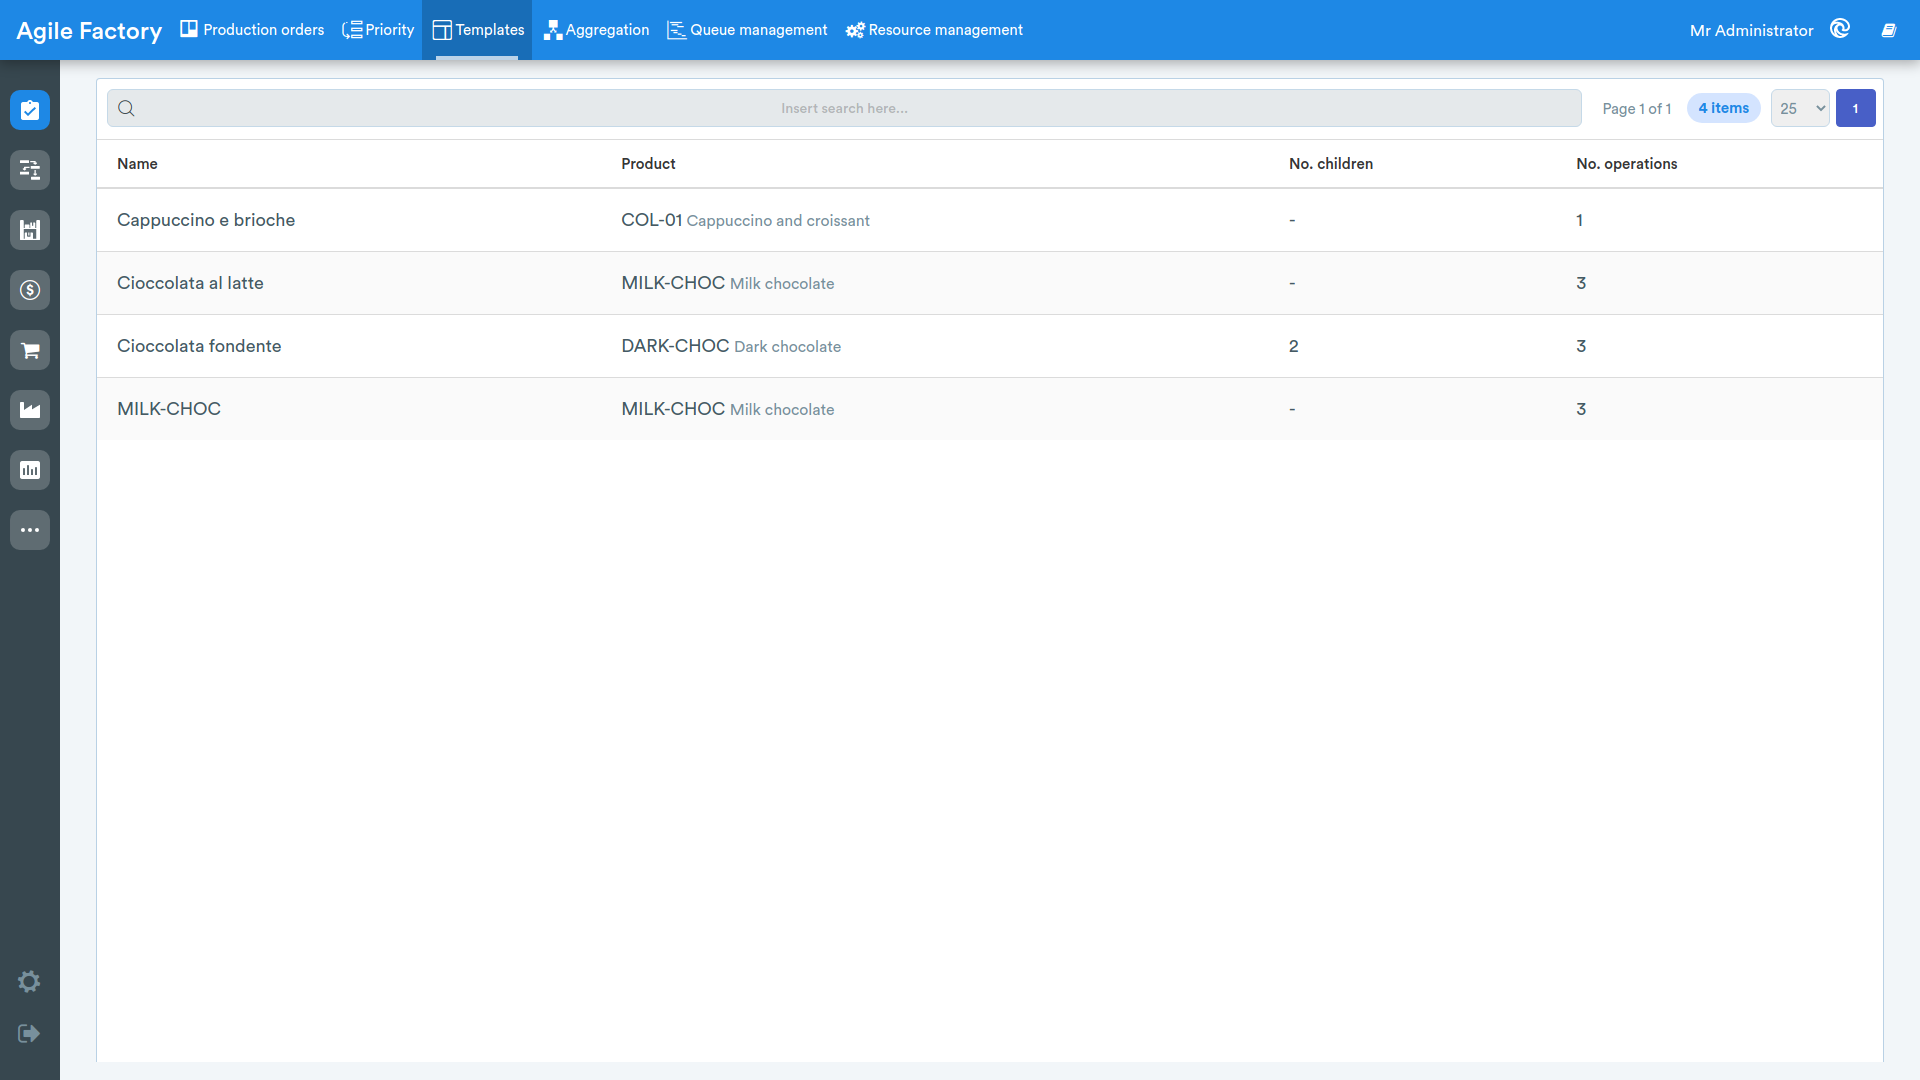
Save Template
Template Details
By clicking on a template, it will be possible to view the information related to the order and its operations.
To delete, click on the trash can; to use the template instead, click the Use template button.
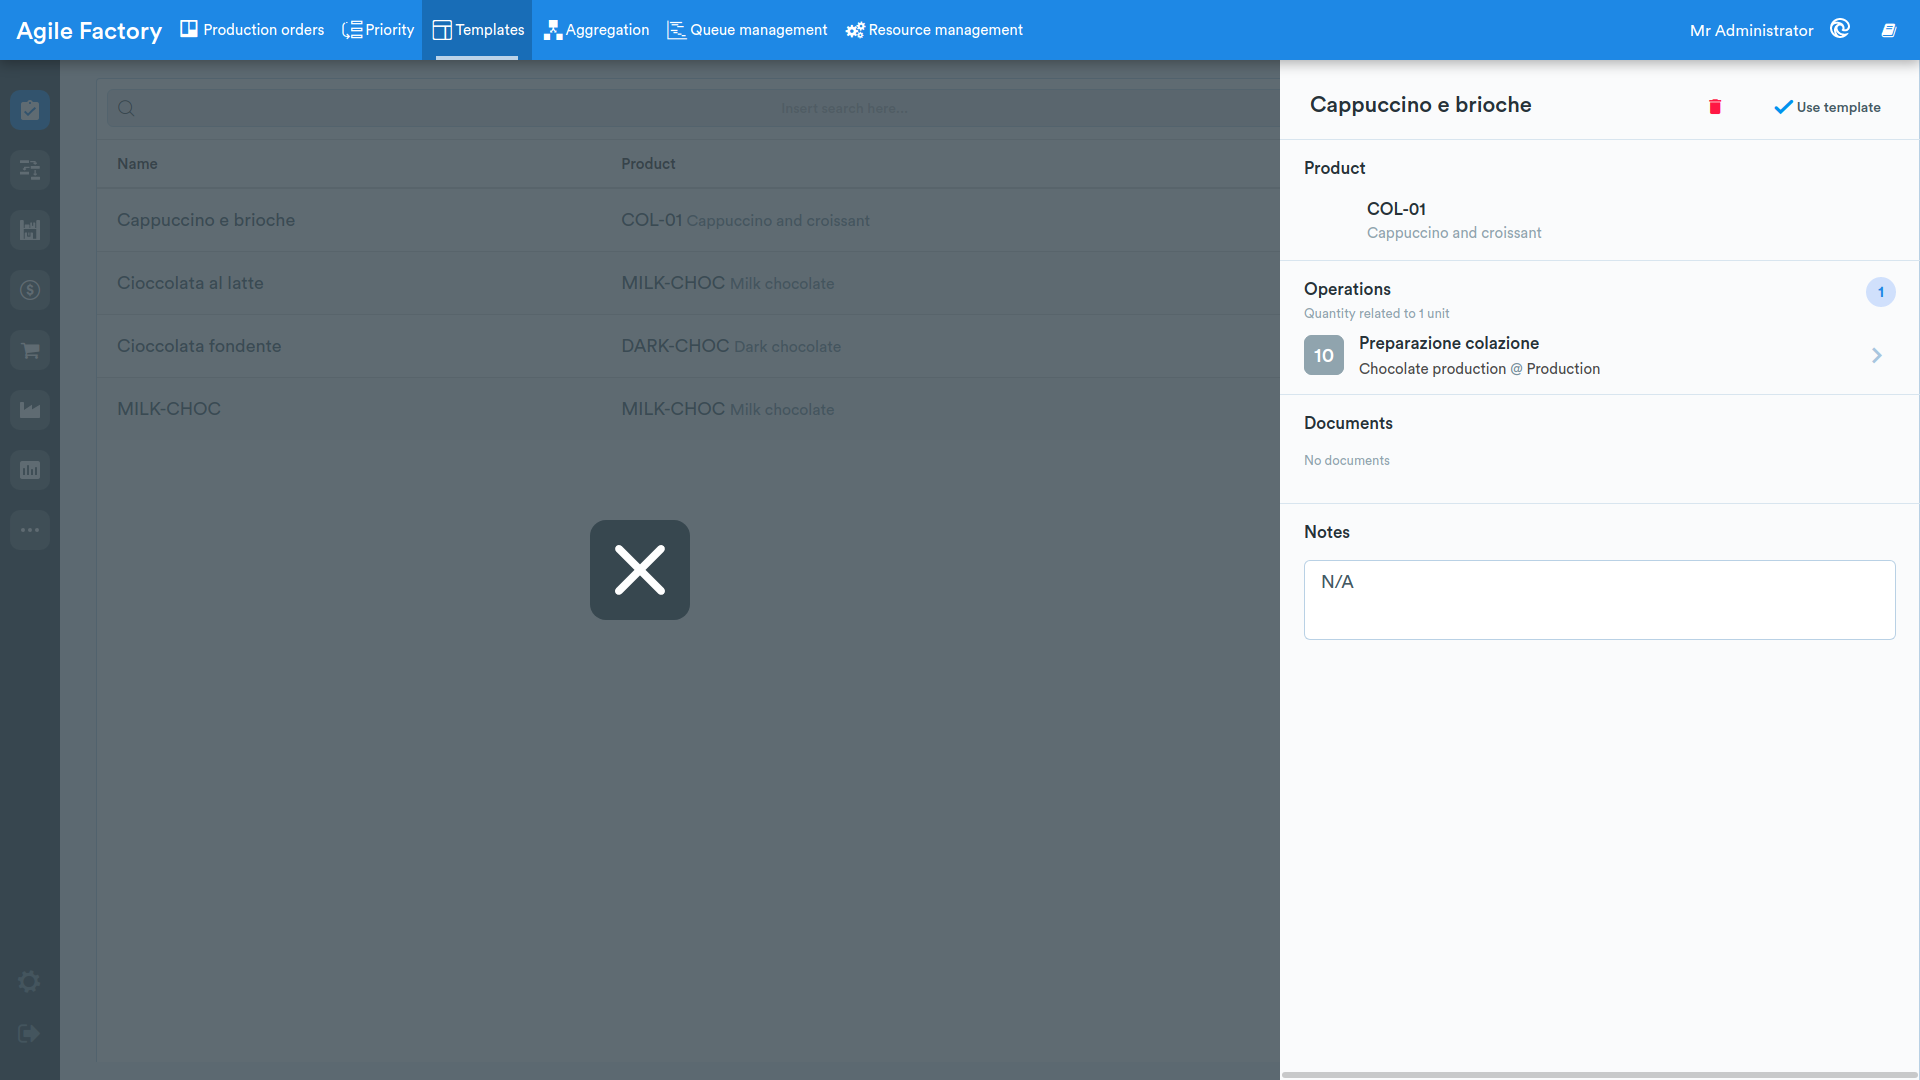
Use Template
Use this functionality to create an order from the template.
Once the Use template button is pressed, you will be asked for:
- order name
- quantity
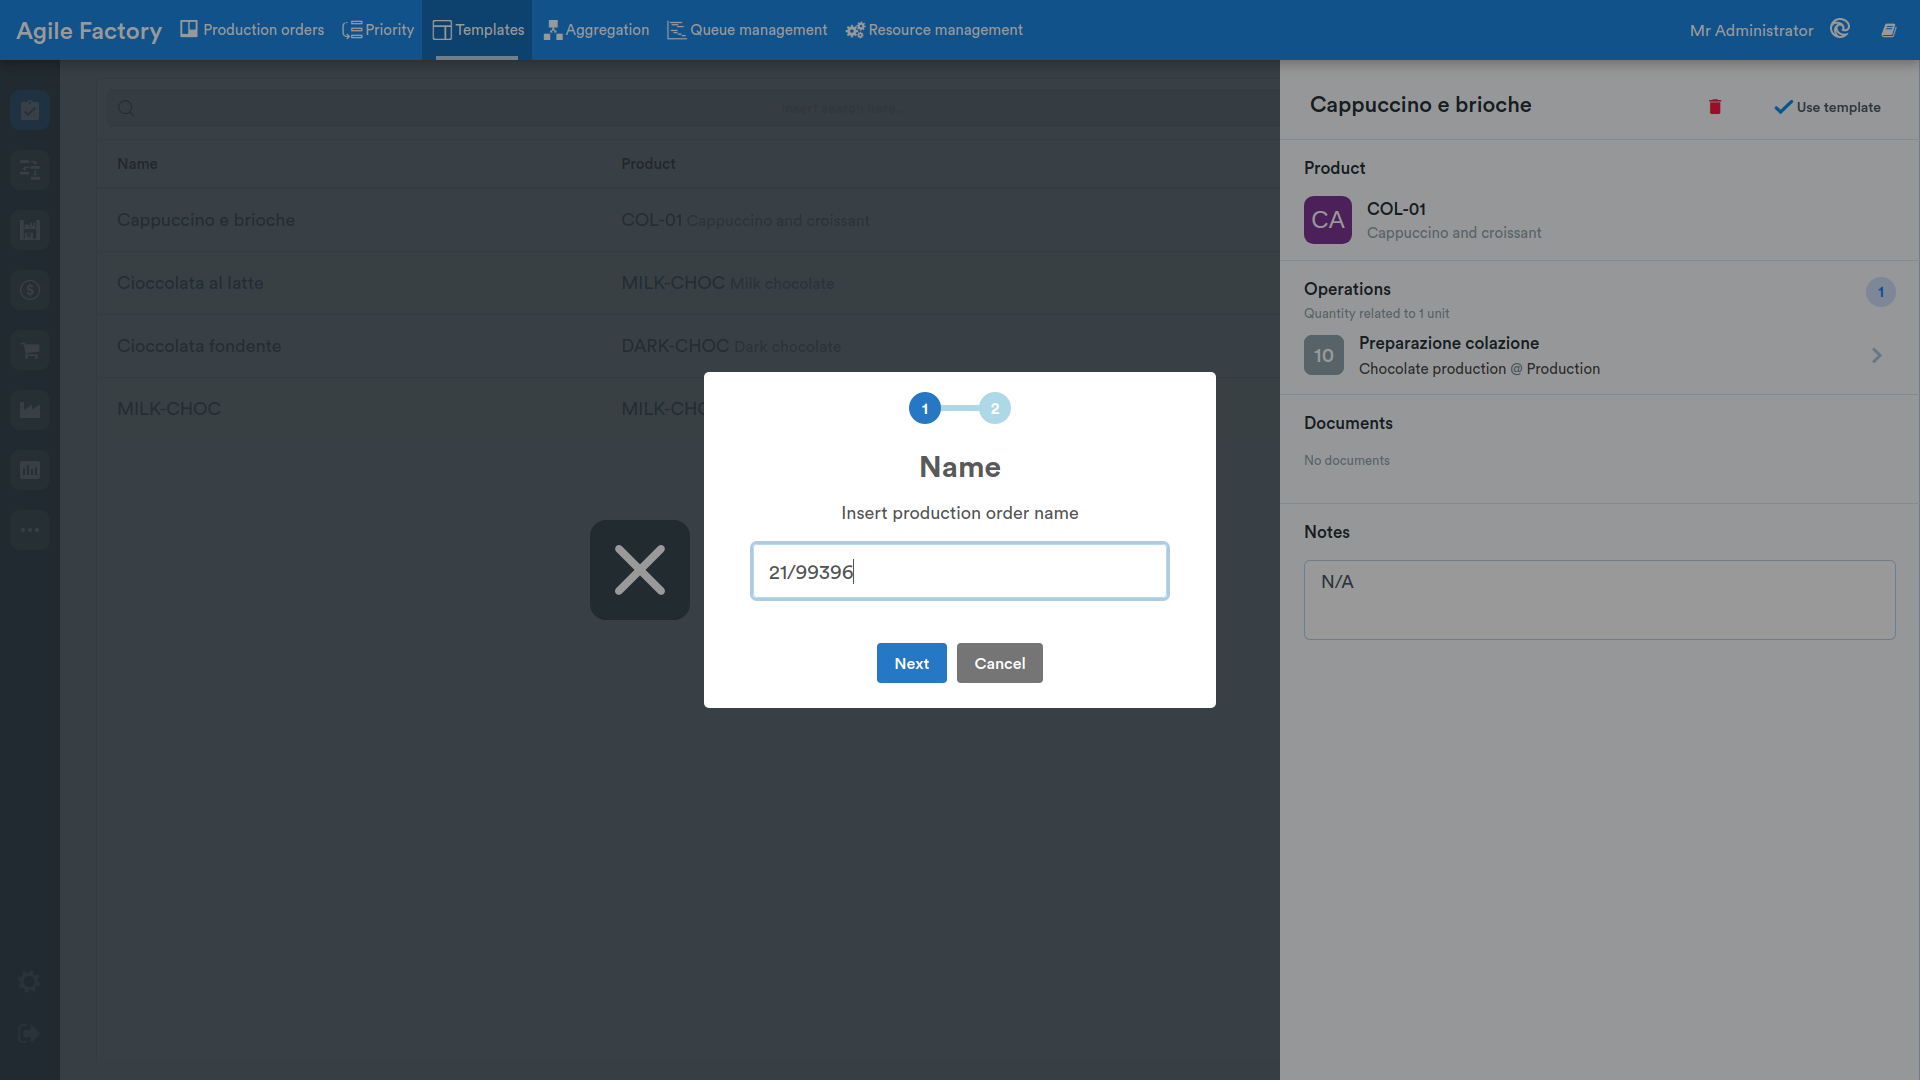
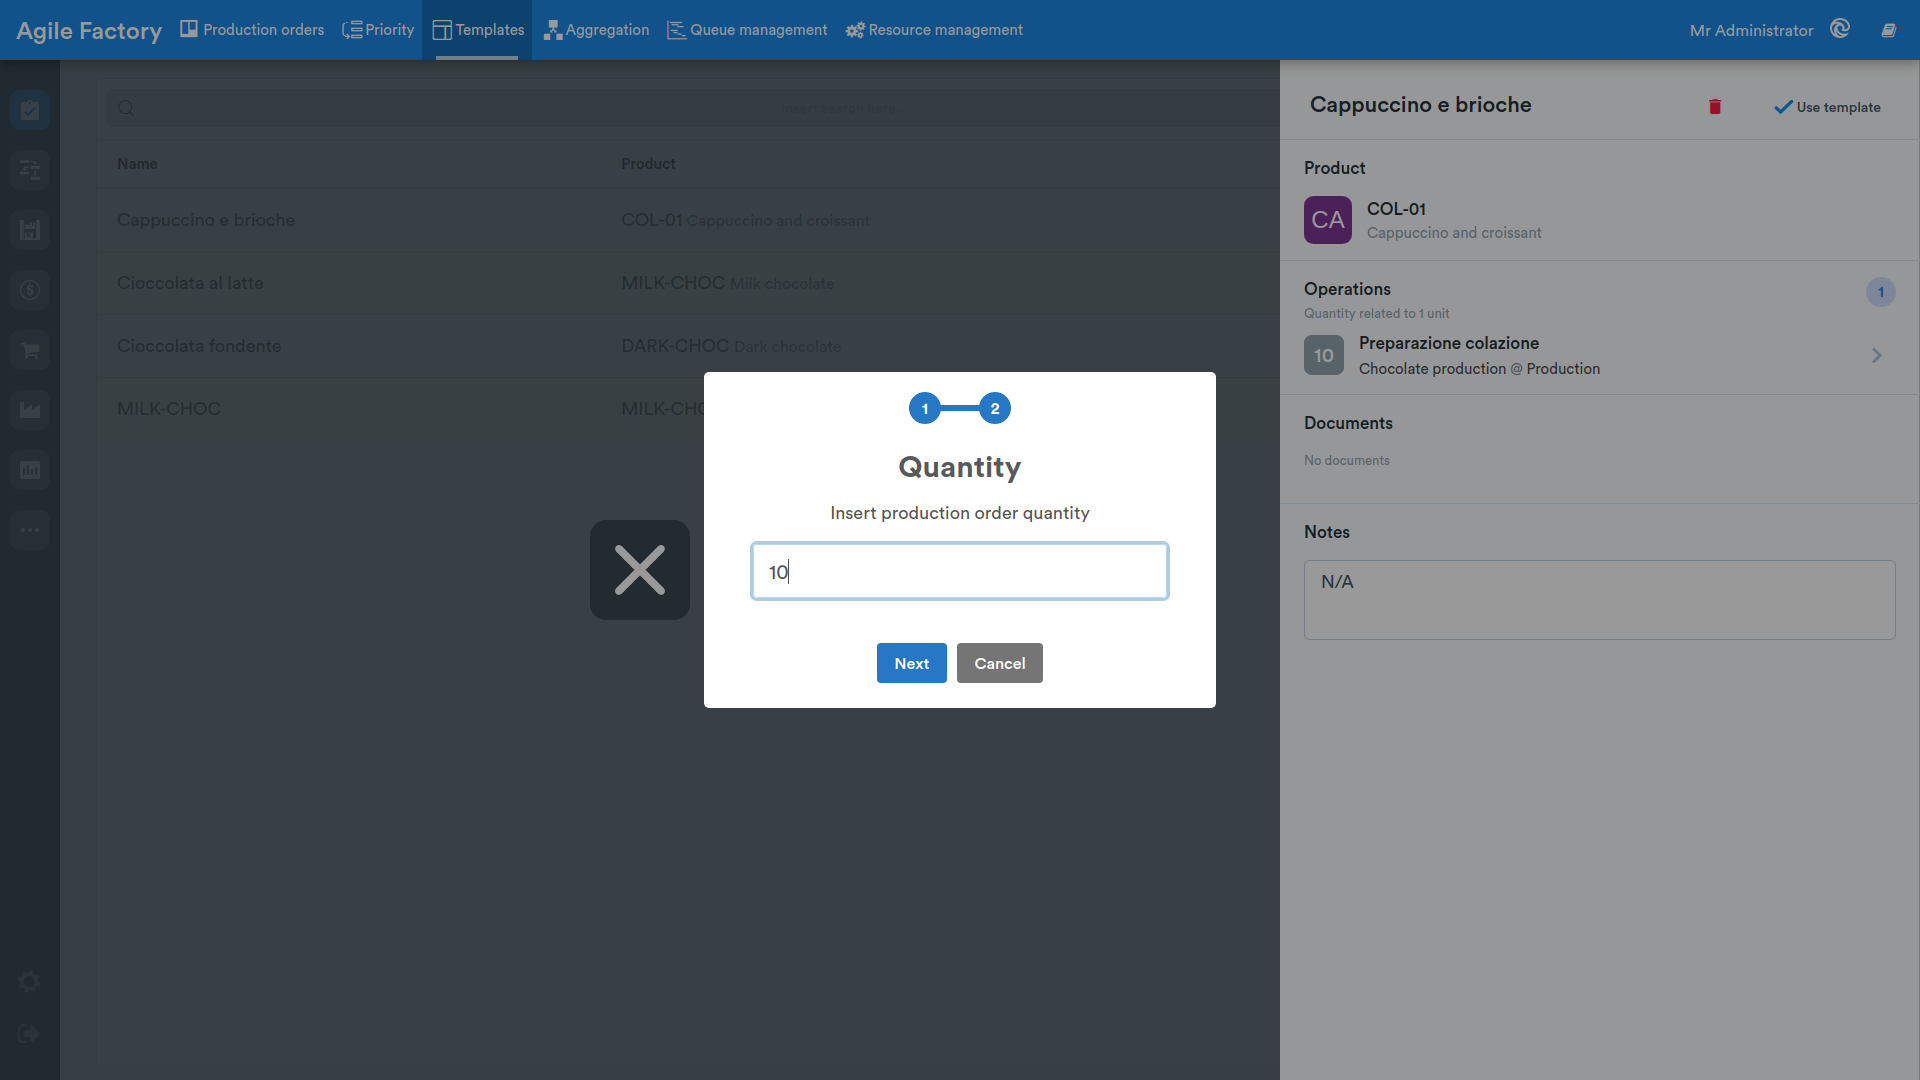
Subsequently, the new production order page will be displayed, having the same configuration and the same operations as the template.
At this point, you can decide to modify or queue the new order.
Aggregation ✨
This functionality allows you to manage the aggregation of different production orders (in whole or in part) created in the Production Orders section. Aggregation is an additional tool that allows you to minimize individual production tasks, optimize production and work with the HMI operator interface.
Main View
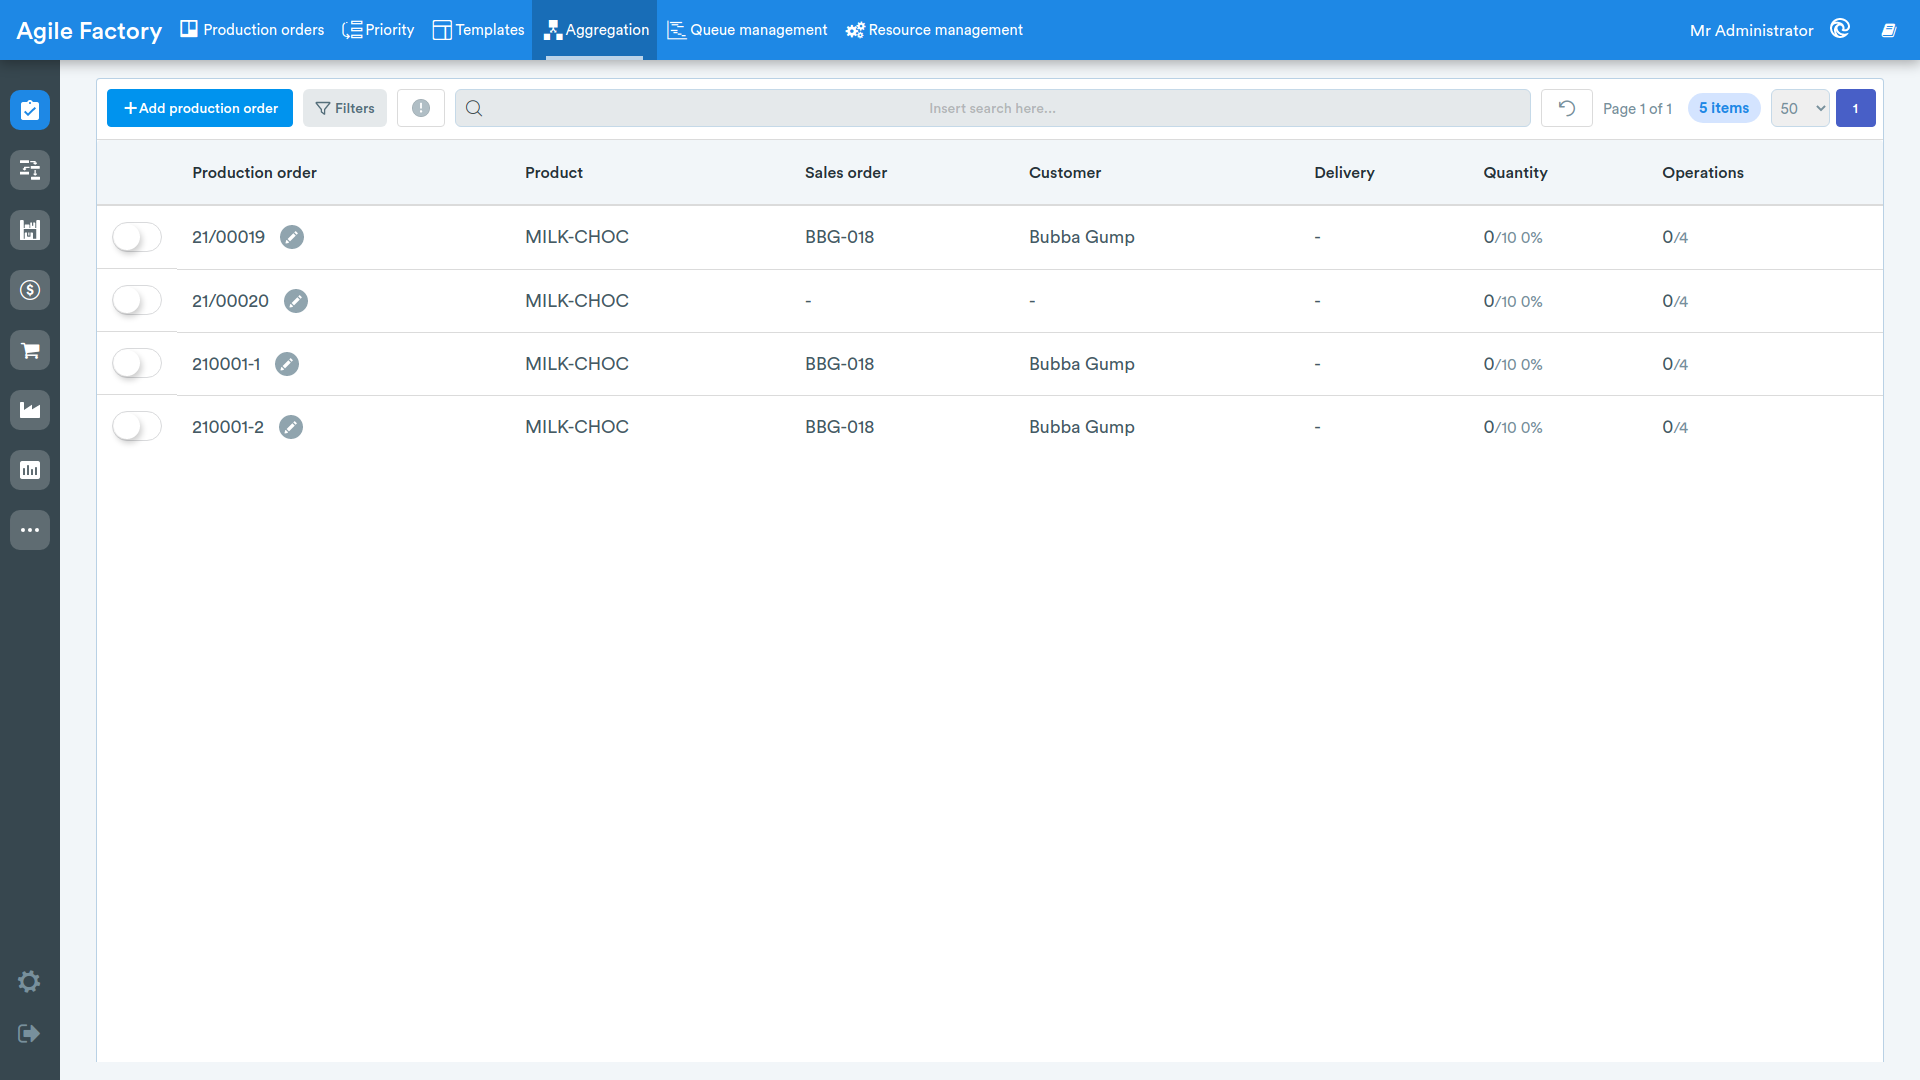
This screen displays the orders present in the system in the definition phase and those already aggregated. The information content is substantially similar to that of the Production Orders section.
Add Aggregated Order
To create an aggregated order for the necessary number of separately created orders, select the production orders to be aggregated using the corresponding buttons on the left.
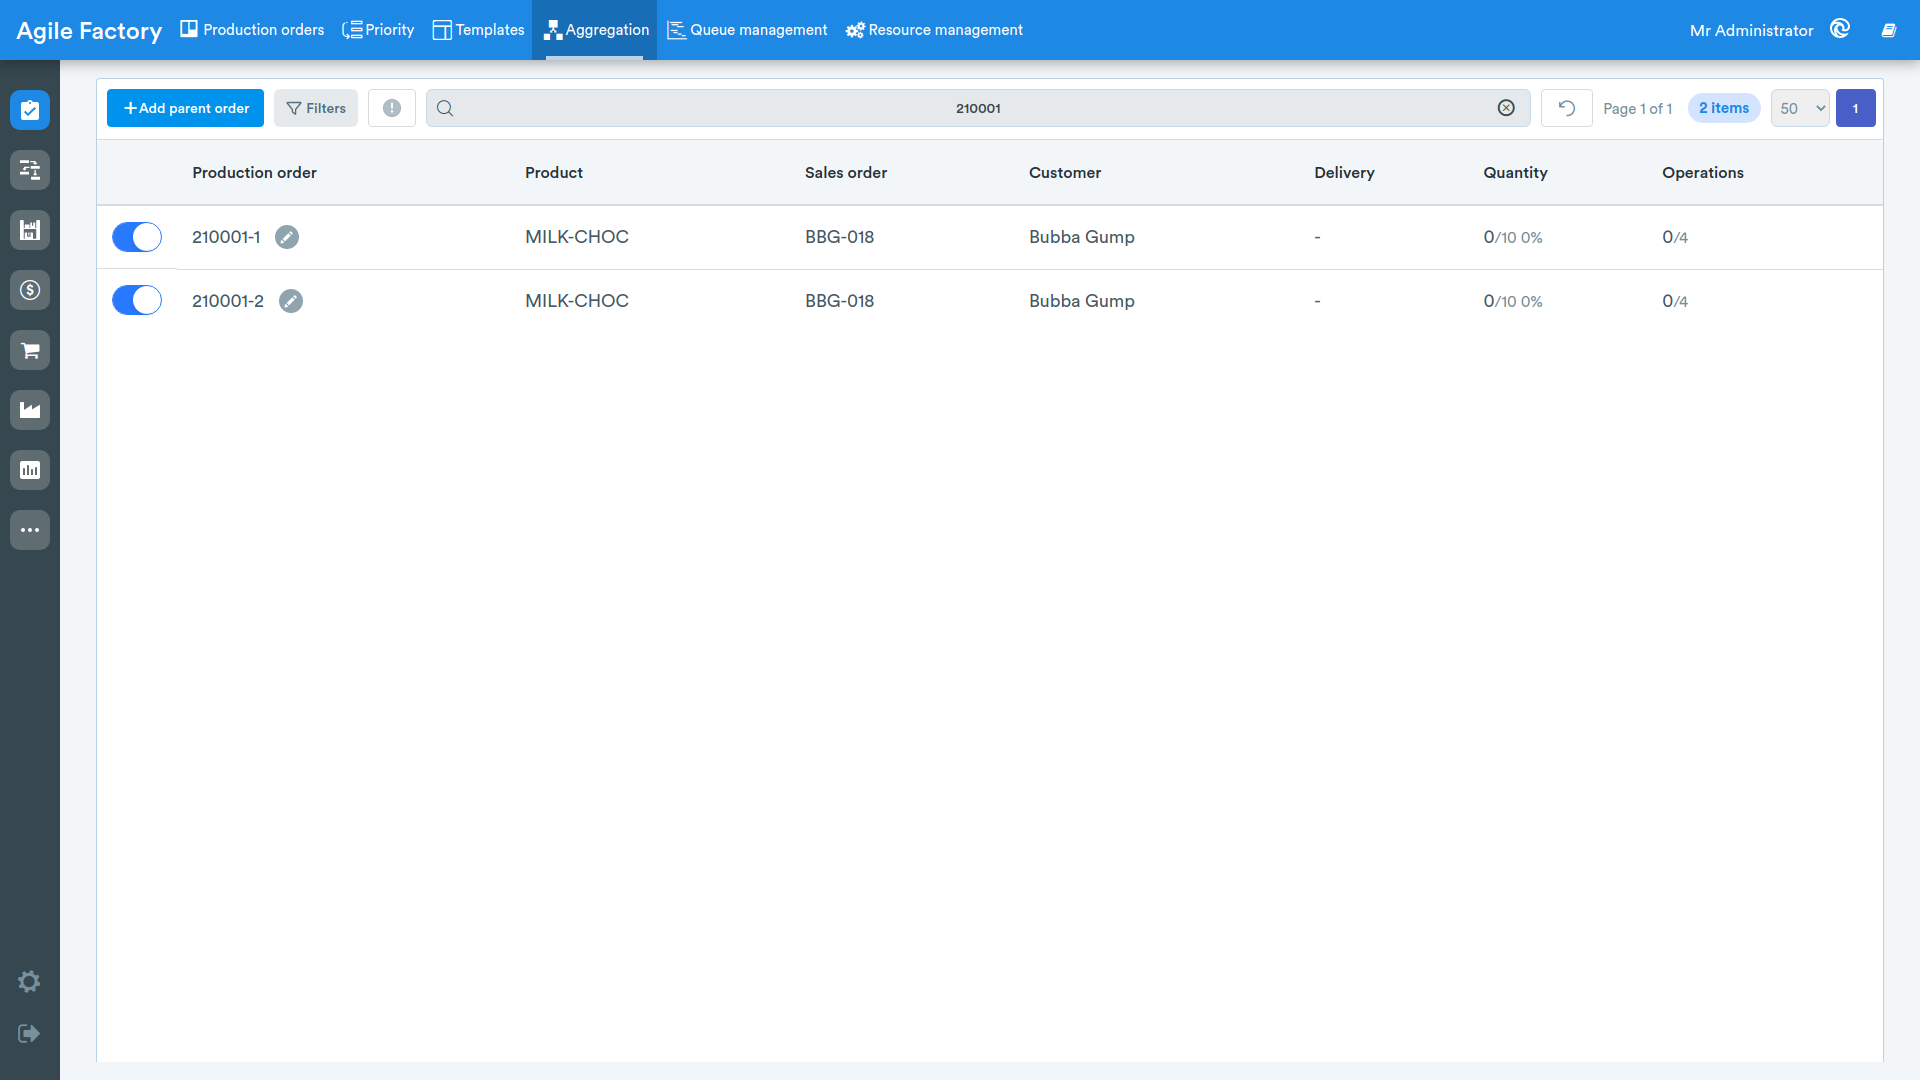
After selecting the orders to aggregate, click on the + Create parent order button. The screen will switch to the aggregated production order creation mode.
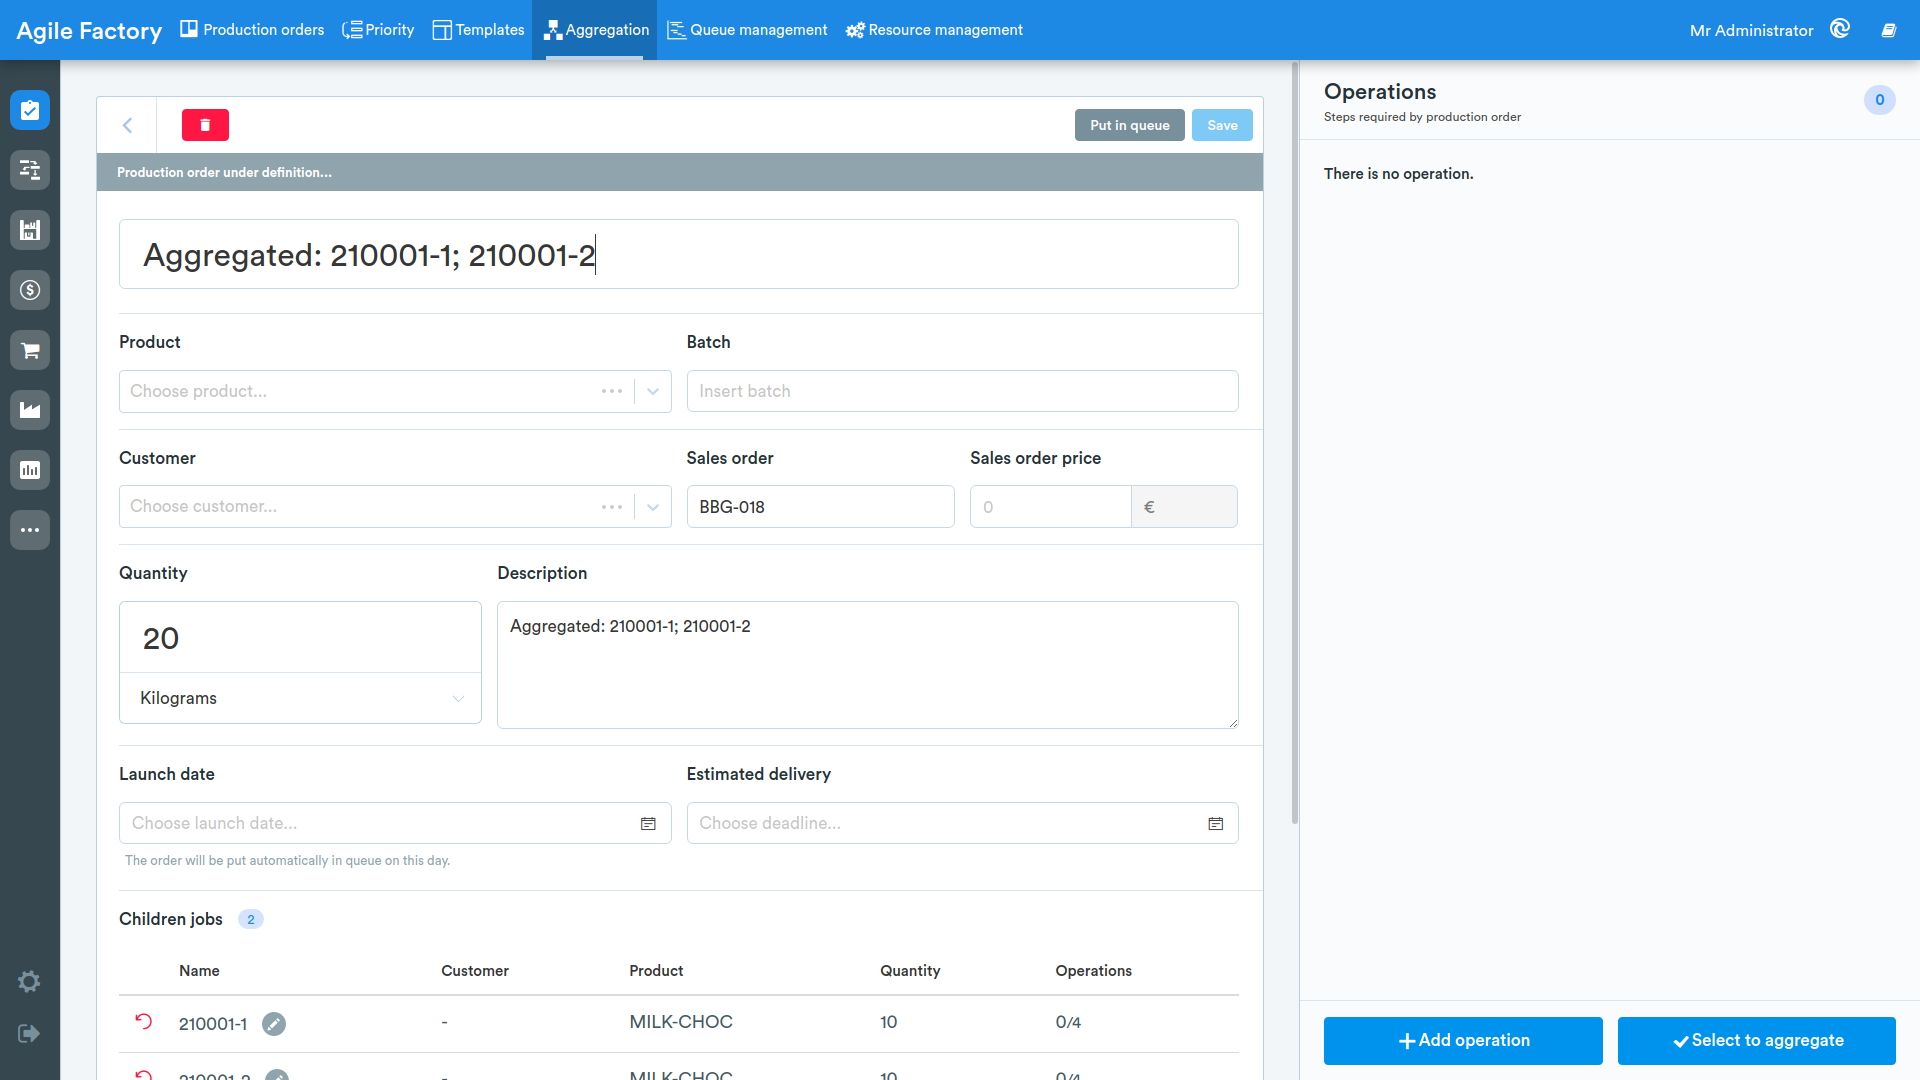
The fields related to the product name and customer for the aggregated order are not mandatory and remain empty if they are not common among the original orders. As with normal production orders, the following fields are available to fill in:
- PO name (the system automatically proposes a name composed of the names of the original orders)
- sales order: sales order name
- batch: if it exists
- delivery: delivery date
- execution date: if the order must be shipped on a specific day
- quantity (the system automatically proposes the sum from the original orders)
At the bottom of the production order is the list of initial orders aggregated in this main order, as well as the aggregated list of materials automatically compiled by the system based on the material lists of the child orders.
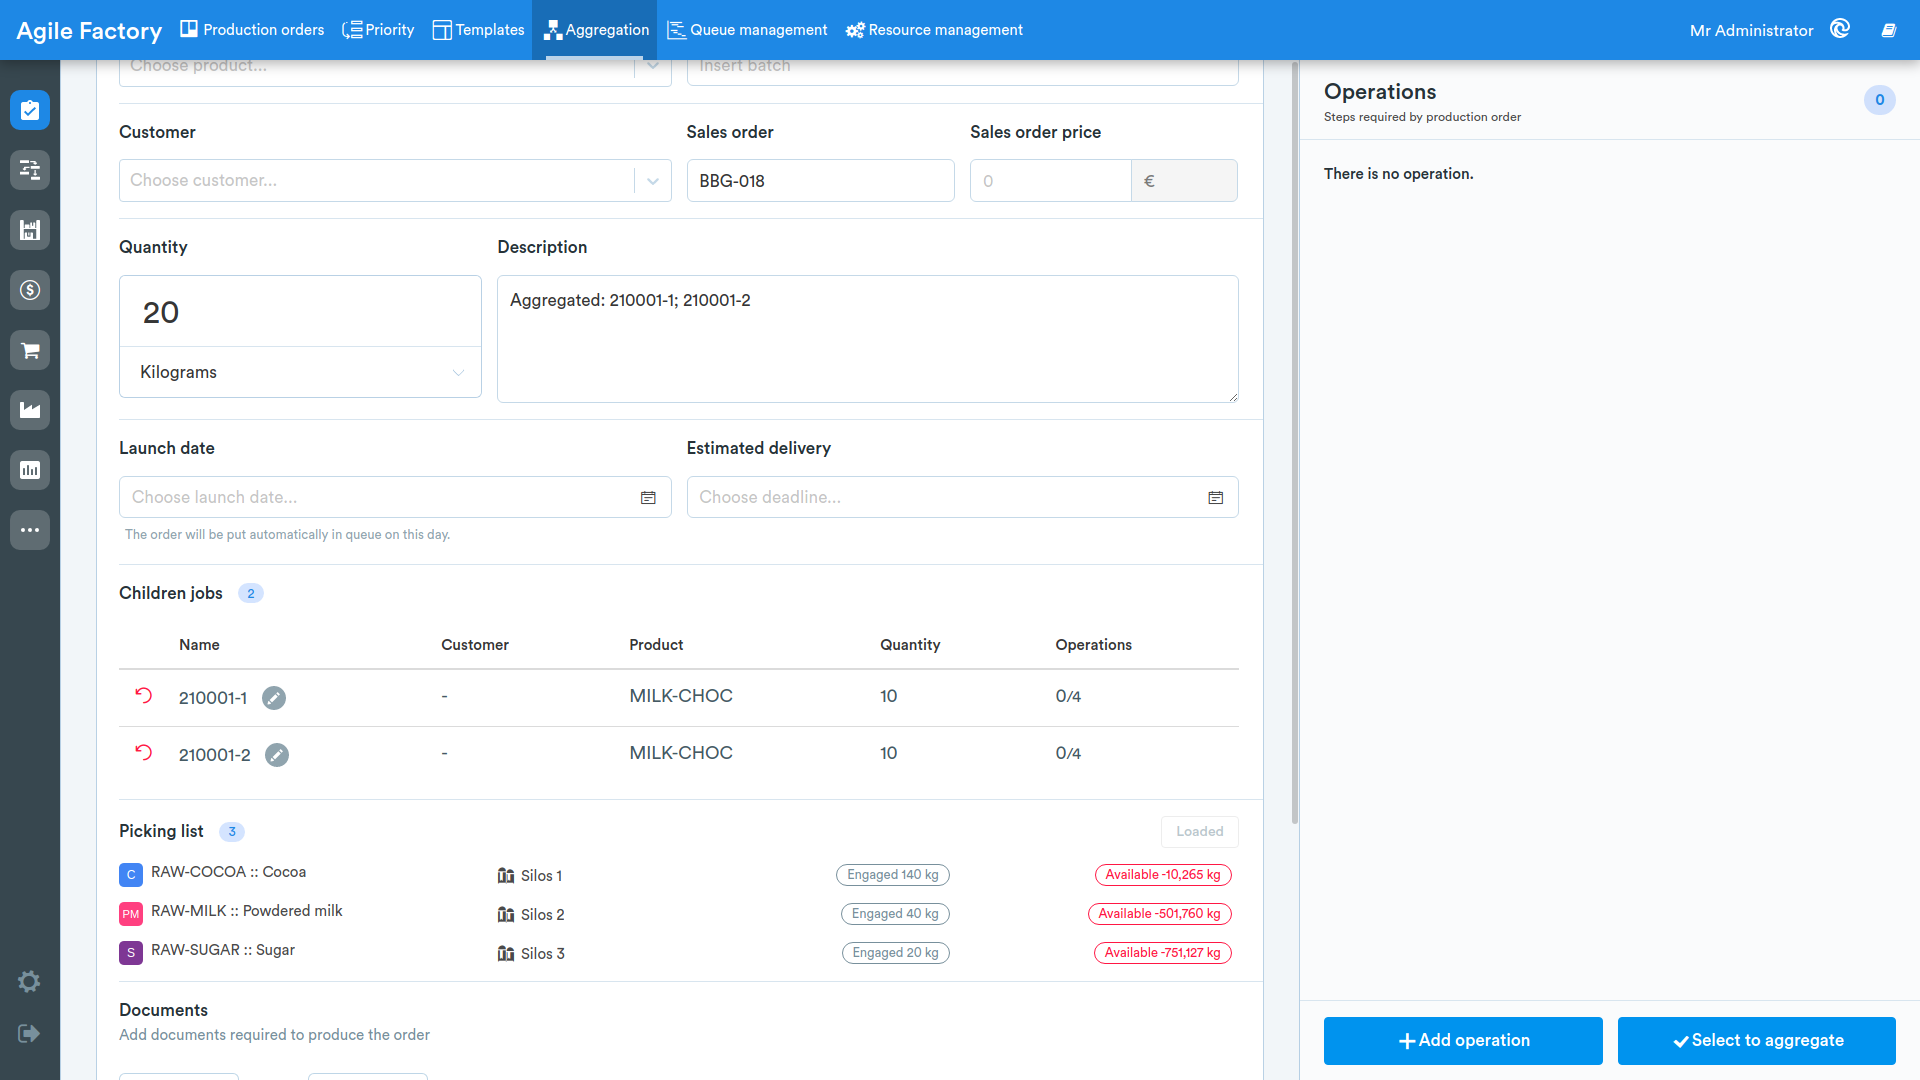
If after creating an aggregated order, changes/additions have been made to the order's main information, to continue it is necessary to save the order using the Save button.
After saving the changes or immediately after aggregation, it is possible to proceed to the selection of operations that will be assigned to this aggregated order, here there are two possibilities.
Add Operations
Using the + Add operation button, it is possible to add in free mode, equal to the Production Orders flow, operations for an aggregated order, which will subsequently be common for the child orders.
Operation Aggregation
This function allows the user to simplify the configuration of technological operations for an aggregated order, using the initial list of operations configured for the child orders.
Using the Select to aggregate button, the operation selection menu from the list is displayed.
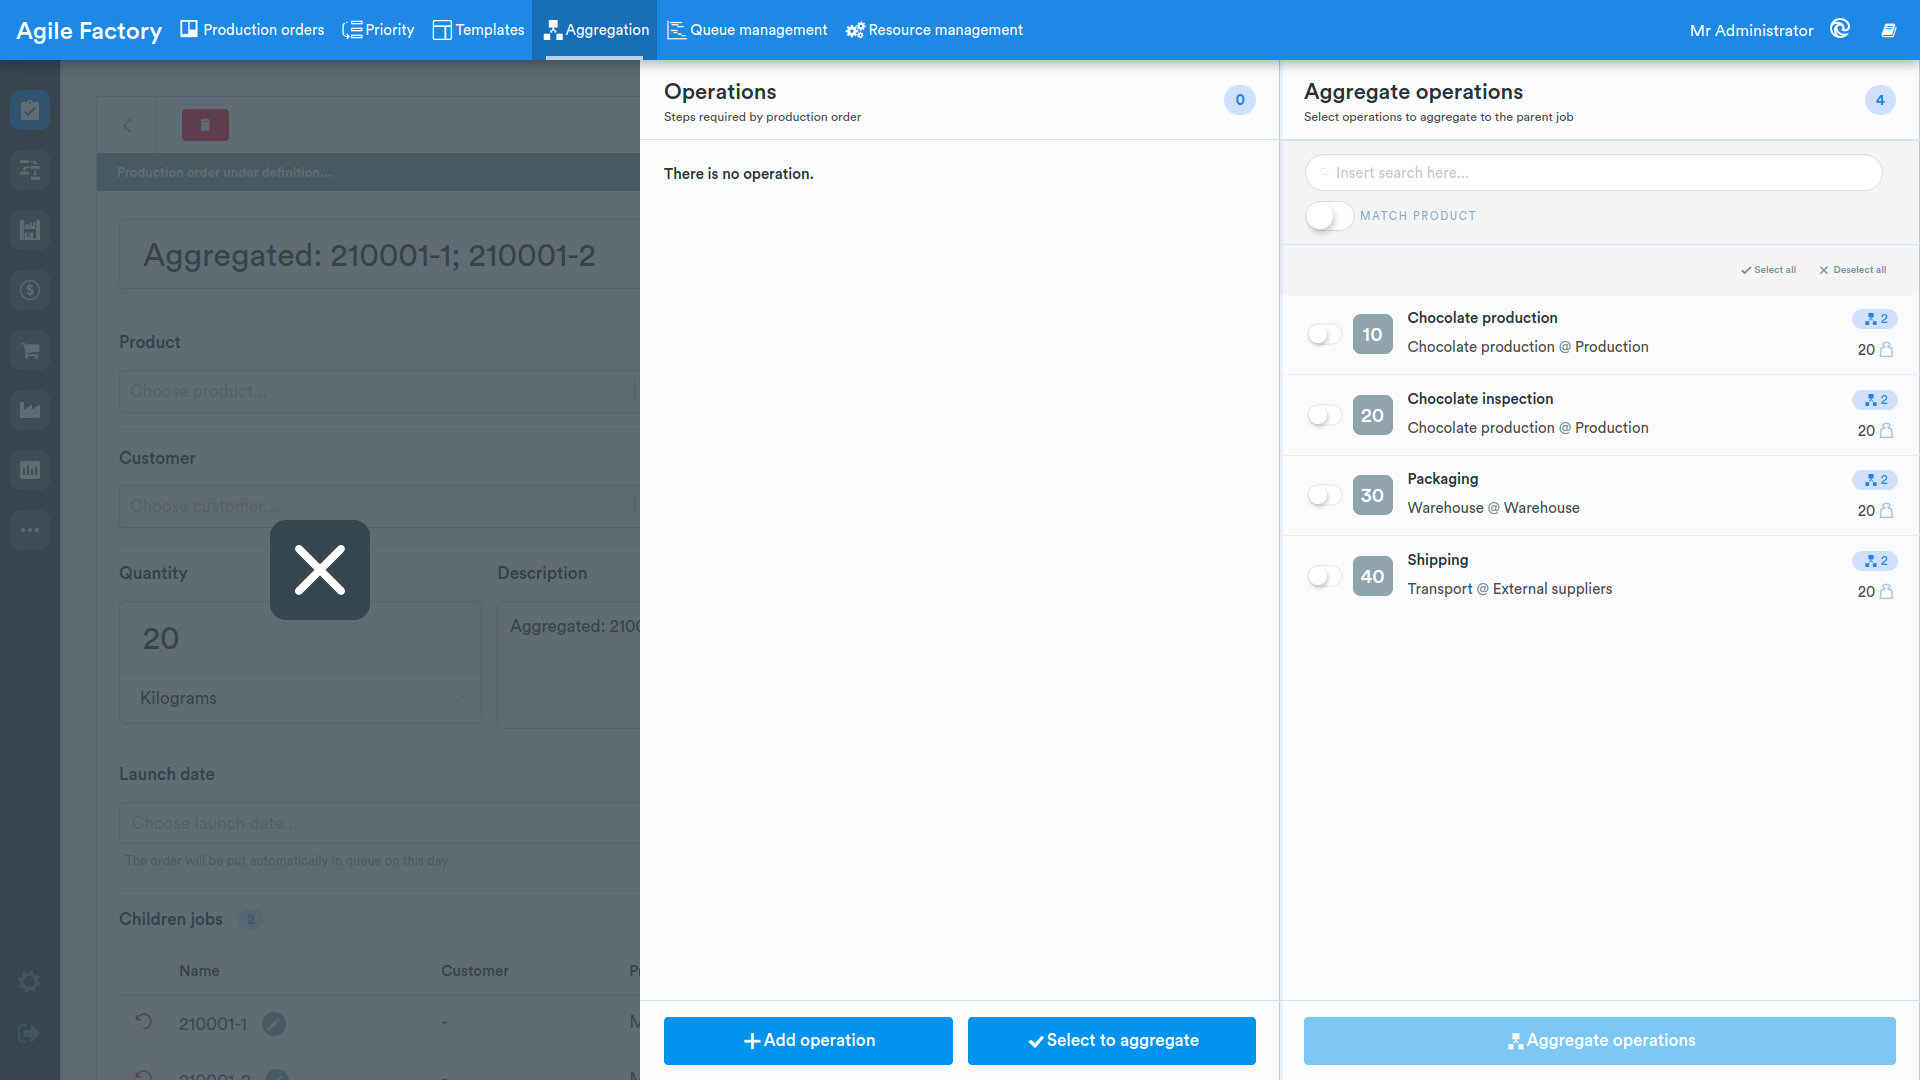
The system automatically sums the number of operations common to the child orders, without taking into account the operation products.
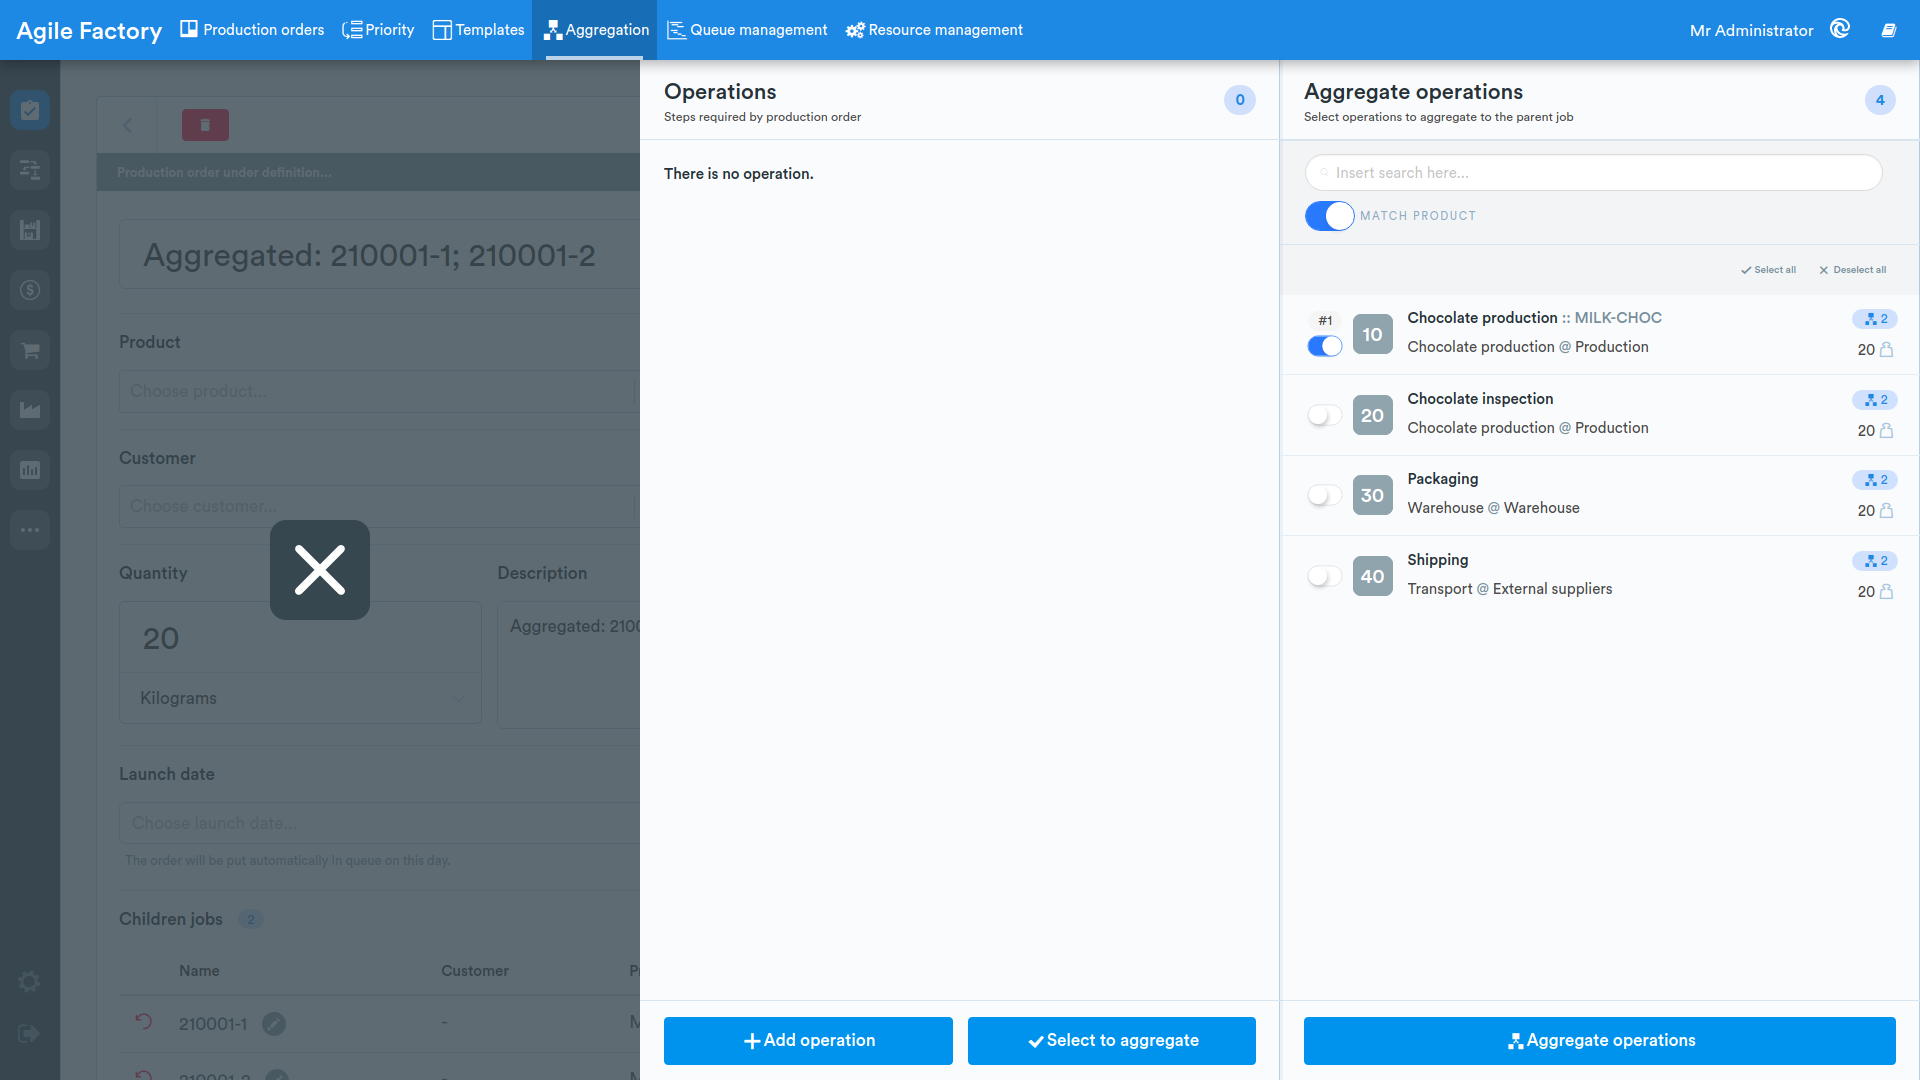
When selecting the operations to aggregate, the system shows the user the execution order, which is determined by the selection order of the operations to aggregate (#1, #2...). The list of operations for aggregations can be filtered using the search bar, or you can use the Match product button, necessary to search only for operations with identical products.
After selecting the operations to aggregate using the Aggregate operations button, it is possible to perform the aggregation. The selected operations are transferred to the central part of the screen and become common for the initial child orders. The system automatically aggregates the indicators specified in the initial operations in terms of quantity, bill of materials and execution times.
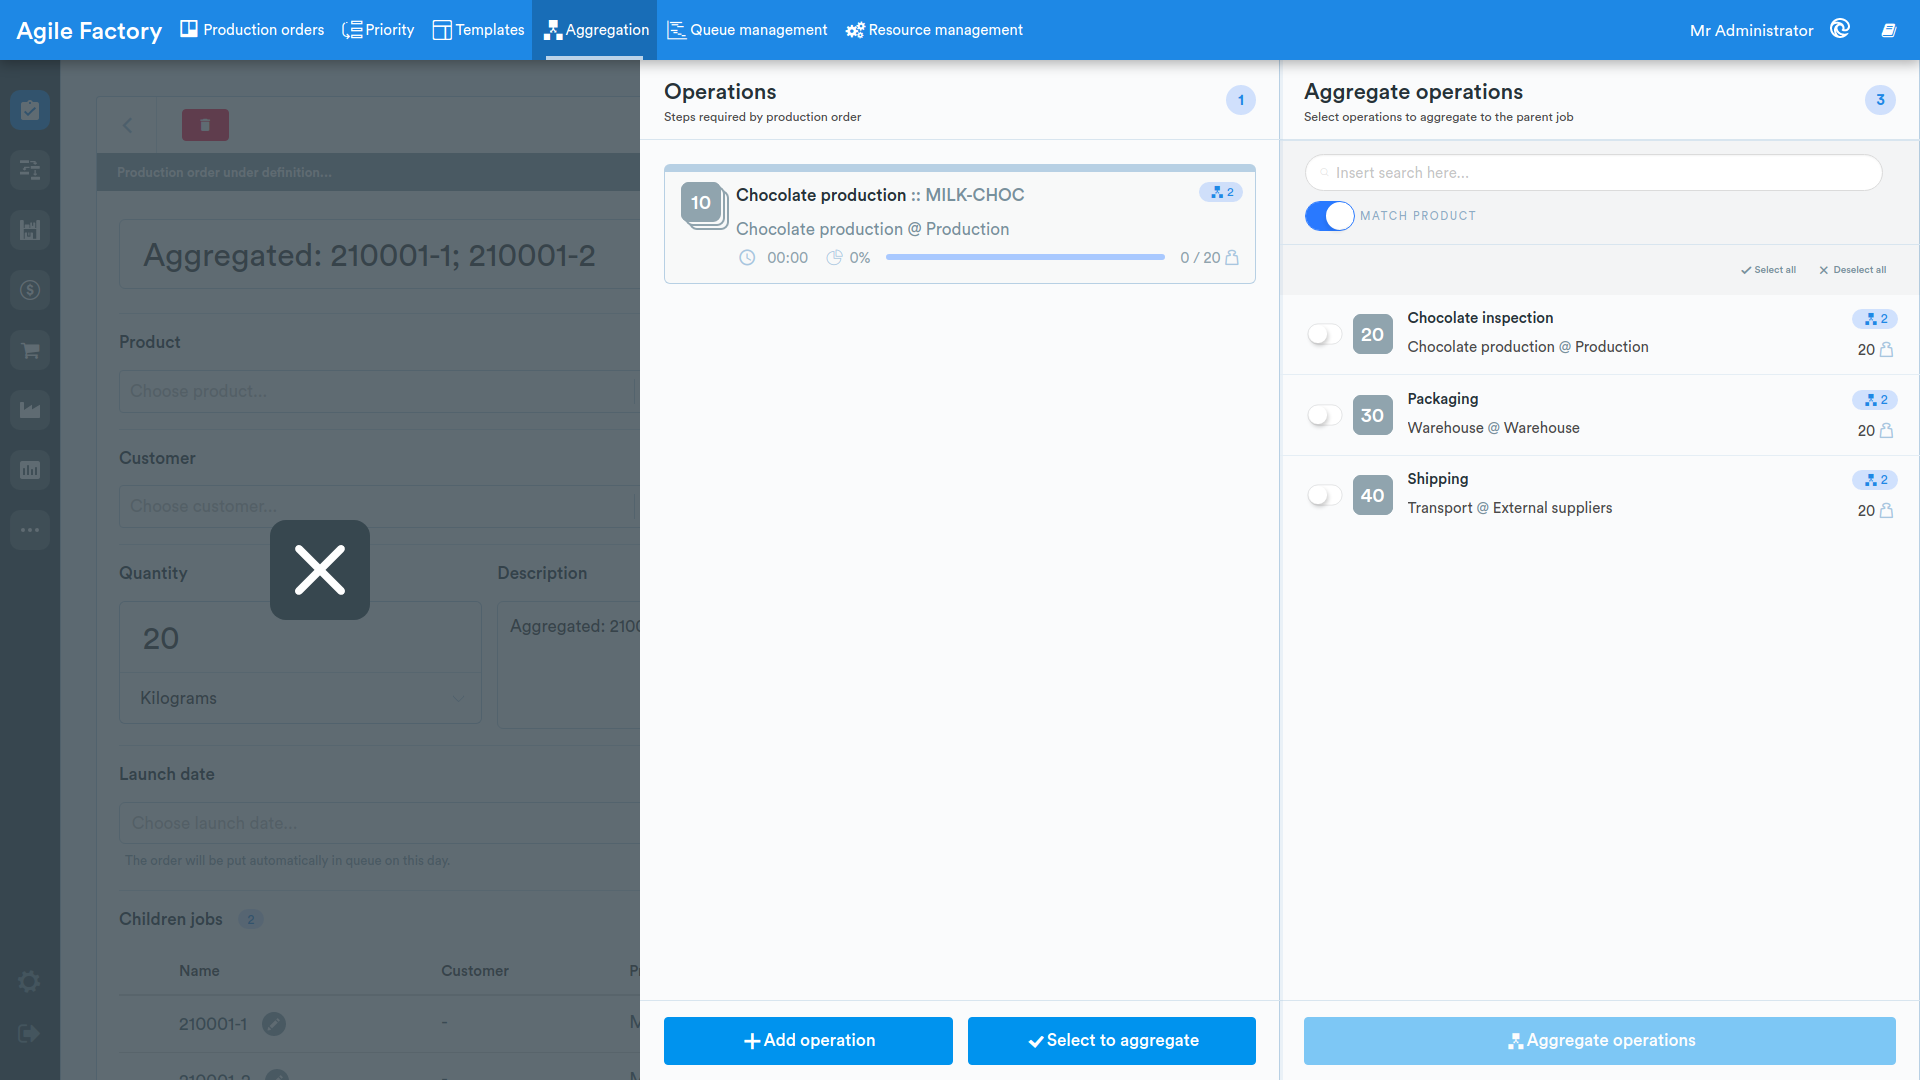
After completing the necessary aggregation of production orders. It is possible to send the aggregated order to the production queue, while the original orders will also be sent to the queue, including operations that were not part of the aggregation.
For user convenience, the aggregated operations icon is different from that of normal operations (10, 20). In the advanced operation settings, it is possible to view the details of the aggregation planned for the aggregated order.
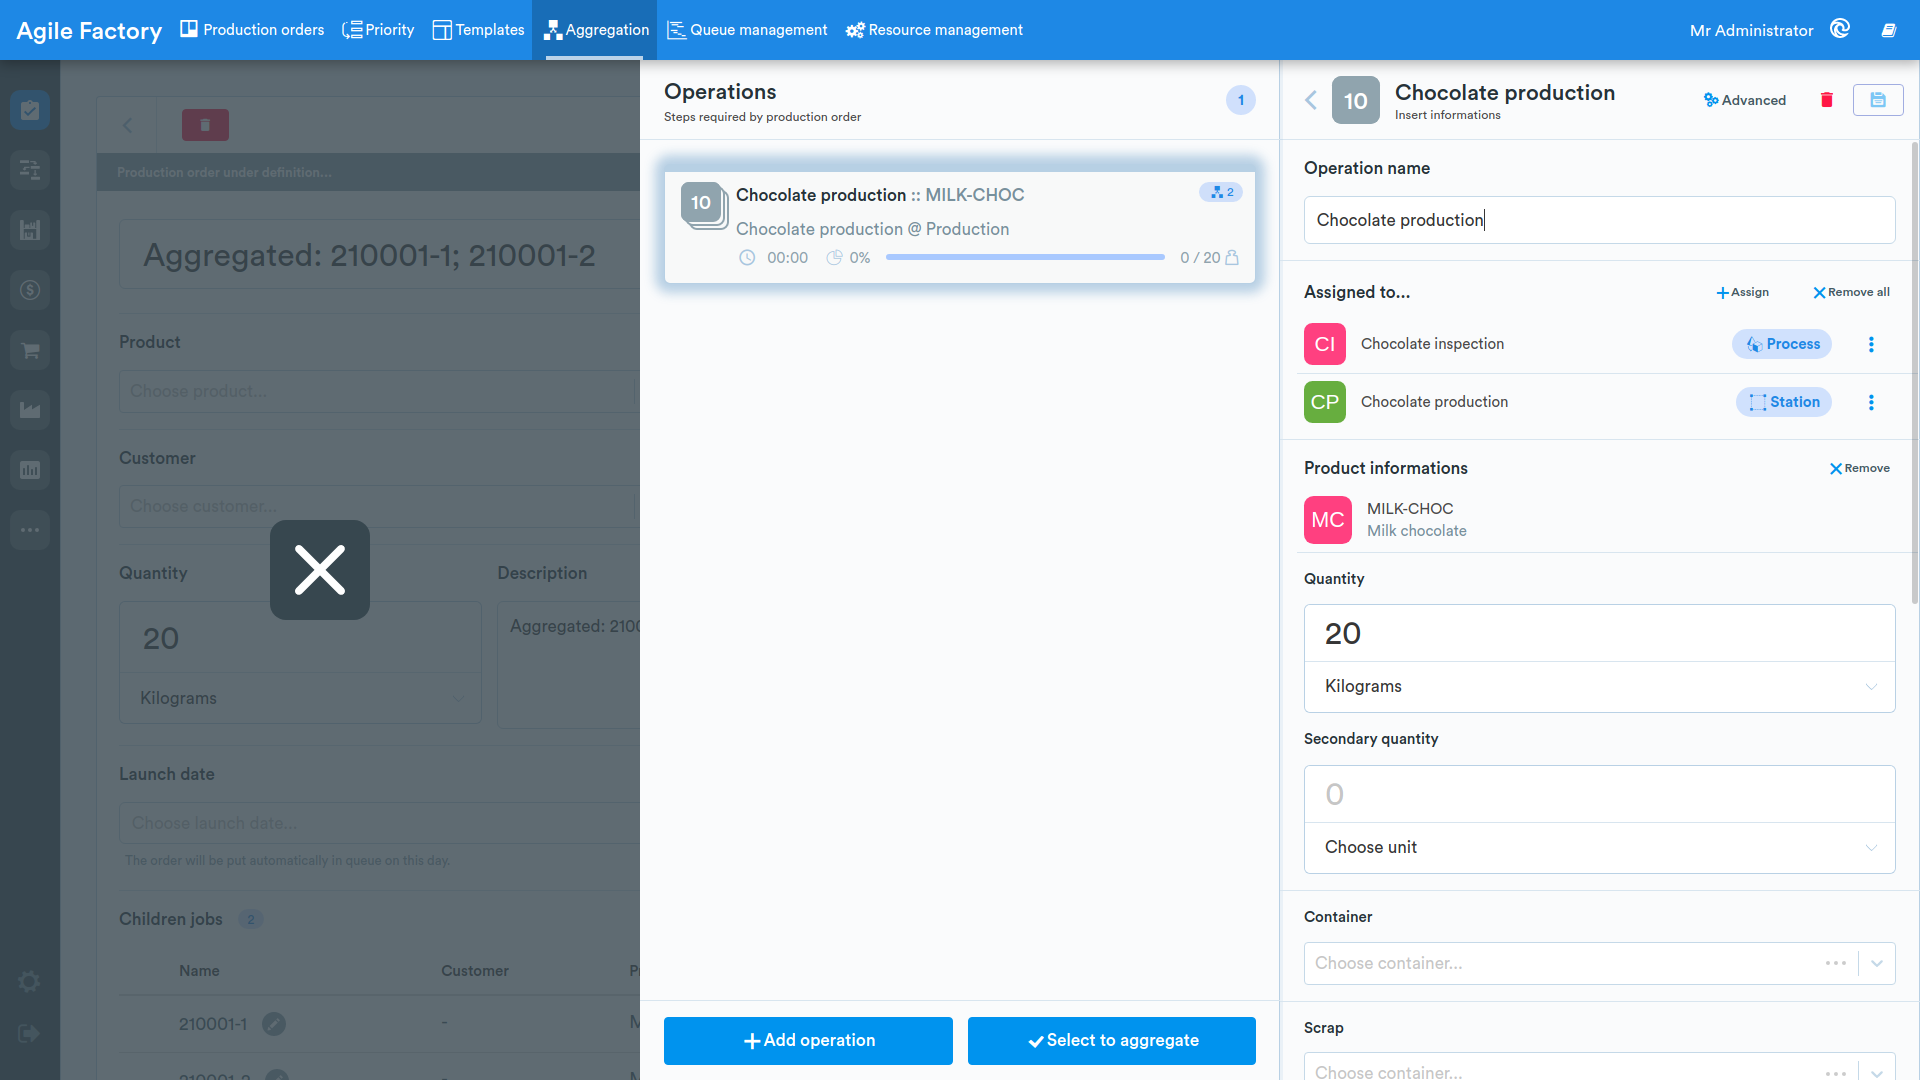
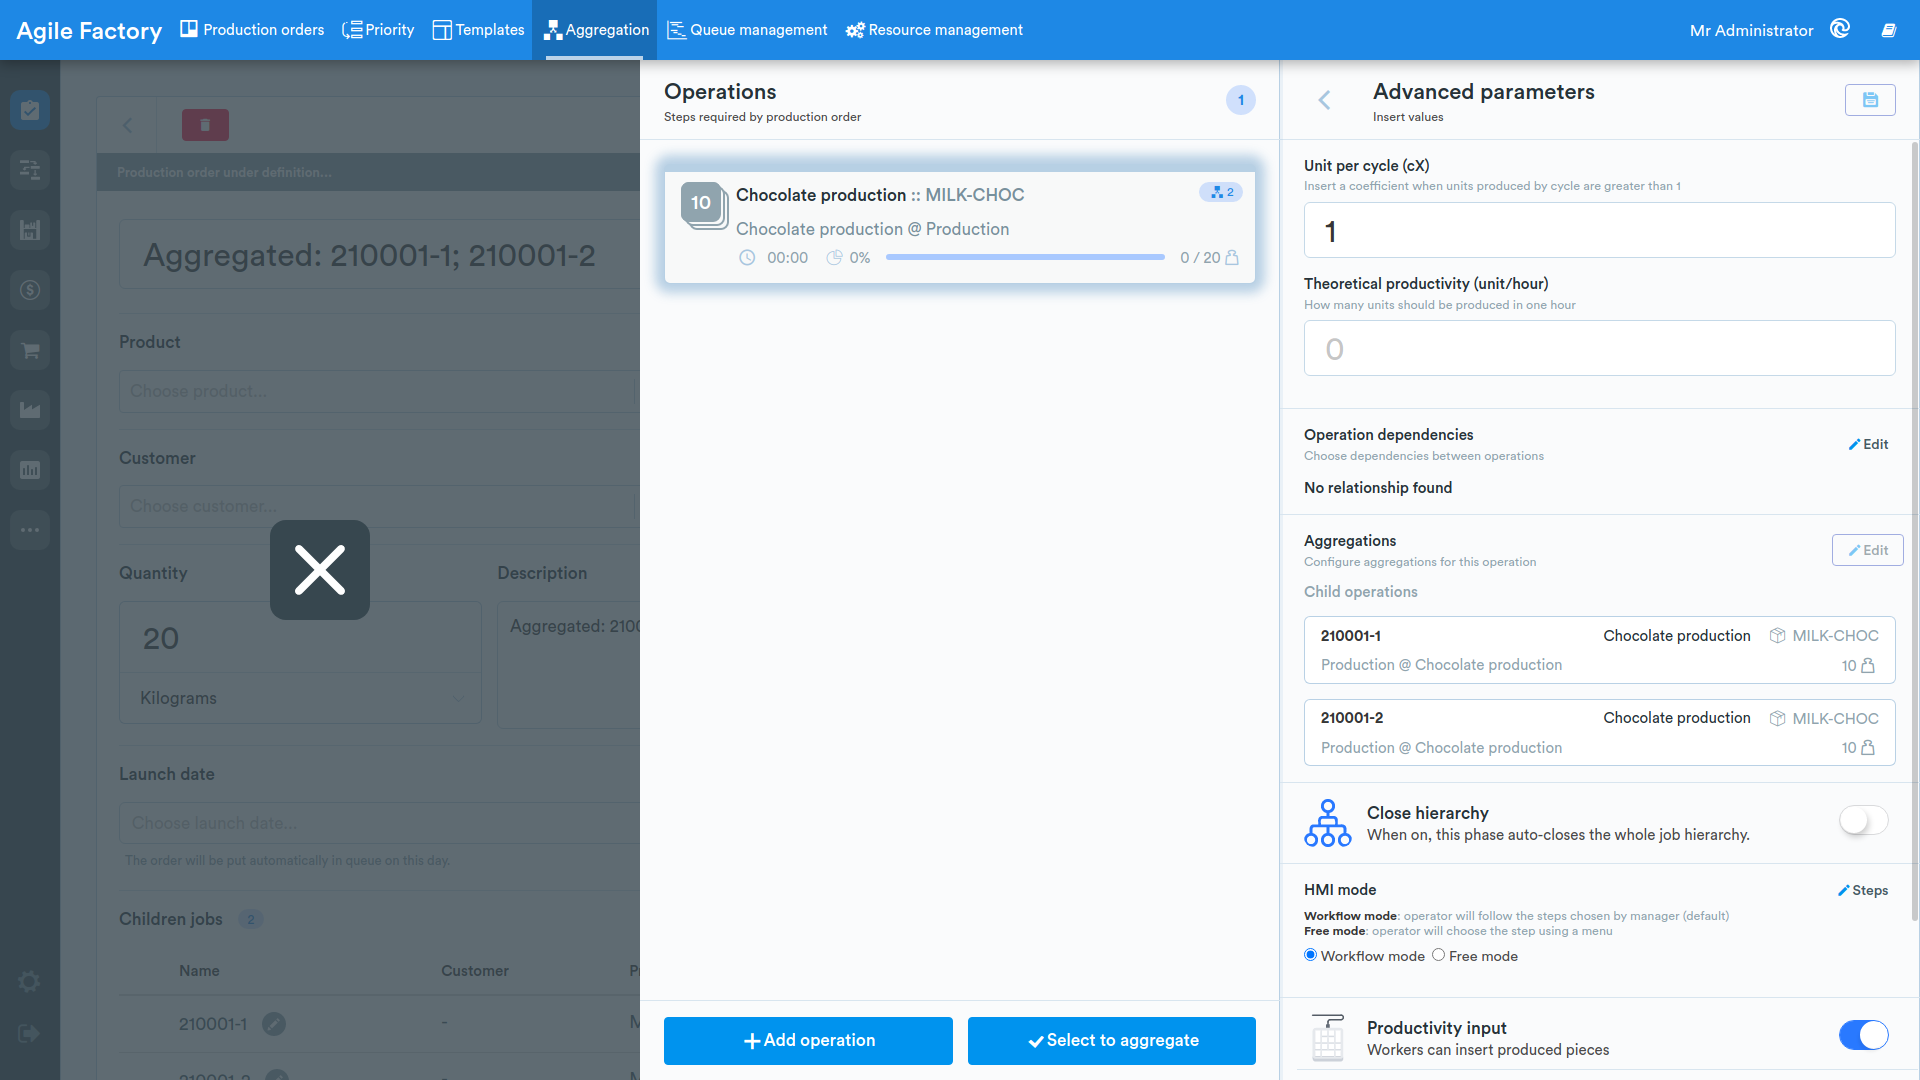
Subsequent operations related to the aggregated order do not differ from those expected for normal production orders described in the Production Orders section.
The aggregation process can be automated using a special plugin. For more detailed information, contact us in your preferred way.
Queue management ✨
This function is intended for managing the sequence of production operations assigned to the different production stations of the factory. When using this function, the sequence of production operations in the operator interface on the HMI will be displayed in the sequence specified here.
Main View
The workspace can be divided into 2 or 3 work areas corresponding to the factory's workstations.
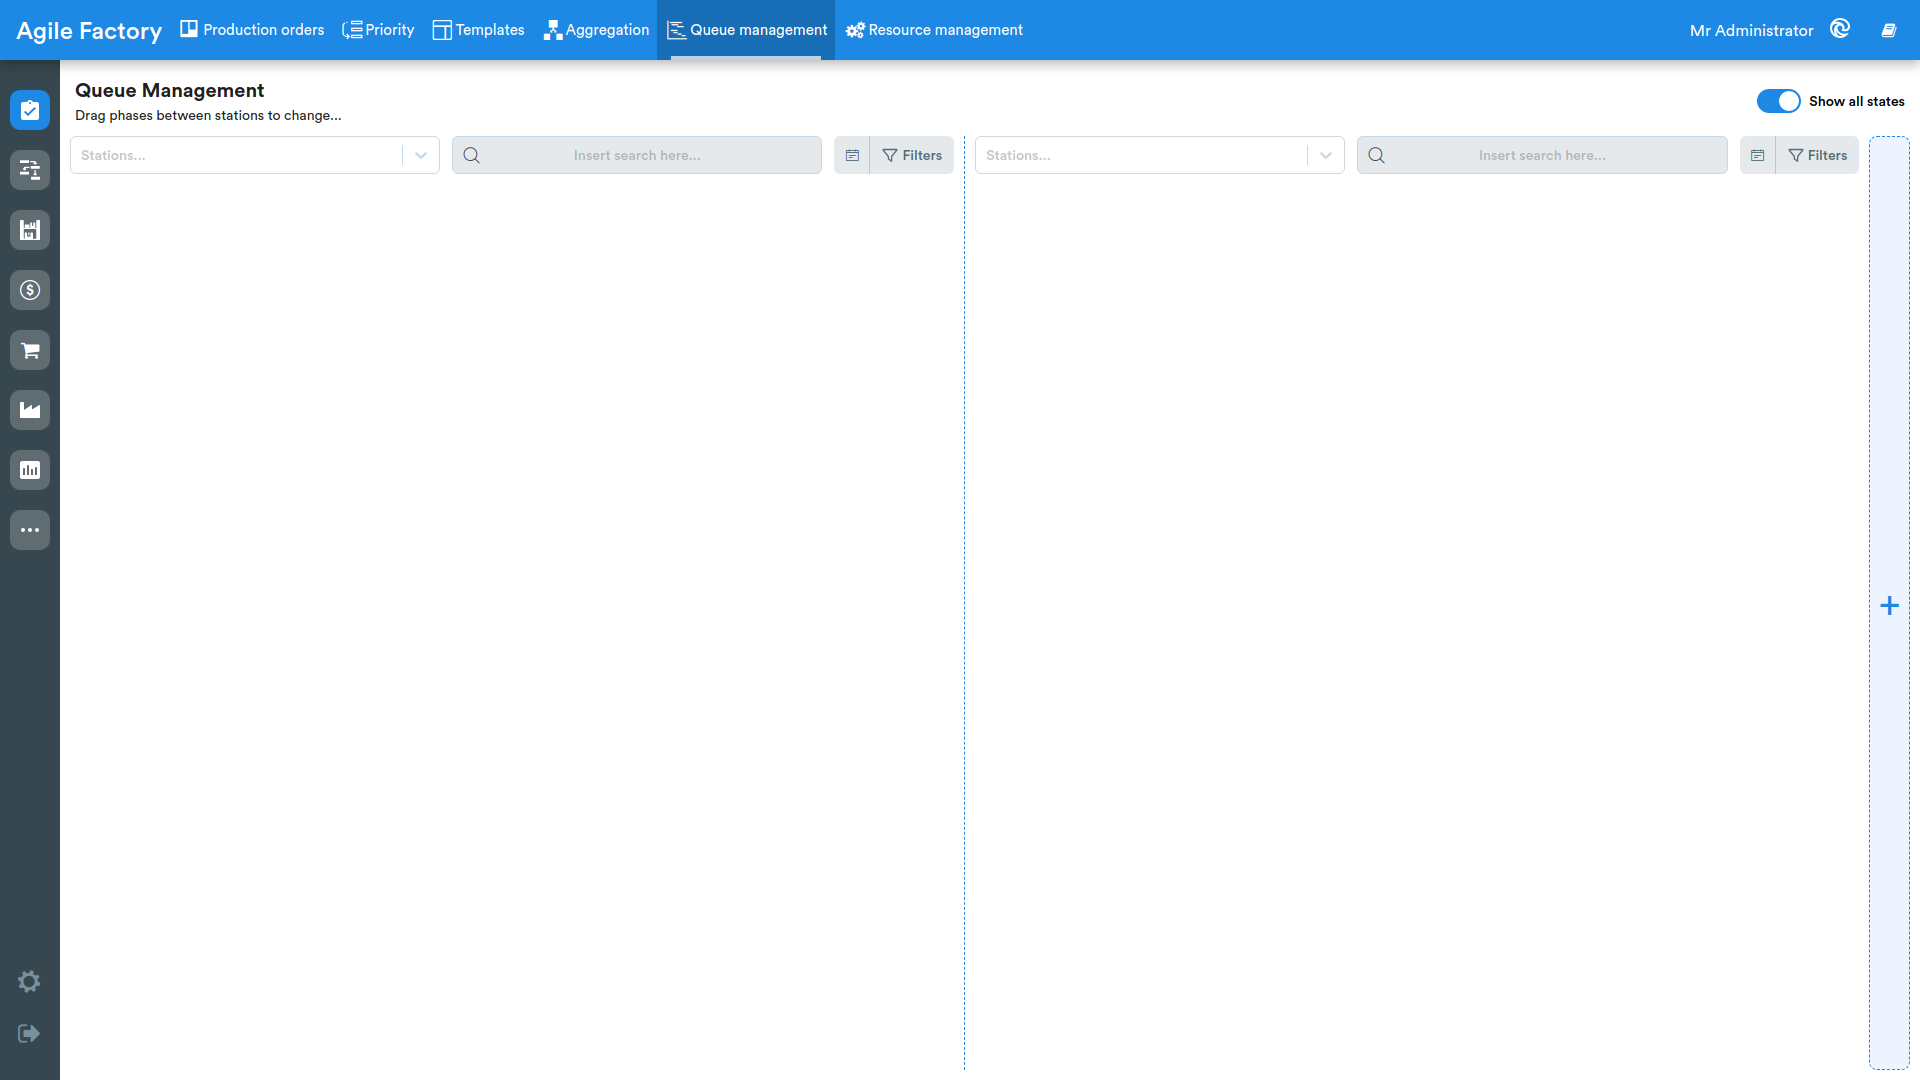
By pressing + on the right side of the screen, it is possible to add a third workstation.
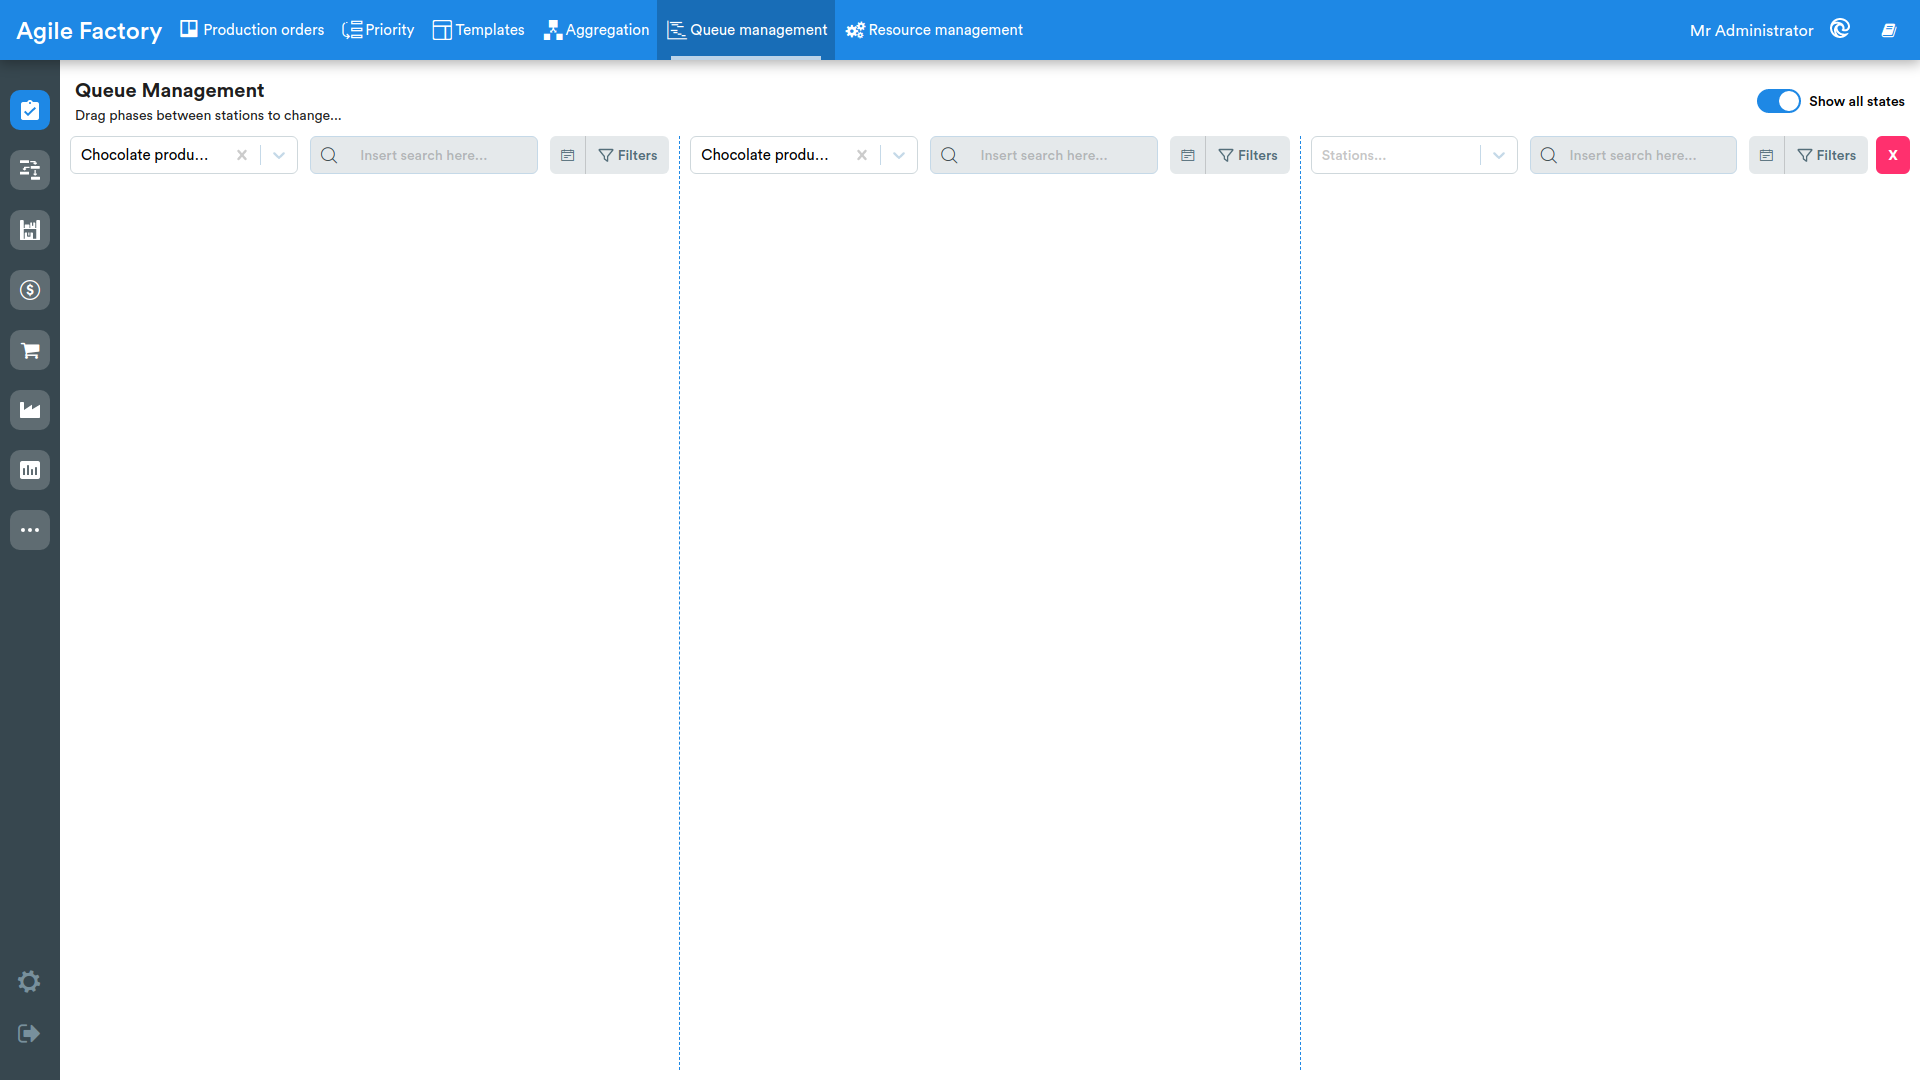
To hide the third workstation, use the red x button in the upper right corner of the screen. By selecting the station at the top of each workstation, production operations are displayed on the screen in a sequence determined by the following criteria:
- production order delivery date;
- sort (progressive number) of the production order;
- any phase dependencies.
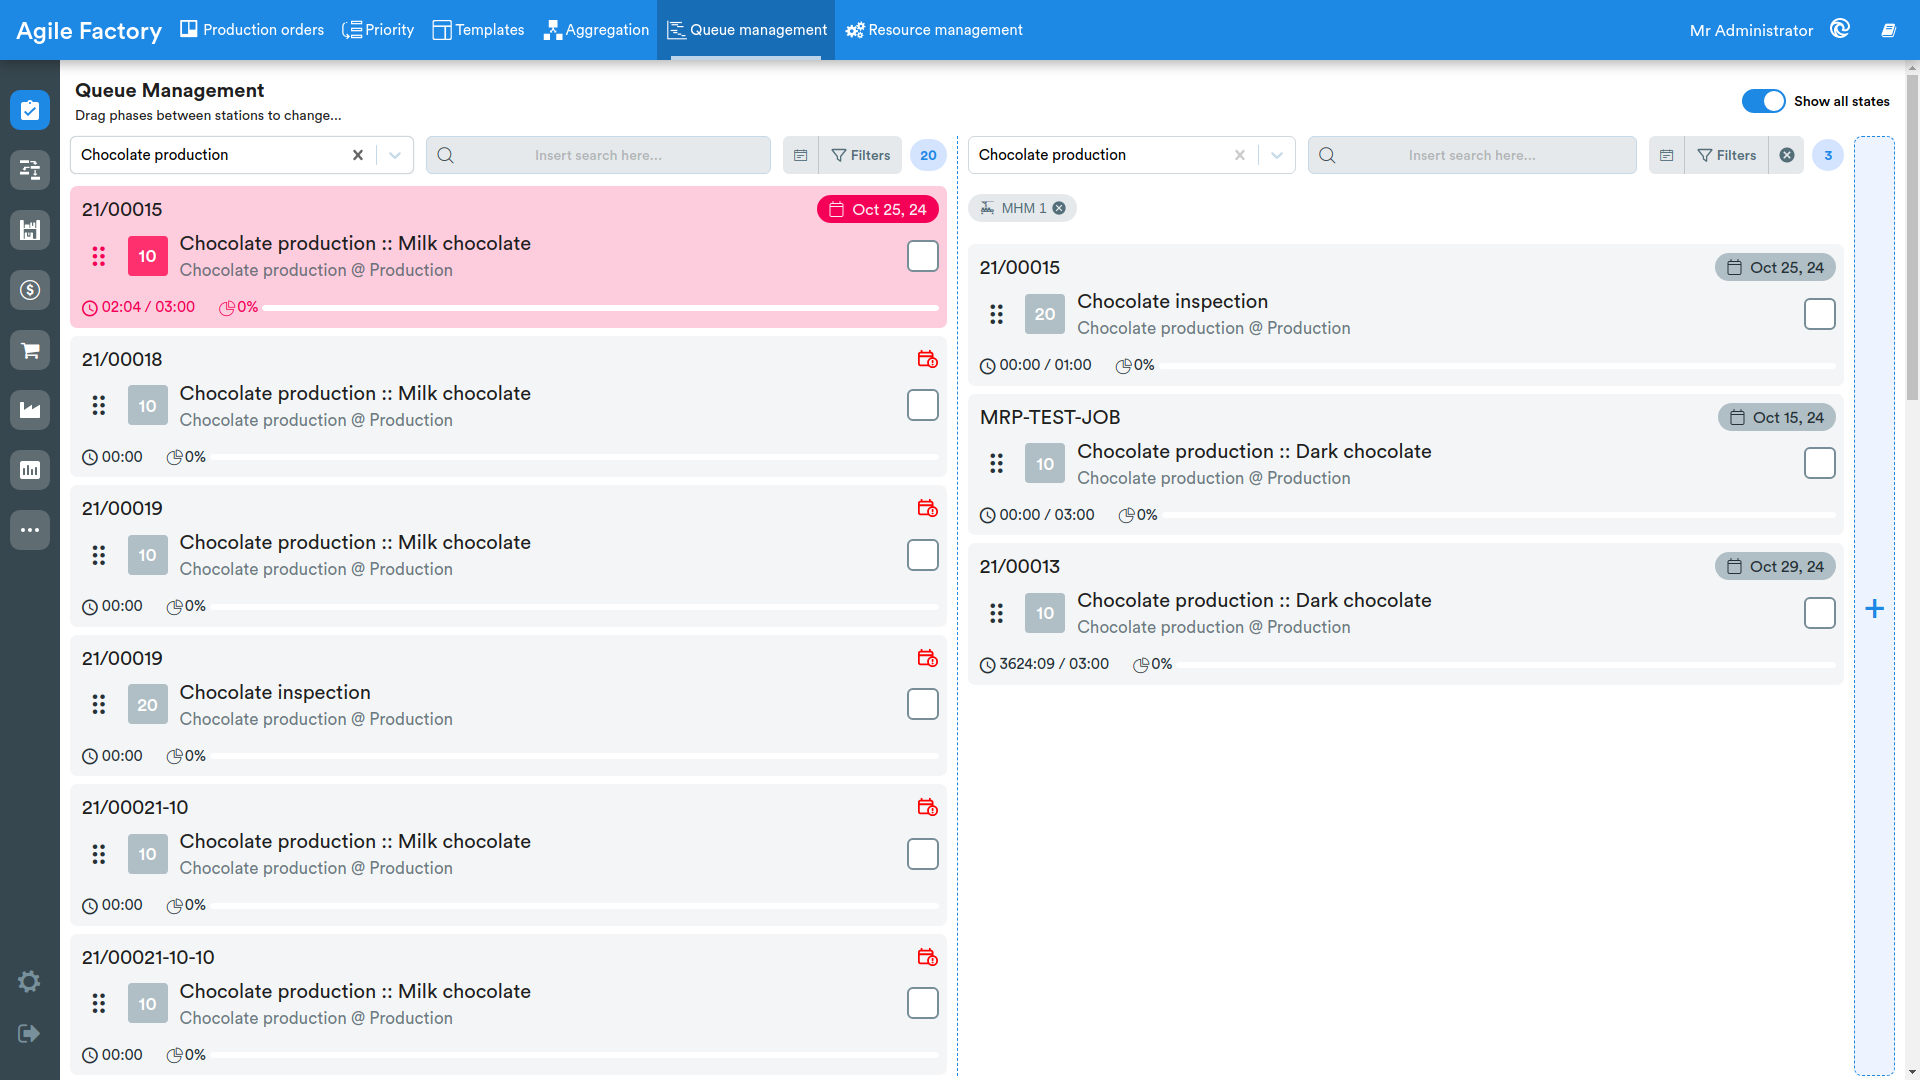
With the Show all states button, it is possible to disable the display of current operation states (by default this option is enabled).
Search and Filters
At the top of each workstation there is a search bar to quickly filter operations, while all other filters are gathered in a single panel that opens by pressing the Filters button.
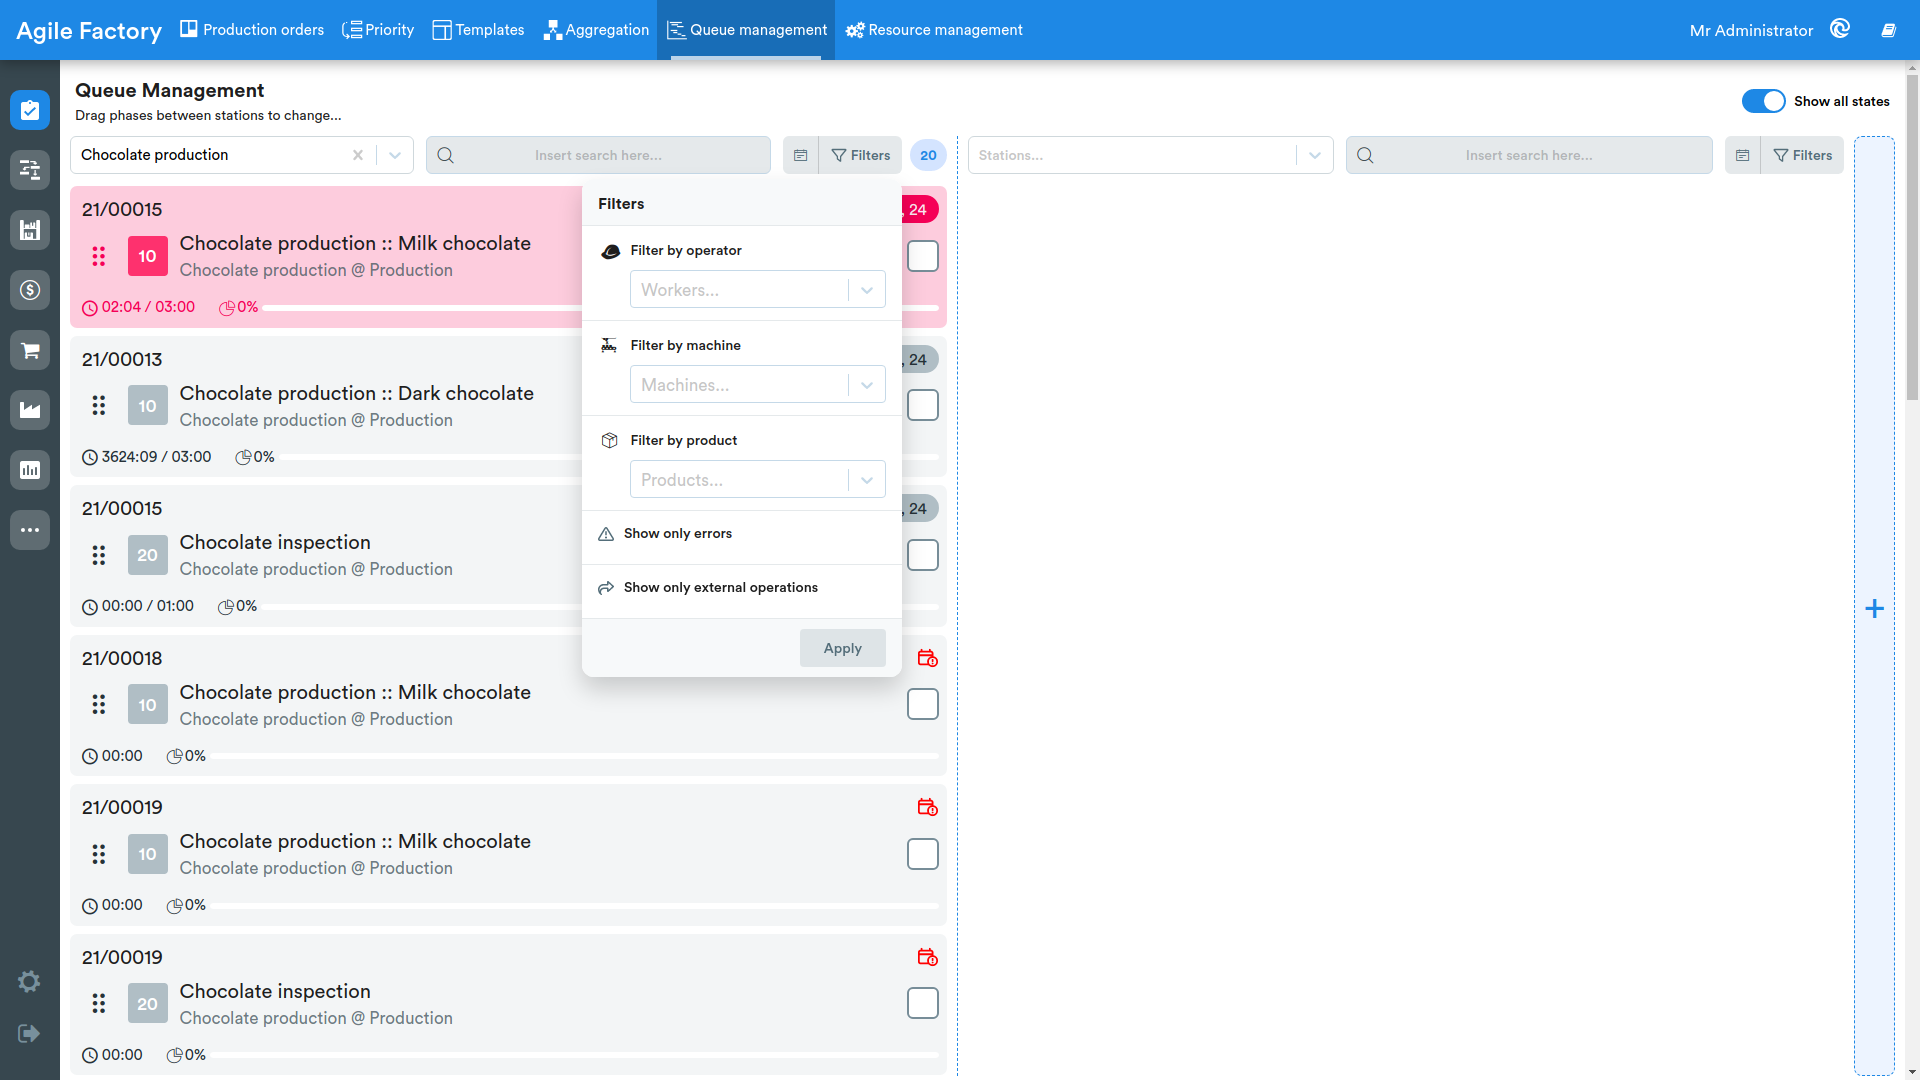
From the Filters panel it is possible to apply one or more of the following filters according to needs:
- Show only errors (shows operations related to error messages)
- Show only external operations (operations performed in outsourcing)
- Filter by operator
- Filter by machine
- Filter by product
After setting the desired filters, press Apply to apply them.
Date Filter
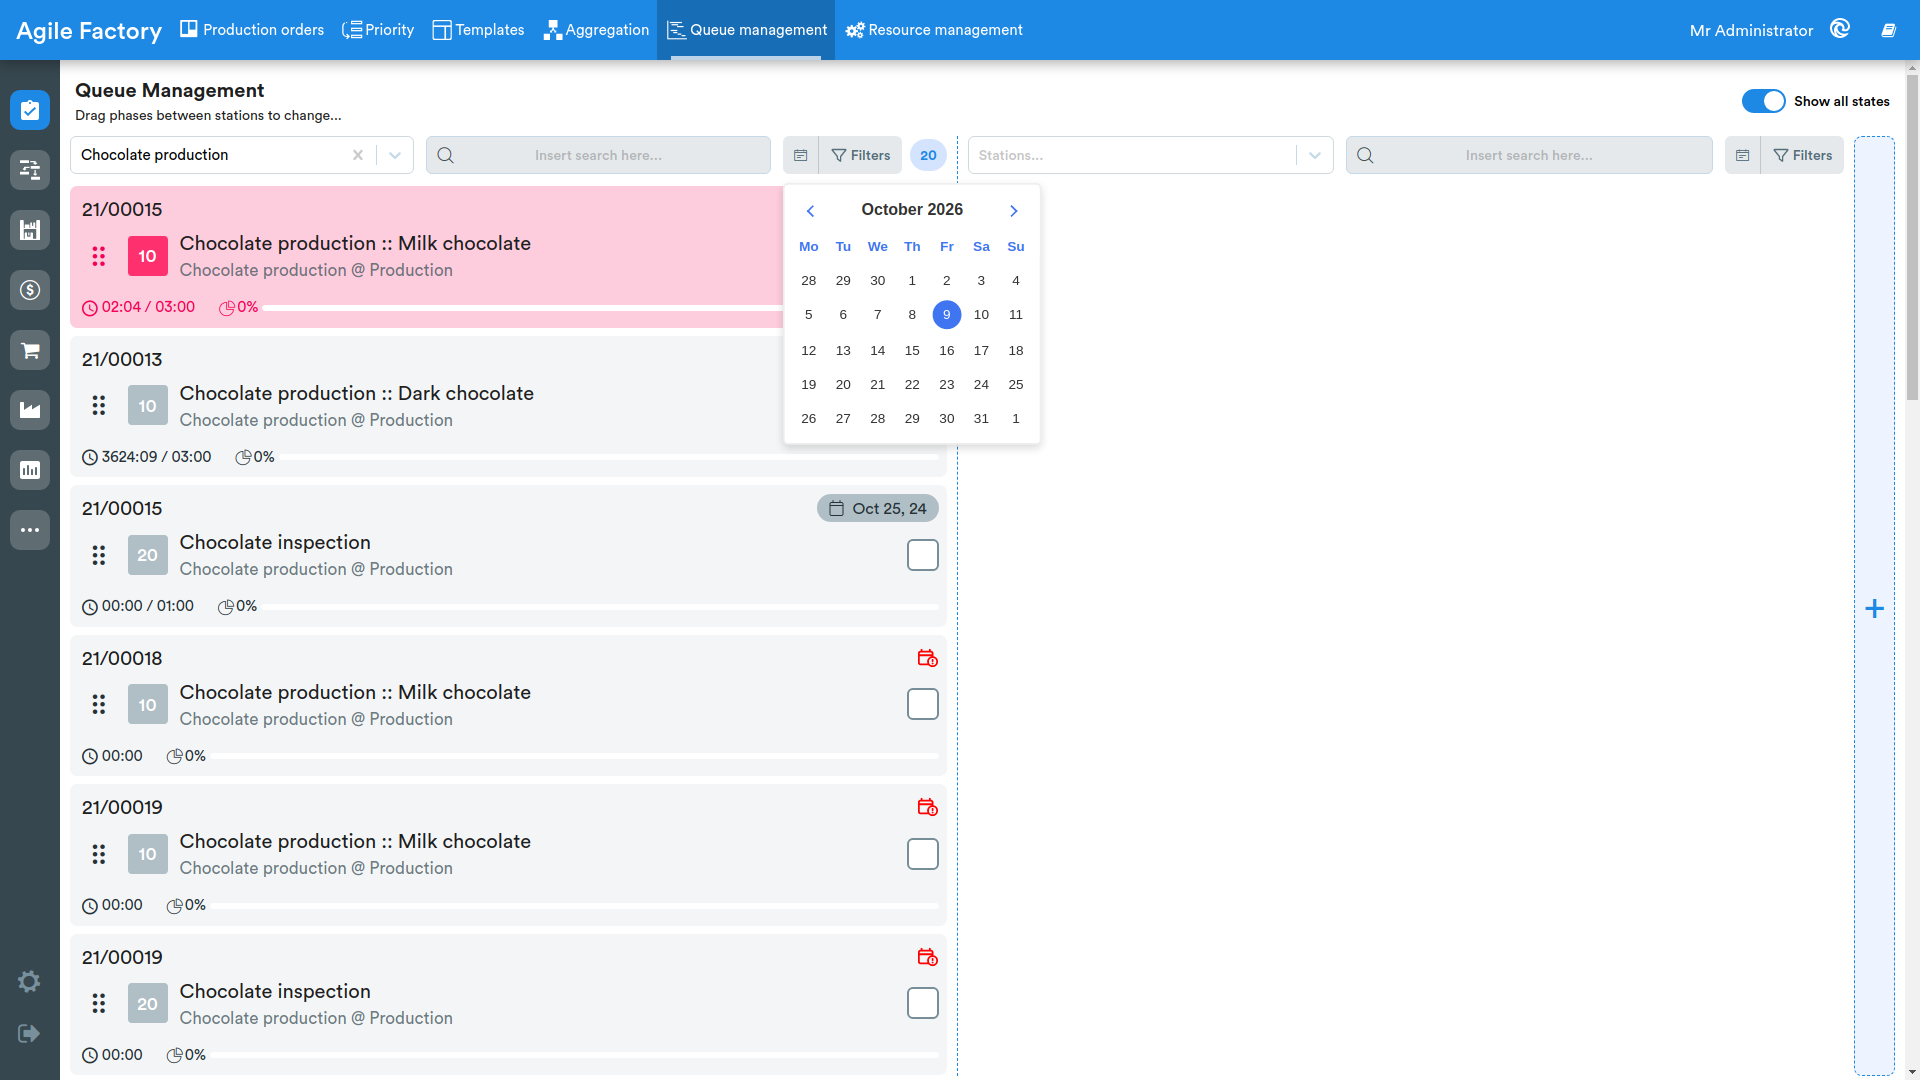
Next to the Filters button there is a calendar icon that allows filtering operations based on the expected delivery date of the production order.
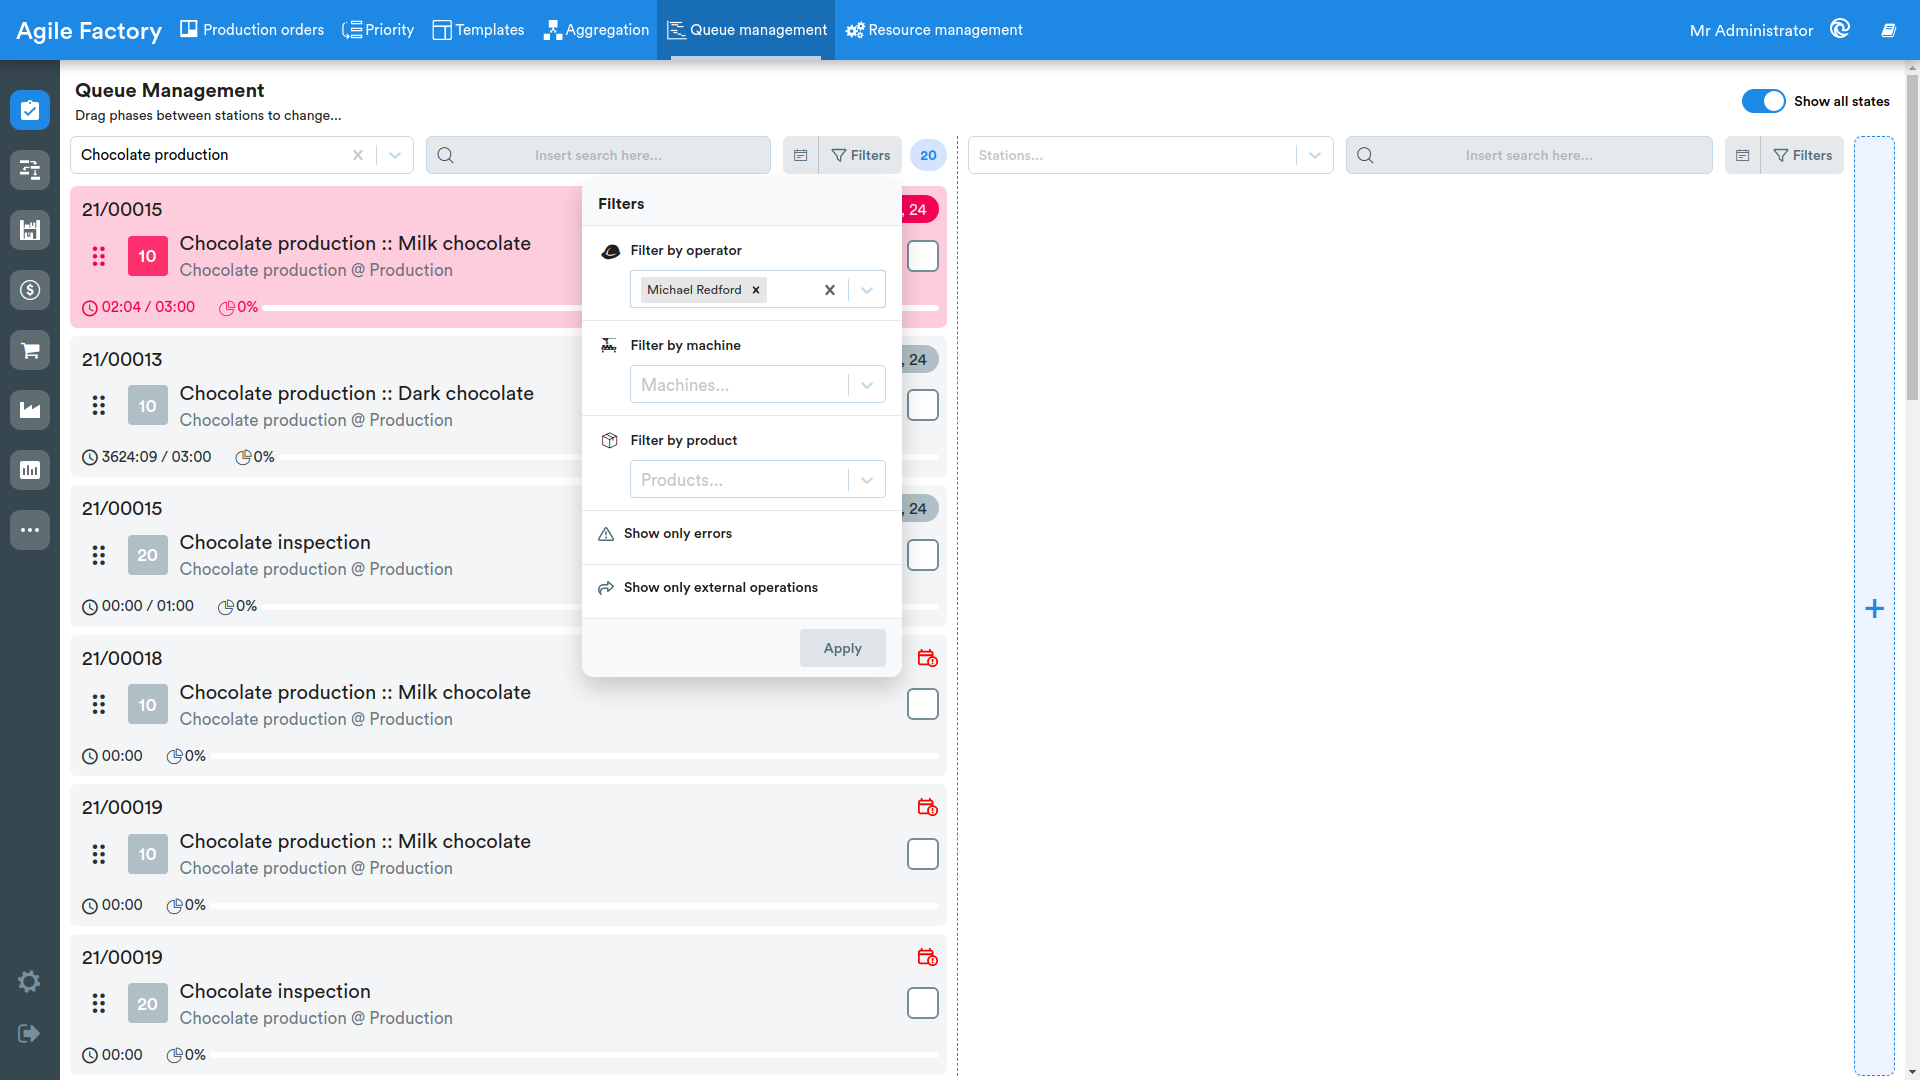
Filter by Operator
By selecting Filter by operator inside the panel, the system prompts the user to select the name of a specific operator.
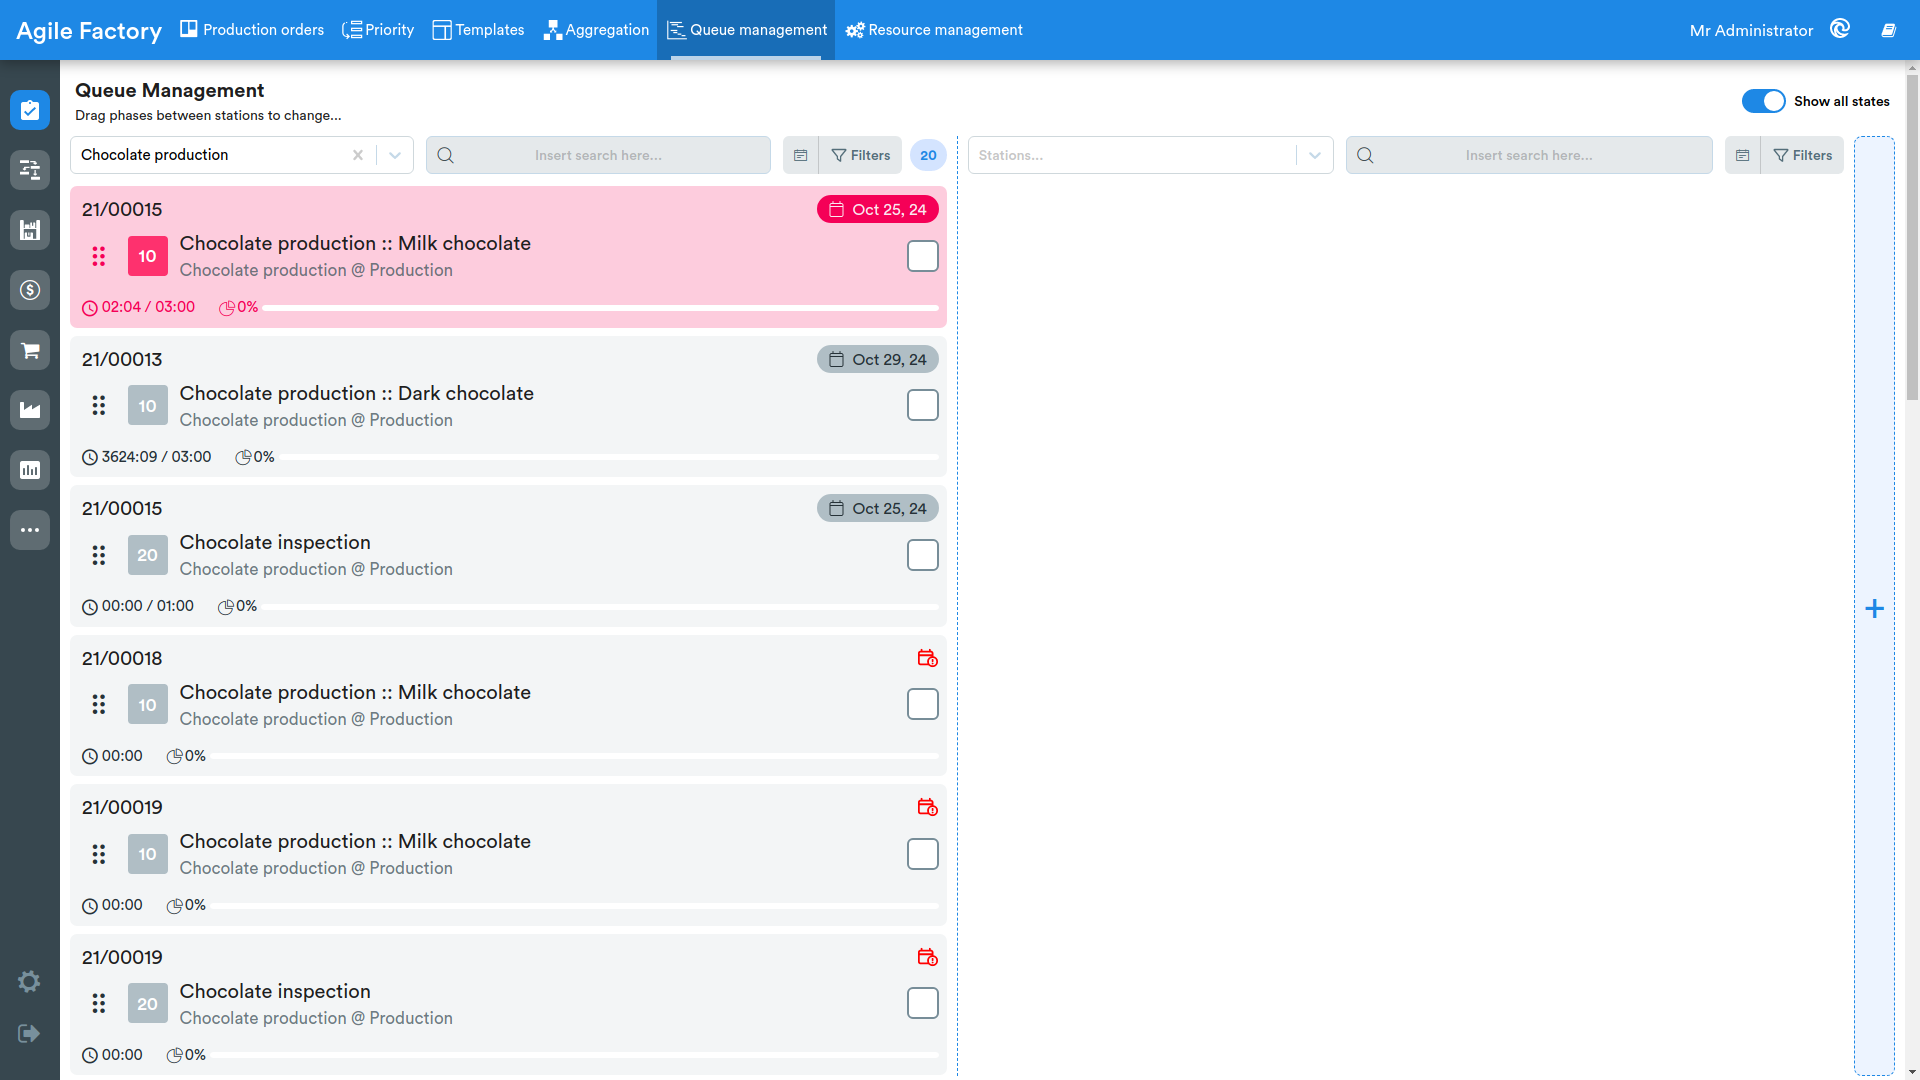
Filter by Machine
By selecting Filter by machine inside the panel, the system prompts the user to select the name of a specific machine.
Filter by Product
By selecting Filter by product inside the panel, the system prompts the user to select the name of a specific product.
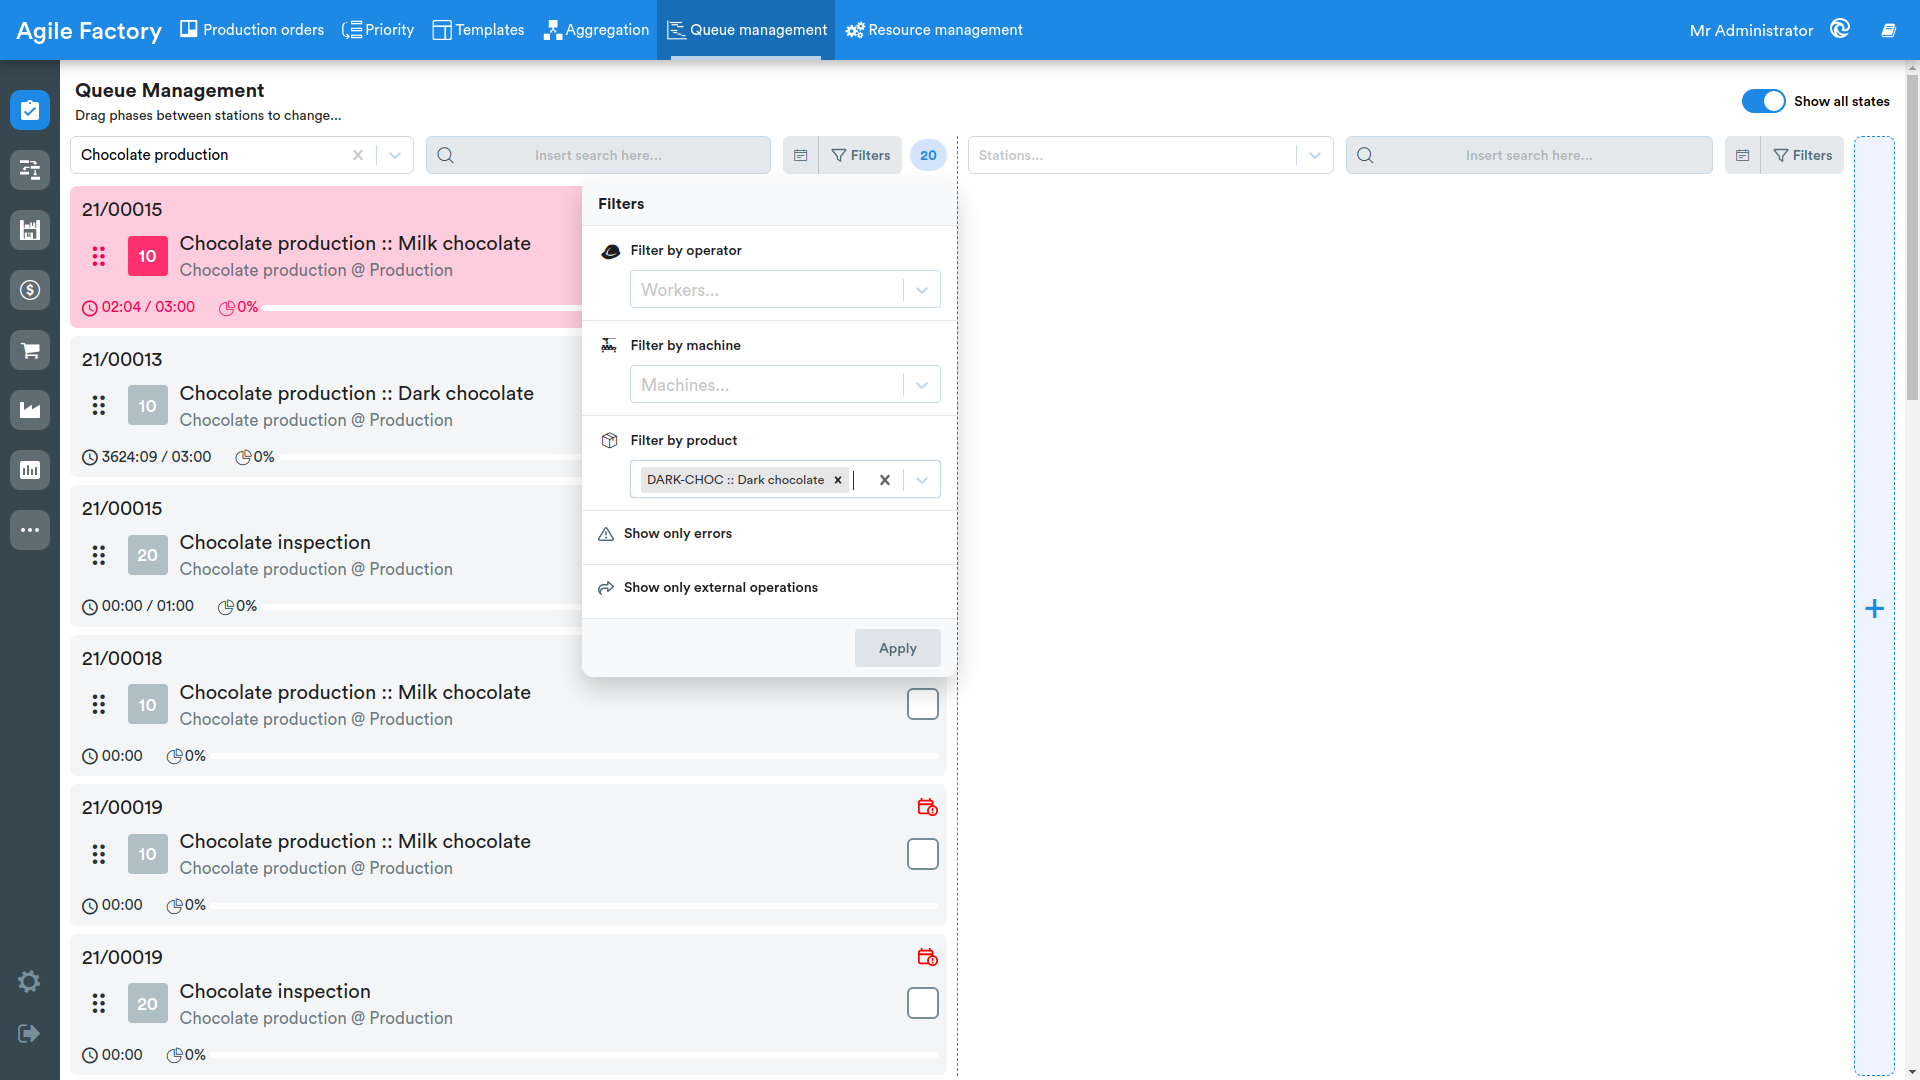
Active filters are shown as removable labels (chips) below the filters bar: to remove a filter, simply click the x on the corresponding label.
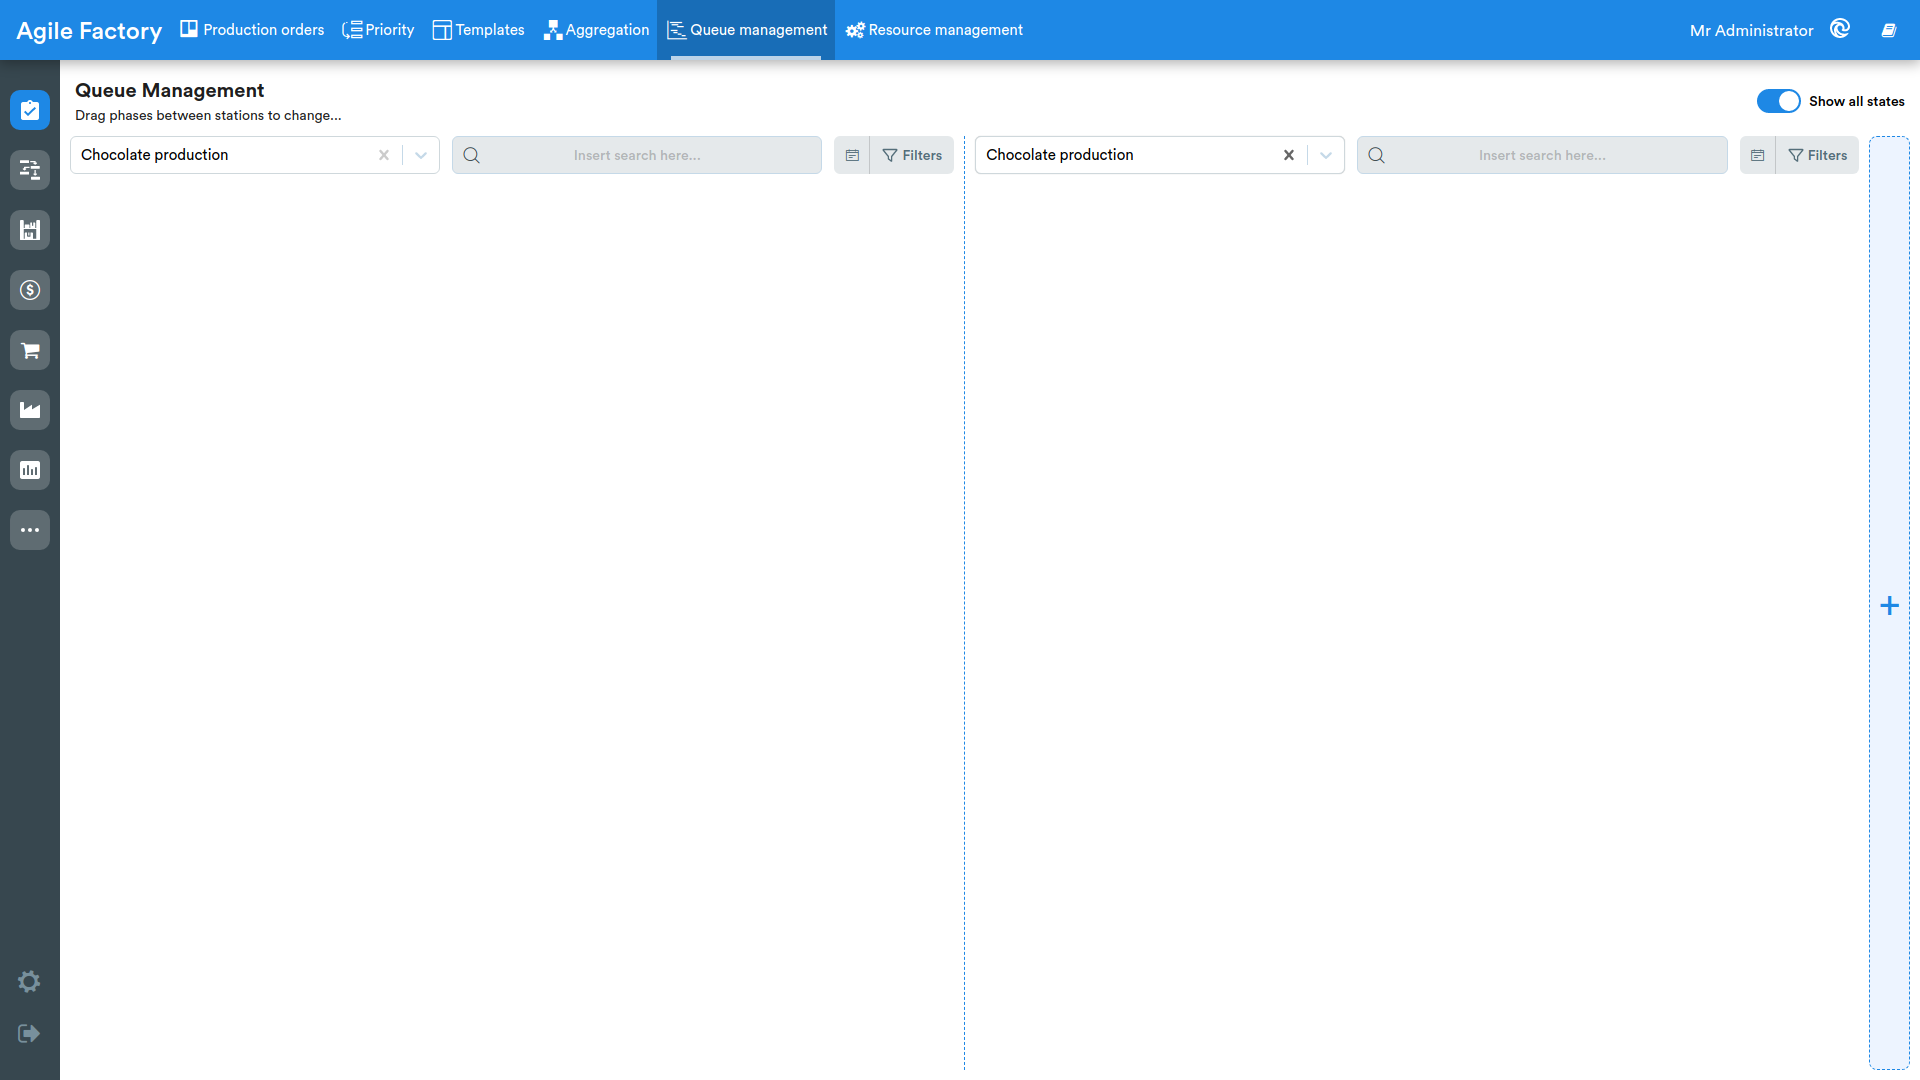
Multiple Filter
Together with filters by operator and/or product, it is possible to use a single station in two work areas simultaneously.
Possible Actions
After setting the necessary filters with this tool, it is possible to perform the following actions:
- move a single operation down or up in a station or move the operation to another queue
- simultaneous movement of multiple selected operations up or down in a single station or movement of the operation to another queue
- modification of the production order delivery date.
Single Move
The transfer of operations is done via drag'n'drop.
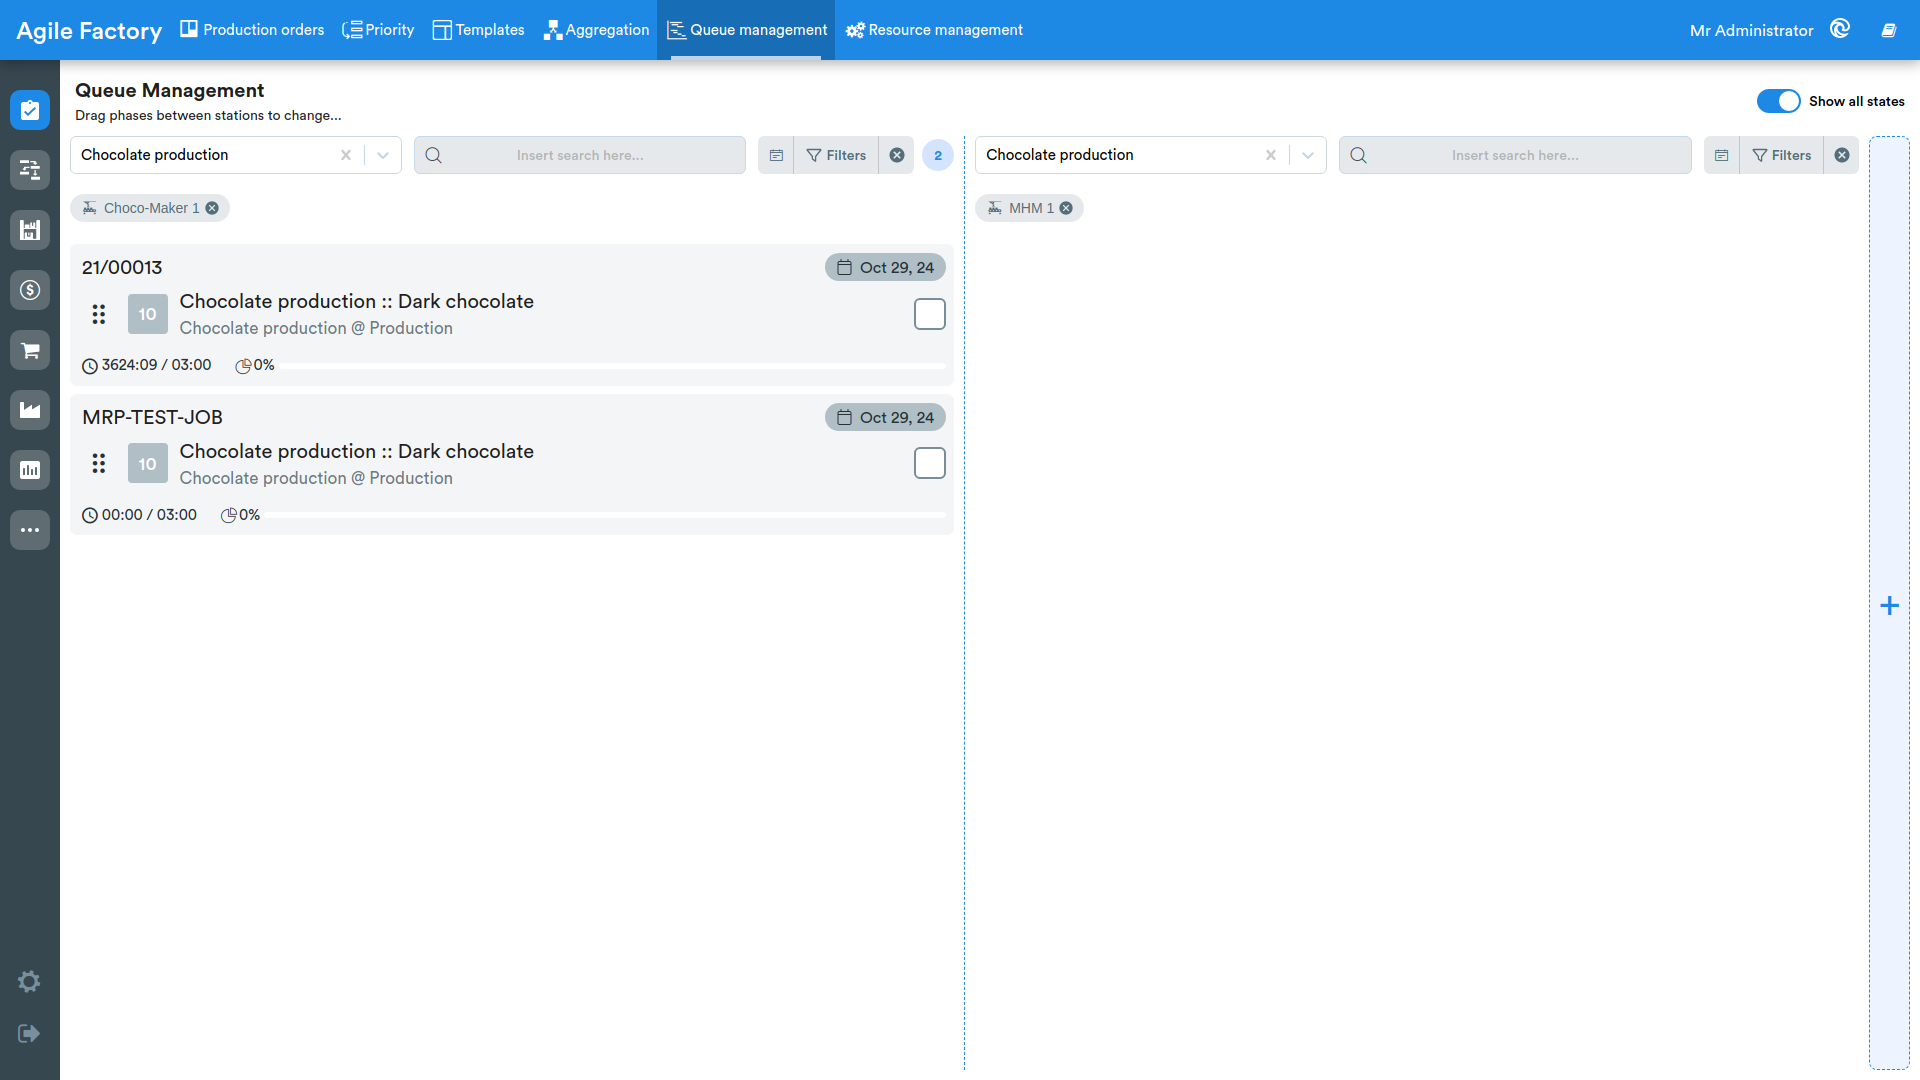
In this example, a drag'n'drop operation is performed from one machine to another within the same station.
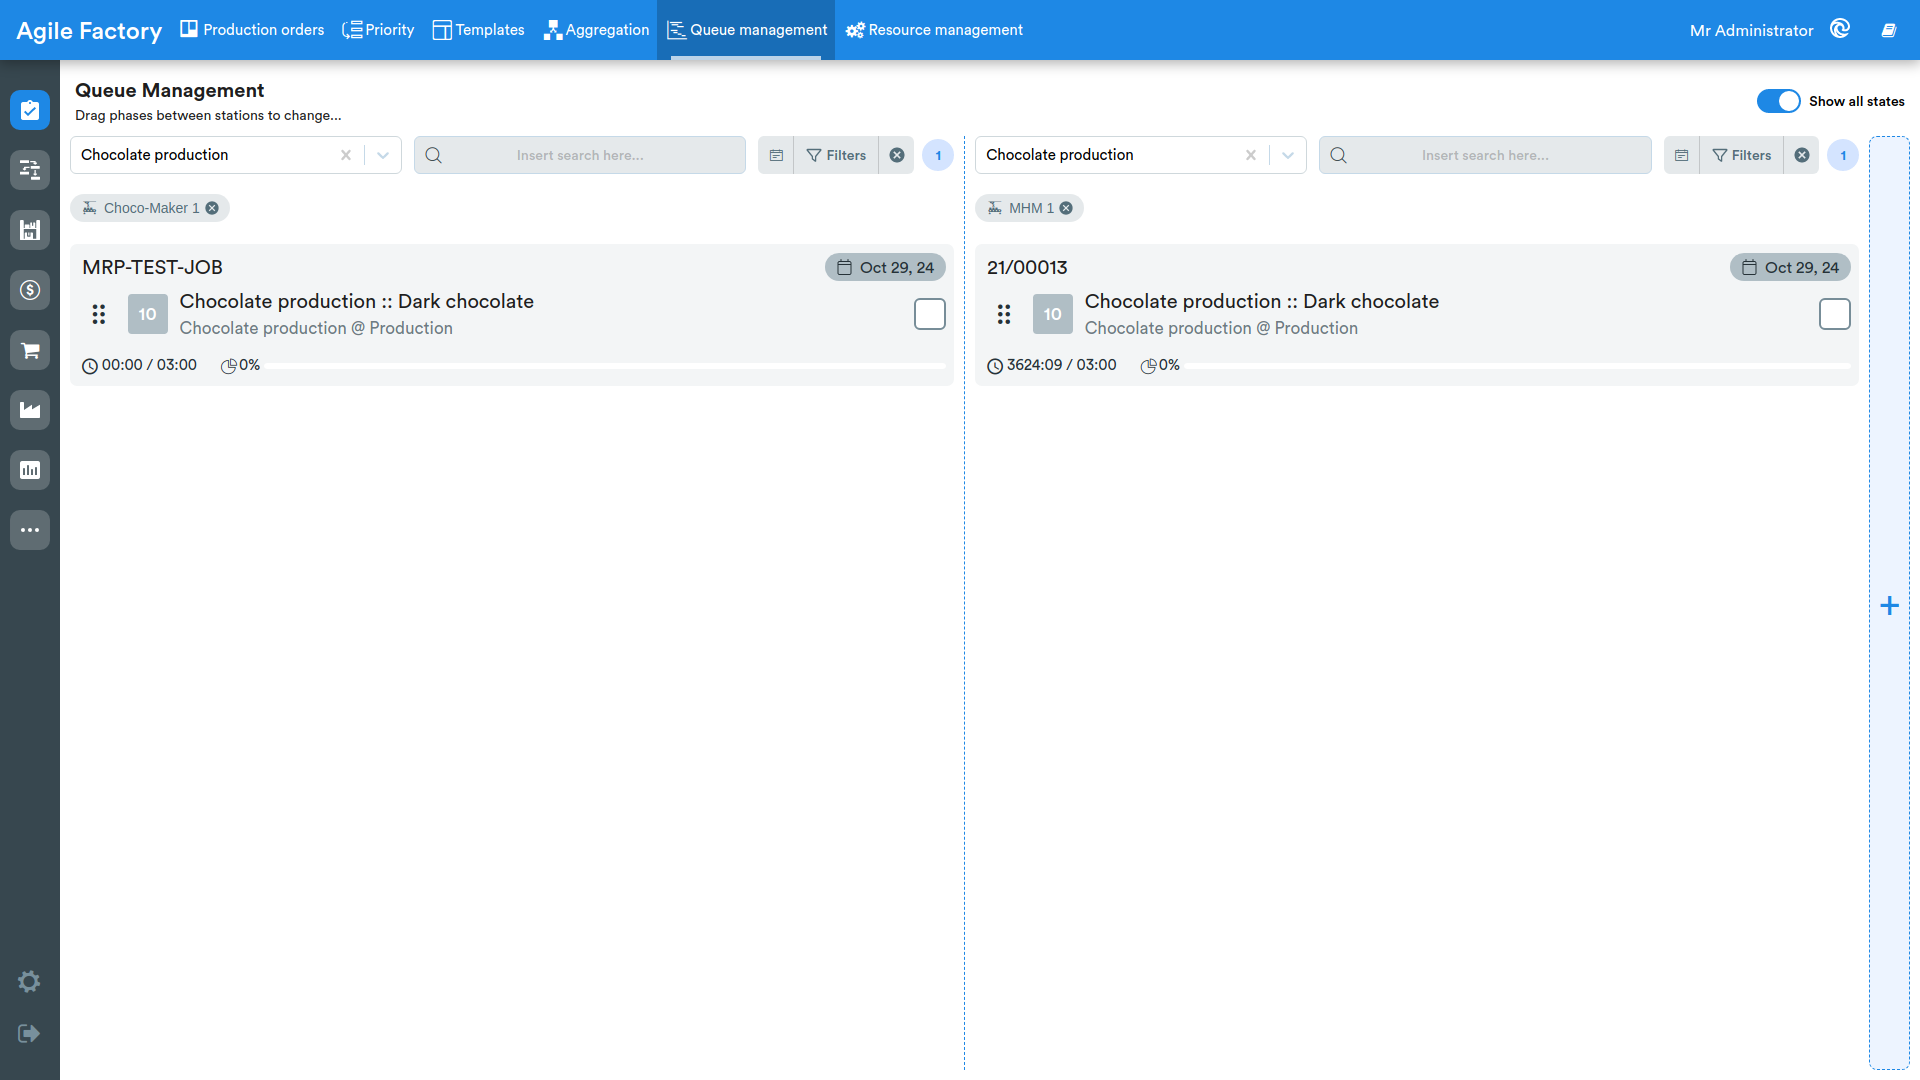
After the transfer, the operation is assigned to another station/machine/operator.
Simultaneous Move
To transfer multiple operations simultaneously from one queue to another or within the same queue, it is necessary to select the desired operations using the checkbox.
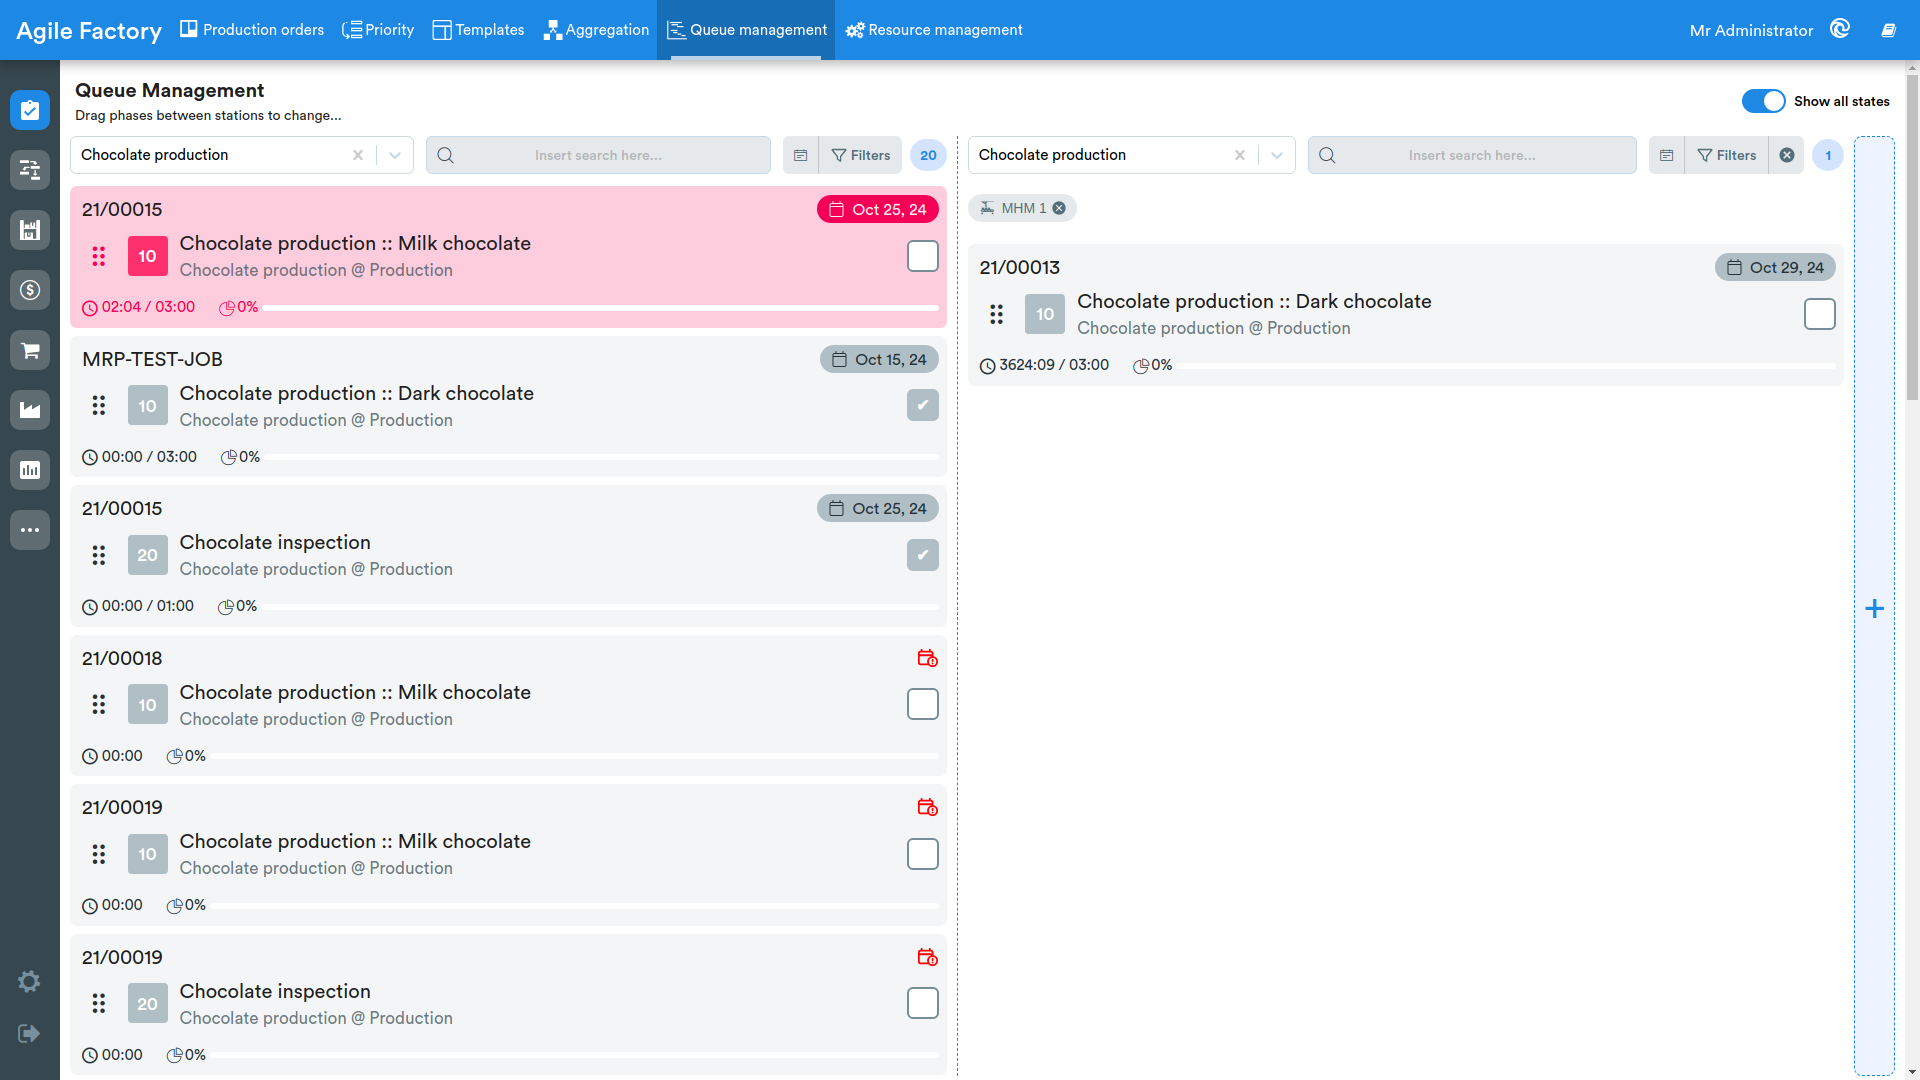
And perform the transfer.
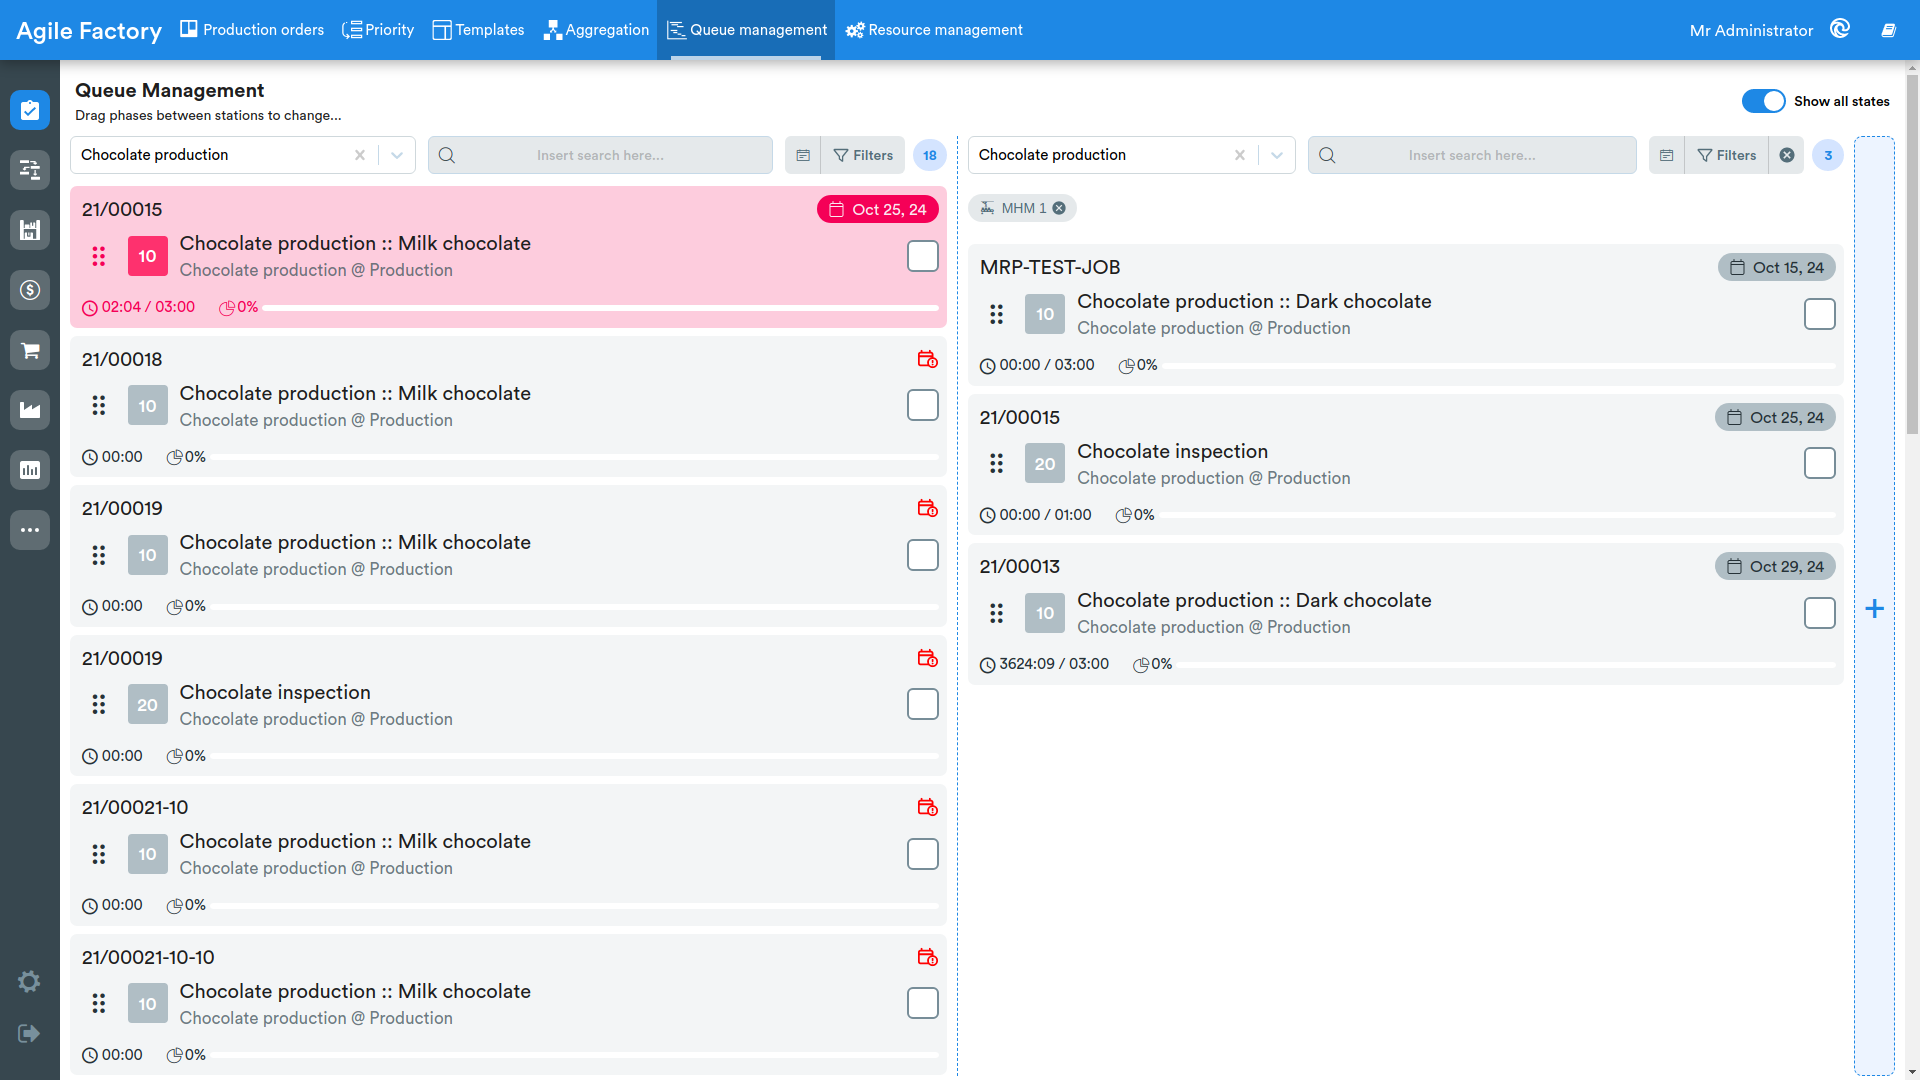
Modify Delivery
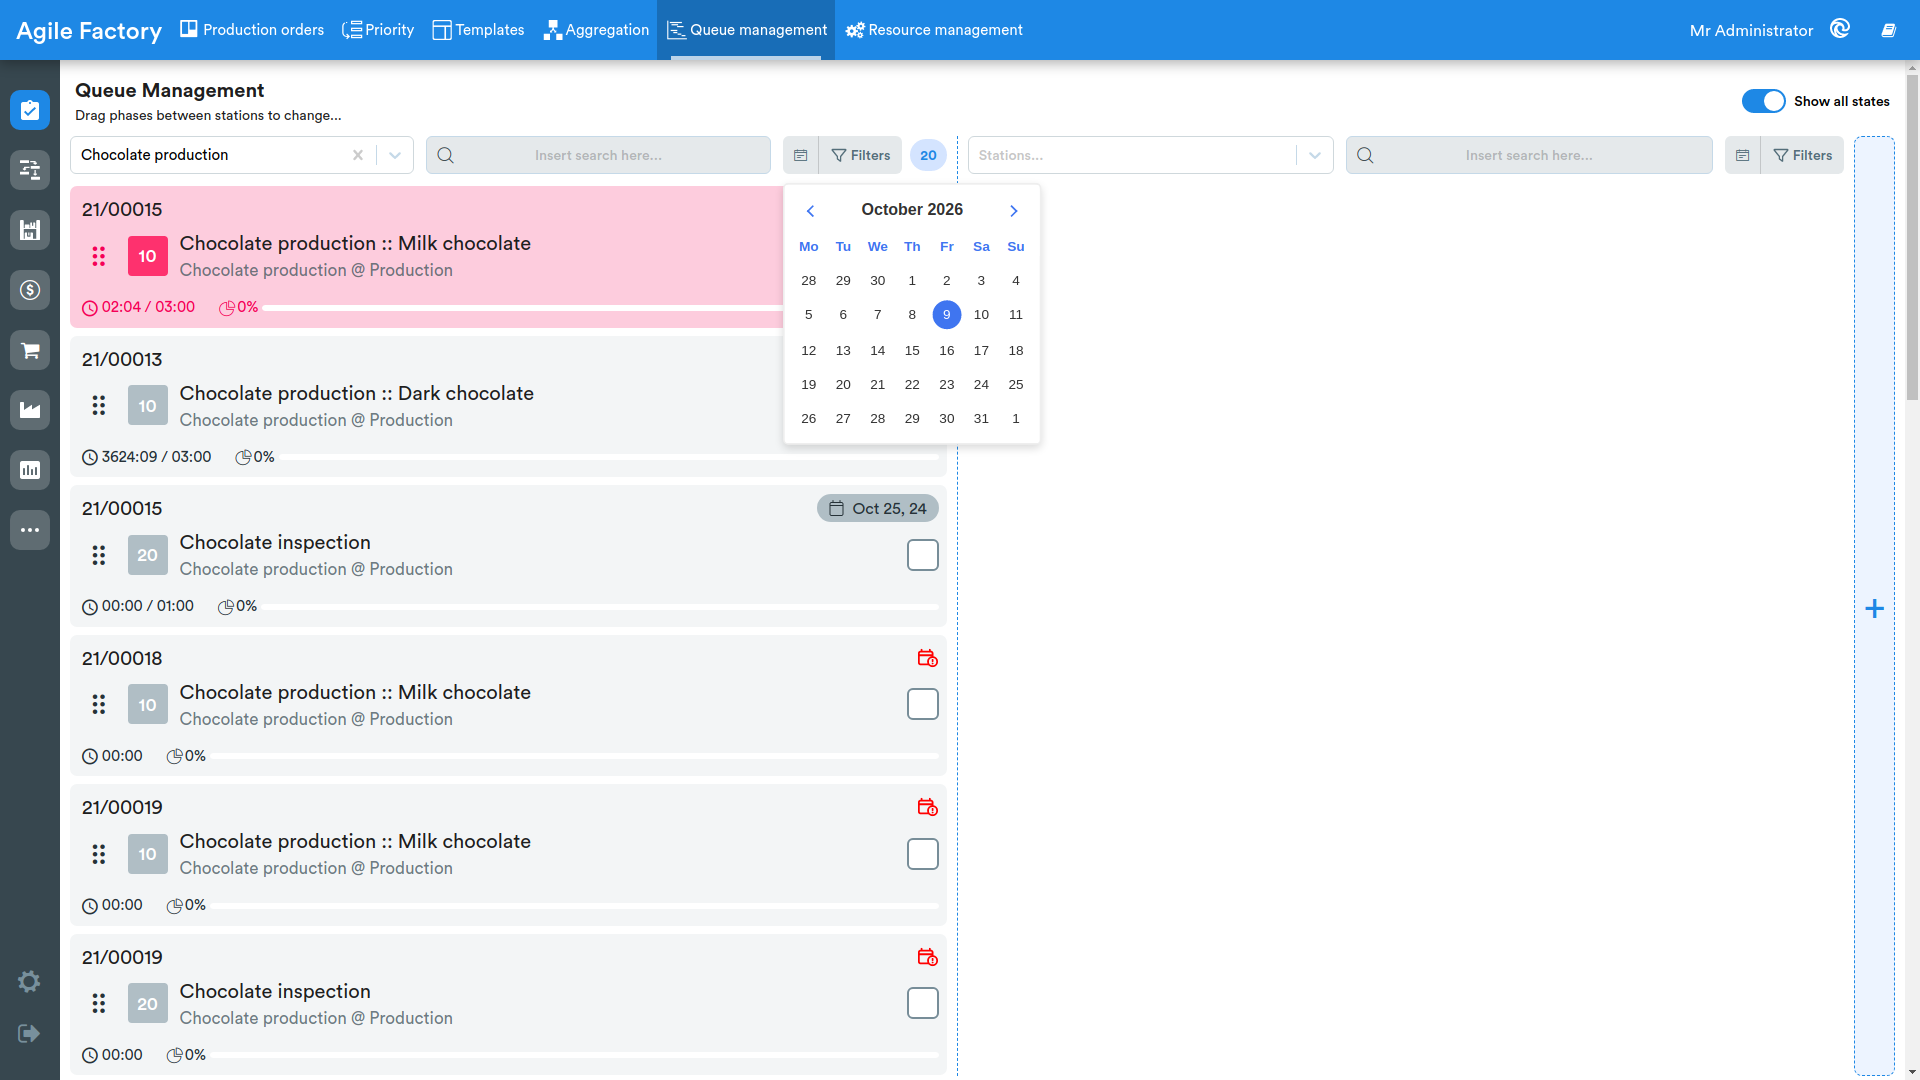
To modify the order delivery date using the "Queue Management" interface, it is necessary to click on the delivery date or on the red calendar icon (if the delivery date has not been set), select the desired date and click Save.
Operation Details
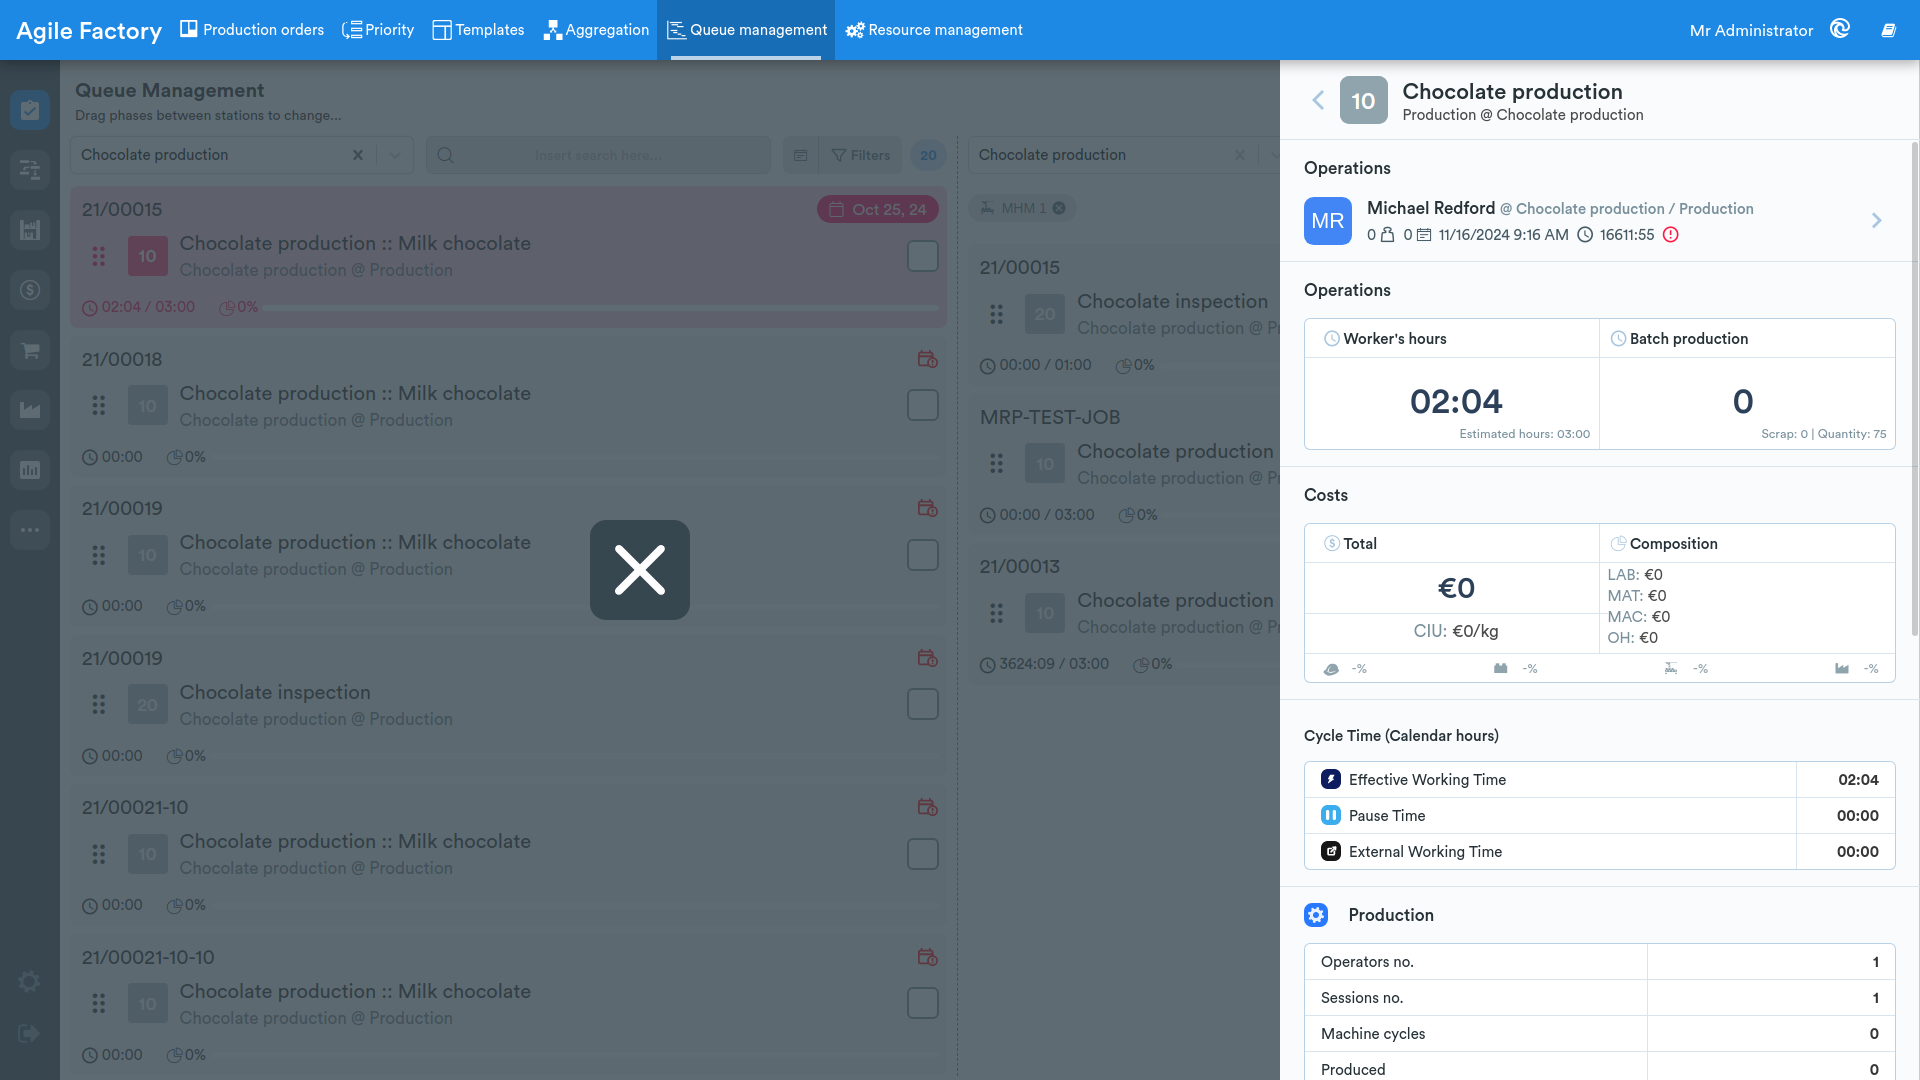
By double-clicking on one of the operations, it is possible to view the details of the production operation.
Limitations
- A workstation cannot be selected in two or more zones simultaneously without using filters by operator and machine.
- The transfer of operations from one queue to another is possible only if the processes for the selected workstations coincide (for example, a chocolate production operation cannot be transferred to a station that does not include a similar process - settable in Settings).
- An operation with an error cannot be transferred to the queue (it is necessary to first remove the error), nor can an operation that is currently in one of the production states be reassigned.
When changing the position of a phase in a queue, AgileFactory makes a calculation to determine its new priority based on three parameters:
- deadline of its production order;
- sort of its production order;
- any phase dependencies.
In particular, initially, if the production order has a delivery date, this will have greater importance in determining the new priority, otherwise the sort value will be used, which is an arbitrary value determined based on the production order creation order. In a second step, it will be verified that the new priorities respect the dependencies, otherwise the order of the phases will be reorganized accordingly. For this reason, when moving a phase to a specific position in a queue to lower or raise its priority, it is possible that the system will not maintain the position indicated by the user and will seek one more suitable to the production execution requirements.
Resource management ✨
This section of the MES is dedicated to managing production resources, in particular workstations/machines and personnel within work shifts; this feature makes it possible to conveniently distribute production orders/operations, based on the specific workstation, among the employees assigned to that workstation within a given work shift, for the period the user is interested in.
Main view
The main interface is made up of the days of the week, divided into work shifts, which can be configured in the Settings section. On the right there is a universal bar for orders/operations/workers/teams. At the top there are various filters to customize the view, as well as a search bar.
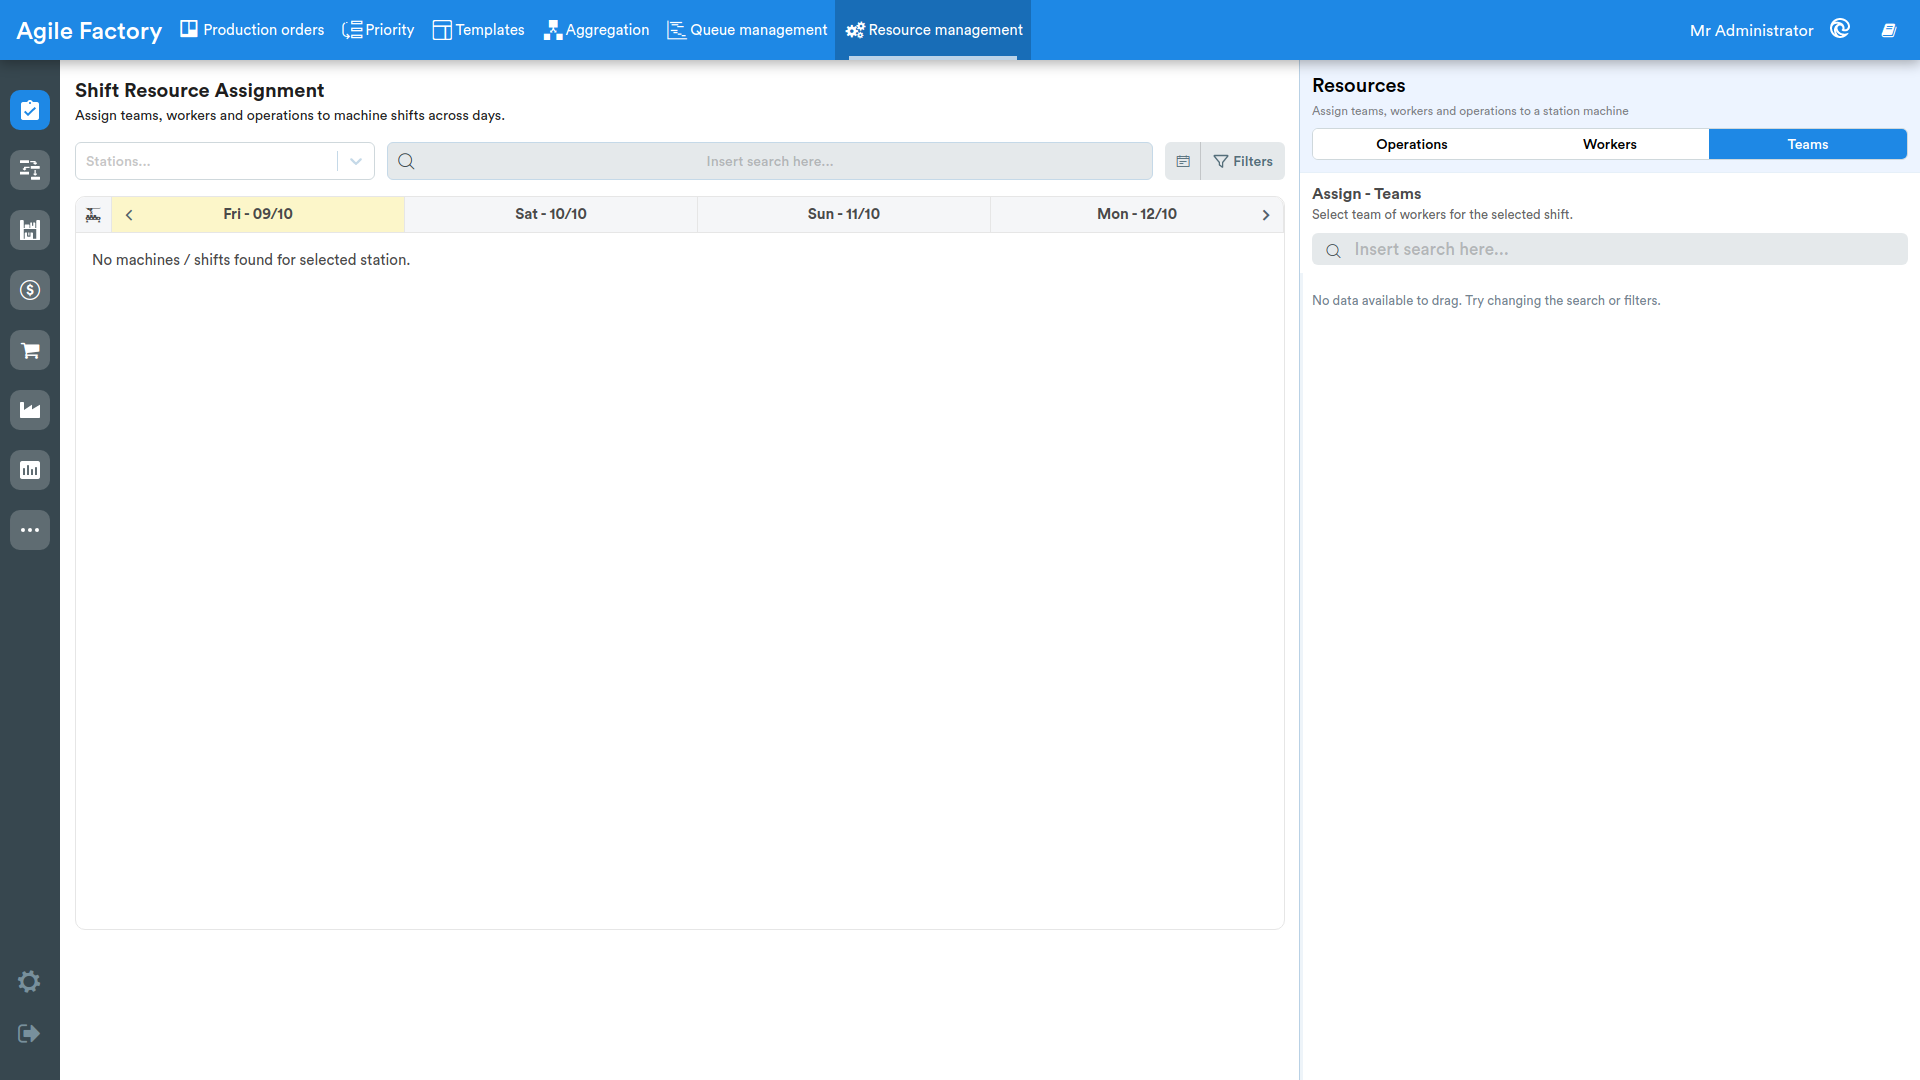
After selecting the desired station in the top-left corner of the screen, the user sees the breakdown of work shifts by machine starting from today onwards.
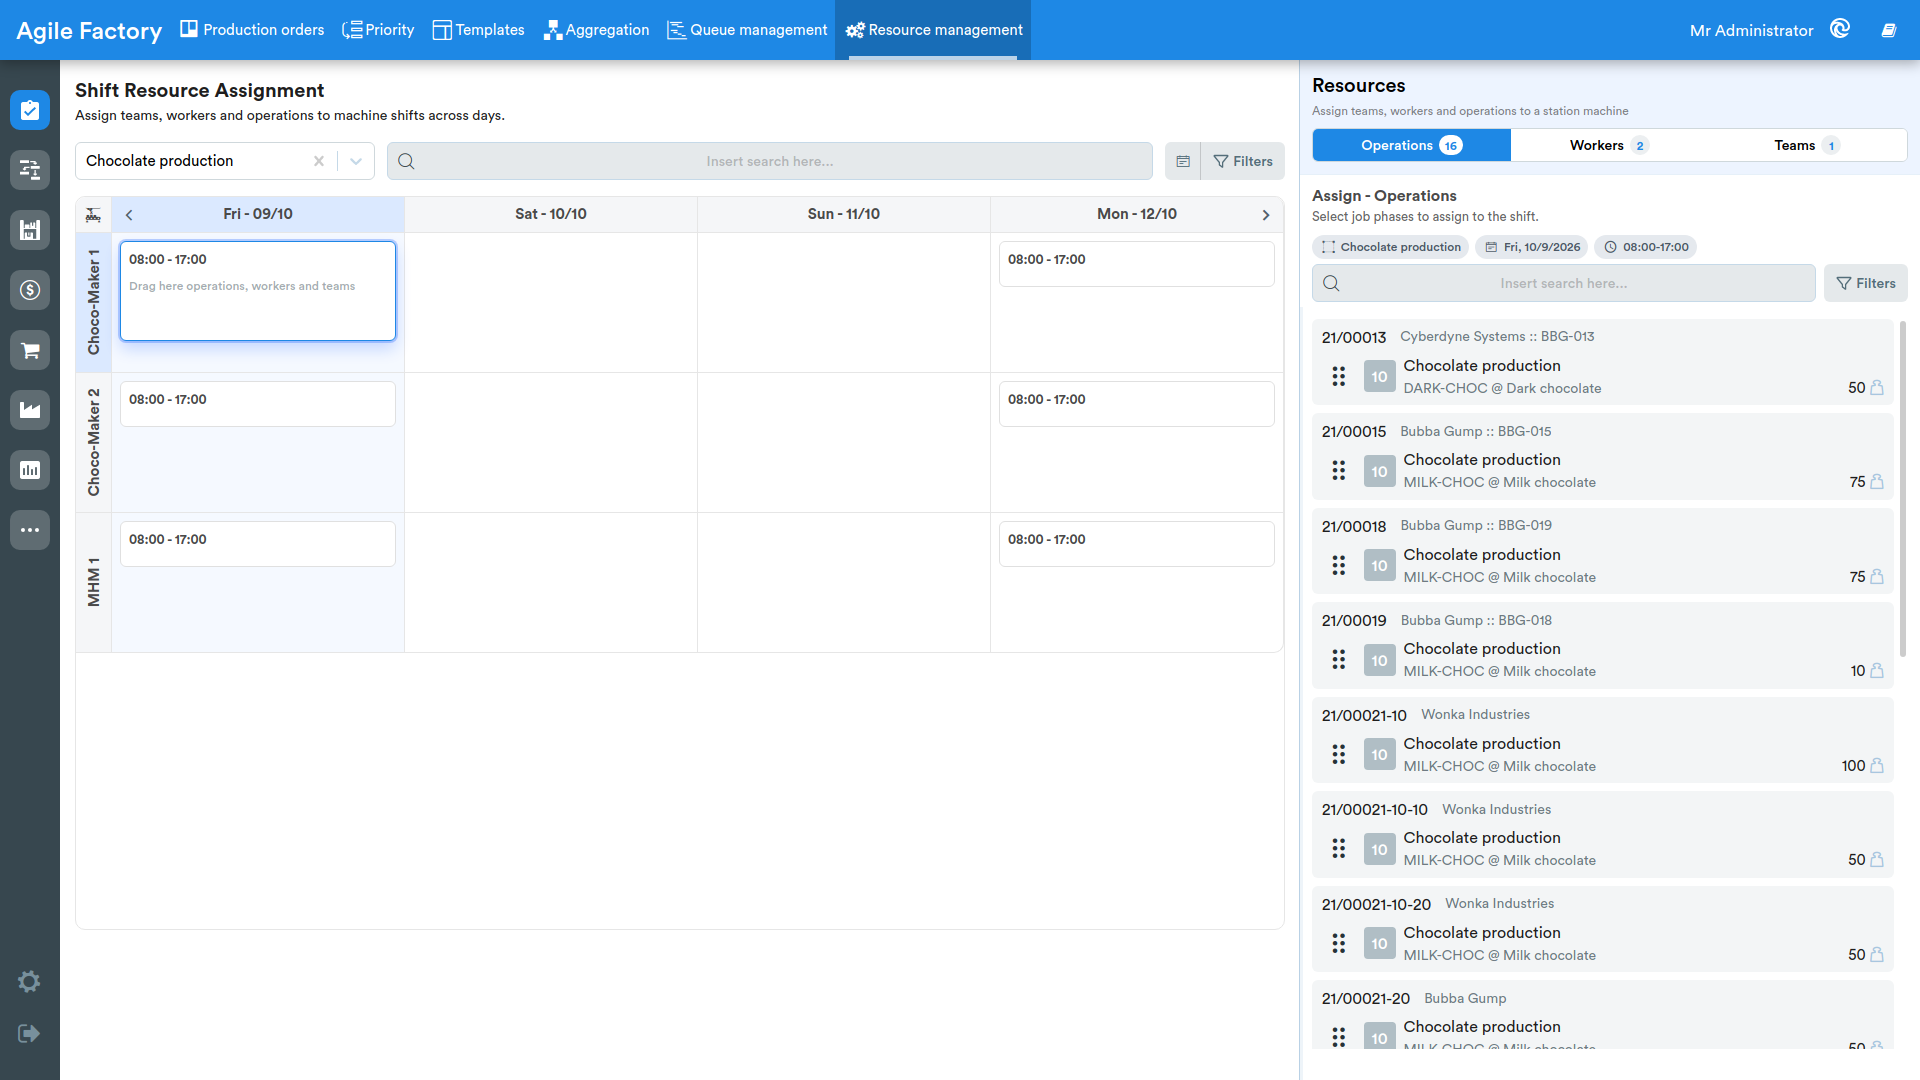
It is advisable to use a 3-day period to get a complete view of the information relating to each shift.
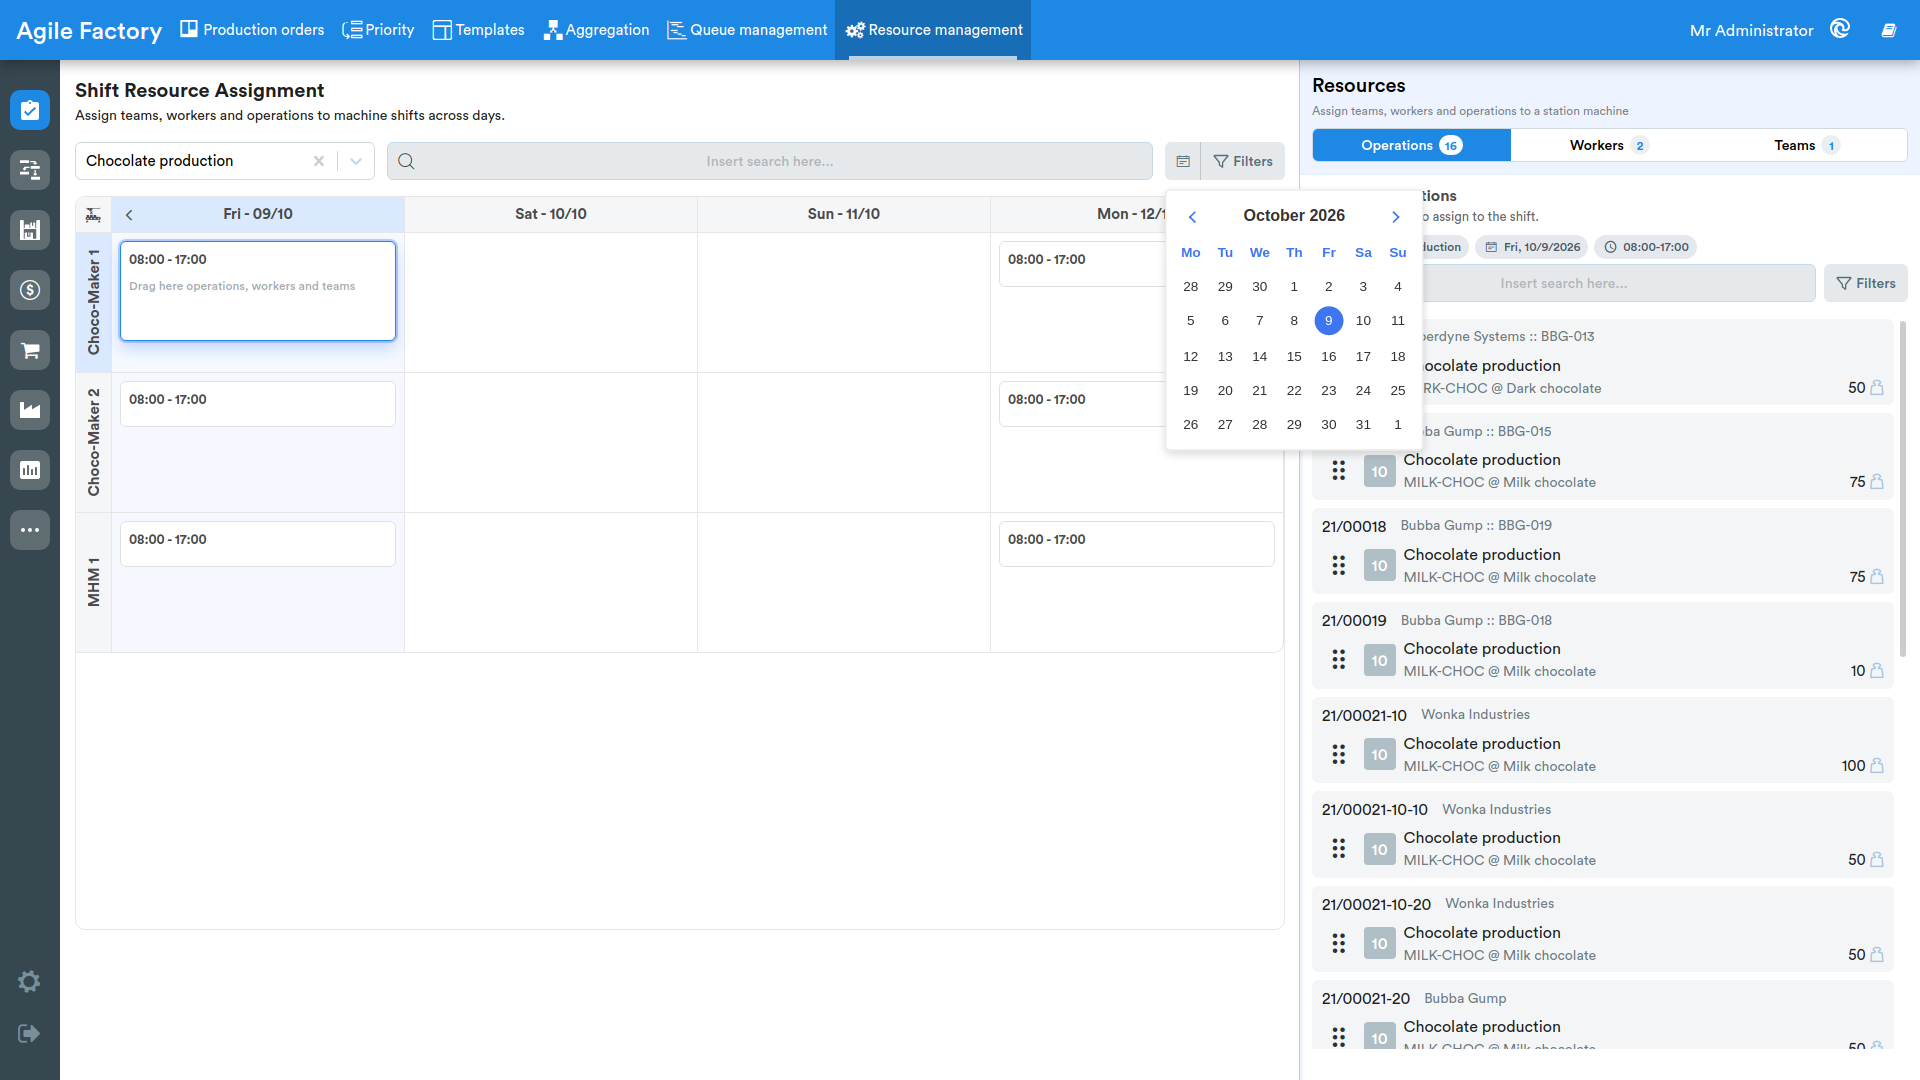
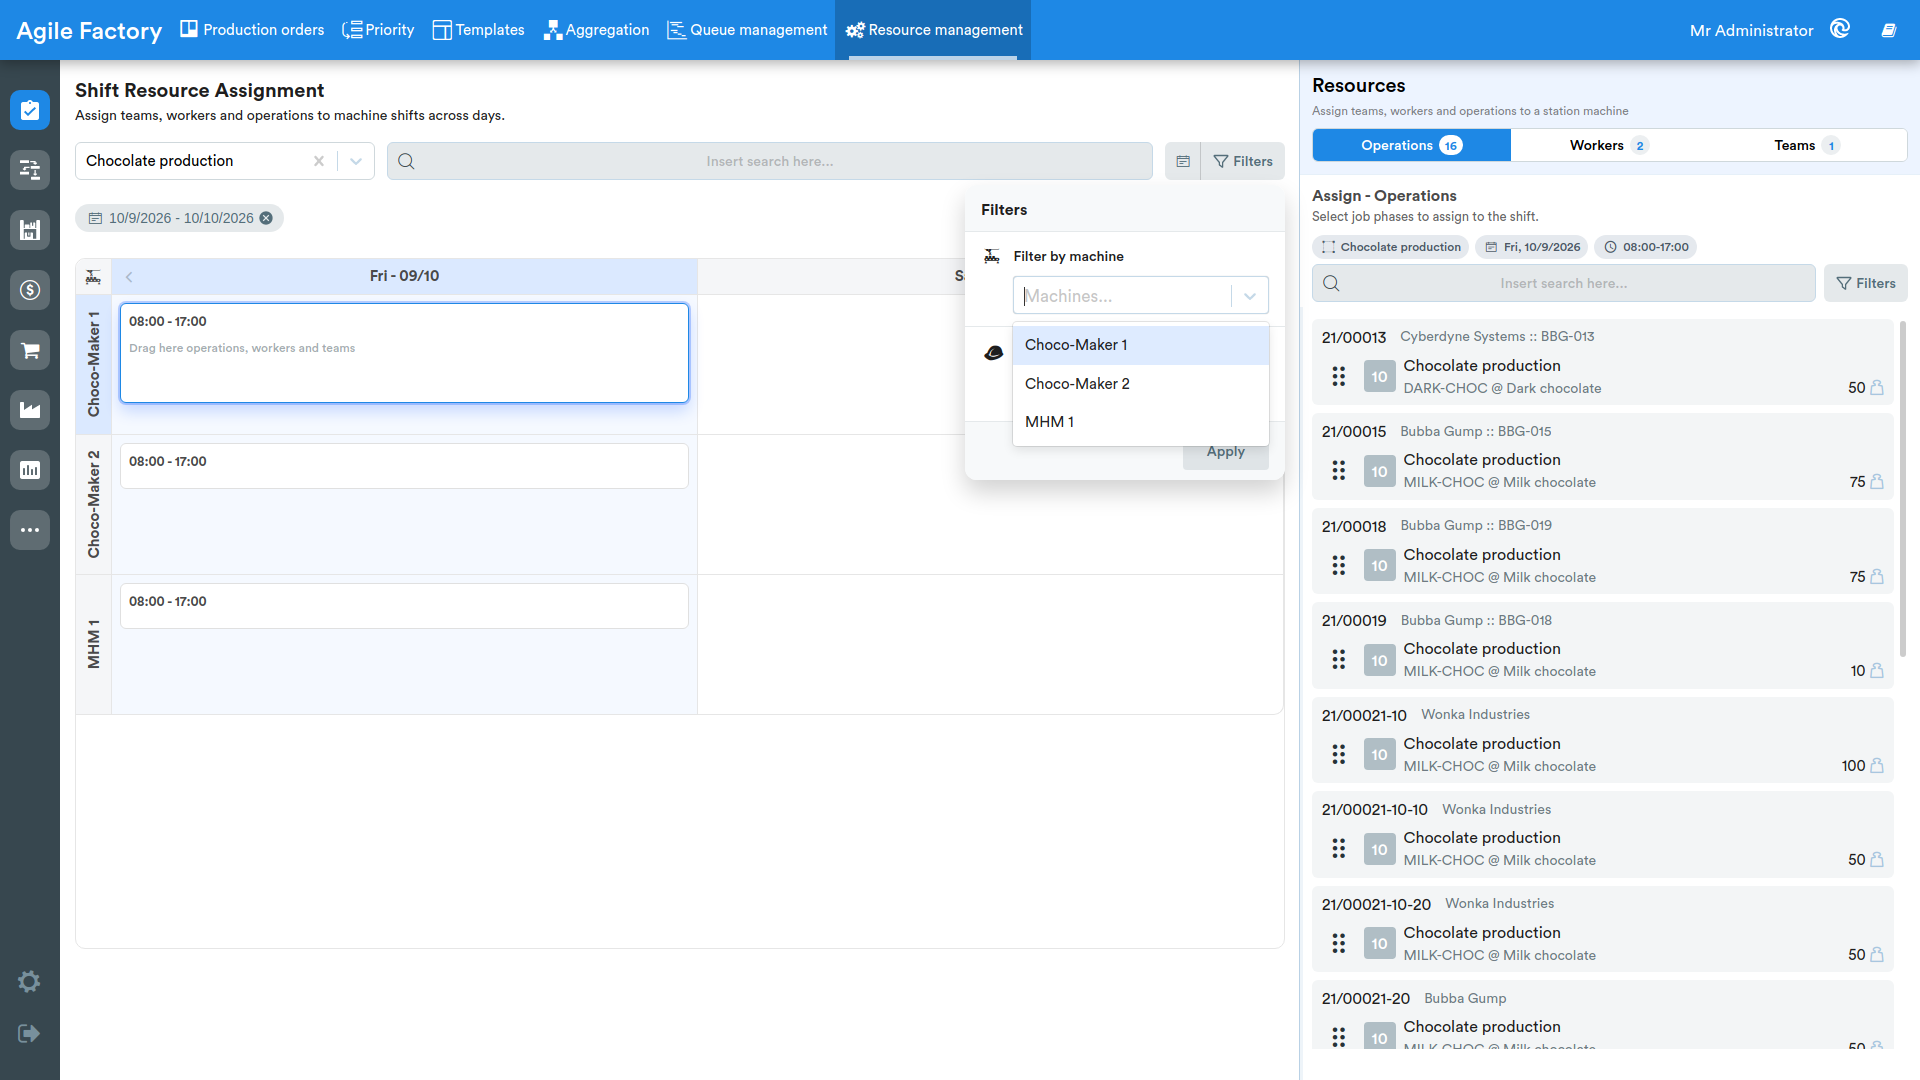
If necessary, the machine filter can also be used.
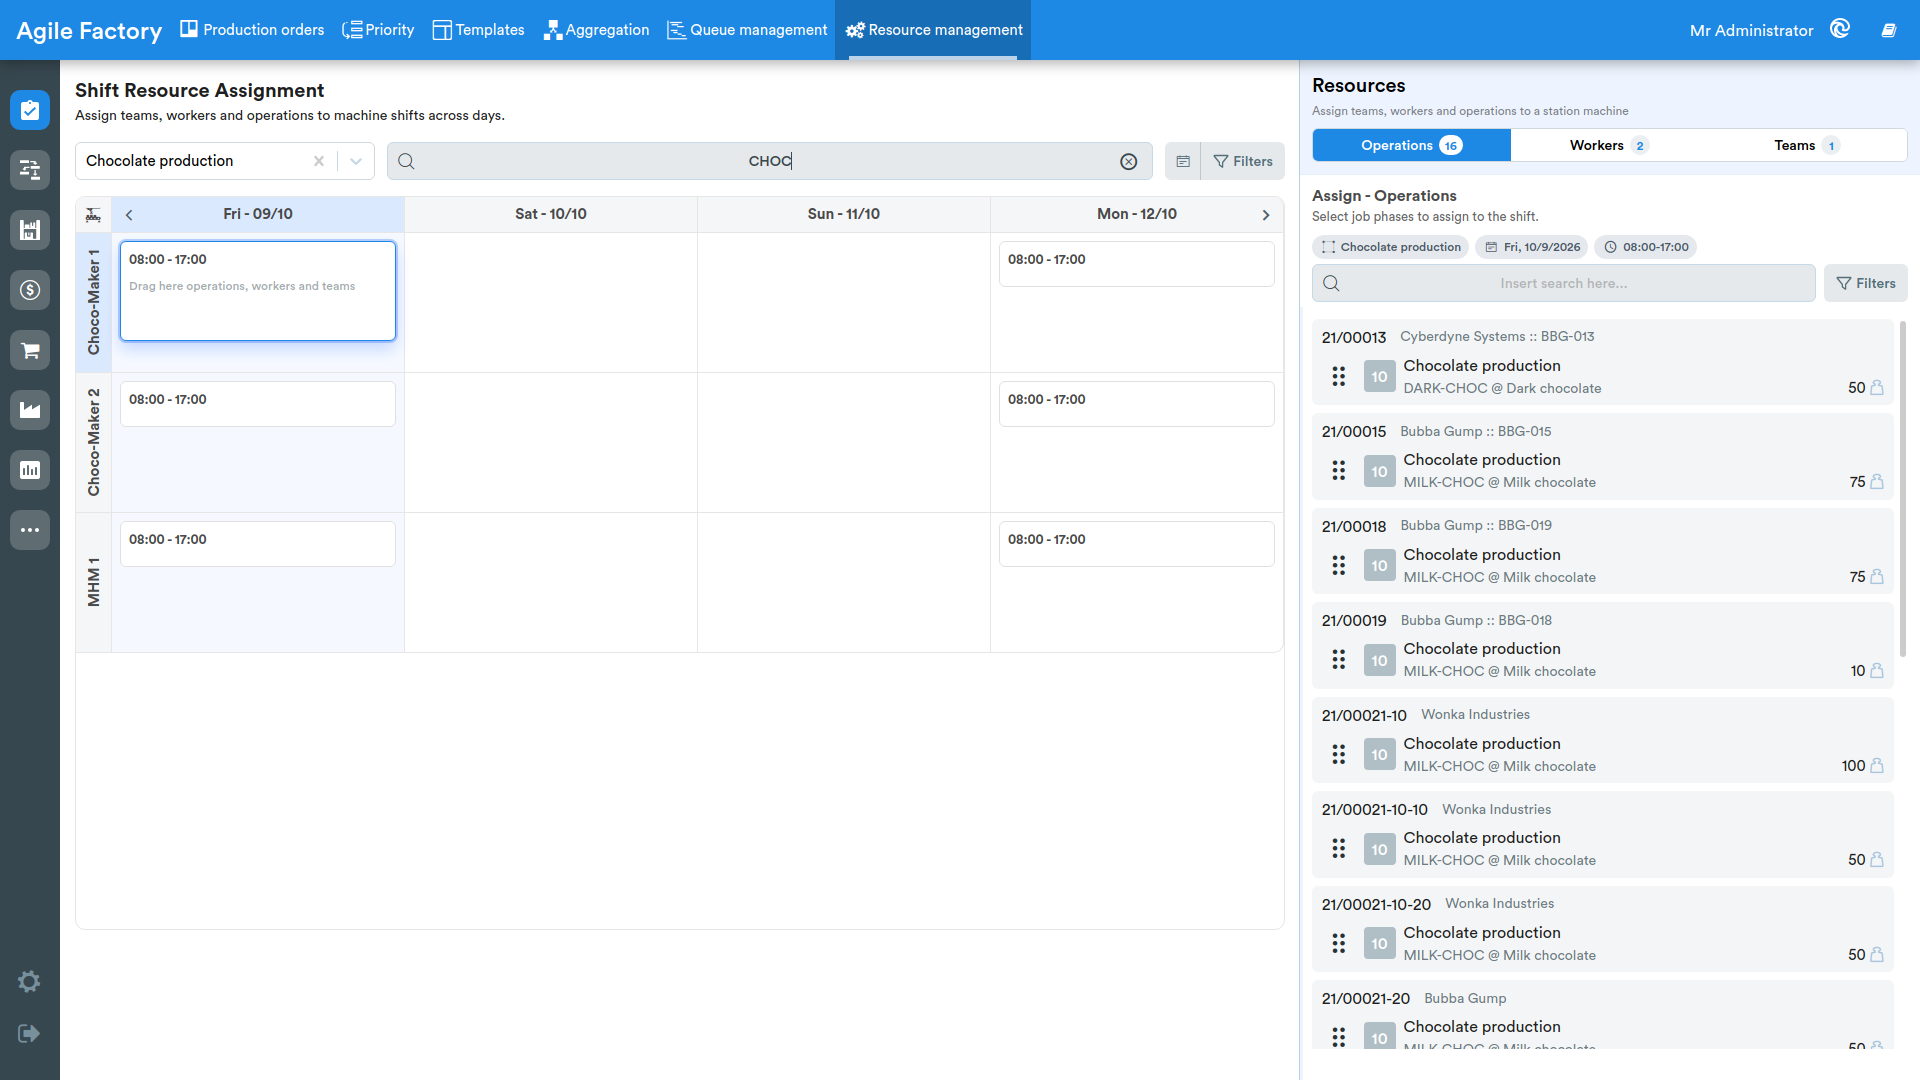
Or the search bar can be used.
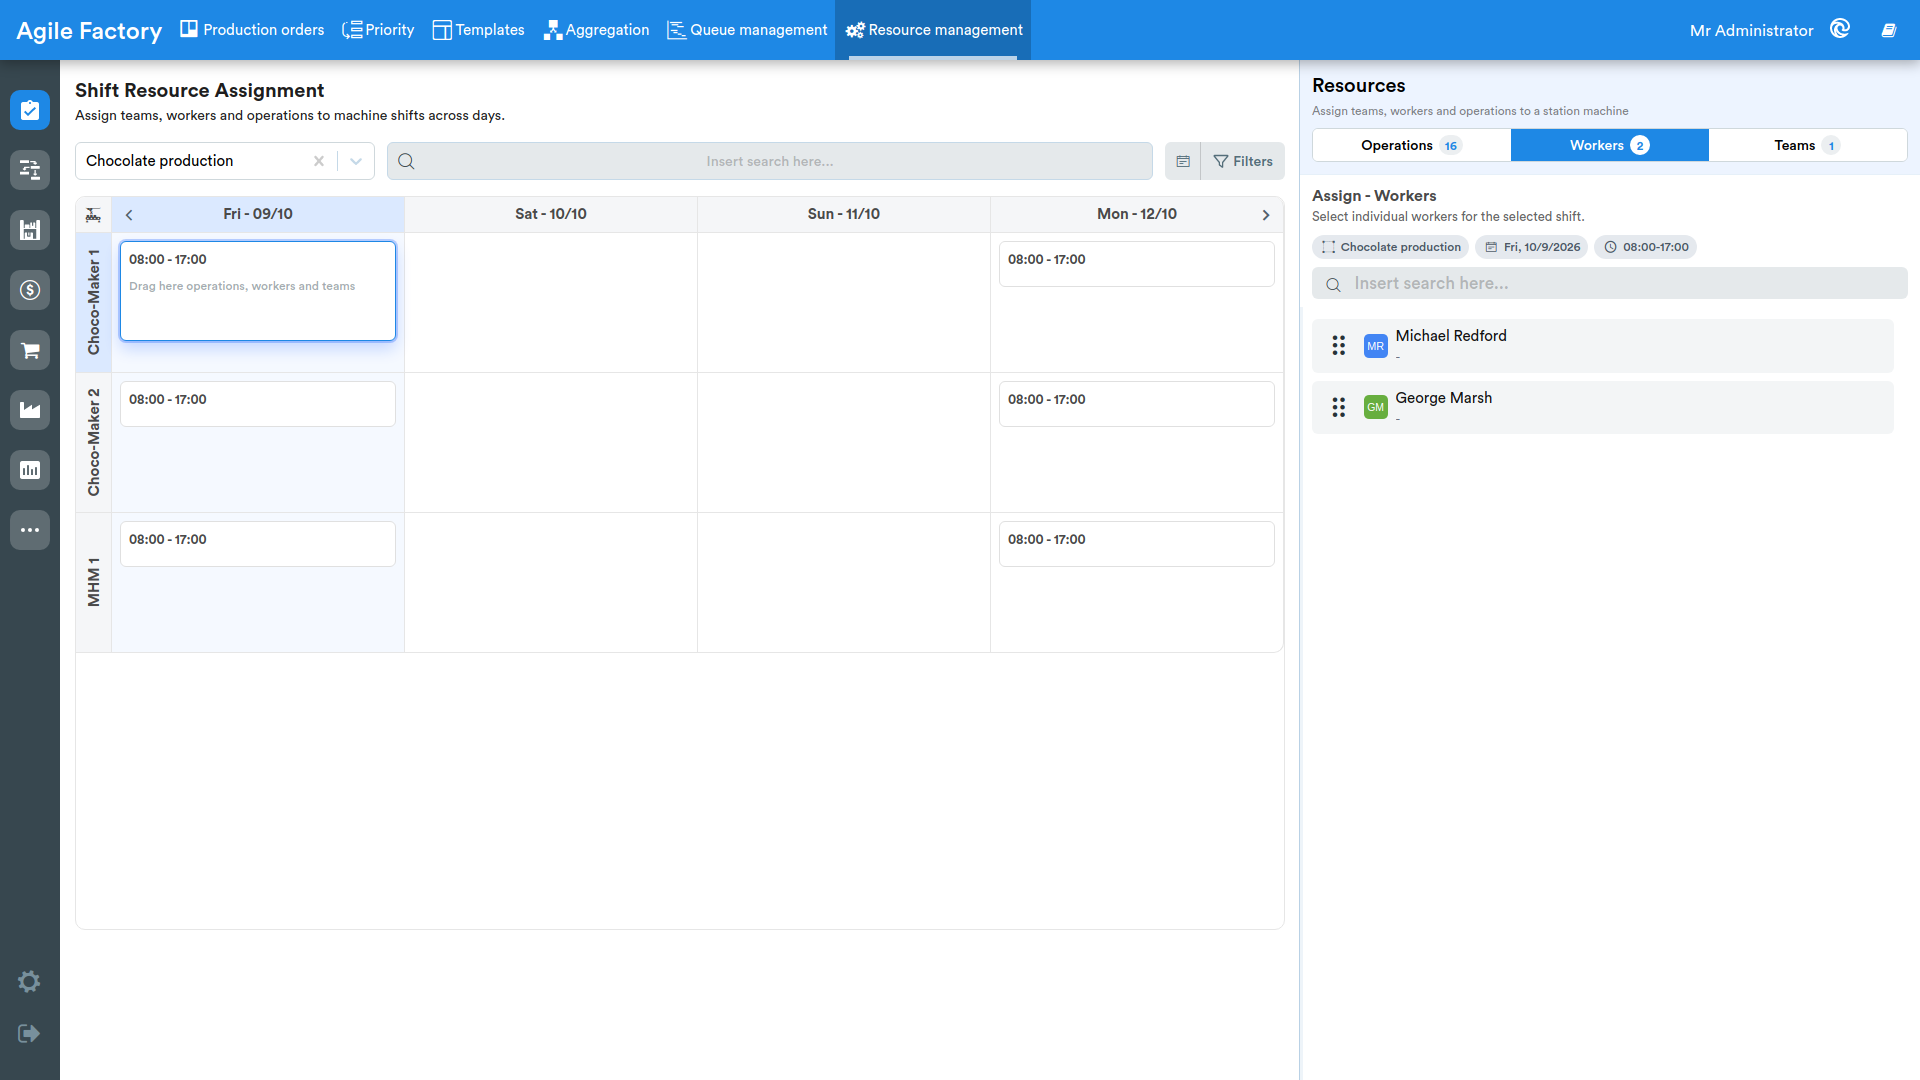
On the right side of the screen a list of the production operations assigned to the selected station and ready to be distributed is available. The "Workers" and "Teams" tabs are also available. For the user's convenience, the list of employees and teams is displayed already filtered: only the employees or teams whose employment is scheduled for that specific shift are available for selection.
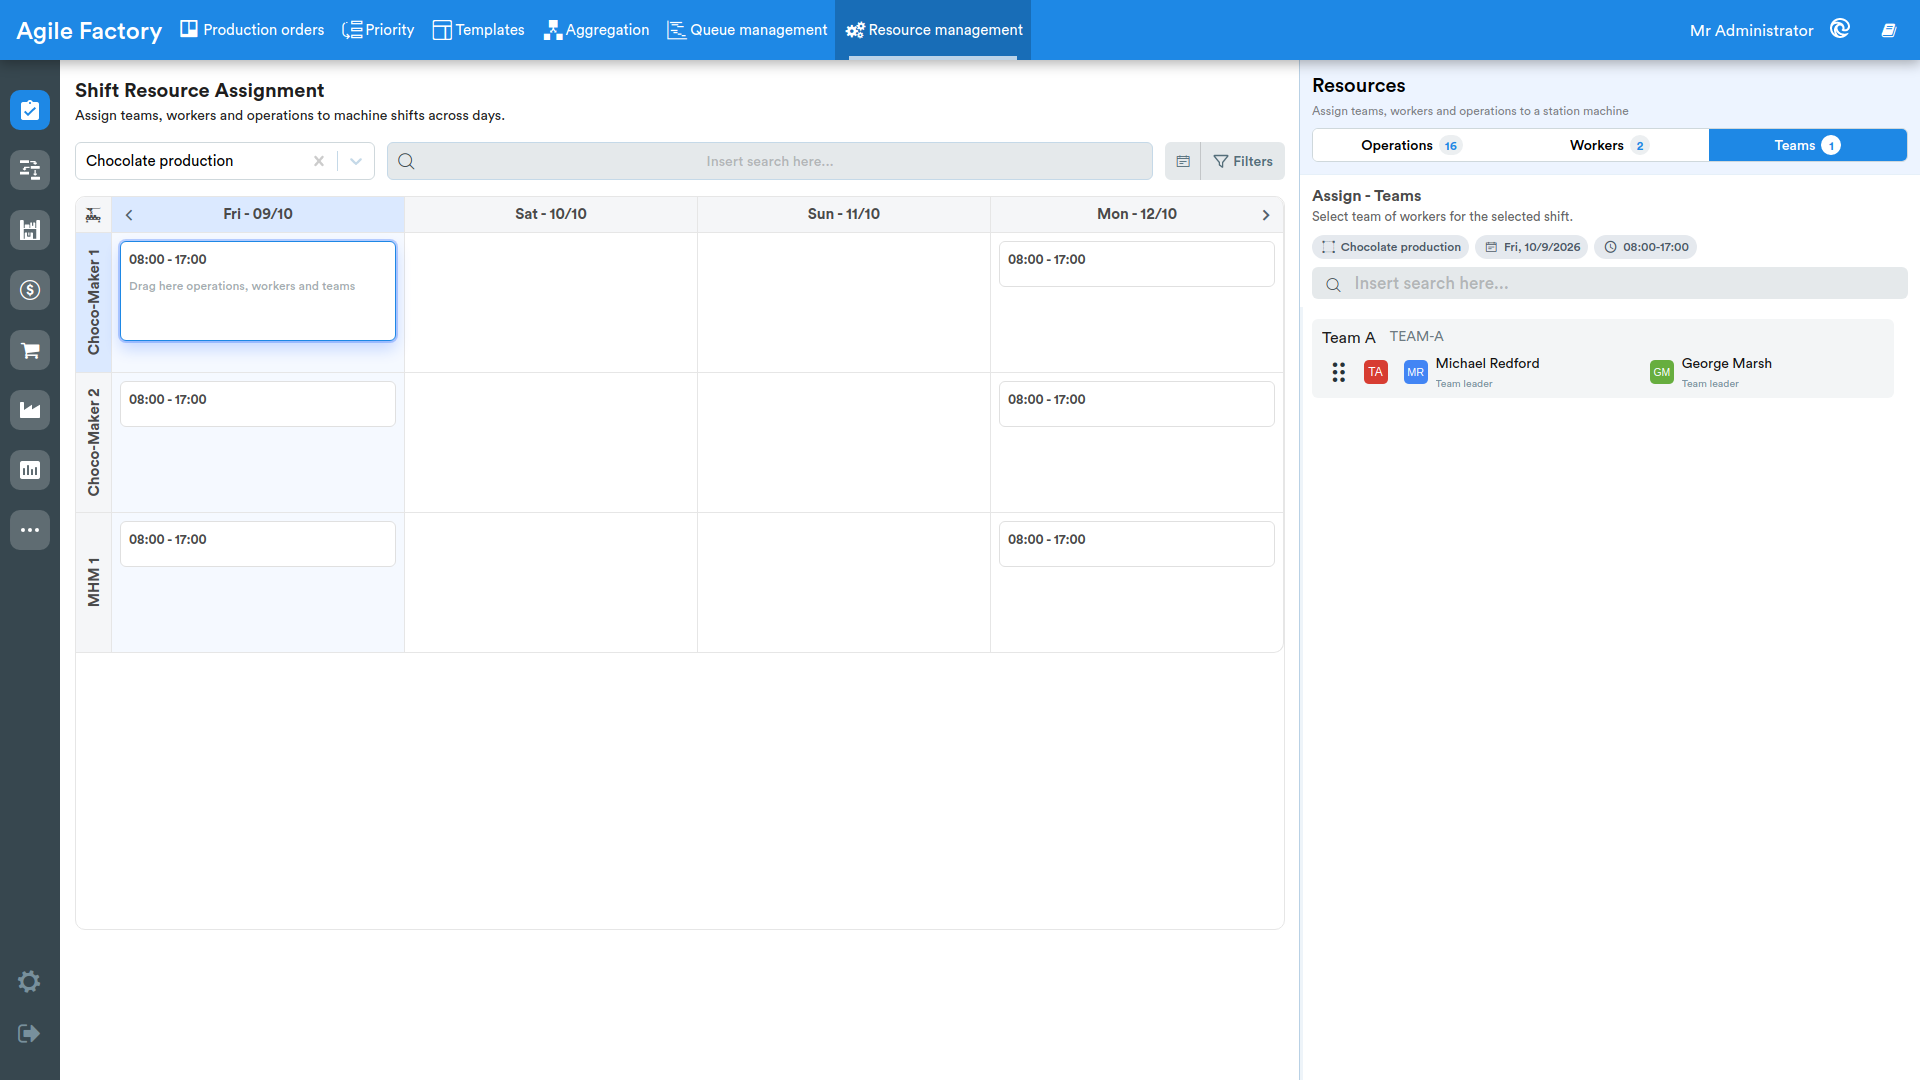
The assignment of operations, employees or teams takes place in a free order, at the user's discretion.
Resource panel filters
In the Operations tab of the right-hand panel, next to the search bar there is a Filters button. Pressing it opens a popover that lets you narrow down the list of operations available for assignment.
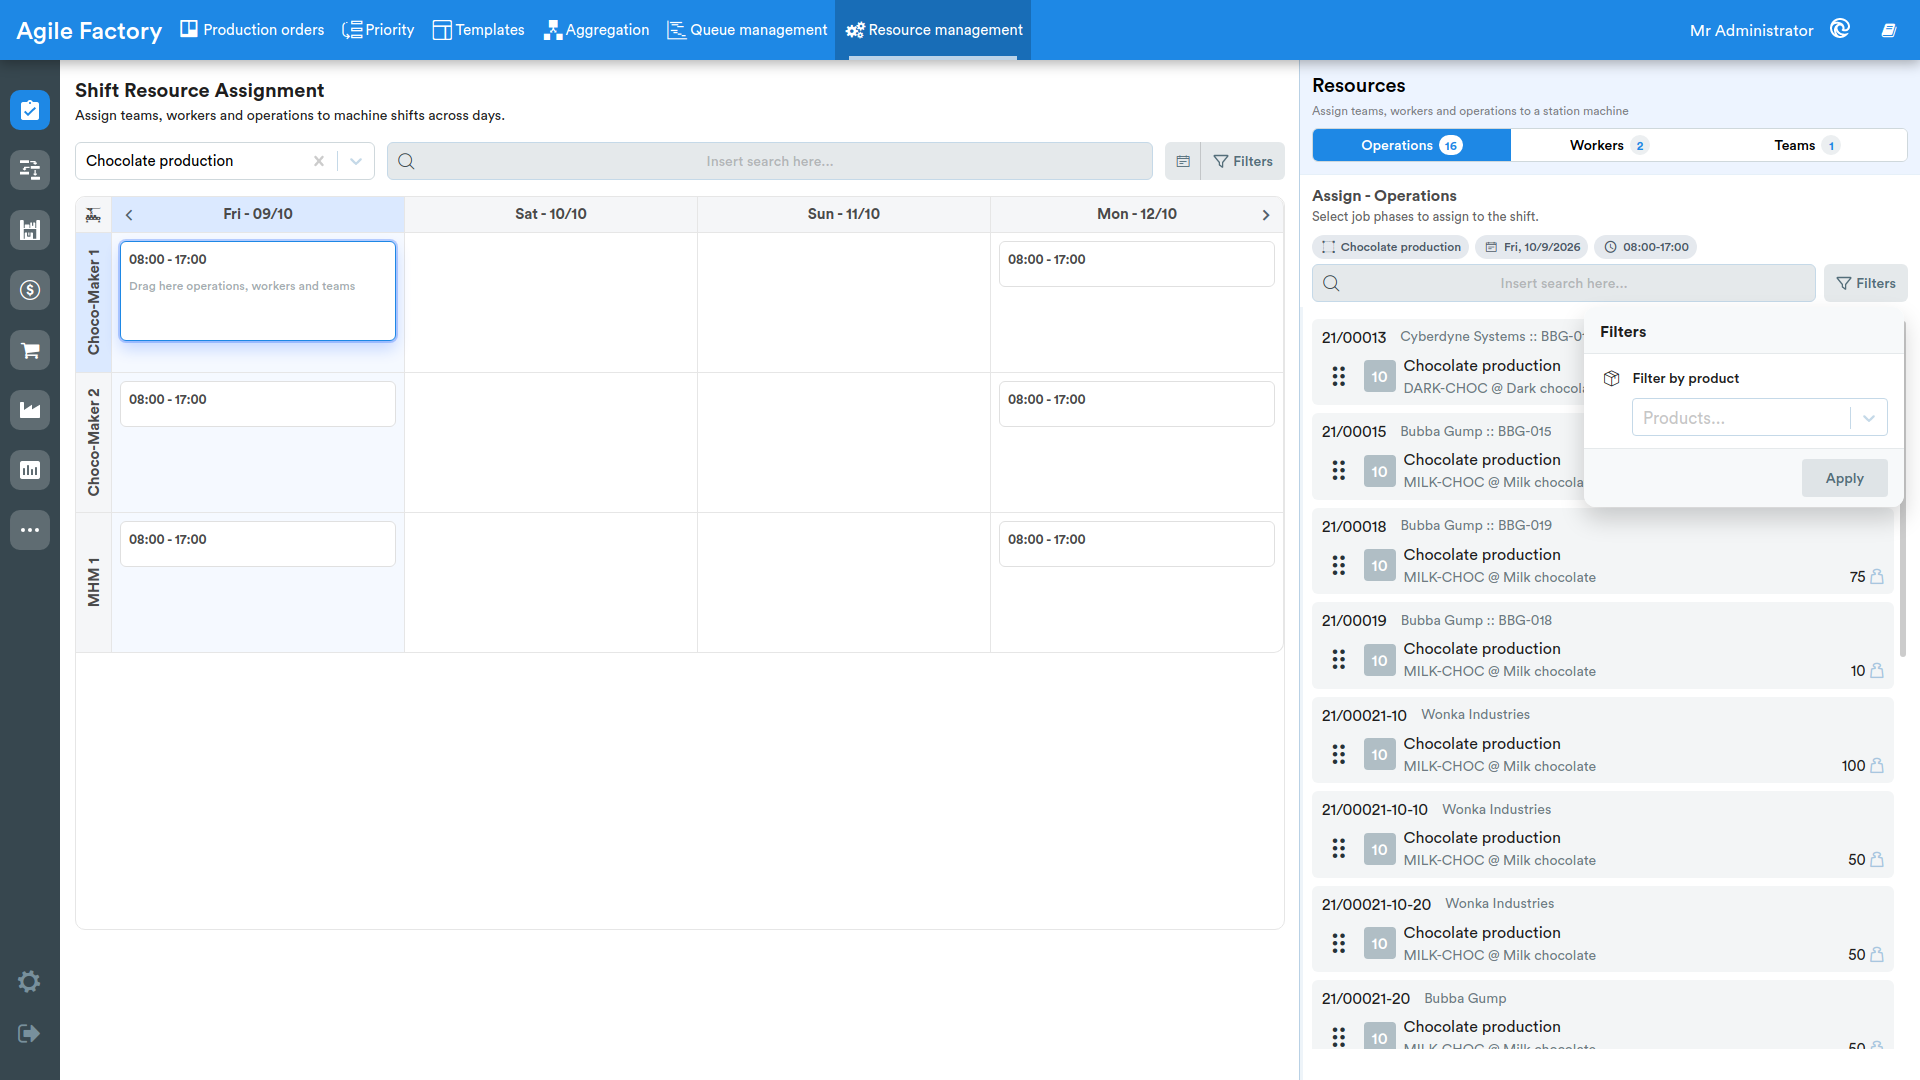
Filter by product
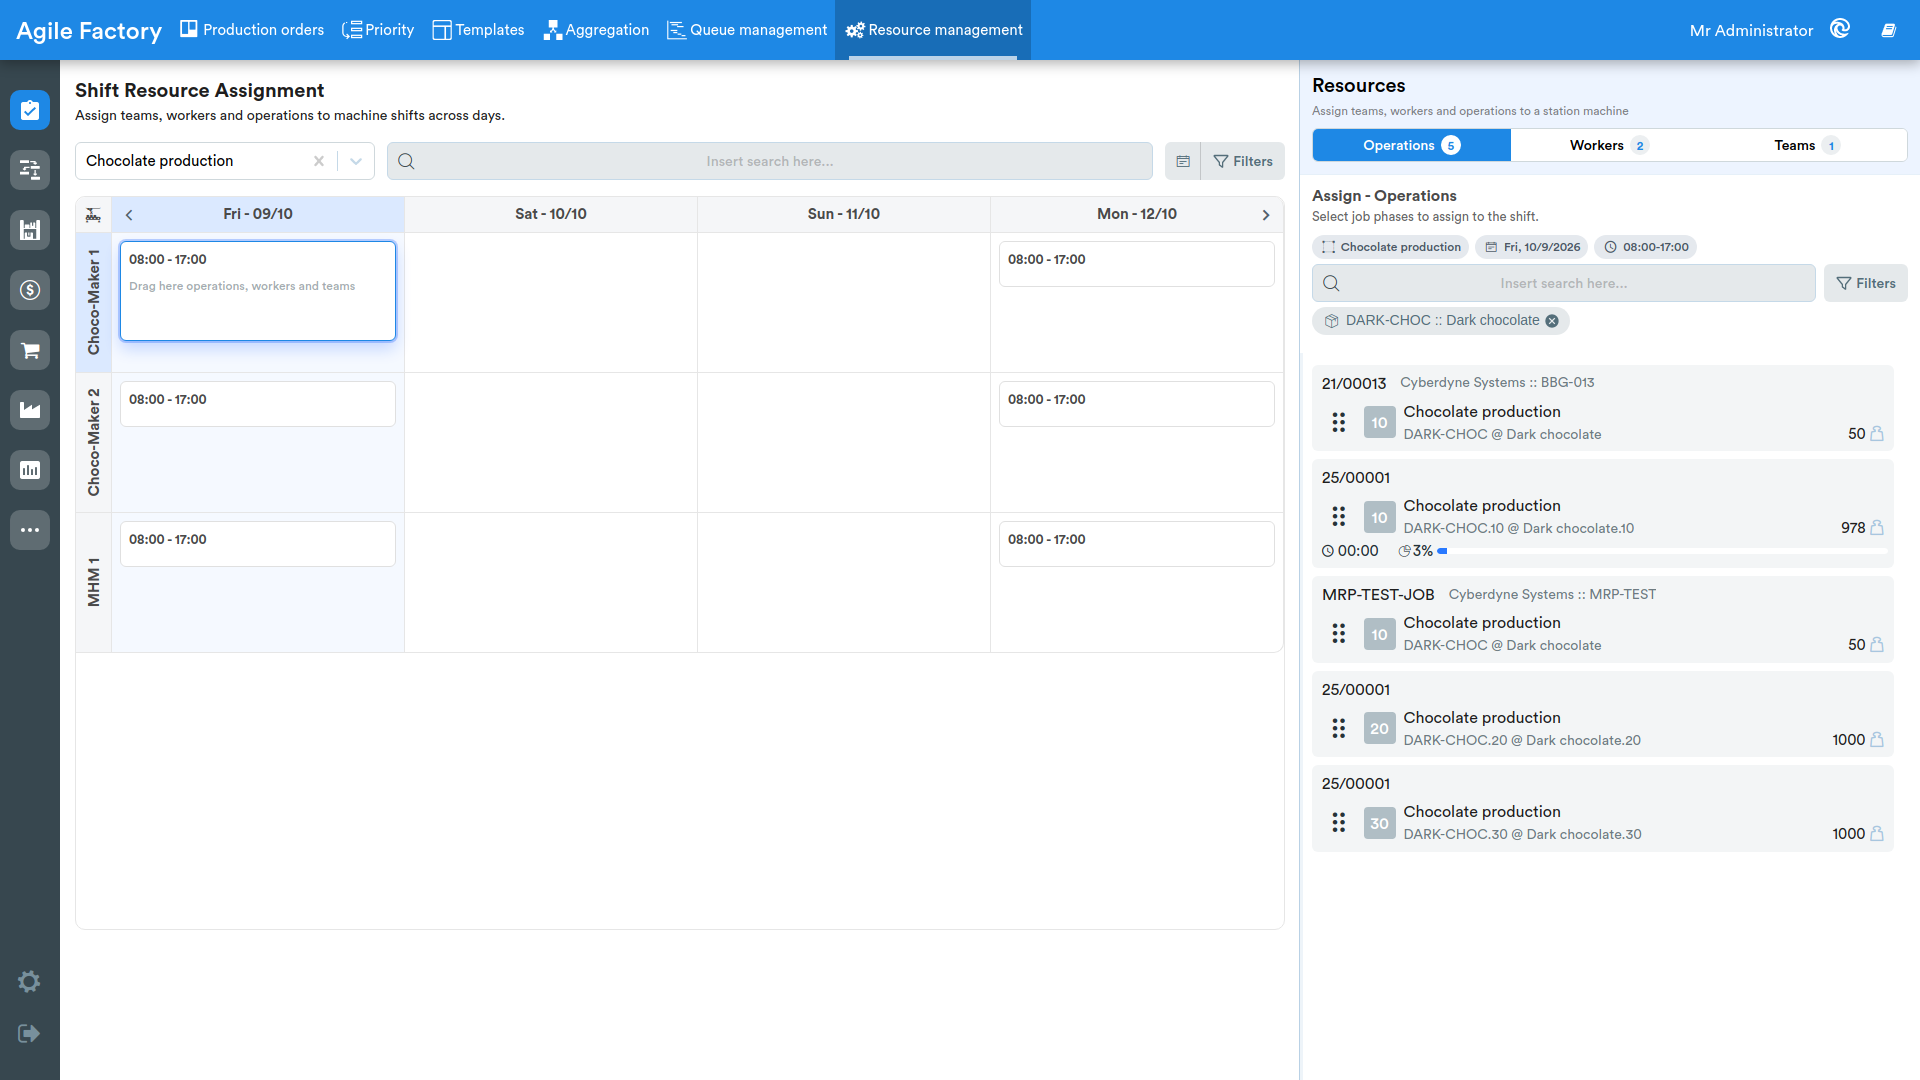
Inside the Filters popover the Filter by product option is available, which lets you select one or more products and show only the operations associated with them in the list. After selecting the desired products, press Apply to make the filter effective. The selected product is shown as a removable label (chip) below the search bar; to remove the filter just click the x on the corresponding label.
Operation assignment
Operations are assigned to shifts through a simple drag'n'drop: just right-click on the desired shift, then do the same on the desired operation and drag it to the correct position.
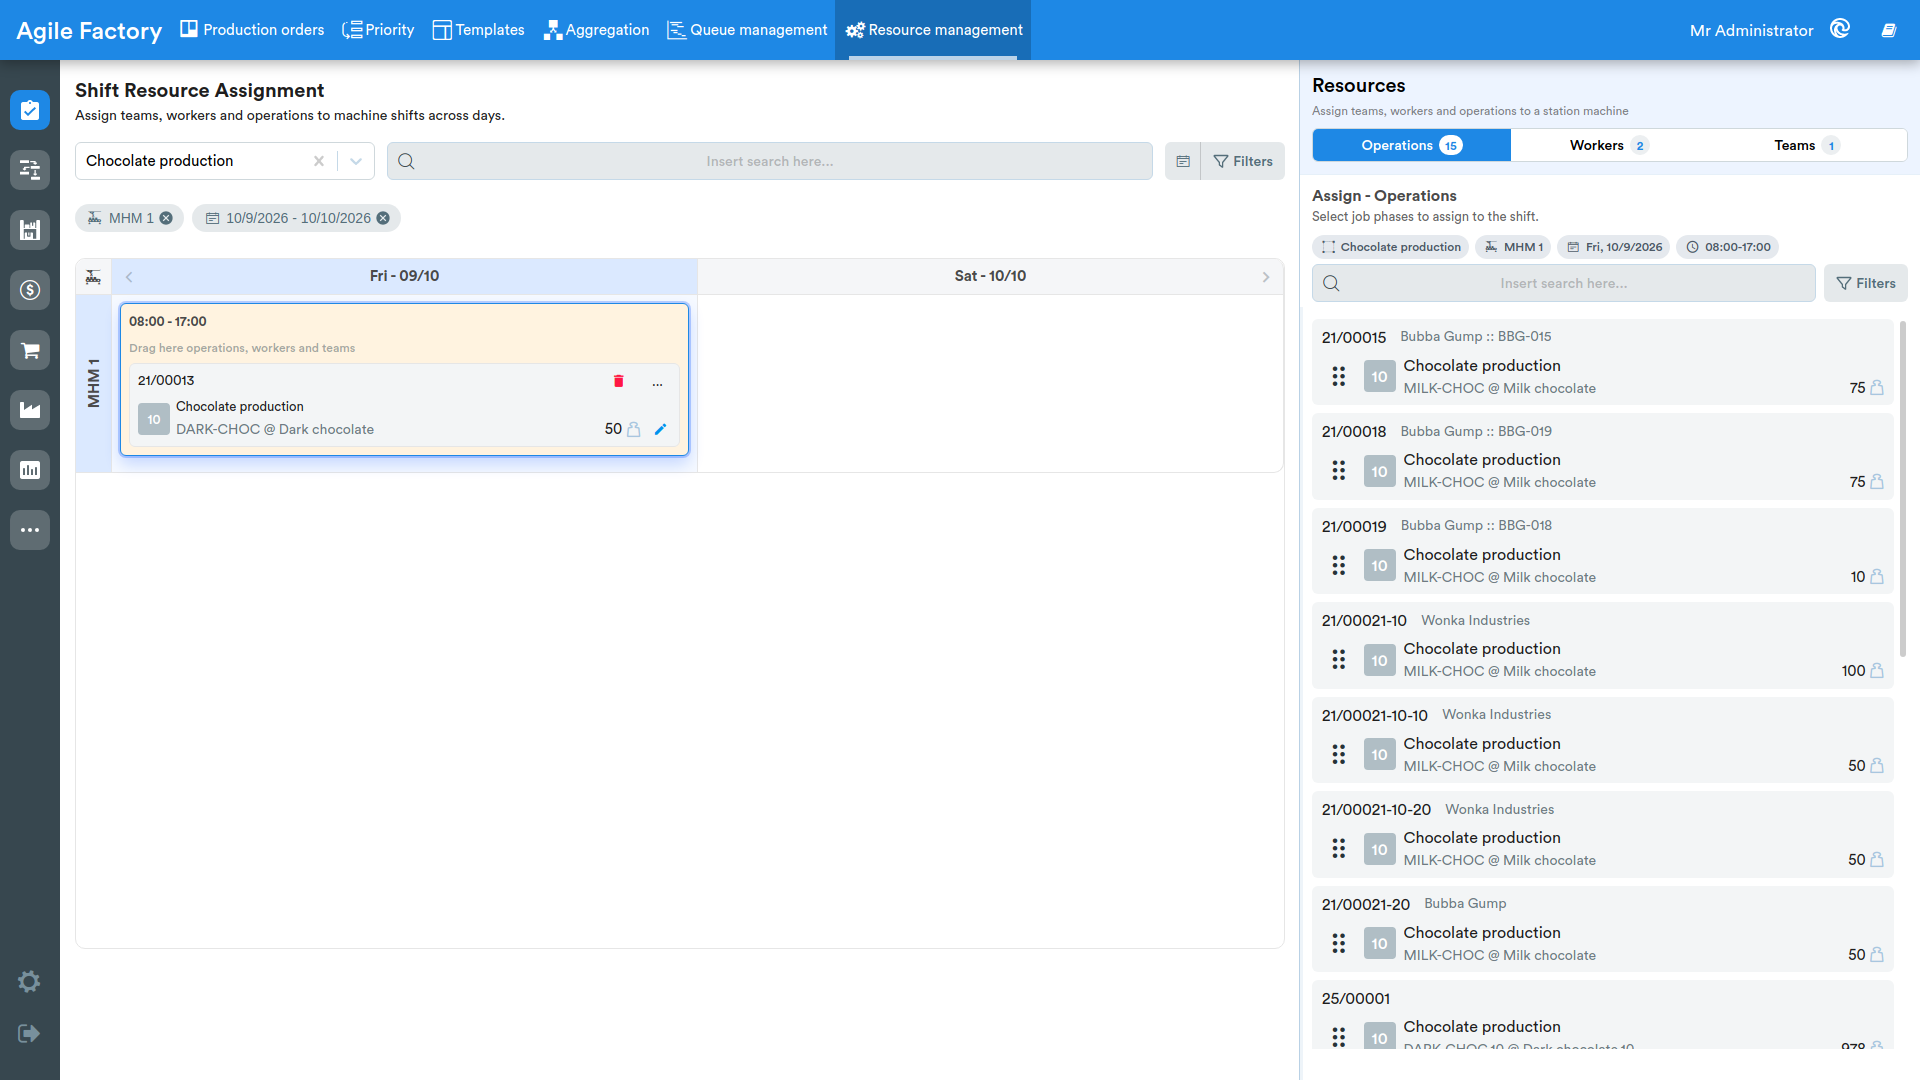
The number of finished product units assigned to the shift can be changed using the ✏️ symbol after assigning the operation to the shift.
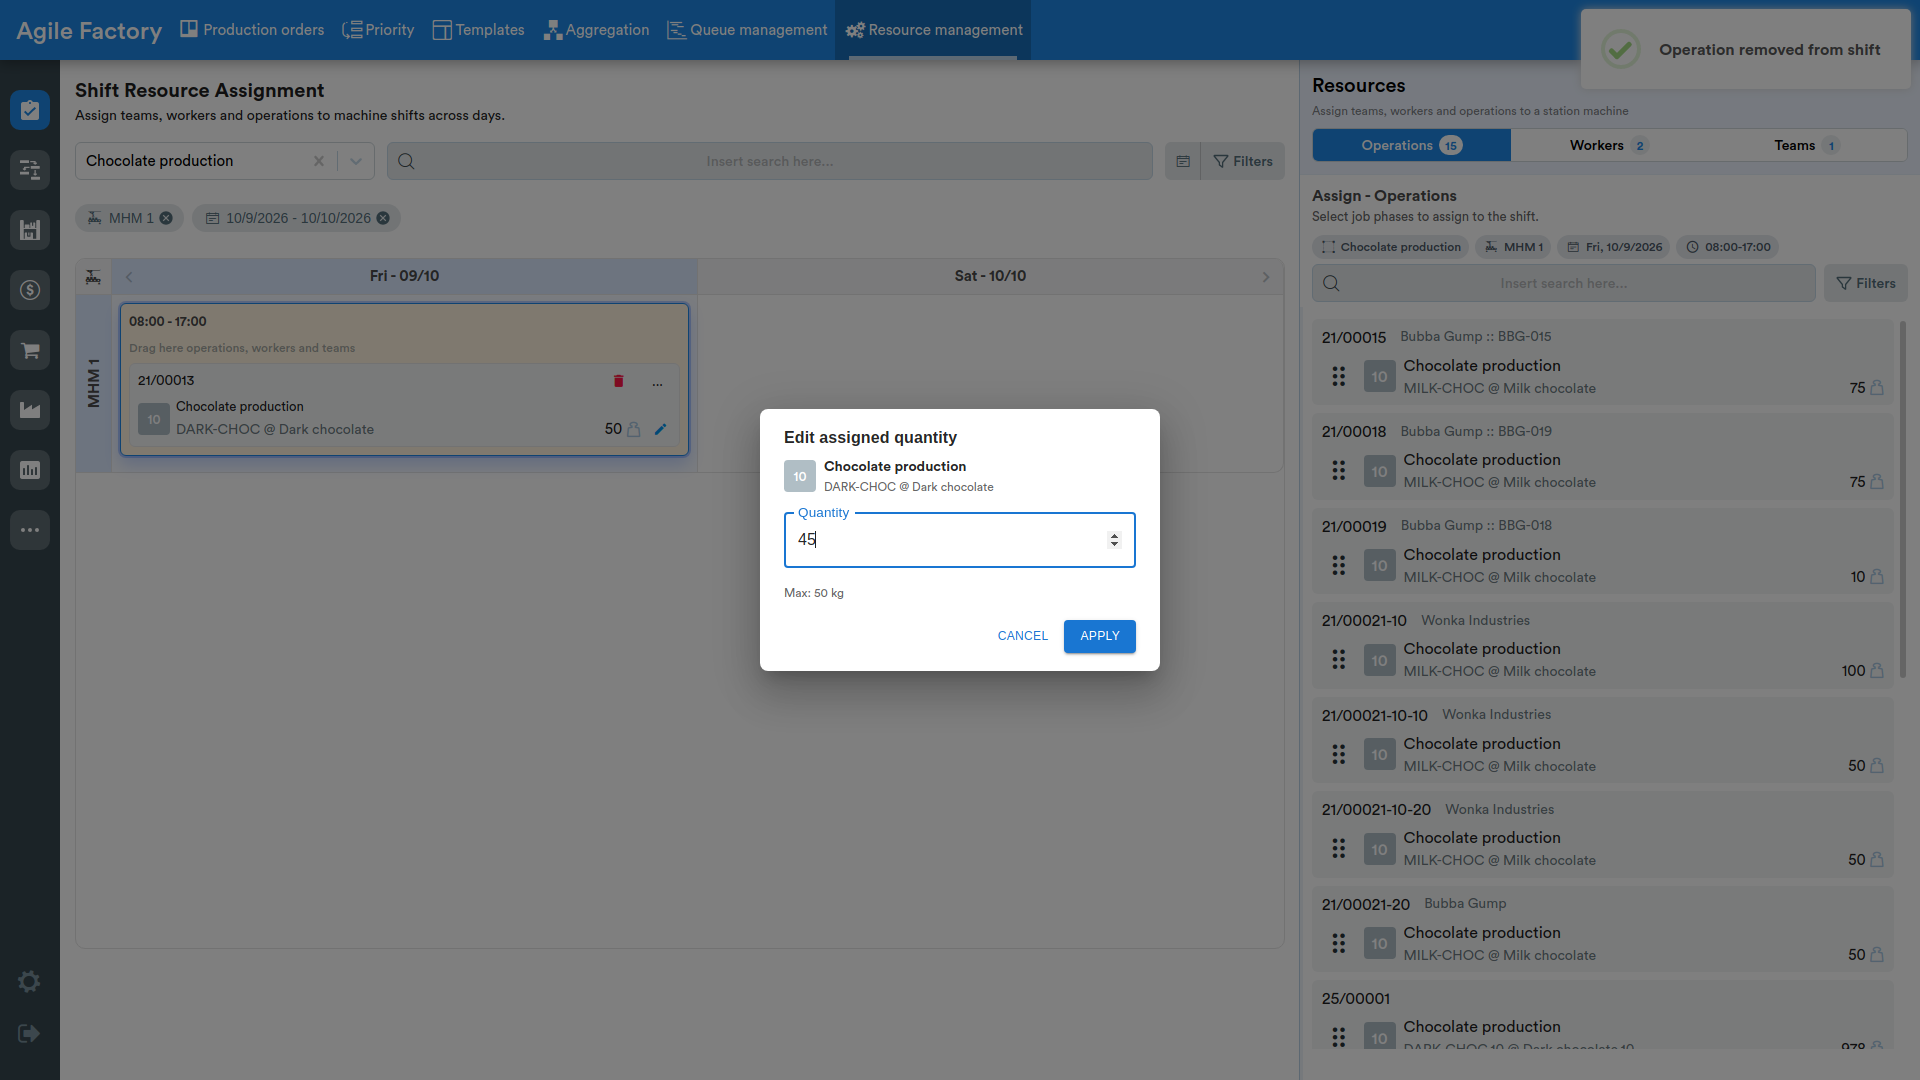
The number of product units to be produced during a given shift can be defined using the aggregation parameters available for each product type in the Listings section, via the "Shift limit" parameter.
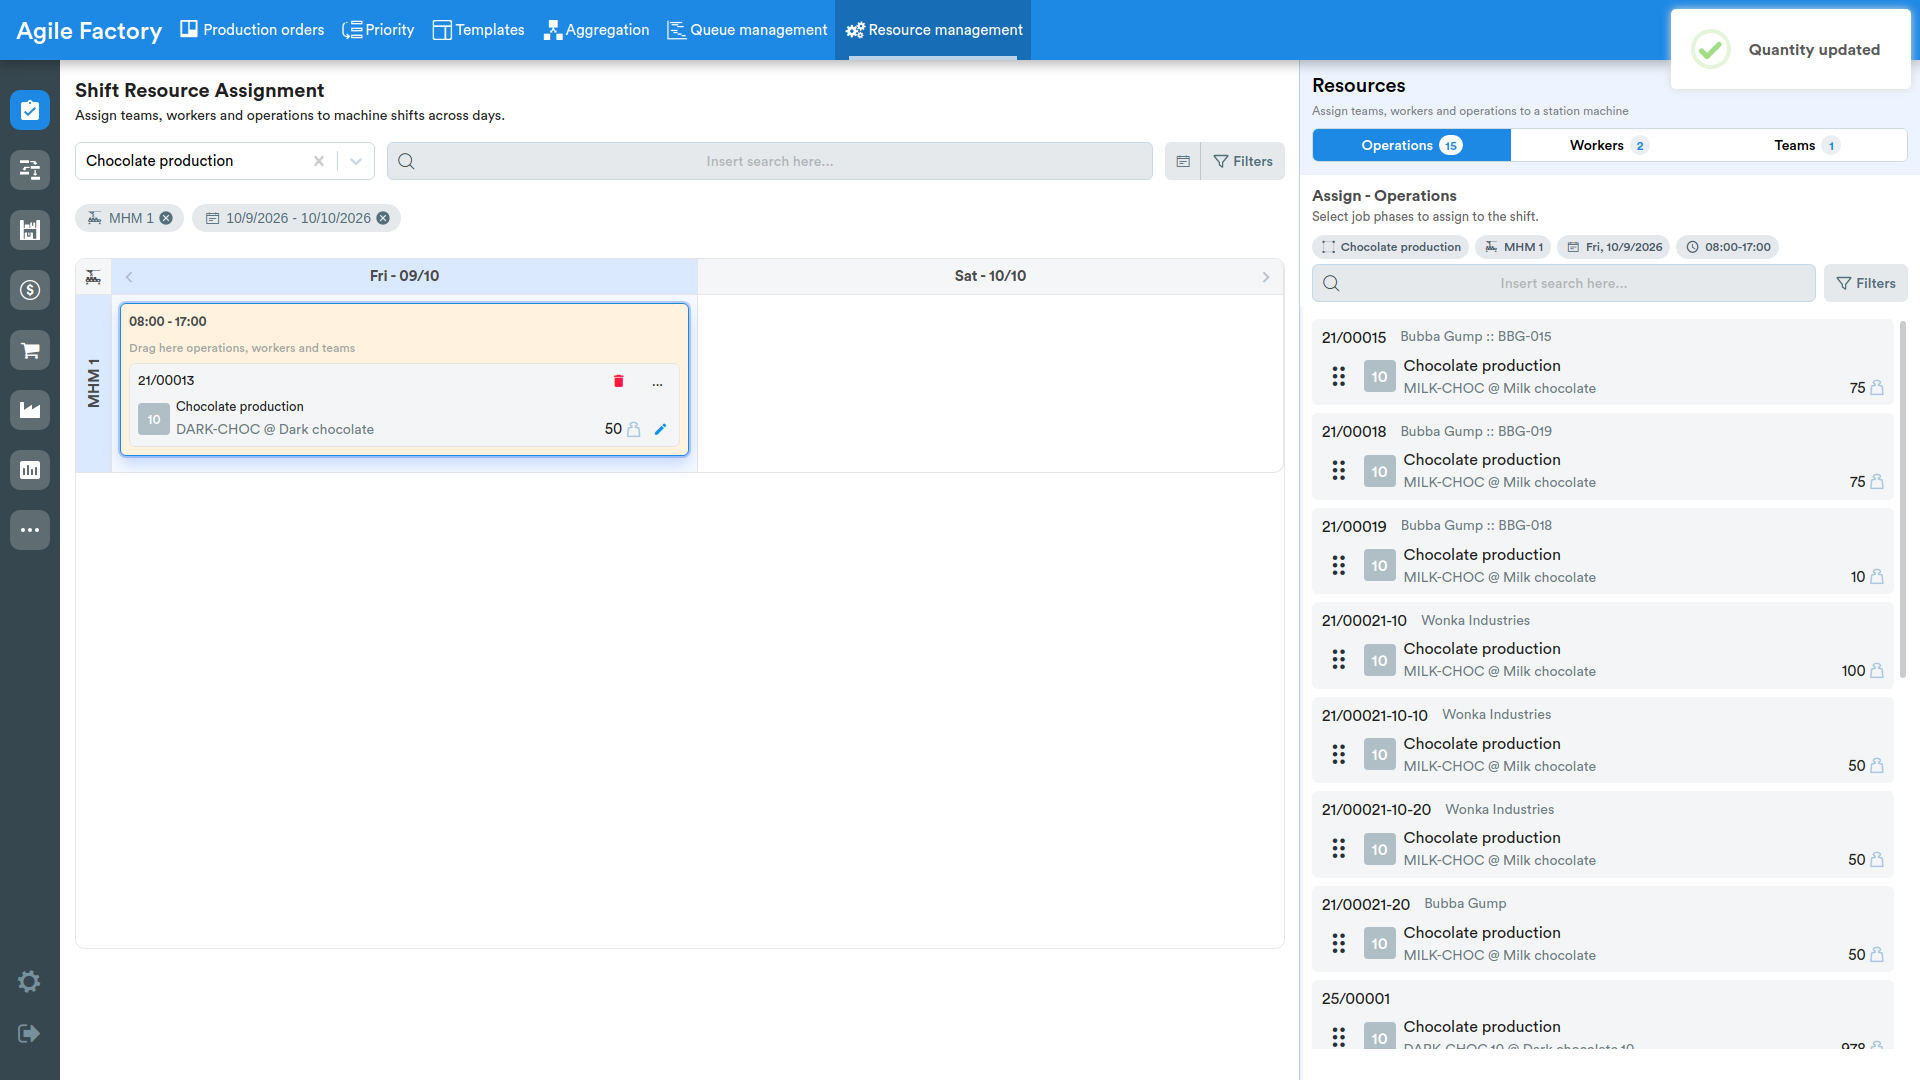
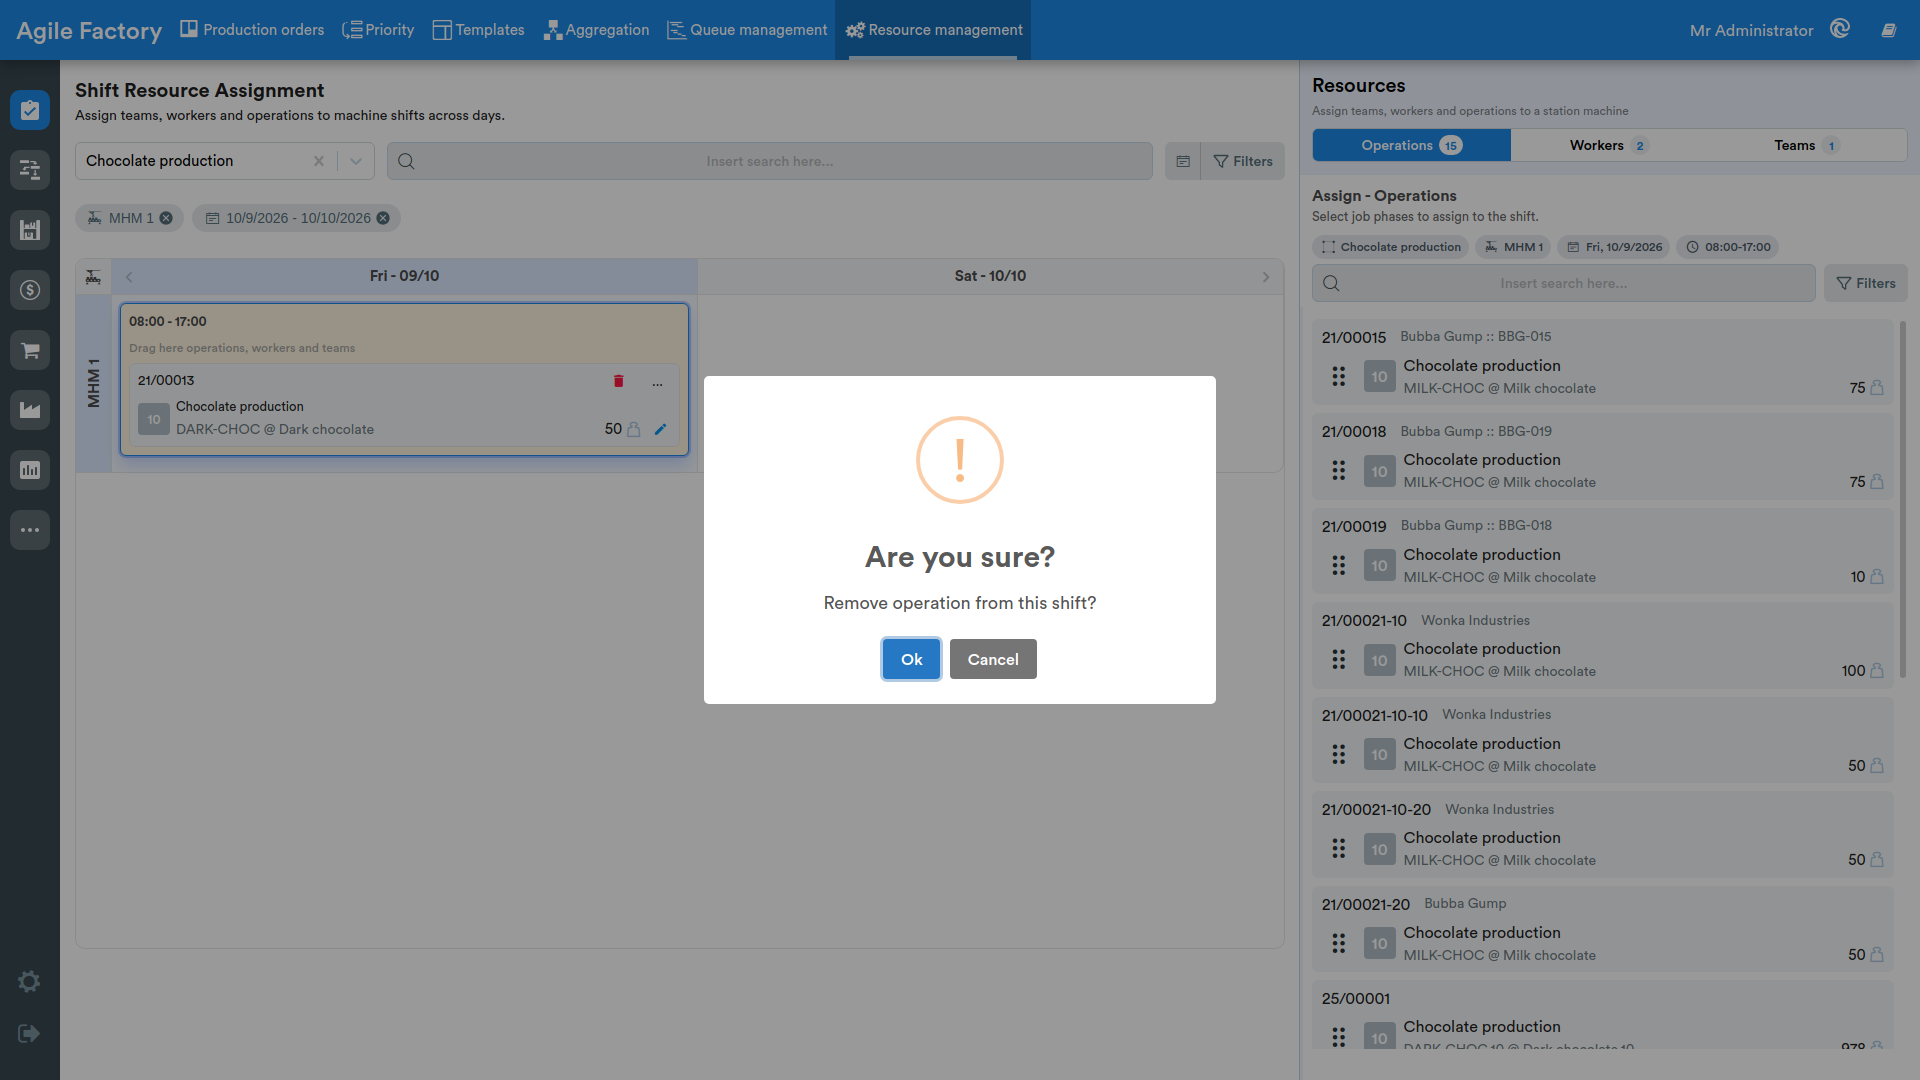
If this value is entered, no more than the indicated number will be assigned to each shift, while the remaining quantity will be available for distribution to the next work shift. If the number of production units related to an operation has been entirely assigned to a shift, that operation is removed from the list once assigned to the shift. If necessary, the assignment can be cancelled using the trash button. The deleted operation will become available again in the operations list on the right.
Operator assignment
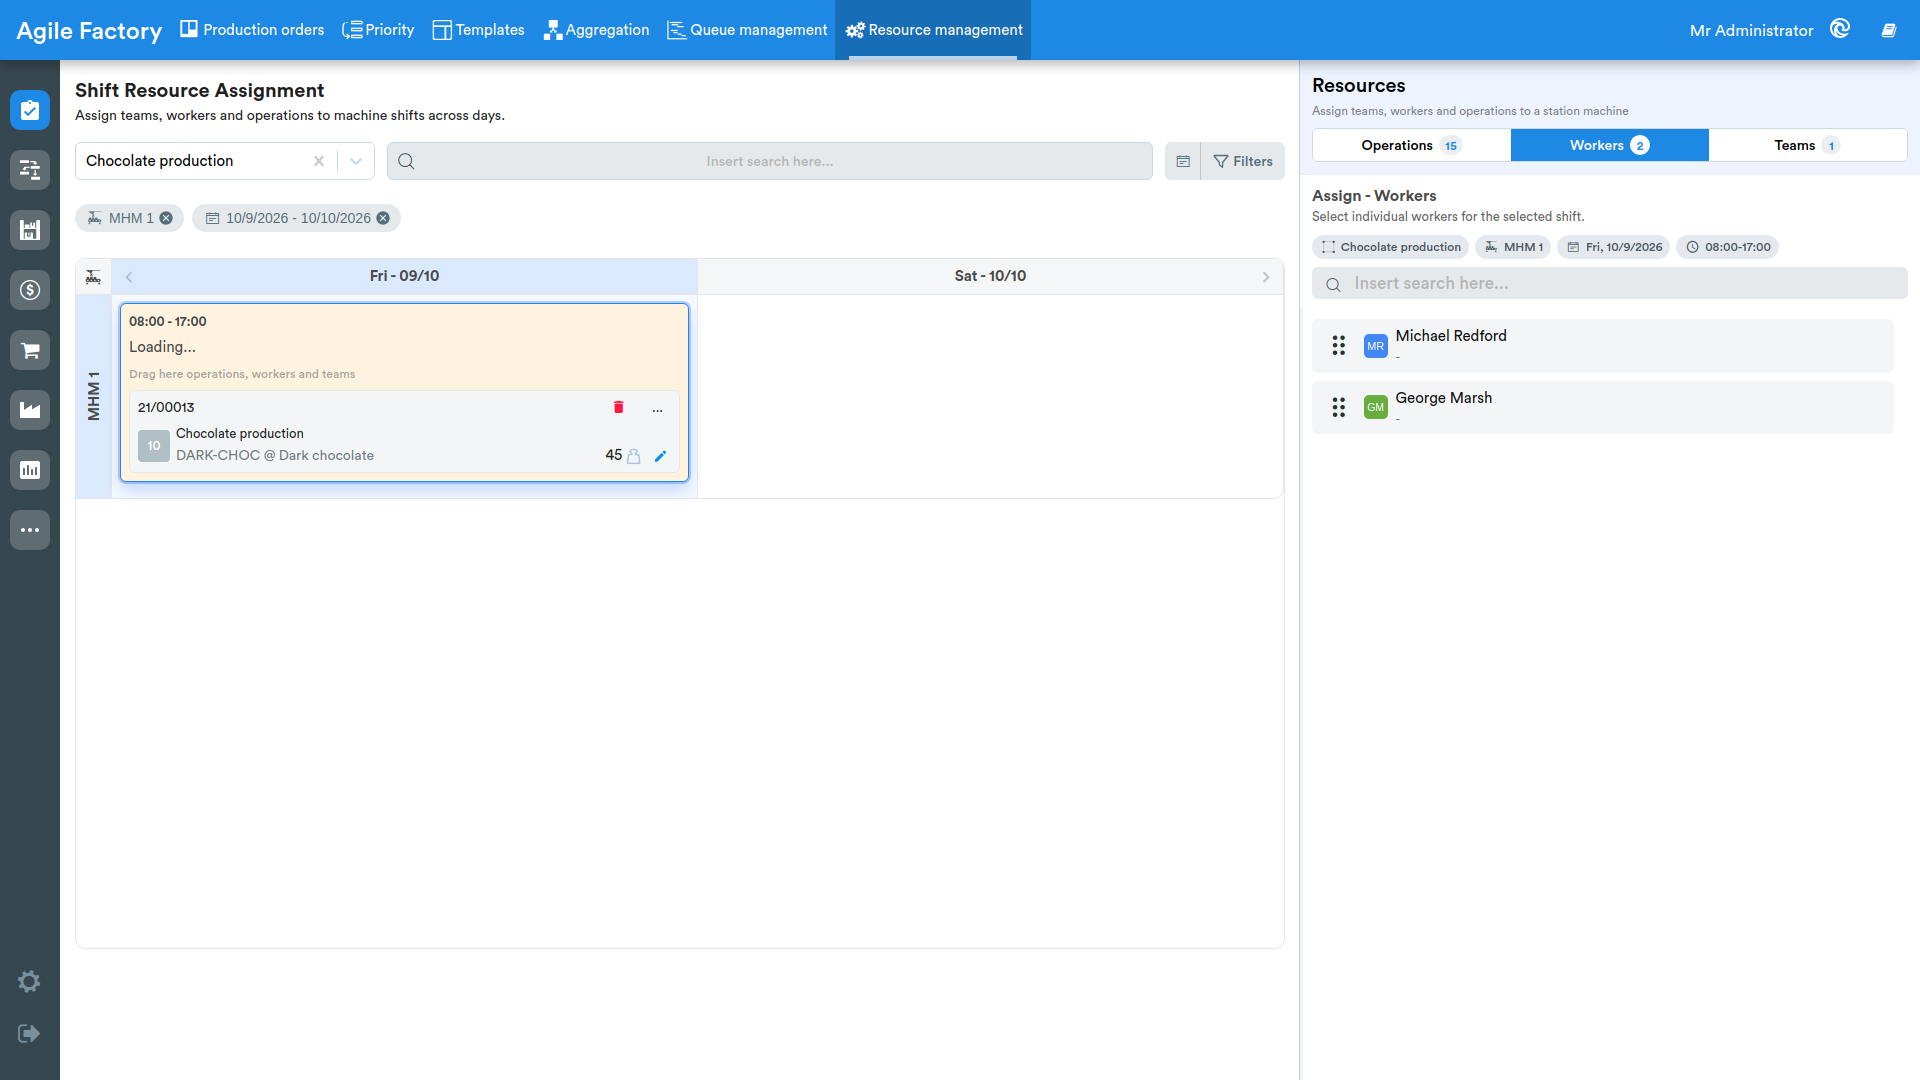
By clicking on the "Workers" tab the list of employees is displayed; by selecting the desired shift, the list is automatically filtered according to the shift assigned to each individual employee.
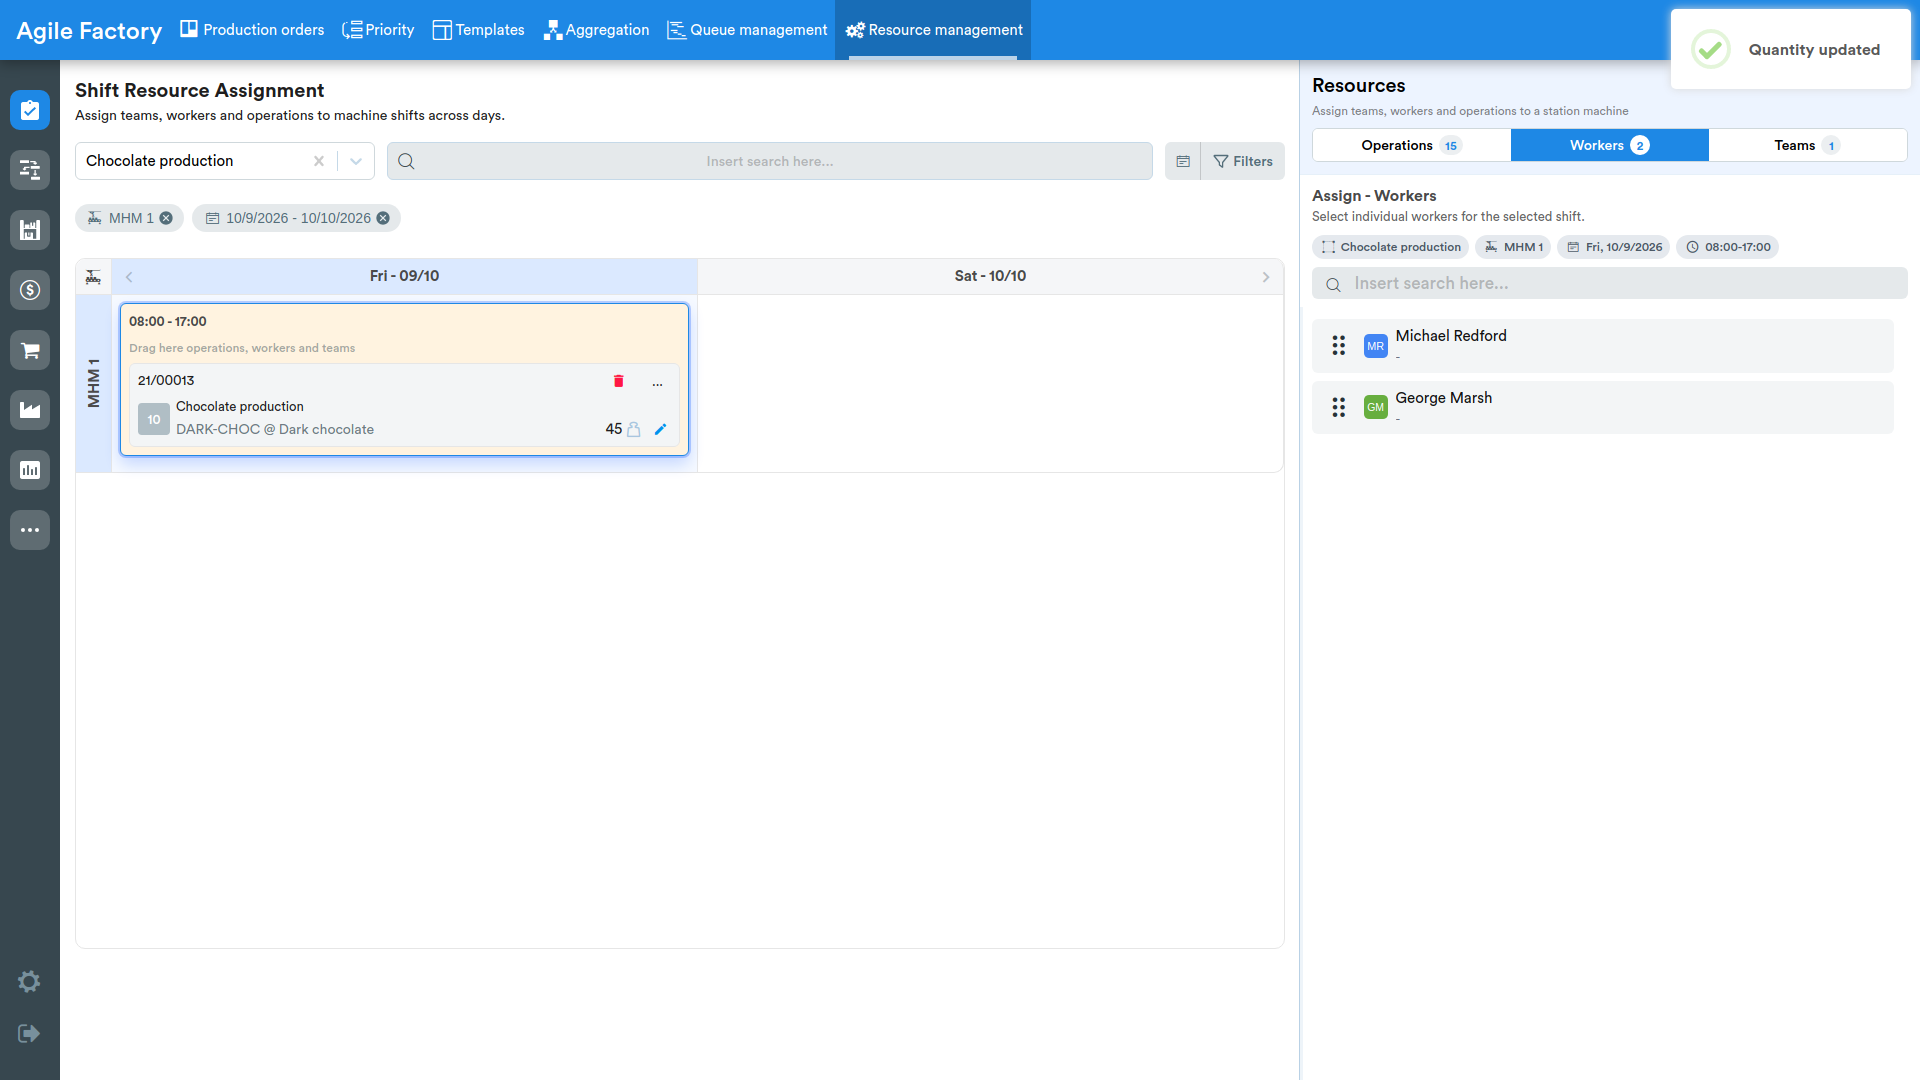
Employees can also be assigned via drag'n'drop.
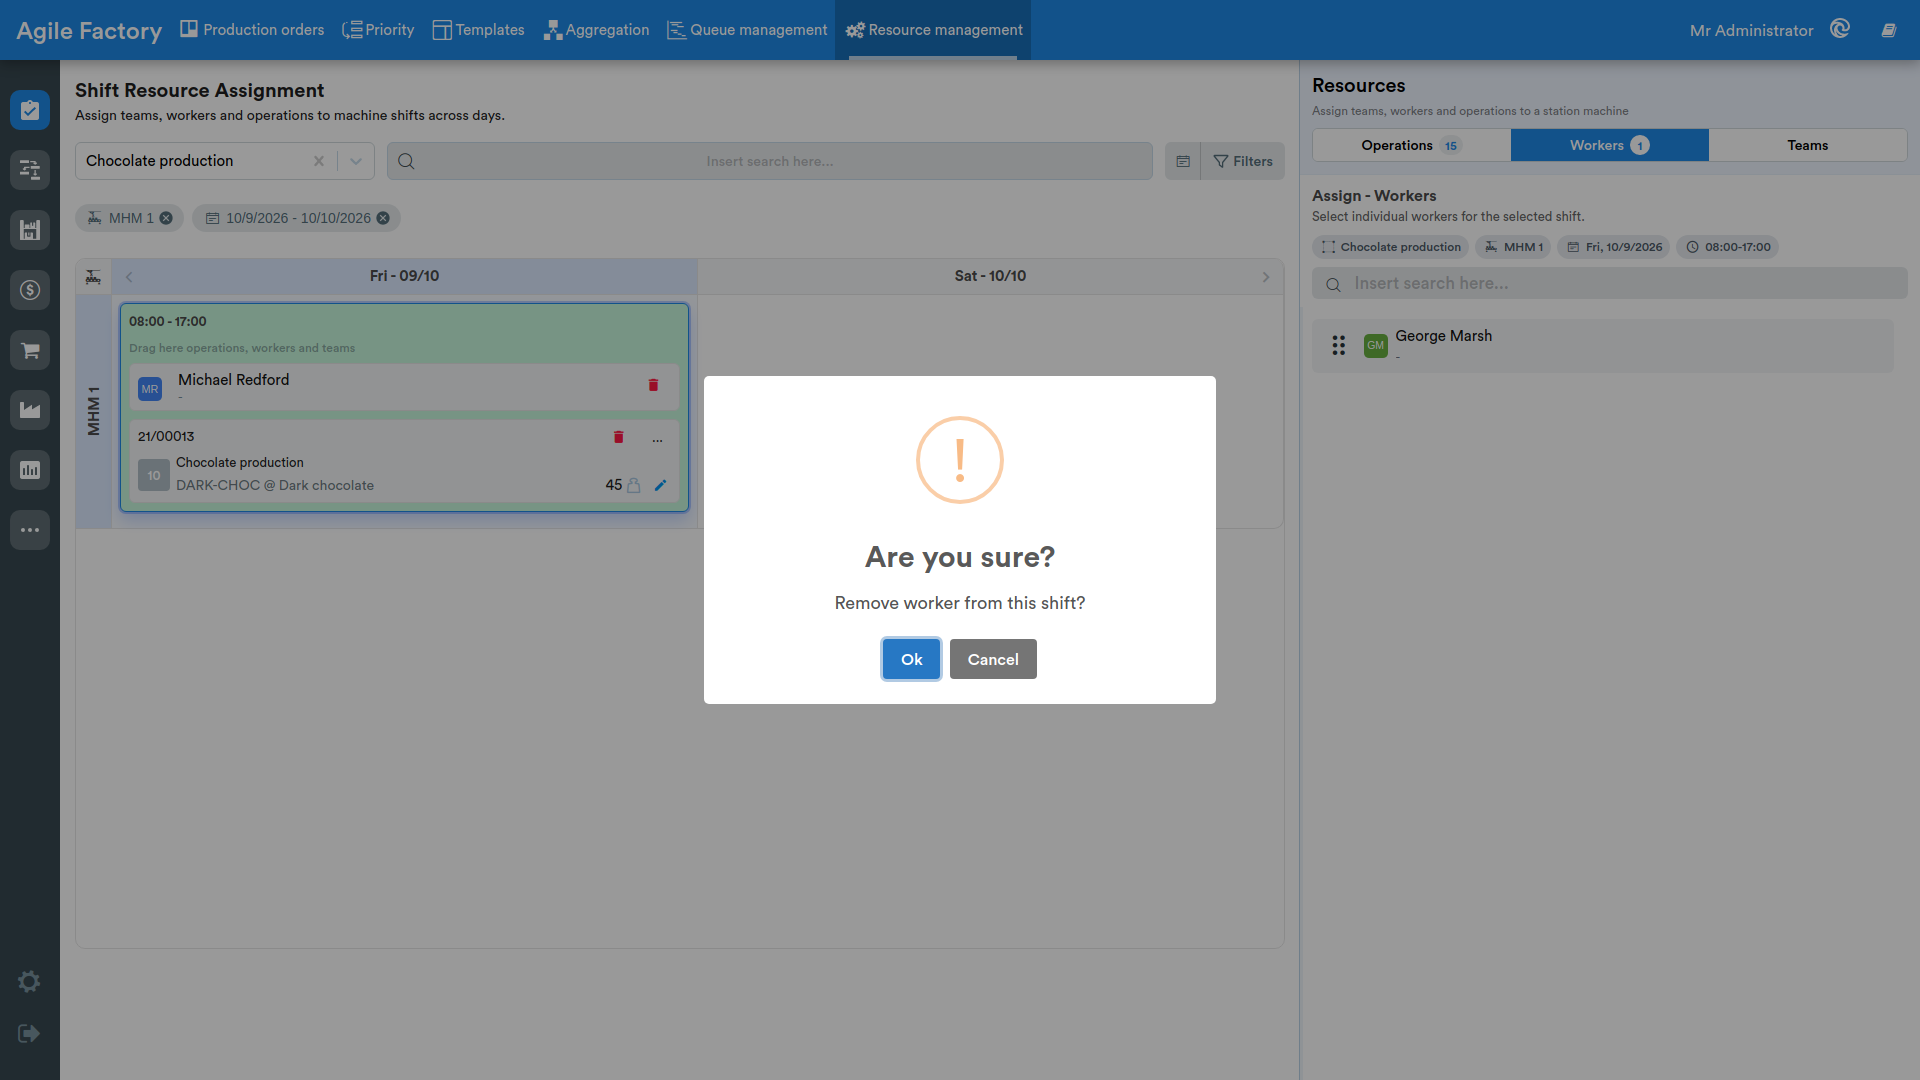
The assignment of an operation to an employee can be modified following the same principle used to modify the assignment of operations (trash button, dragging onto another employee).
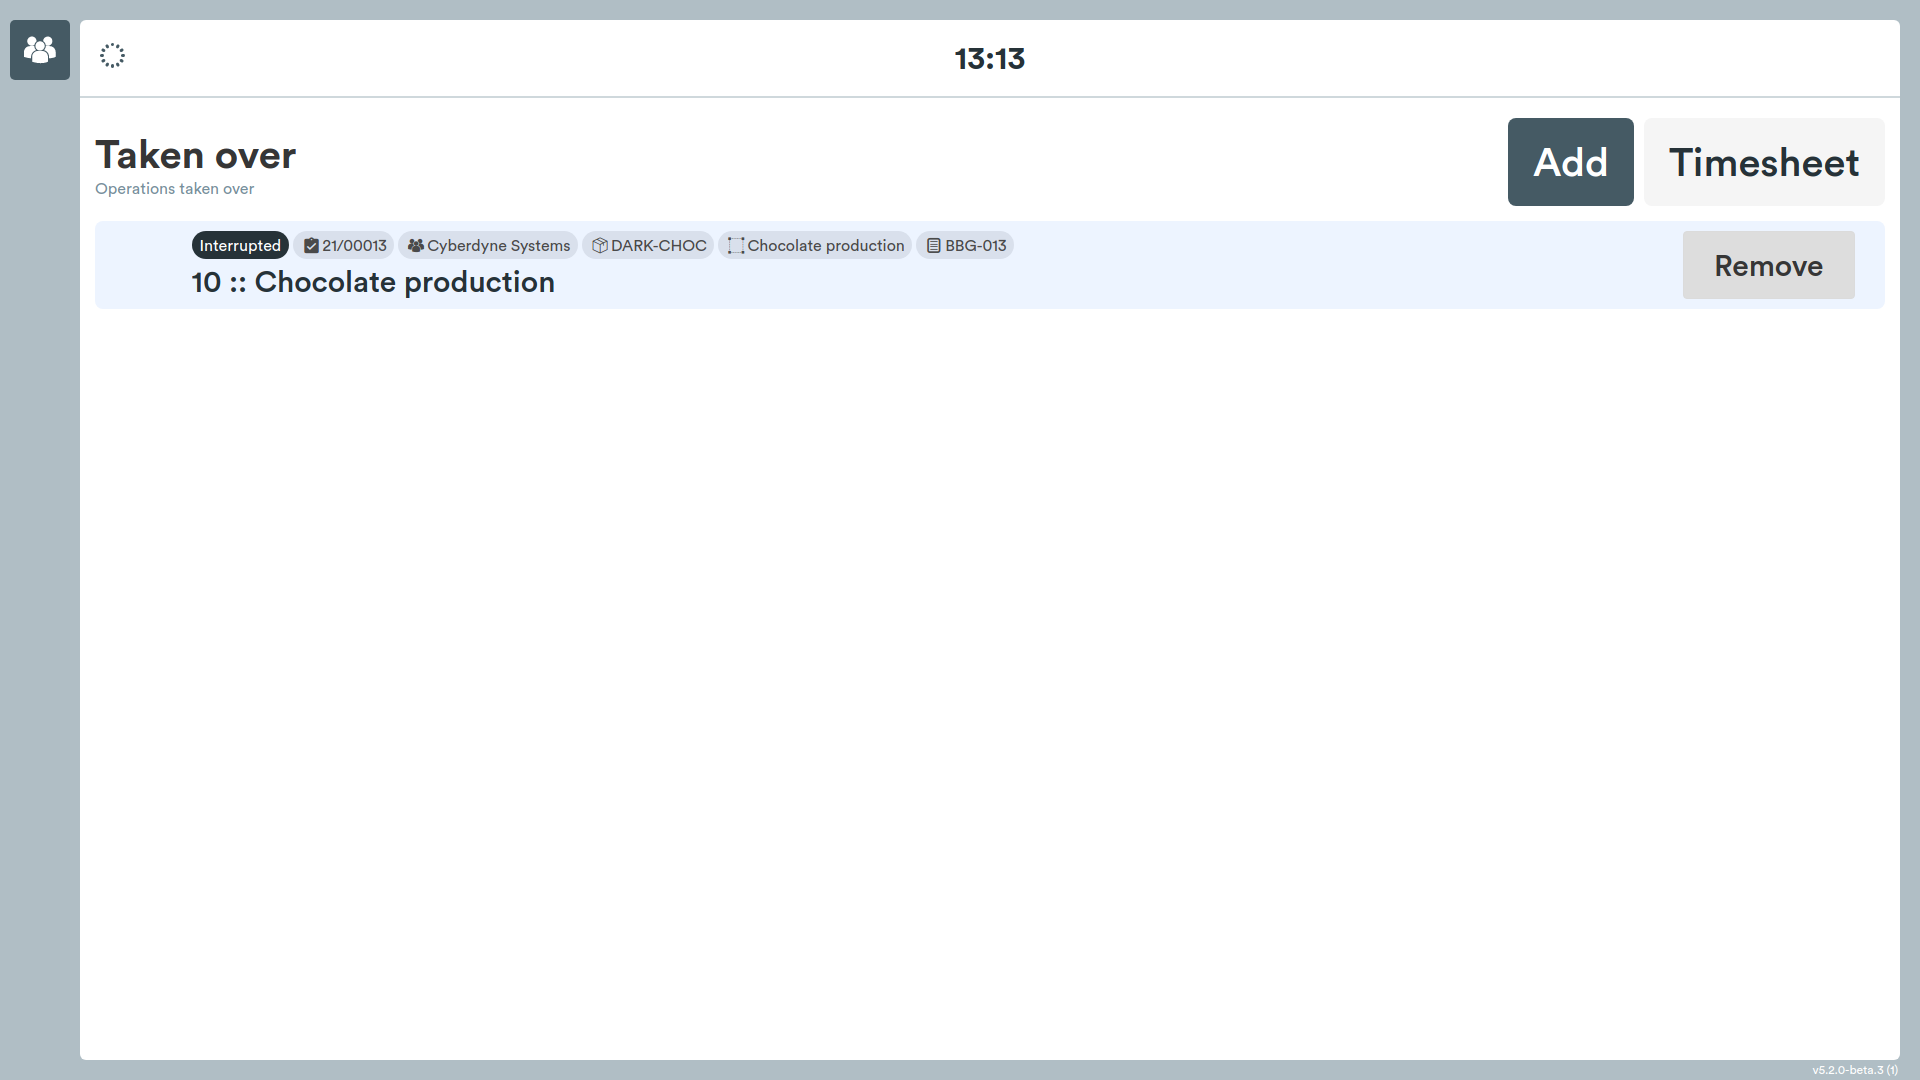
Operations assigned to employees through the "Resource management" interface, provided the MES terminals are configured in production, will be displayed in the task list of a given operator after they have logged into the system using the HMI -> Operators flow.
Team assignment
In some departments, groups of workers are gathered into teams that represent a set of employees united not by a specialization, but by a common working schedule (for example, night shift, day shift). For more information on configuring teams, see the Settings section.
By clicking on the "Teams" tab the list of teams is displayed; by selecting the desired shift, the list is automatically filtered according to the shift assigned to each individual team.
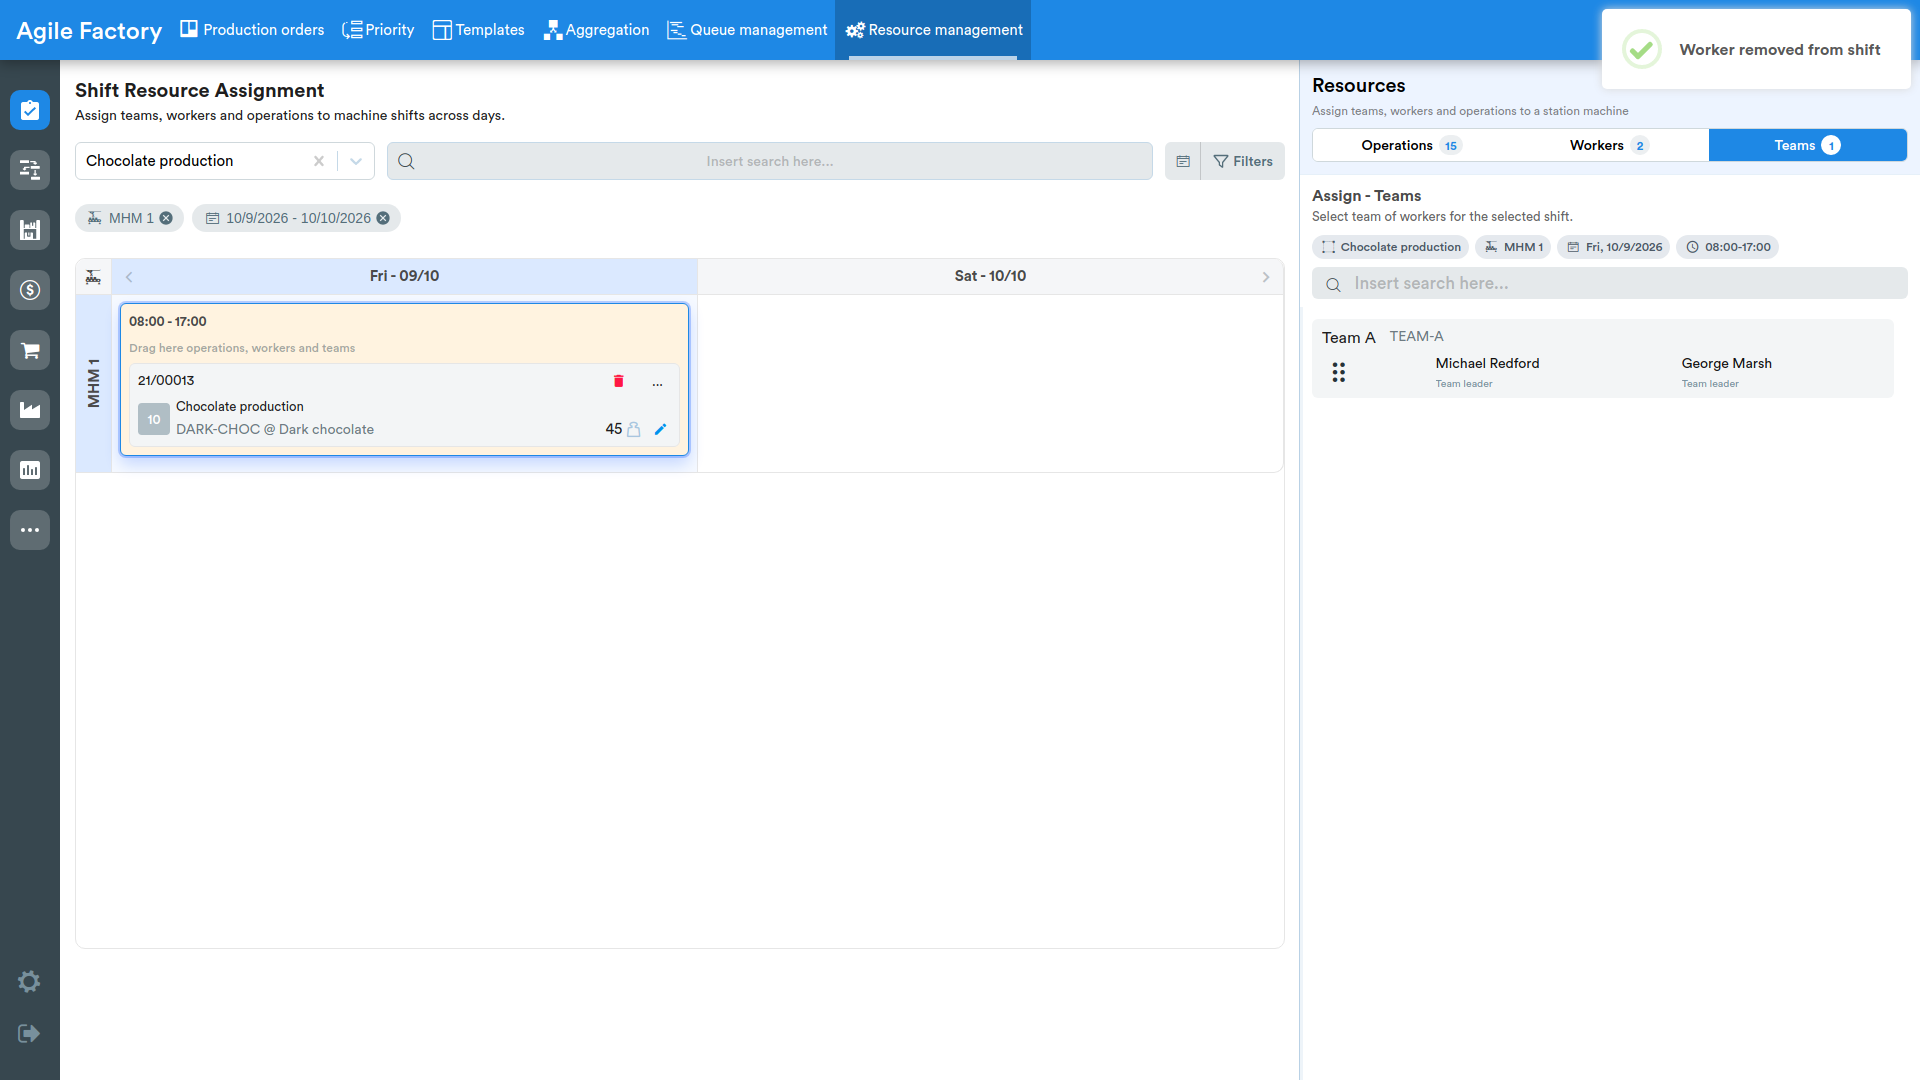
Teams can also be assigned via drag'n'drop.
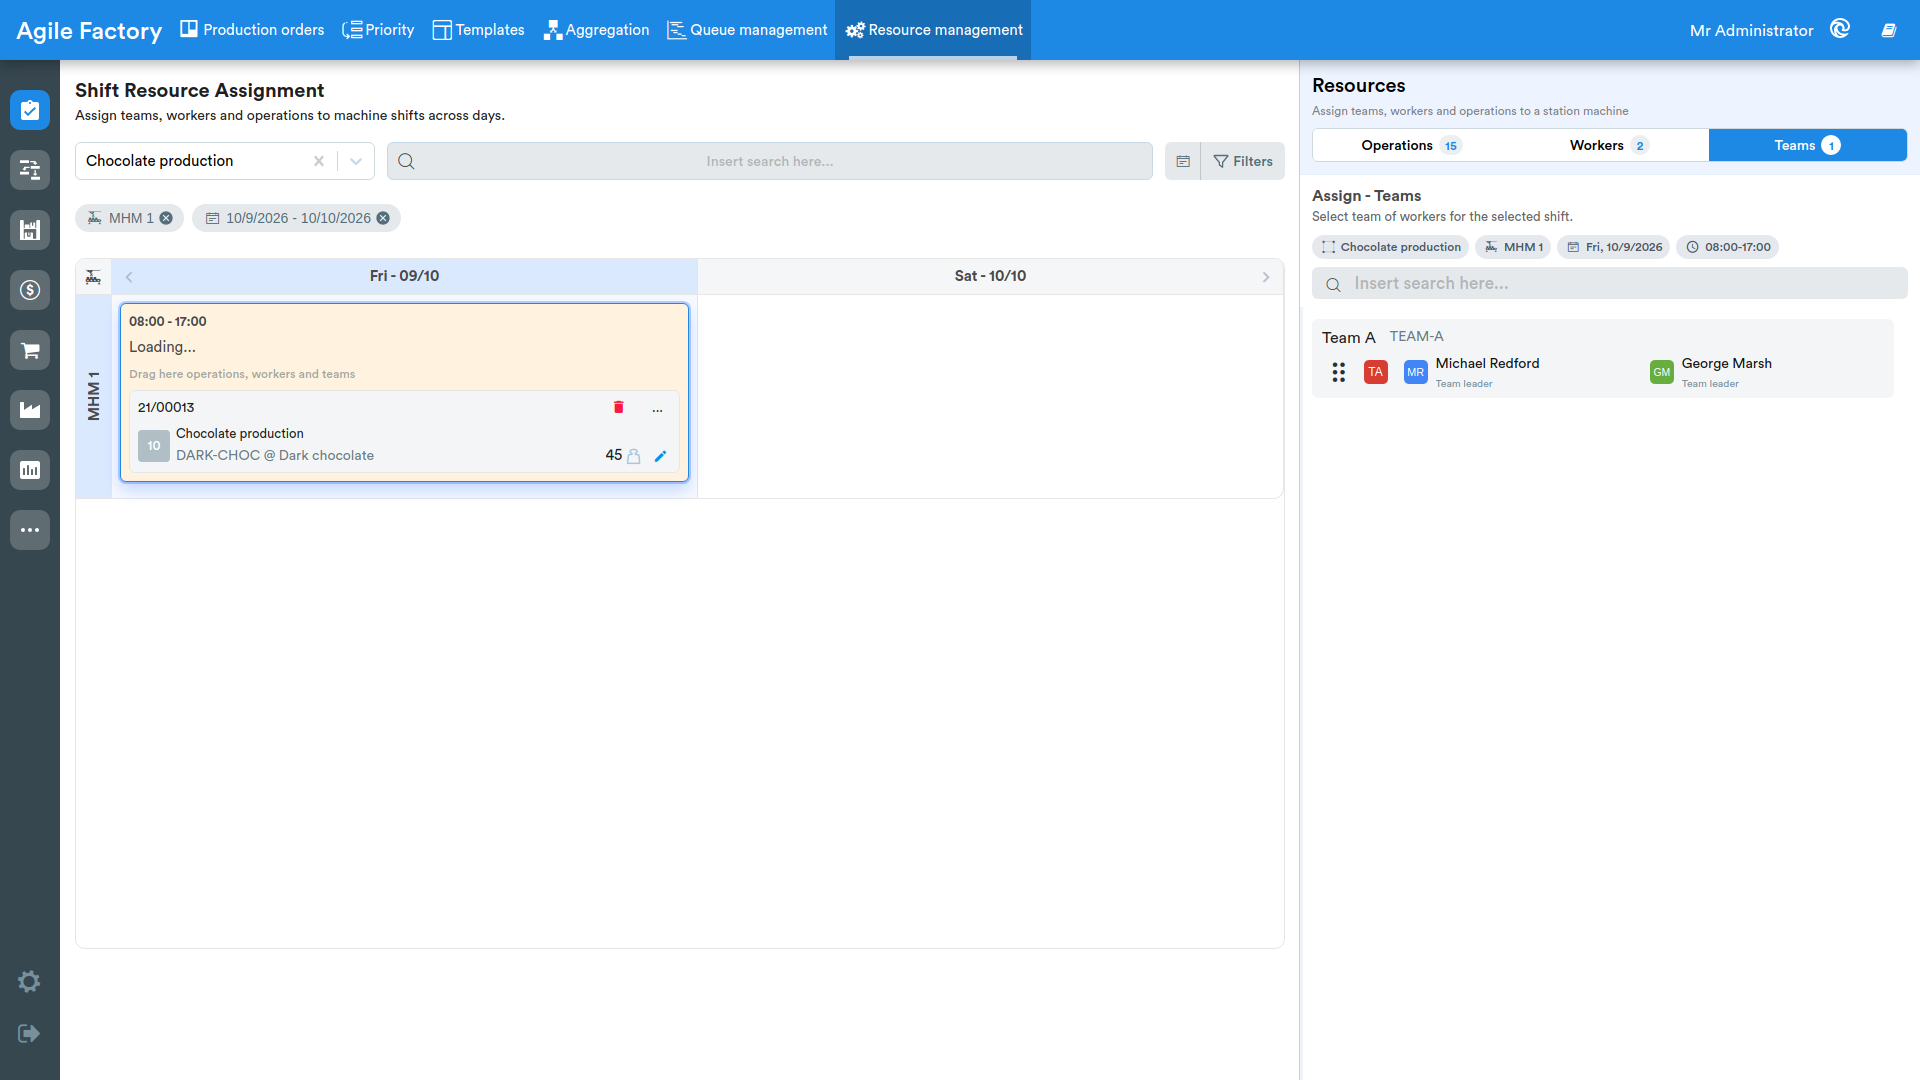
The assignment of an operation to a team can be modified following the same principle used to modify the assignment of operations (trash button, dragging onto another team).
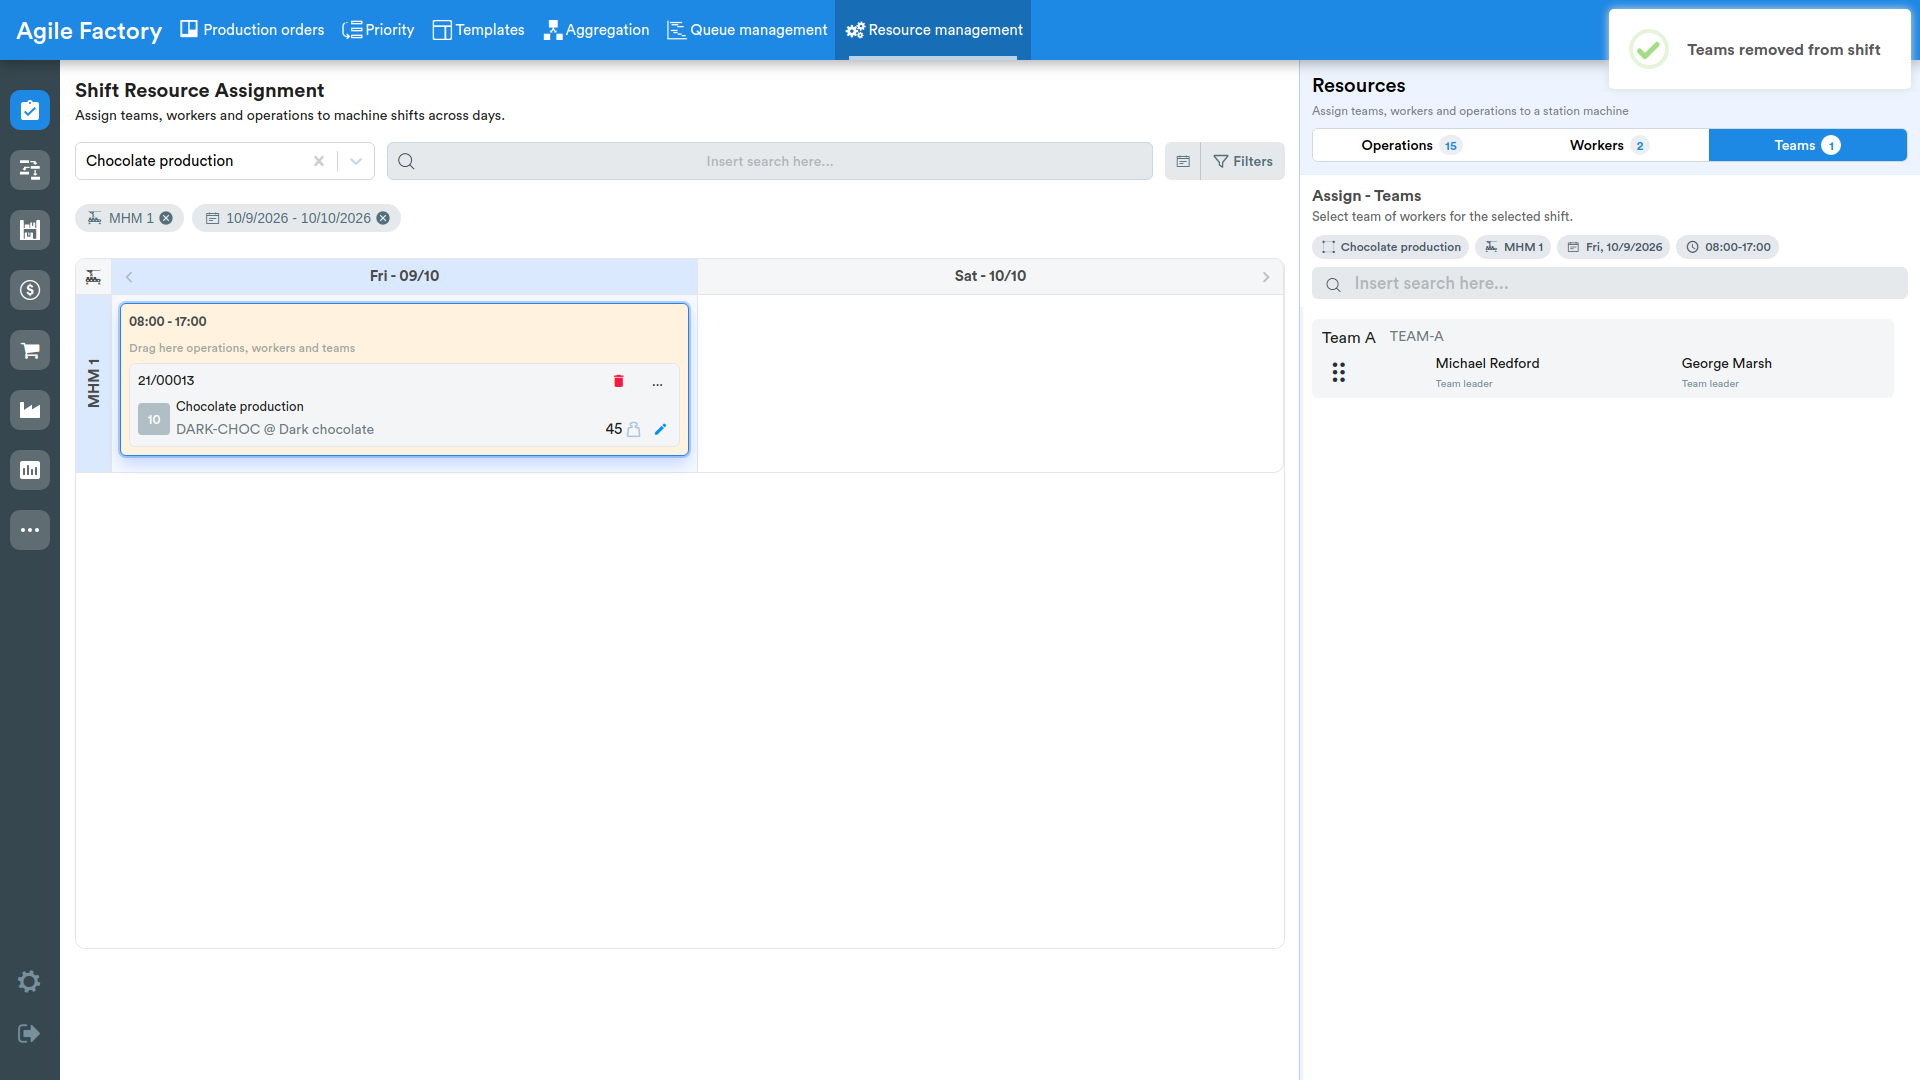
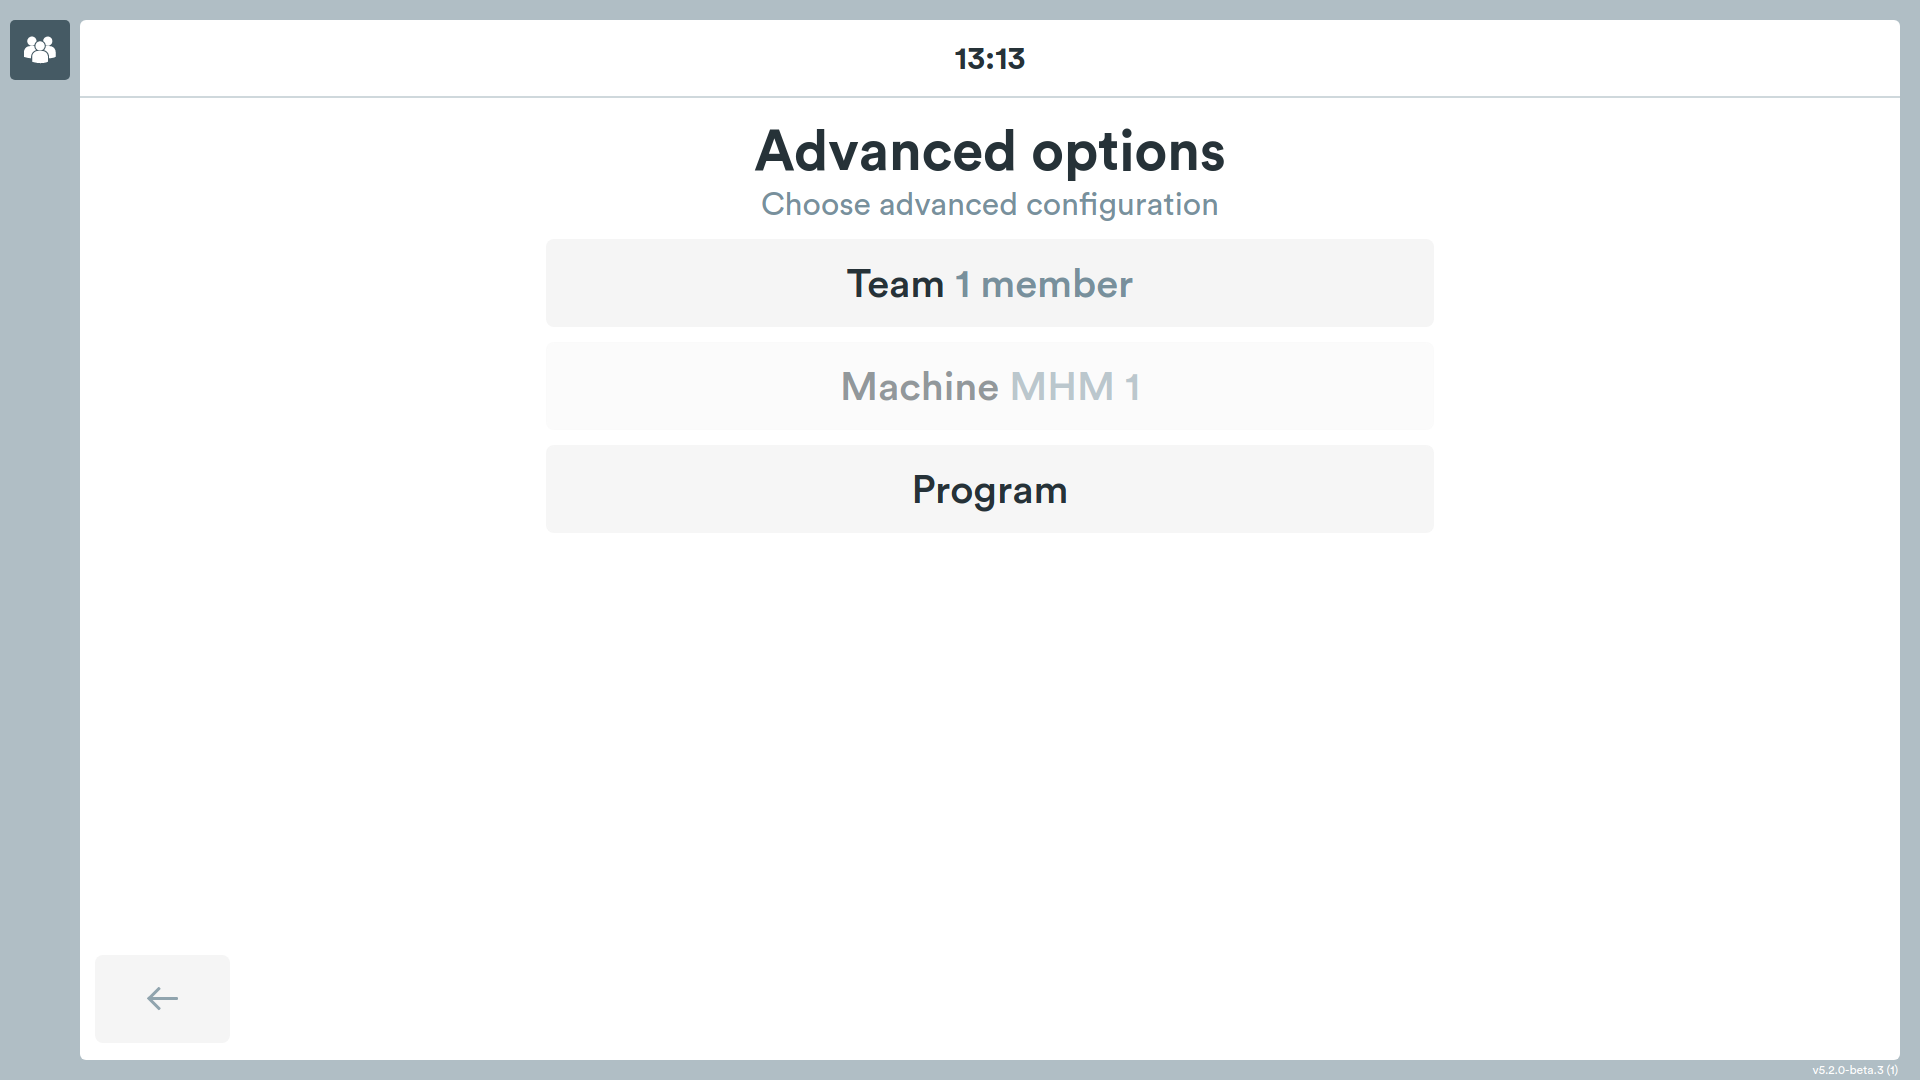
Operations assigned to specific teams of employees through the "Resource management" interface, provided the MES terminals are configured in production, will automatically imply that the work session from the operator interface will be started by only one employee of the team, while the second will appear as their partner HMI.
Resource locking once a session has started
When an operator starts a work session on an operation, worker or team previously assigned to a shift, those resources are locked: the remove buttons (the trash icon) for the operation, the worker and the team are no longer displayed, so as to prevent modifying an assignment whose work has already started. To modify the assignment again, the related session must be ended.